Are you ready to take control of your home lighting with ease? Learning how to program your Leviton light switch can save you time, boost your comfort, and even lower your energy bills.
Imagine turning your lights on or off without leaving your seat or setting schedules that fit your daily routine perfectly. In this guide, you’ll discover simple, step-by-step instructions to make your Leviton switch work exactly the way you want it to.
Keep reading, and you’ll be amazed at how quickly you can master this smart home upgrade.
Leviton Light Switch Basics
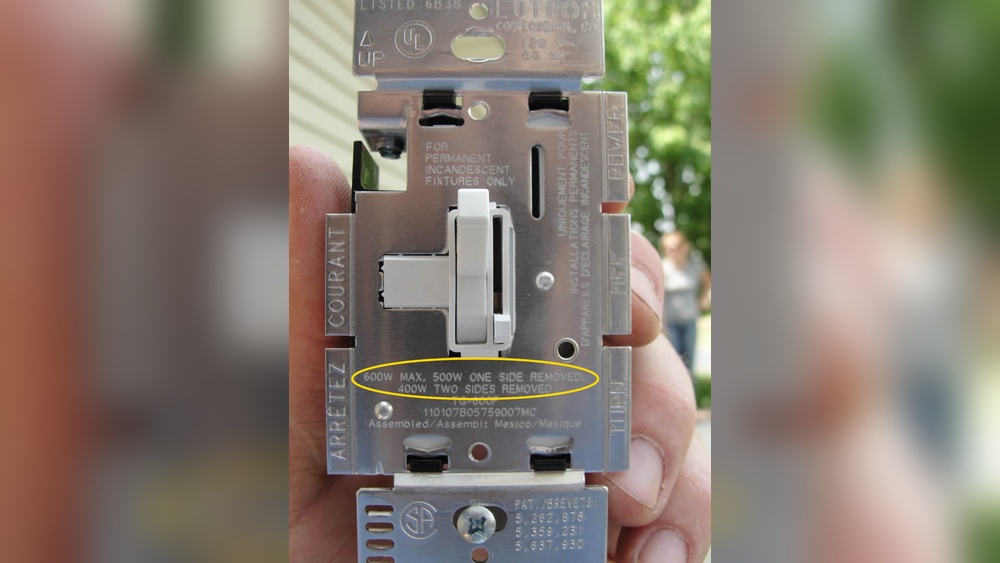
Understanding the basics of Leviton light switches helps with installation and programming. These switches come in different types and designs. Each type fits different needs and setups. Knowing the tools needed also makes the process easier and safer.
Types Of Leviton Switches
Leviton offers various switches for home and office use. Standard switches turn lights on and off. Dimmer switches adjust the brightness of lights. Smart switches connect to Wi-Fi for remote control. Each type has unique features and programming steps.
Essential Tools Needed
Gathering the right tools saves time and prevents errors. A screwdriver is needed to open the switch plate. A voltage tester ensures the power is off before work. Wire strippers help prepare wires for connection. Having these tools ready makes the job smooth and safe.

Credit: www.youtube.com
Preparing For Installation
Preparing for installation is the first step to program your Leviton light switch. This stage ensures a smooth and safe setup. Follow the steps carefully to avoid any issues or accidents.
Safety Precautions
Always prioritize safety before starting any electrical work. Wear insulated gloves to protect against shocks. Use tools with insulated handles. Avoid working in wet or damp areas. Keep children and pets away from the workspace.
Turning Off Power
Switch off the power at the circuit breaker. Confirm that the power is off by testing the switch or using a voltage tester. Never work on live wires. This step prevents electrical shock and protects your home.
Removing Old Switch
Remove the switch cover plate with a screwdriver. Unscrew the old switch from the wall box. Carefully pull the switch out, exposing the wires. Note the wire connections or take a photo for reference. Disconnect the wires safely before installing the new switch.
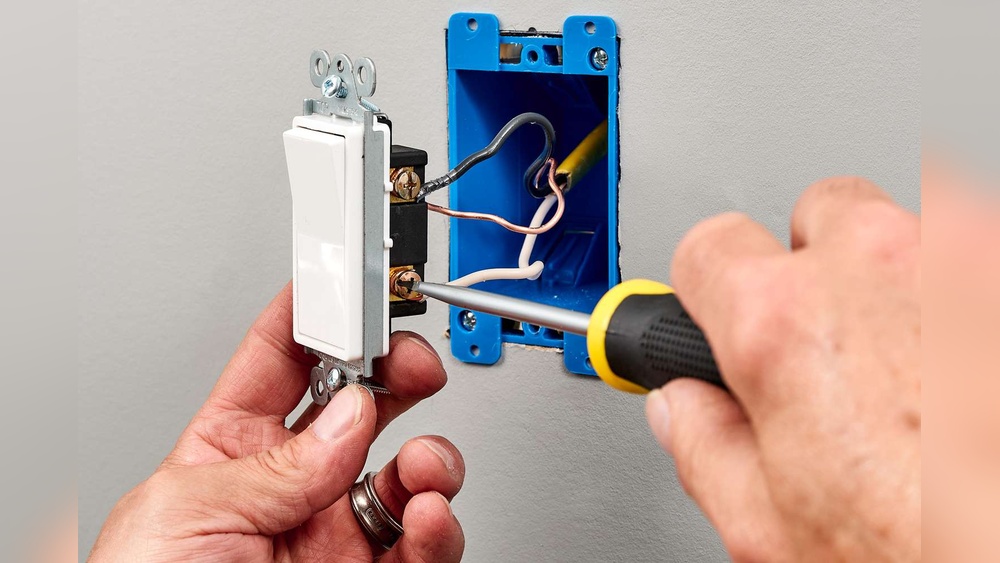
Wiring The Leviton Switch
Wiring the Leviton switch is a key step in its installation. Correct wiring ensures your switch works safely and efficiently. This part of the process requires care and attention to detail. Follow each step carefully for best results.
Identifying Wires
Start by turning off the power at the breaker box. Remove the old switch to see the wires. Look for the black (hot) wire, white (neutral) wire, and green or bare copper (ground) wire. Use a voltage tester to confirm the wires are not live. Label each wire with tape if needed for easier identification.
Connecting Wires Correctly
Match each wire from the wall to the corresponding wire on the Leviton switch. Connect the black wire to the terminal marked “hot” or “line.” Attach the white wire to the neutral terminal. Connect the green or bare wire to the ground terminal. Tighten the screws firmly to secure the wires but avoid overtightening.
Securing The Switch
Gently fold the wires back into the electrical box. Align the switch with the mounting holes. Use the provided screws to fasten the switch to the box. Ensure the switch sits flush with the wall surface. Restore power and test the switch to confirm proper operation.
Credit: leviton.com
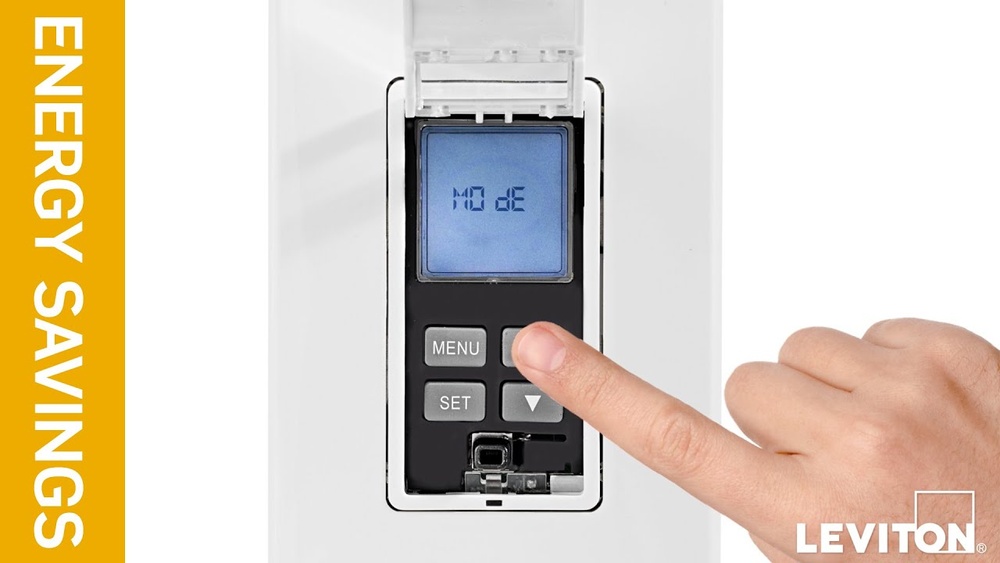
Programming The Switch
Programming the Leviton light switch lets you control your lighting with ease. It offers simple steps to customize your switch. This section guides you through the programming process. Follow each part carefully to set up your switch correctly.
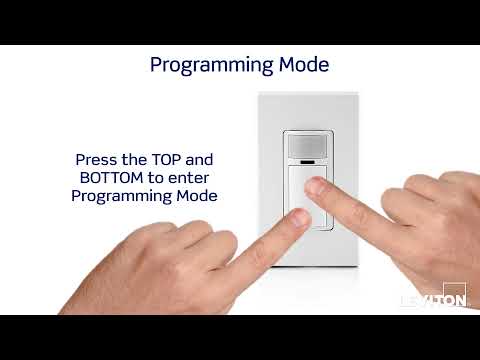
Accessing Programming Mode
Start by turning off the power to the switch. Press and hold the top and bottom buttons together. Hold them for about 5 seconds. The LED light will blink, showing you are in programming mode. Now, the switch is ready for setup.
Setting Up Basic Functions
In programming mode, press the top button to turn on the light. Press the bottom button to turn it off. You can set the switch to respond to a single press. This basic setup helps control your lights easily.
Customizing Settings
Use the buttons to change how the switch works. Set dimming levels by pressing and holding the buttons. Adjust the timer to turn lights off automatically. Save your settings by pressing both buttons at once. Your switch now matches your needs.
Testing And Troubleshooting
Testing and troubleshooting are key steps after programming your Leviton light switch. These steps ensure the switch works properly and safely. They help find any issues early. Fixing problems quickly prevents damage and saves time.
Powering On Safely
Turn off the power at the circuit breaker before installation. This prevents electric shocks. After wiring the switch, restore power carefully. Use a voltage tester to confirm power is on. Avoid touching wires or terminals directly. Safety first, always.
Verifying Switch Operation
Press the switch to test if the light turns on. Check if the switch responds smoothly. Use any app or remote controls if the switch supports them. Confirm the dimmer or timer features work as planned. Make sure all functions respond correctly every time.
Common Issues And Fixes
If the light does not turn on, check the wiring again. Loose connections cause most problems. Reset the switch by turning the breaker off and on. Update the switch’s firmware using the app if possible. Replace the switch if it still fails after troubleshooting.
Smart Features And Integration
Leviton light switches offer smart features that make home lighting easier. These switches connect to your home’s Wi-Fi and work with popular voice assistants. You can also set schedules and automate your lights for comfort and savings. This section explains how to use these smart features and integrate your Leviton switch smoothly.
Connecting To Wi-fi
Start by turning on your Leviton switch. Open the Leviton app on your smartphone. Follow the app’s instructions to connect the switch to your Wi-Fi network. Make sure your phone is near the switch during setup. A strong Wi-Fi signal helps keep the connection steady. Once connected, the switch is ready for smart control.
Using With Voice Assistants
Leviton switches work with Alexa, Google Assistant, and Siri. Link your Leviton app to your voice assistant app. Use simple commands like “turn on the living room light.” Voice control lets you change lights without moving. It adds convenience and helps if your hands are full. This step makes your home smarter and easier to manage.
Scheduling And Automation
Set schedules in the Leviton app to turn lights on or off automatically. Choose times that match your daily routine. Automation saves energy and improves security. You can also create scenes to control multiple lights together. This feature lets your home adjust lighting based on your habits. It’s a simple way to add comfort and control.
Maintenance Tips
Keeping your Leviton light switch in good shape helps it work well for a long time. Regular care avoids common problems and keeps the switch responsive. Follow these simple tips to maintain your device easily.
These steps help you avoid breakdowns and save time fixing issues.
Regular Cleaning
Dust and dirt can build up on the switch surface. Use a soft cloth to wipe it gently. Avoid using water or harsh chemicals. Clean the switch at least once a month. This keeps the buttons and sensors clear and working smoothly.
Firmware Updates
Leviton often releases updates to improve switch performance. Check the app or website for new firmware. Install updates as soon as possible. Updates fix bugs and add new features. This keeps your switch secure and up to date.
When To Replace
Notice if the switch stops responding or acts strange. Flickering lights or slow response can mean trouble. Replace the switch if cleaning and updates do not help. Using a faulty switch risks safety and comfort. Choose a replacement that fits your home’s needs.
Credit: leviton.com
Frequently Asked Questions
How Do I Program A Leviton Light Switch?
To program a Leviton switch, press and hold the top button for 10 seconds. Release when the LED blinks. Follow specific model instructions to set functions like dimming or scheduling.
Can I Reset My Leviton Light Switch Easily?
Yes, press and hold the top and bottom buttons simultaneously for 10 seconds until the LED blinks rapidly. This resets the switch to factory settings.
What Tools Are Needed To Program Leviton Switches?
You typically need a smartphone with the Leviton app, Wi-Fi, and the switch installed. Some models require no tools, just manual button presses for programming.
How To Connect Leviton Switch To Wi-fi?
Open the Leviton app, put the switch in pairing mode by holding the top button. Follow app instructions to connect to your home Wi-Fi network.
Conclusion
Programming a Leviton light switch is simple with clear steps. Follow the instructions carefully to avoid errors. Double-check your connections before starting the process. Take your time and proceed step by step. Once done, test the switch to ensure it works well.
Enjoy the convenience of your programmed lighting. This guide helps you save time and effort. Keep this information handy for future reference. Your home lighting control is now easier and smarter.