Have you ever wished you could adjust the brightness of your lights to match your mood or save energy? Installing a dimmer switch is an easy way to take control of your lighting and create the perfect atmosphere in any room.
But if you’re unsure where to start or worried it might be too complicated, don’t worry—you’re in the right place. In this guide, you’ll discover simple, step-by-step instructions to put a dimmer on your light switch, even if you’ve never done electrical work before.
Keep reading, and by the end, you’ll have the confidence to brighten up your space exactly how you want.

Credit: www.gelighting.com
Choose The Right Dimmer
Choosing the right dimmer switch is important for good lighting control. Not all dimmers work the same way. Picking the correct one helps save energy and protects your bulbs. It also makes your lights last longer. Understanding types, bulb compatibility, and wattage limits helps find the best dimmer.
Types Of Dimmers
There are several dimmer types. Rotary dimmers turn by twisting. Slide dimmers move up and down. Touch dimmers work by tapping. Each type fits different switch boxes and styles. Some dimmers are made for specific light types like LED or incandescent.
Compatibility With Bulbs
Not all dimmers work with every bulb. Incandescent bulbs work with most dimmers. LED and CFL bulbs need special dimmers. Using the wrong dimmer can cause flickering or damage. Always check if the dimmer matches your bulb type before buying.
Wattage Limits
Every dimmer has a wattage limit. This limit is the maximum power it can handle. Using bulbs that exceed this limit can cause overheating. Check the total wattage of bulbs on the circuit. Choose a dimmer that supports this total wattage for safety and performance.
Gather Necessary Tools
Before installing a dimmer switch, gather all the tools you need. Having the right tools makes the job easier and safer. Prepare your workspace and check your supplies. Ready your tools in one place to avoid interruptions.
Essential Tools List
- Screwdriver (flathead and Phillips)
- Wire stripper
- Voltage tester
- Needle-nose pliers
- Electrical tape
- Wire nuts
- Dimmer switch kit
Safety Gear
Safety gear protects you during electrical work. Use insulated gloves to avoid shocks. Wear safety glasses to protect your eyes. Make sure your clothes fit well and cover your skin. Avoid loose sleeves or jewelry that might catch on wires.
Turn Off Power Safely
Turning off power safely is the first step to install a dimmer switch. Electricity can be dangerous. Taking care prevents shocks and accidents. Always make sure the power is off before touching wires. This keeps you safe and protects your home.
Locate Circuit Breaker
Find your home’s circuit breaker box. It is usually in a basement, garage, or utility room. Look for the breaker that controls the light switch you want to change. Flip this breaker to the “off” position. This stops electricity flow to the switch. Double-check that the breaker stays off during your work.
Use Voltage Tester
Use a voltage tester to confirm the power is off. Touch the tester’s probes to the switch wires. No light or sound means no electricity. If the tester shows power, turn the breaker off again. Always test twice to be sure. This step keeps you safe and prevents accidents.

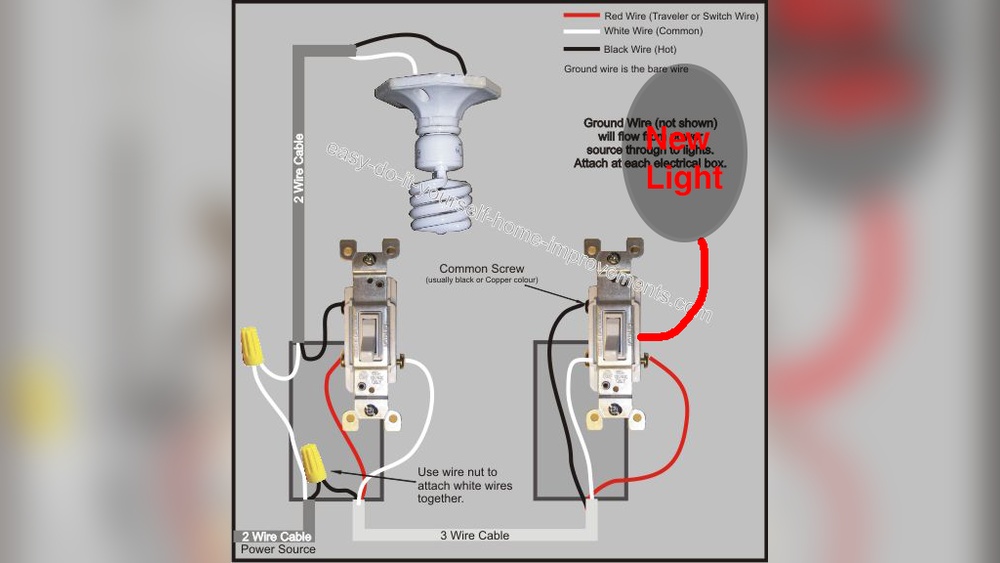
Credit: www.youtube.com
Remove Existing Switch
Removing the existing switch is the first step to install a dimmer. Safety is key. Always turn off power at the circuit breaker before starting. Double-check that the switch is not live with a voltage tester. This step ensures no electric shock during the process. Once safe, begin by removing the switch plate and disconnecting the wires.
Unscrew Switch Plate
Find the screws holding the switch plate in place. Use a screwdriver to remove these screws carefully. Keep the screws safe for reuse later. Gently pull the plate away from the wall. Sometimes the plate may stick; pull slowly to avoid damage. After removing the plate, the switch and wires become visible.
Disconnect Wires
Note how the wires connect to the switch. Taking a photo can help for reference. Use a screwdriver to loosen the terminal screws. Carefully disconnect each wire from the switch. Keep the wires separate to avoid confusion. If wires are attached with wire nuts, twist the nuts off gently. After disconnecting, the switch can be removed from the electrical box.
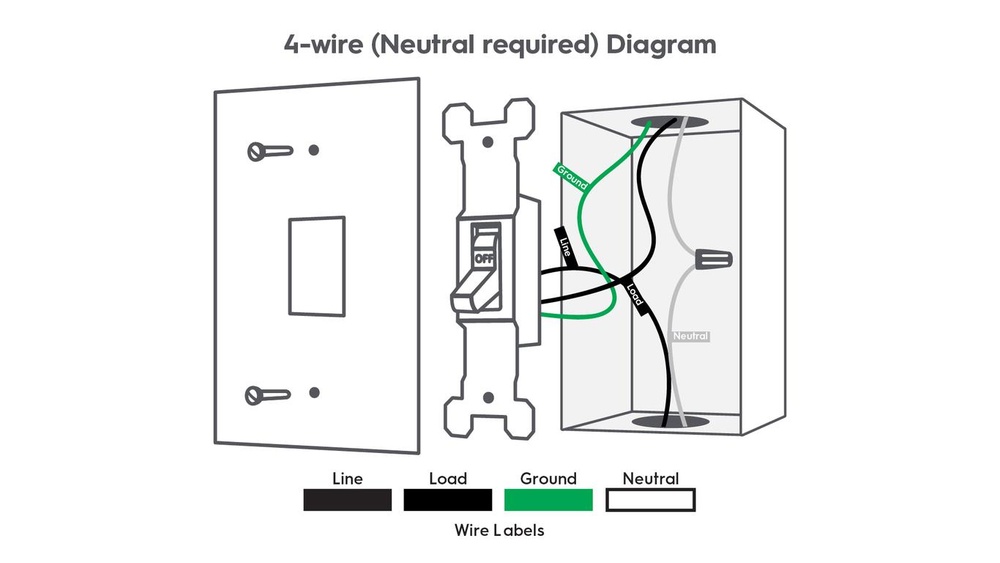
Wire The Dimmer Switch
Wiring a dimmer switch is a key step in controlling light brightness. It needs care and attention. Follow the steps carefully to wire the dimmer correctly. Safety is important. Always turn off the power before starting.
Match Wire Colors
Identify the wires from the wall and the dimmer switch. Usually, black wires carry the power. White wires are neutral. Green or bare wires are ground. Match the black wire from the dimmer to the black wire in the wall. Connect the white wire to white, if your dimmer has one. Correct matching ensures the switch works safely.
Connect Ground Wire
Find the green or bare copper wire from the dimmer. Connect it to the ground wire in the wall box. Use a wire connector or screw it to the grounding screw on the switch. This step prevents electrical shocks and keeps the system safe.
Secure Wire Nuts
Twist the wires together tightly. Place a wire nut over the twisted wires. Twist the nut clockwise until tight. Give a gentle tug to check the connection. Secure wire nuts keep wires from coming loose. This step ensures the dimmer switch stays connected and functions properly.
Install Dimmer Switch
Installing a dimmer switch is a smart way to control your room’s lighting. It lets you adjust brightness to fit your mood or task. The process is simple with basic tools and safety steps.
Start by turning off the power to the switch at your home’s circuit breaker. This step keeps you safe while working with electrical wires.
Attach To Wall Box
First, connect the dimmer switch wires to the wall box wires. Match the colors: black to black, white to white, and green or copper to ground. Use wire nuts to secure each connection tightly.
Push the wires carefully back into the wall box. Make sure no wires are loose or touching each other. Then, align the dimmer switch with the screw holes on the wall box.
Use a screwdriver to fasten the dimmer switch to the wall box. Tighten screws evenly to keep the switch stable and flush with the wall.
Replace Switch Plate
After the dimmer switch is secured, place the switch plate over it. Align the plate with the screw holes on the switch. Use a screwdriver to tighten the screws firmly.
The switch plate should fit snugly against the wall without gaps. This finishes the installation and keeps wires covered for safety.
Turn the power back on at the circuit breaker. Test the dimmer by sliding or turning it to see the light change brightness smoothly.
Restore Power And Test
After installing your dimmer switch, restoring power and testing it is important. This step ensures the dimmer works correctly and safely. Follow these simple actions to bring your new dimmer to life.
Turn On Circuit Breaker
Locate your home’s circuit breaker panel. Find the switch you turned off earlier. Flip the switch back to the ON position. This restores power to the light fixture and dimmer. Be careful and avoid touching any other switches.
Check Dimmer Functionality
Go to the dimmer switch and gently turn the knob or slide the control. The light should brighten or dim smoothly. Listen for any unusual noises or flickering lights. Test the dimmer several times to confirm it works well. If the light does not respond, double-check your installation steps.
Troubleshooting Tips
Installing a dimmer switch can improve your lighting experience. Sometimes, issues may arise after installation. Troubleshooting helps fix common problems fast. Here are some simple tips to solve usual dimmer issues.
Dimmer Not Working
Check the power supply first. Ensure the circuit breaker is on. Verify the dimmer switch wiring is correct. Loose wires can stop the dimmer from working. Use a voltage tester for safety. Replace the dimmer if it is damaged.
Flickering Lights
Flickering often means the dimmer and bulb do not match. Use dimmable bulbs with your dimmer switch. LED bulbs may flicker if incompatible. Tighten the bulb in the socket. Replace bulbs that still flicker. Try a different dimmer designed for LED lights.
Buzzing Noise
A buzzing sound can come from the dimmer or bulbs. Make sure you use dimmable bulbs only. Lower-quality dimmers may cause noise. Tighten all wiring connections. Replace the dimmer if buzzing continues. Choose a higher quality dimmer switch for quieter operation.
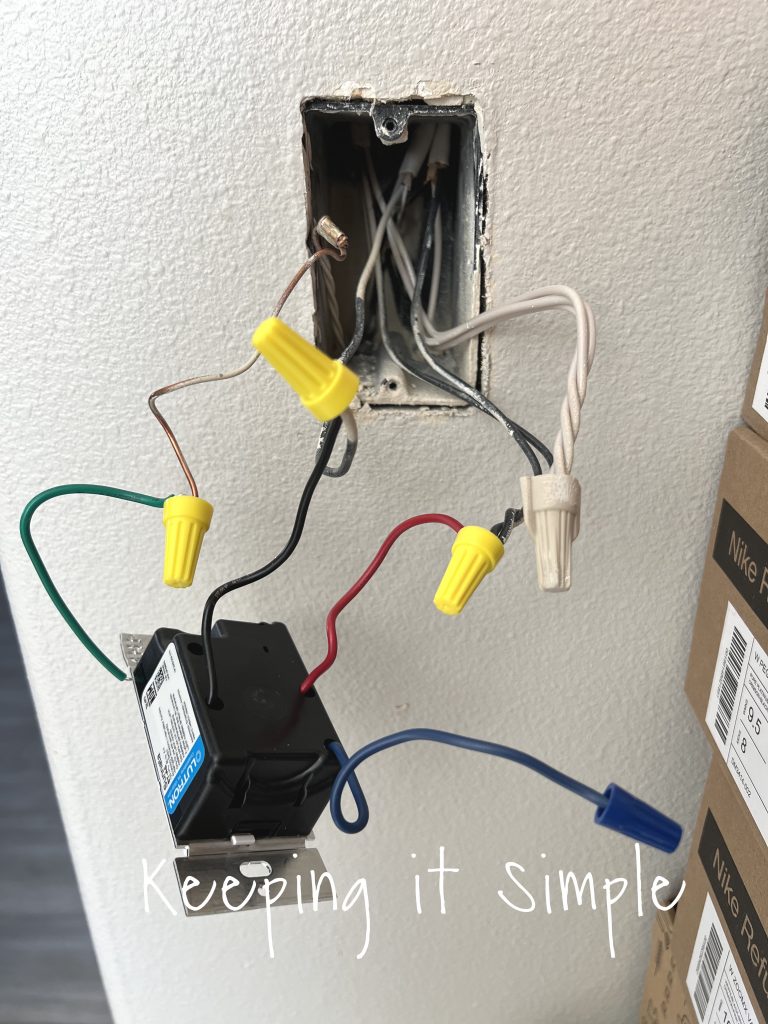
Credit: www.keepingitsimplecrafts.com
Frequently Asked Questions
What Tools Do I Need To Install A Dimmer Switch?
You need a screwdriver, voltage tester, wire stripper, and the dimmer switch. Turn off power before installation. These tools ensure safety and proper setup.
Can I Install A Dimmer Switch Myself Safely?
Yes, if you follow safety steps like turning off power. Read instructions carefully and use a voltage tester. If unsure, consult a professional electrician to avoid hazards.
Will A Dimmer Switch Work With All Light Bulbs?
No, dimmers work best with dimmable LED, incandescent, and halogen bulbs. Check bulb compatibility before installation to ensure smooth dimming performance and avoid flickering or damage.
How Do I Know If My Wiring Supports A Dimmer?
Most standard wiring supports dimmers, but check for a neutral wire. Some dimmers require it. Consult your switch box or an electrician to confirm compatibility.
Conclusion
Adding a dimmer switch is a simple way to change your room’s lighting. It saves energy and lets you set the mood easily. Always turn off the power before starting the work. Follow safety steps and use the right tools.
With a little care, you can do this yourself. Enjoy soft or bright light whenever you want. A dimmer gives you control and comfort in your home. Try it out and see the difference today.