Are you ready to take control of your home lighting and save money on electrician bills? Learning how to wire a light switch is easier than you think, and it gives you the power to fix or upgrade your lighting whenever you want.
Imagine flipping a switch and knowing you installed it yourself—feeling confident and skilled. In this guide, you’ll get simple, step-by-step instructions that anyone can follow, even if you’ve never done electrical work before. Keep reading, and by the end, you’ll be able to wire your light switch safely and quickly.
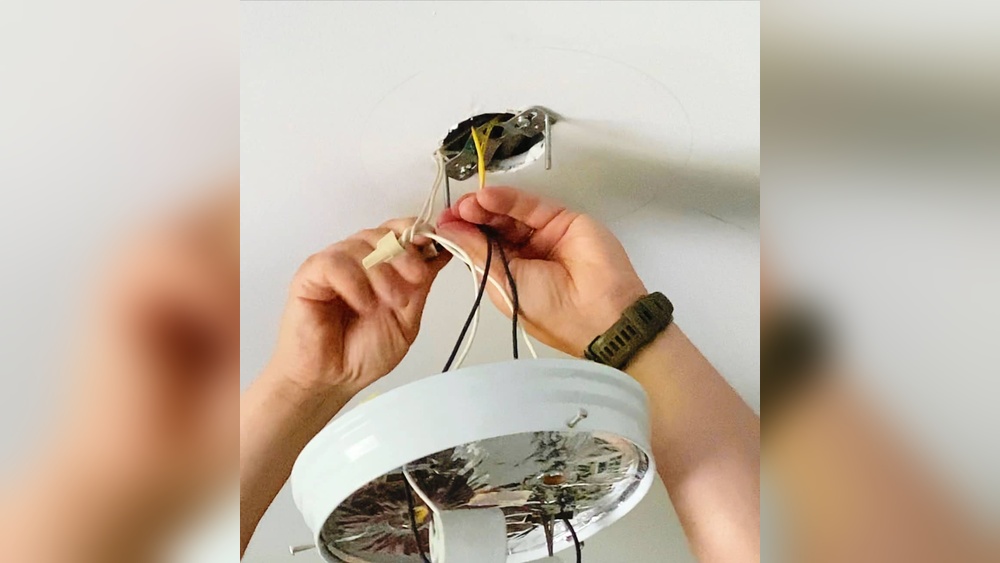
Your home improvement journey starts here!
Credit: futurehousestore.co.uk
Tools And Materials Needed
Having the right tools and materials makes wiring a light switch easier and safer. Prepare everything before starting. This helps avoid delays and mistakes. Below are the essential tools and materials needed for wiring a light switch.
Basic Tools
You need simple tools to handle wires and screws. A screwdriver set with both flathead and Phillips tips is important. Wire strippers help remove insulation without damaging wires. Needle-nose pliers allow better grip and bending of wires. A voltage tester checks if the power is off before starting work.
Electrical Materials
Use the right electrical parts for a safe connection. A single-pole or three-way light switch fits your wiring needs. Electrical tape insulates wire connections and prevents shorts. Wire nuts join wires securely inside the switch box. Copper or aluminum electrical wires are common, but check local codes for approval.
Safety Gear
Safety is key during any electrical job. Wear insulated gloves to avoid shocks. Safety glasses protect your eyes from sparks or debris. Use a sturdy ladder if the switch is high on the wall. Always turn off the power at the breaker before starting the wiring work.
Types Of Light Switches
Light switches control the flow of electricity to your lights. Different types of switches suit different needs. Knowing their types helps you choose the right one for your home.
Single-pole Switch
This is the most common type of light switch. It controls one light or a group of lights from a single location. It has two terminals and a simple on/off function. Easy to install and use.
Three-way Switch
This switch controls a light from two different places. Often used in hallways or large rooms. It has three terminals and works with another three-way switch. You can turn lights on or off from either switch.
Dimmer Switch
This switch adjusts the brightness of a light. It lets you set the light from bright to dim. Great for creating mood lighting and saving energy. Works with special bulbs designed for dimming.
Safety Precautions
Safety is the top priority before wiring any light switch. Taking proper safety steps helps avoid serious injuries and electrical shocks. Simple precautions keep you safe and protect your home’s wiring system.
Follow each step carefully. Never rush through the process. Safety measures help ensure a smooth and secure wiring job.
Turn Off Power
Always switch off the power at the main circuit breaker. Double-check that the power is off before starting work. This step stops any electrical current from flowing to the switch.
Do not rely only on the switch position. Use the breaker panel to cut power fully. This prevents accidental electric shocks or short circuits.
Use Voltage Tester
Use a voltage tester to confirm no electricity runs through the wires. Test all wires connected to the switch. The tester shows if the wires are live or safe to touch.
Never skip this step. Even if the breaker is off, some wires may still have current. A voltage tester ensures complete safety before handling wires.
Wear Protective Gear
Wear insulated gloves to protect your hands from electric shocks. Safety goggles protect your eyes from sparks or debris. Use non-slip shoes to avoid accidents.
Protective gear acts as a barrier between you and electric hazards. Always dress properly before starting any electrical work.

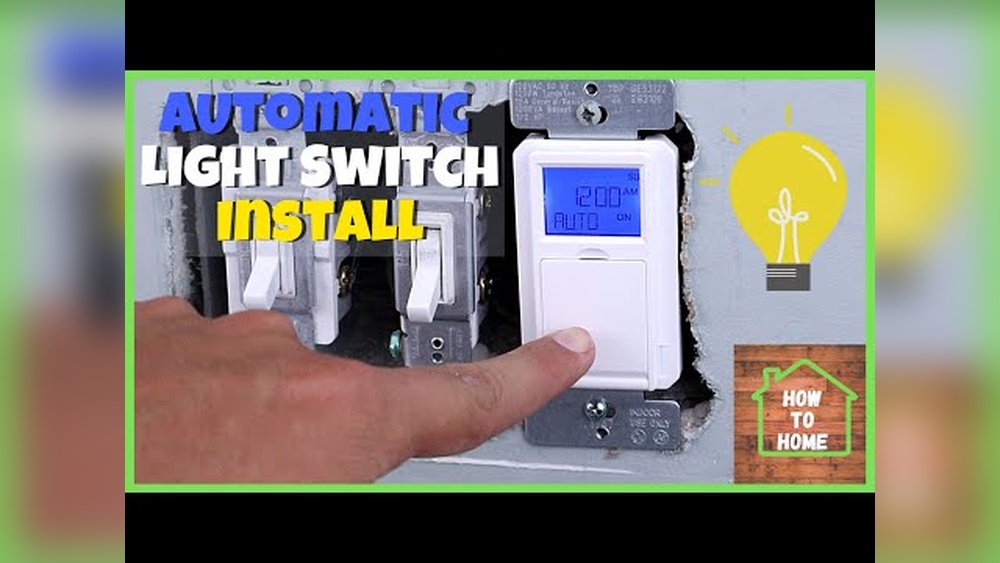
Credit: community.inovelli.com
Preparing The Wiring
Preparing the wiring is an important step before installing a light switch. Proper preparation helps ensure safety and a smooth installation. It involves knowing the wires, handling them carefully, and setting them up correctly.
Identify Wire Types
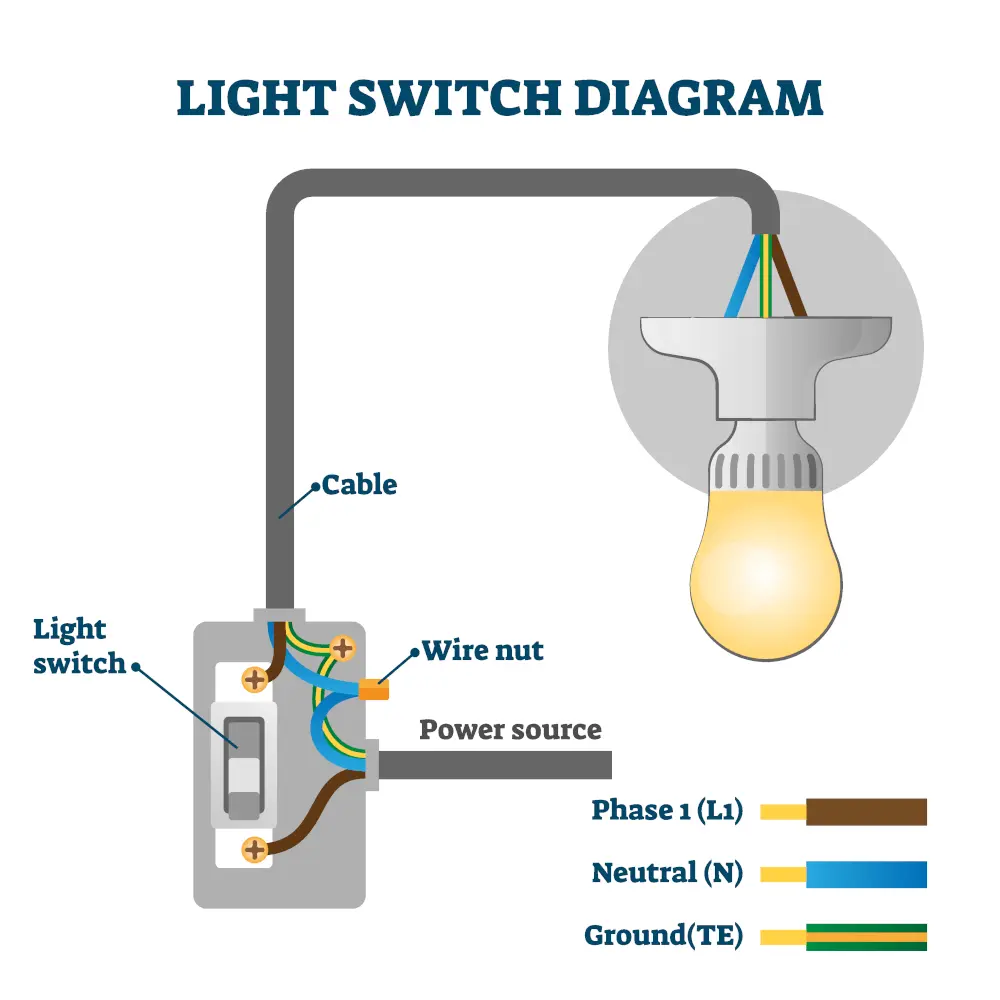
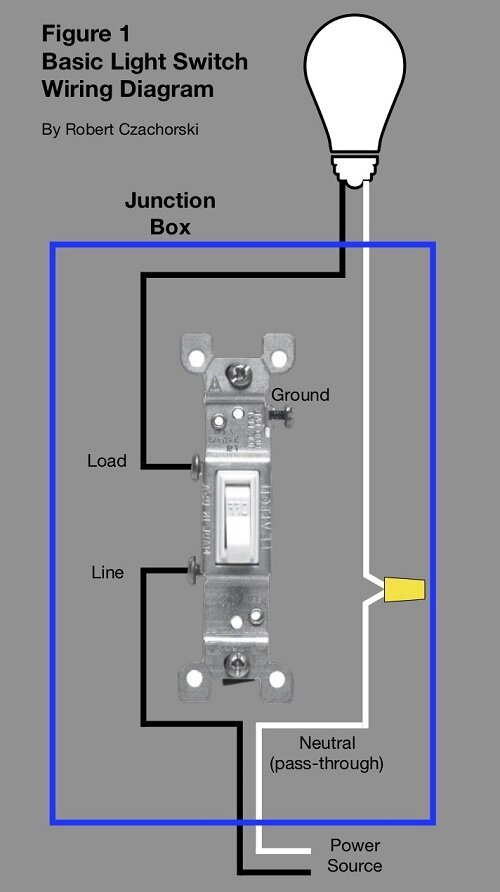
Start by recognizing the different types of wires in your switch box. Usually, you will see black, white, and green or bare wires. The black wire is the “hot” wire carrying electricity. The white wire is the neutral wire. The green or bare wire is the ground wire. Knowing these wires helps you connect the switch properly.
Strip Wire Insulation
Use a wire stripper to remove the plastic coating from the wire ends. Strip about half an inch of insulation from each wire. Be careful not to cut or damage the metal wire inside. Clean and exposed wires make a good connection with the switch terminals.
Arrange Wires Properly
Organize the wires inside the switch box neatly. Keep the ground wires together and twist them with a wire nut. Separate the hot and neutral wires to avoid short circuits. Proper arrangement makes the wiring safer and easier to manage during installation.
Connecting The Switch
Connecting the switch is a key step in wiring a light switch safely and correctly. This process involves attaching different wires to the switch terminals. Each wire has a special role in making the switch work. Follow the steps carefully to avoid mistakes and ensure your switch functions well.
Wiring requires attention to detail. Proper connections help prevent electrical hazards and keep your home safe.
Attach Ground Wire
The ground wire protects you from electric shock. It is usually green or bare copper. Look for the green screw on the switch. Wrap the ground wire around the screw in a clockwise direction. Tighten the screw firmly to hold the wire in place. If your switch has a ground terminal, connect the wire there. If no ground wire is present, check local codes for safety rules.
Connect Hot Wire
The hot wire carries electricity from the power source. It is often black or red. Identify the hot wire coming from the power supply. Connect it to the brass or black screw on the switch. Wrap the wire around the screw clockwise. Tighten the screw to secure the wire. Make sure the wire is snug and does not slip out. This connection controls the flow of electricity to your light.
Secure Neutral Wire
Neutral wires complete the electrical circuit. They usually have white insulation. Most single-pole switches do not connect to neutral wires directly. However, smart switches may require a neutral connection. If your switch needs it, attach the neutral wire to the silver terminal. Otherwise, twist neutral wires together inside the electrical box with a wire nut. Ensure all wire nuts are tight and secure. Proper neutral wiring keeps the electrical system stable and safe.
Mounting The Switch
Mounting the switch is a key step in wiring a light switch. It secures the switch safely inside the wall. This makes sure the switch works well and looks neat. Follow each step carefully to install it correctly.
Fix Switch To Wall Box
Start by placing the switch into the wall box. Align the screw holes on the switch with the holes on the box. Use a screwdriver to tighten the screws. Do not overtighten; the switch should be firm but not damaged. Check that the switch sits flat and straight on the wall.
Attach Cover Plate
Next, place the cover plate over the switch. The cover plate hides the wiring and switch edges. Align the plate with the screw holes on the switch. Use the screws that came with the plate to fasten it. Tighten the screws gently until the plate is secure. The cover plate should fit snugly against the wall without gaps.
Testing The Installation
Testing the installation is a key step after wiring your light switch. It ensures the switch works properly and safely. This step helps catch any wiring mistakes early. Follow these simple actions to confirm your switch is ready to use.
Restore Power
Turn the main power back on at the breaker box. Make sure the circuit breaker for the switch is in the ON position. This restores electricity to the switch and the connected light. Be careful and avoid touching wires while restoring power.
Operate Switch
Flip the switch up and down several times. Check if the light turns on and off smoothly. Notice any flickering or delay in the light. Test all switch positions if it controls multiple lights or settings. This confirms the wiring is correct.
Troubleshoot Issues
If the light does not work, turn off the power again. Check all wire connections inside the switch box. Tighten loose wires and ensure no wires are crossed. Use a voltage tester to check for power at the switch terminals. Replace the switch if it still fails.
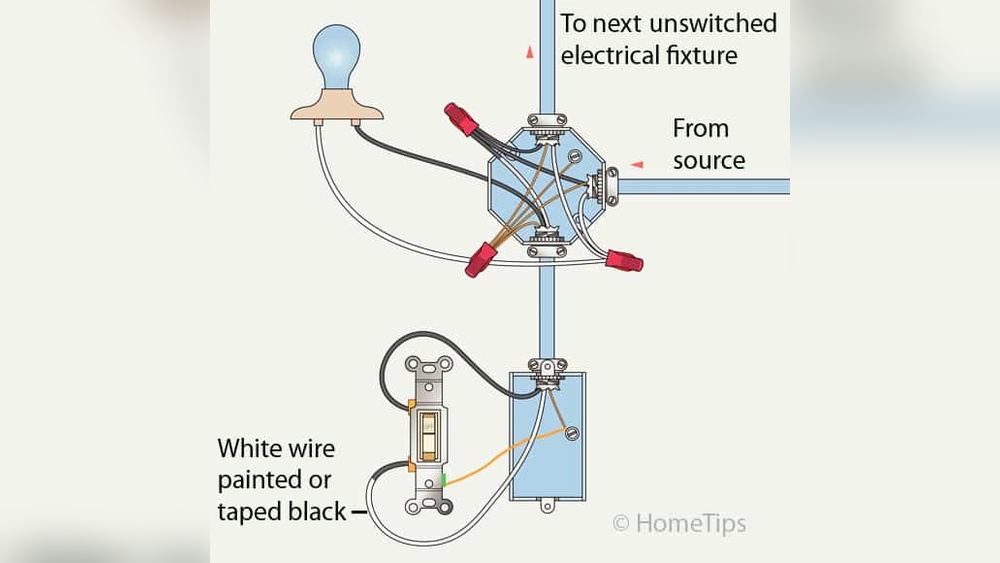
Credit: linkdhome.com
Frequently Asked Questions
How Do I Wire A Light Switch Safely?
Turn off power at the circuit breaker first. Use a voltage tester to confirm no electricity. Connect the black (hot) wire to the switch’s screw. Attach the white (neutral) wires together. Follow local electrical codes and use proper tools.
What Tools Are Needed For Wiring A Light Switch?
You need a screwdriver, wire stripper, voltage tester, electrical tape, and wire nuts. These tools ensure safe and efficient switch installation. Having the right tools helps avoid errors and speeds up the wiring process.
Can I Replace A Light Switch Myself?
Yes, if you follow safety rules and instructions. Always turn off power before starting. Use a voltage tester to check wires. If unsure, consult a professional electrician to prevent hazards.
What Types Of Light Switches Can I Wire?
Common types include single-pole, three-way, and dimmer switches. Single-pole controls one light from one location. Three-way allows control from two locations. Choose based on your wiring setup and lighting needs.
Conclusion
Wiring a light switch is easier than it seems. Follow safety steps carefully to avoid risks. Use the right tools and check connections twice. Turn off the power before starting any work. Take your time and work slowly. This helps you avoid mistakes and keeps you safe.
With practice, wiring switches becomes simple. Keep learning and stay cautious. You can handle small electrical tasks with confidence. Remember, safety always comes first in any project.