Are you tired of fumbling in the dark to find your light switch? Imagine walking into a room and having the lights turn on automatically, saving you time and effort.
Connecting a motion sensor light switch can make this a reality, adding convenience and energy savings to your home. In this guide, you’ll learn exactly how to install and set up your motion sensor switch quickly and safely—even if you’re not an expert.
Keep reading, and by the end, you’ll have the confidence to upgrade your lighting with ease.
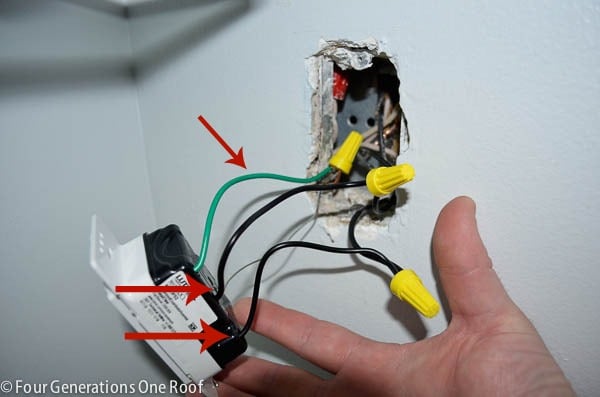
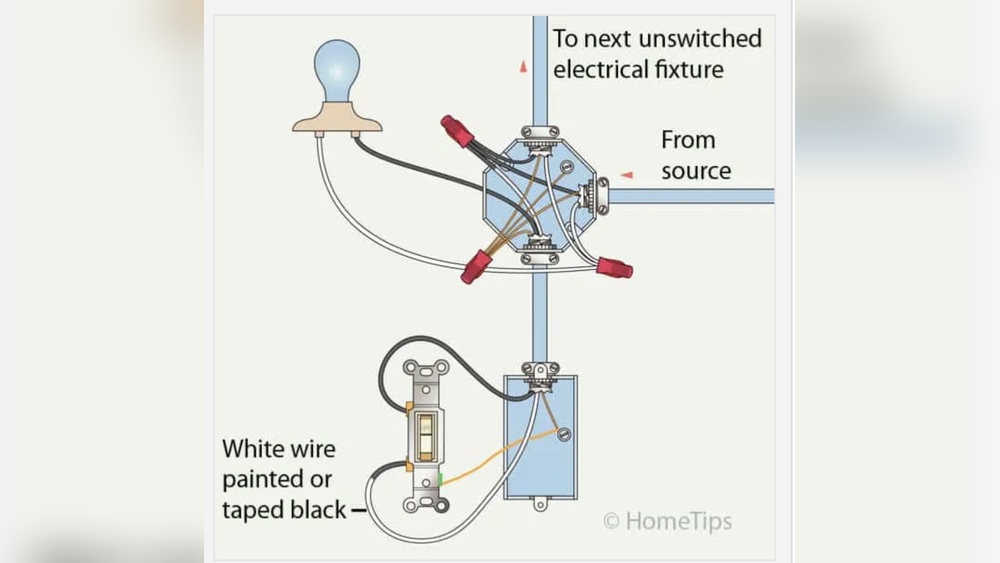
Credit: www.fourgenerationsoneroof.com
Tools And Materials Needed
Installing a motion sensor light switch requires some basic tools and materials. Having the right items ready makes the process smoother and safer. This section lists everything needed to connect your new switch correctly.
Essential Tools For Installation
You will need a screwdriver, usually a flathead and a Phillips. A voltage tester is important to check if the power is off. Wire strippers help prepare the wires for connection. Pliers are useful to twist wires together tightly. A drill might be needed if new holes are required for mounting.
Materials Required For The Project
The main material is the motion sensor light switch itself. Electrical tape helps secure wire connections. Wire nuts join wires safely and keep them insulated. You may need extra electrical wires if the existing ones are too short. Always have a user manual for specific instructions about your switch model.
Safety Gear To Use
Wear insulated gloves to protect against electric shock. Safety goggles shield your eyes from dust or sparks. A flashlight is handy if the workspace is dark. Use a sturdy ladder if the switch is high on the wall. Make sure your tools are in good condition before starting.
Choosing The Right Motion Sensor Switch
Choosing the right motion sensor switch matters for safety and ease of use. The perfect switch fits your needs and wiring. It also works well with your space and lighting. Understanding the types and compatibility helps you pick the best option.
Types Of Motion Sensors
Motion sensors detect movement and turn lights on or off. Passive infrared (PIR) sensors sense body heat and movement. Ultrasonic sensors use sound waves to detect motion. Dual technology sensors combine both PIR and ultrasonic for accuracy. Choose the type based on your room size and lighting needs.
Compatibility With Your Wiring
Check your home wiring before buying a motion sensor switch. Some switches need a neutral wire to work. Older homes may not have a neutral wire in the switch box. Confirm if your wiring supports the sensor switch type. Proper compatibility ensures easy installation and proper function.
Safety Precautions
Safety comes first when connecting a motion sensor light switch. Electricity can be dangerous. Taking the right steps protects you and your home. Follow these safety tips carefully.
Turning Off Power
Always switch off the power before starting. Find the correct circuit breaker and turn it off. Test the switch with a voltage tester. Confirm no electricity flows to avoid shocks. Never trust the switch position alone.
Using Proper Safety Gear
Wear insulated gloves to protect your hands. Use safety glasses to shield your eyes from sparks or debris. Avoid loose clothing that might catch on wires. Use tools with insulated handles for extra safety.

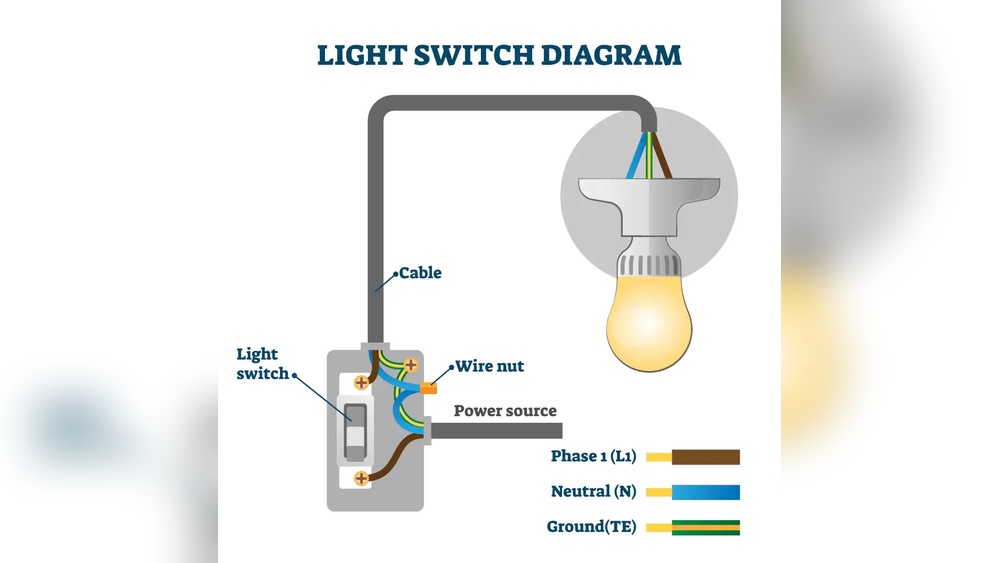
Credit: www.beeslighting.com
Preparing The Work Area
Preparing the work area is the first step in installing a motion sensor light switch. A clean, safe space helps you focus and work without interruptions. It also protects you from electrical hazards. Take time to gather all tools and materials before starting.
Turn off the power at the circuit breaker. This step keeps you safe from shocks. Use a voltage tester to double-check the power is off. Clear the area around the switch for easy access. Good lighting helps you see wires clearly.
Removing The Old Switch
Remove the switch cover plate by unscrewing it. Keep the screws safe to reuse later. Unscrew the old switch from the electrical box. Pull the switch gently to expose the wires. Note how the wires connect to the switch. Take a picture for reference if needed.
Checking The Wiring
Inspect the wires for damage or wear. Look for frayed or exposed copper. Make sure wires are clean and straight. Check the wire colors: black, white, and green or bare copper. Confirm the existing wiring matches the motion sensor switch instructions. Replace any damaged wires before proceeding.
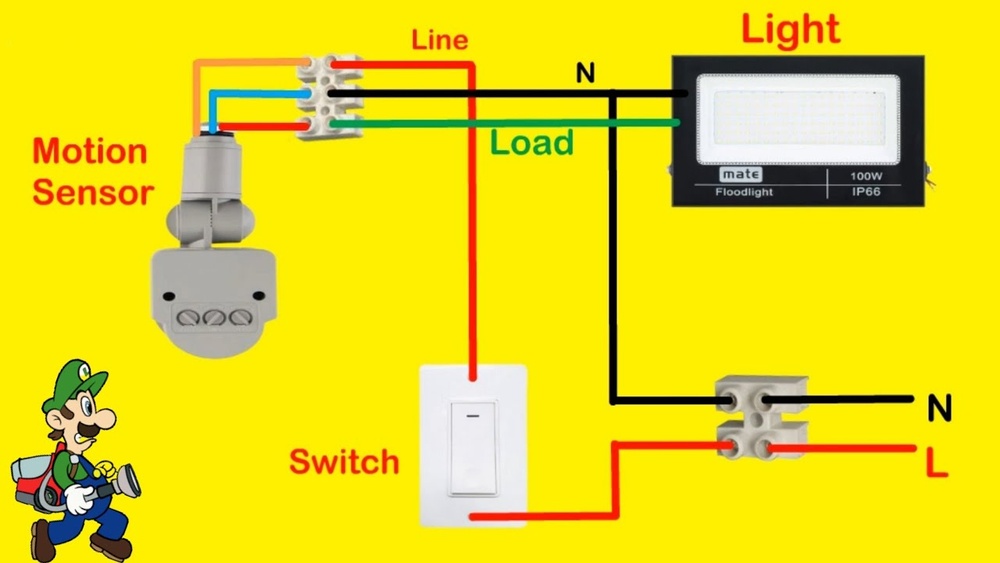
Wiring The Motion Sensor Switch
Wiring the motion sensor switch is an important step for a successful installation. It controls the flow of electricity to the light based on motion detection. Proper wiring ensures the switch works safely and efficiently.
Follow clear steps to connect the wires correctly. Understanding the wires and securing each connection prevents electrical problems.
Identifying Wires
Start by turning off the power at the breaker. Use a voltage tester to confirm no power flows to the wires. Look for three main wires in the switch box: the live wire, the load wire, and the neutral wire.
The live wire carries power from the electrical panel. The load wire connects to the light fixture. The neutral wire completes the circuit back to the panel. Sometimes, a ground wire is also present for safety.
Connecting Wires To The Switch
Match the switch wires to the house wires by color or label. Typically, black wires connect to live and load terminals. White wires connect to neutral terminals. Green or bare wires connect to the ground screw.
Attach each wire to its terminal on the motion sensor switch. Tighten screws firmly to hold wires in place. Avoid loose connections to prevent sparking or failure.
Securing Wire Connections
Use wire nuts to cover and secure wire joins. Twist wires together before placing the nut on. Check that no bare wire is exposed outside the nut.
Wrap electrical tape around wire nuts for extra safety. Carefully push wires back into the electrical box. Screw the motion sensor switch into the box firmly.
Installing The Switch
Installing the motion sensor light switch is a simple process. It requires careful handling to ensure the switch works properly and safely. After wiring the switch, the next steps are mounting it and attaching the cover plate. These steps secure the switch and give a clean, finished look.
Mounting The Switch In The Box
First, gently push the wires back into the electrical box. Align the switch with the mounting holes. Use the screws provided to fasten the switch securely. Tighten the screws but avoid over-tightening. The switch should sit flush against the wall. Check that the sensor is facing the right direction for best detection.
Attaching The Cover Plate
Choose the correct cover plate for your switch model. Place it over the mounted switch carefully. Align the screw holes on the plate with those on the switch. Insert the screws and tighten them gently. The cover plate should fit snugly without gaps. This step completes the installation and protects the wiring.
Testing The Motion Sensor
Testing the motion sensor is a key step after installation. It ensures the sensor works properly and controls the light as expected. This process helps avoid any issues like false triggers or no response. Follow simple steps to check and adjust the sensor settings for best performance.
Restoring Power
Turn the circuit breaker back on to restore power. This step activates the motion sensor light switch. Watch the light closely after power returns. The sensor should start working immediately. If the light does not turn on, check the wiring connections. Make sure the switch is correctly installed and wired.
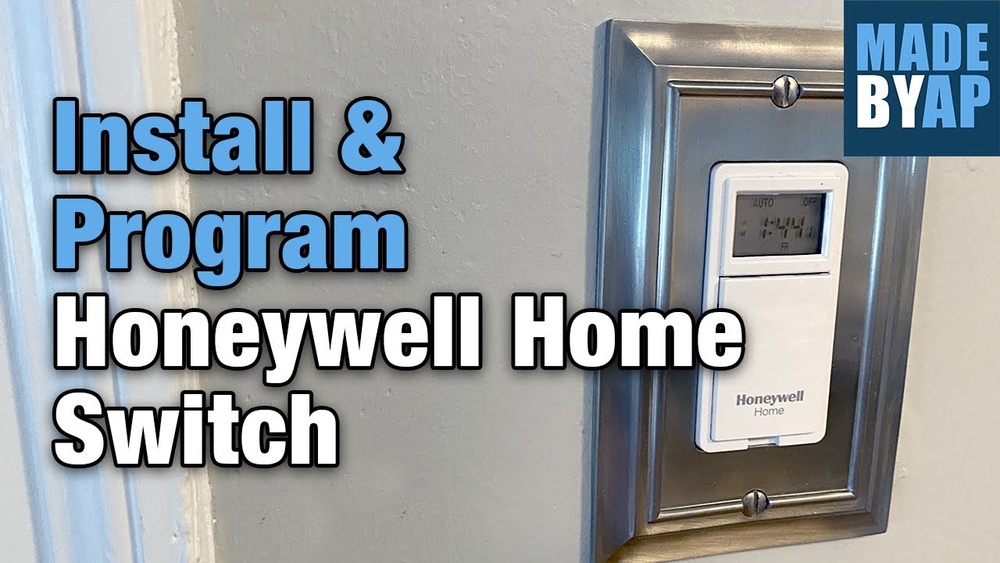
Adjusting Sensitivity And Timer Settings
Most motion sensor switches have controls for sensitivity and timer. Sensitivity adjusts how far the sensor can detect movement. Timer controls how long the light stays on after motion stops. Use the dials or buttons on the switch to change these settings. Test the sensor by walking in front of it. Increase sensitivity if it misses movement. Lower it if the light turns on too often. Set the timer to keep the light on long enough for your needs. Fine-tune these settings for comfort and energy savings.

Credit: waterheatertimer.org
Troubleshooting Common Issues
Troubleshooting common issues with a motion sensor light switch helps keep your space safe and well-lit. Some problems may occur during or after installation. Knowing how to fix them saves time and money. Let’s explore easy ways to solve these issues.
Switch Not Turning On
Check the power supply first. Make sure the circuit breaker is on. Confirm the wiring matches the instructions. Loose or wrong wires stop the switch from working. Test the switch by turning it on manually. Replace the switch if it still does not work.
Lights Flickering
Flickering lights often mean a poor connection. Tighten all wire nuts and screws. Use a voltage tester to check for power spikes. Sometimes, the bulb type is not compatible with the switch. Use recommended bulbs for motion sensor switches. Replace bulbs if flickering continues.
Sensor Not Detecting Motion
Clean the sensor lens to remove dust or dirt. Adjust the sensor’s angle and range settings. Avoid placing the sensor near heat sources or vents. These can trigger false signals or block detection. Test motion detection by moving slowly in front of the sensor. Replace the sensor if it fails to detect any motion.
Frequently Asked Questions
What Tools Are Needed To Install A Motion Sensor Light Switch?
You will need a screwdriver, voltage tester, wire stripper, and electrical tape. Safety gloves and a ladder may also help during installation.
How Do I Connect Wires To A Motion Sensor Switch?
Match the motion sensor wires to your home’s electrical wires by color. Usually, black to black, white to white, and green or bare copper to ground.
Can I Install A Motion Sensor Switch Myself Safely?
Yes, if you turn off power at the breaker and follow instructions carefully. If unsure, consult a licensed electrician for safe installation.
How Do I Test A Motion Sensor Light Switch After Installation?
Turn the power back on and wave your hand near the sensor. The light should turn on when motion is detected and off after the set delay.
Conclusion
Connecting a motion sensor light switch is simple and useful. It saves energy and adds safety to your space. Follow the steps carefully and use the right tools. Double-check all connections before turning the power back on. Test the sensor to make sure it works well.
Enjoy the convenience of automatic lighting in your home. Small effort, big difference. Keep your home bright only when needed. A smart choice for any room or outdoor area.