Are you ready to give your room a quick upgrade? Changing a light fixture might seem tricky, but it’s easier than you think.
Imagine transforming your space with just a few simple steps—no need to call a pro or spend a fortune. In this guide, you’ll discover exactly how to switch out a light fixture safely and confidently. Keep reading, and by the end, you’ll have the skills to brighten up your home exactly the way you want.
Gather Necessary Tools
Gathering the right tools is the first step to switch out a light fixture. Having everything ready makes the job easier and safer. It saves time and prevents mistakes. This section lists what you need to prepare before starting.
List Essential Equipment
Start with a screwdriver, usually a flathead or Phillips. A voltage tester is key to check if the power is off. Wire strippers help remove insulation from wires. Pliers are useful for twisting wires together. A ladder or step stool lets you reach the fixture safely. Keep a flashlight nearby for better visibility. Electrical tape helps secure wire connections. Finally, have the new light fixture and its mounting hardware ready.
Safety Gear To Use
Wear safety goggles to protect your eyes from dust and debris. Use insulated gloves to avoid electric shocks. Non-slip shoes ensure stable footing on ladders. Turn off power at the breaker box before starting. Confirm power is off with a voltage tester. Clear the area of any tripping hazards. Work in a well-lit space to see clearly. These safety steps help prevent accidents during the task.
Credit: www.artofmanliness.com
Turn Off Power Safely
Turning off the power safely is the first step before changing a light fixture. It protects you from electric shocks and accidents. Always handle electrical work with care. Never skip this step, even if you think the power is off.
Locate Circuit Breaker
Find your home’s circuit breaker box. It is usually in the basement, garage, or closet. Open the box and look for the switch that controls the light fixture. The switch might be labeled with the room name or number.
Flip the switch to the “off” position. This stops the electrical flow to the light fixture. If you cannot find the right switch, turn off the main breaker to cut power to the whole house.
Test For Power
Use a voltage tester or a non-contact voltage detector. Hold it near the wires or light fixture. If the tester does not light up or beep, the power is off.
Double-check by turning the light switch on and off. The light should not turn on. Never touch wires without testing first. Safety comes first in every step.
Remove Old Fixture
Removing the old light fixture is the first step in your switch. It prepares the space for the new fixture. This step requires care and attention to avoid damage or injury.
Turn off the power at the circuit breaker to stay safe. Use a voltage tester to confirm the power is off. Now, you can start removing the old fixture.
Unscrew Fixture Components
Locate the screws holding the fixture in place. Use a screwdriver to remove these screws carefully. Keep the screws in a safe place; you might need them later. Remove any covers or glass shades gently. Set these parts aside to avoid breakage. Take the fixture off the mounting bracket slowly.
Disconnect Wiring
Look at the wires connecting the fixture to the ceiling. Unscrew the wire nuts that join the wires. Separate the fixture wires from the ceiling wires. Remember the wire colors and their positions. Use tape to label wires for easy reconnection. Move the old fixture away from the ceiling carefully.
Prepare New Fixture
Preparing your new light fixture is an important step before installation. It ensures the fixture fits well and works safely in your space. Taking time to prepare helps avoid problems later.
Check Compatibility
Verify the new fixture matches your home’s electrical setup. Look at the voltage and wattage ratings on the fixture. Confirm the mounting hardware fits your ceiling or wall box. Check the size and shape to ensure it suits your room. Make sure the fixture supports your bulb type.
Assemble Components
Unpack all parts carefully. Follow the instructions to put pieces together. Attach any shades, bulbs, or covers as directed. Tighten screws and connectors firmly but gently. Keep small parts safe during assembly to avoid loss. Test the fixture’s moving parts for smooth operation.
Connect New Wiring
Connecting new wiring is a key step in changing a light fixture. It ensures the fixture gets power safely. Proper wiring keeps your home safe and the light working well. Follow each step carefully to avoid mistakes.
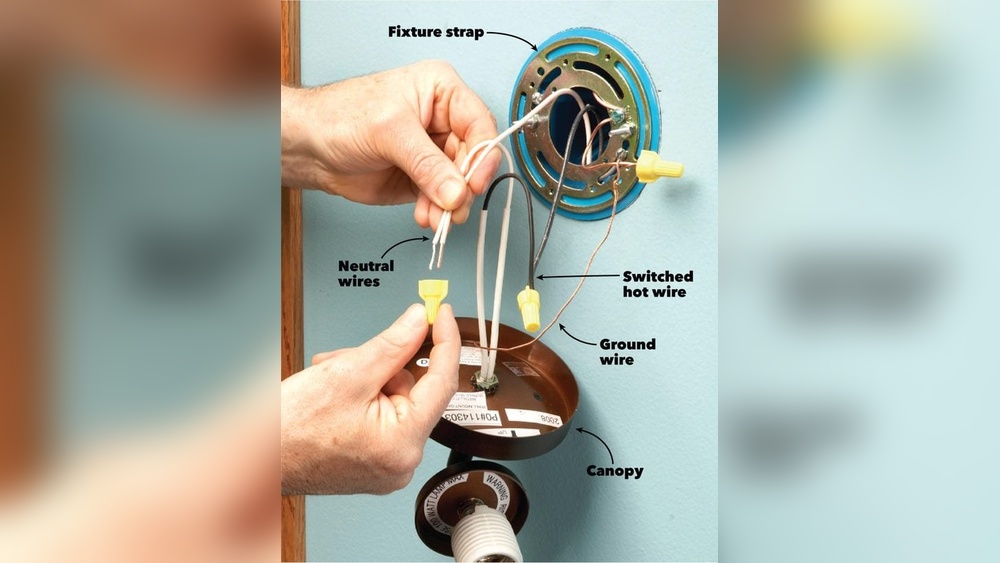
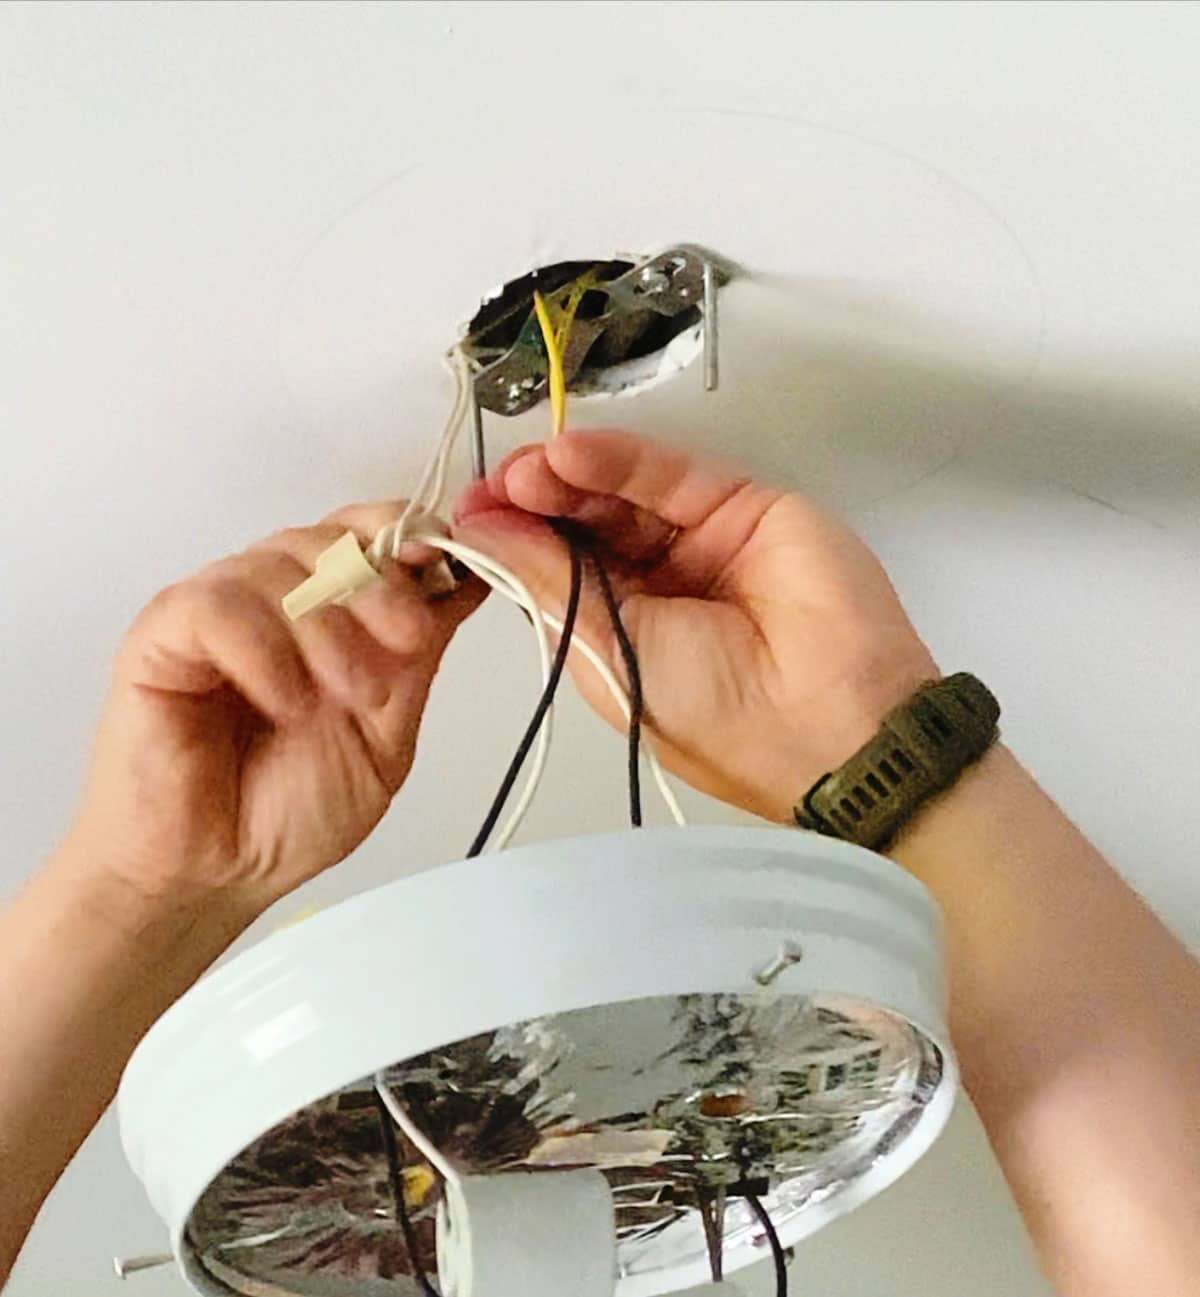
Match Wire Colors
First, identify the wires by their color. Usually, black or red wires carry power. White wires are neutral. Green or bare wires are ground. Match each wire from the fixture to the same color wire in the ceiling. This keeps the electrical flow correct. Do not mix different colors. Incorrect matching can cause short circuits or shocks.
Secure Wire Nuts
After matching, twist the wires together. Use wire nuts to cover the twisted wires. Wire nuts keep connections tight and safe. Twist the nut clockwise until it feels secure. Tug gently on the wires to check. Loose connections can cause sparks or outages. Cover all exposed wire ends with wire nuts for safety.
:max_bytes(150000):strip_icc()/how-to-replace-ceiling-light-fixture-1824657-03-d0831082affb46be9ab0fb2652da8092.jpg)
Credit: www.thespruce.com
Mount New Fixture
Mounting the new light fixture is the next key step. This process holds your fixture firmly in place. A well-mounted fixture ensures safety and function. Follow clear steps to attach and secure it properly.
Attach Bracket
First, find the mounting bracket that came with your fixture. Align it with the electrical box on the ceiling or wall. Use the screws provided to fasten the bracket tightly. Make sure it feels stable and does not move. The bracket supports the weight of the light fixture. Double-check the screws to avoid any loosening later.
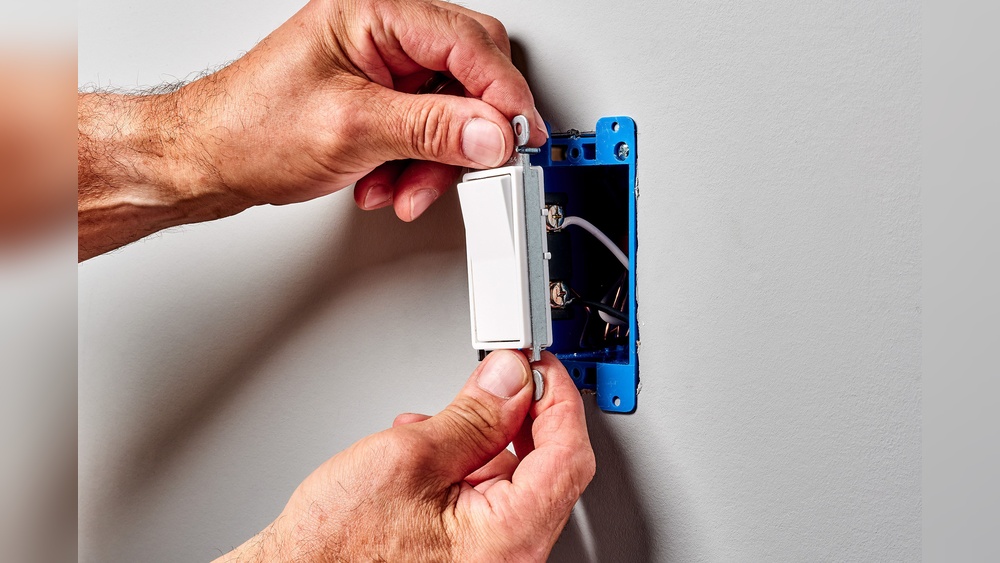
Secure Fixture
Next, connect the fixture to the bracket. Hold the fixture close to the bracket and line up the holes. Insert the screws through the fixture and into the bracket. Tighten the screws carefully, but do not over-tighten. Over-tightening can damage the fixture or bracket. Ensure the fixture sits flush against the ceiling or wall. Test it by gently shaking to confirm it is secure.
Restore Power And Test
After installing your new light fixture, restoring power and testing it is the next crucial step. This ensures your fixture works properly and safely. Take your time to carefully bring the electricity back to the area. Check the fixture’s function to confirm everything is set up correctly. Follow these steps to finish your light fixture switch with confidence.
Switch On Circuit
Locate the circuit breaker panel in your home. Flip the switch for the light fixture’s circuit back to the ON position. You should hear a click. This action restores power to the wiring and your new fixture. Be sure to switch on the correct breaker. If unsure, turn on breakers one by one and watch for the fixture to activate.
Check Light Function
Go to the light fixture and turn on the wall switch. The light should turn on immediately. If the light does not come on, double-check your wiring connections. Make sure the bulbs are properly seated in the sockets. If the fixture still does not work, switch off the breaker and review your installation steps. Testing ensures your new fixture is safe and ready to use.
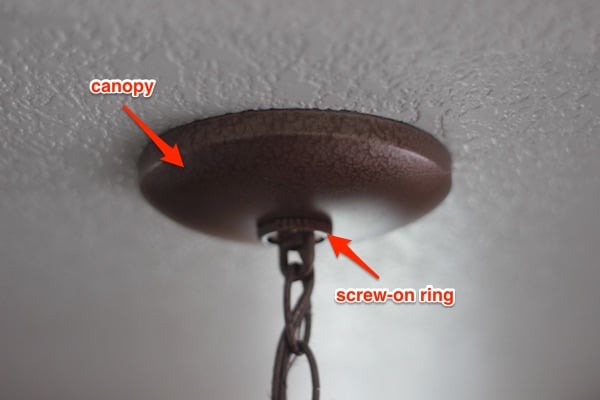
Credit: houseofhipsters.com
Troubleshooting Tips
Troubleshooting a light fixture can save time and money. Some common issues appear after switching out a fixture. These problems often have simple fixes. Knowing what to check helps you avoid extra work. Below are easy tips to solve common light fixture problems quickly.
Fix Flickering Lights
Flickering lights can be annoying and unsafe. Start by checking the bulb. Make sure it is screwed in tightly. Replace the bulb if it is old or damaged. If flickering continues, check the light switch. A faulty switch may cause flicker. Sometimes the fixture wiring is loose or damaged. Turn off the power and inspect the wires. Tighten any loose connections carefully. If unsure, ask an electrician for help.
Address Loose Connections
Loose connections cause flickering and power loss. Turn off the breaker before handling wires. Remove the fixture cover and look for loose wires. Wires should be tightly twisted and secured with wire nuts. If a wire nut is missing, add one. Check the fixture’s mounting screws too. Tighten any that feel loose. Loose parts can cause the fixture to move or spark. Proper connections keep your fixture safe and working well.
Frequently Asked Questions
How Do I Safely Turn Off Power Before Switching Fixtures?
Always switch off the circuit breaker controlling the light fixture. Use a voltage tester to confirm no electricity flows before starting work. This ensures safety and prevents electrical shocks.
What Tools Are Needed To Switch Out A Light Fixture?
You will need a screwdriver, wire stripper, voltage tester, and possibly pliers. Having these tools ready speeds up the replacement process and ensures proper installation.
How Do I Identify The Wires In My Light Fixture?
Typically, black or red wires are live, white is neutral, and green or bare is ground. Confirm with a voltage tester and refer to your fixture’s wiring diagram for accuracy.
Can I Replace A Light Fixture Without An Electrician?
Yes, if you follow safety steps and understand wiring basics, you can do it yourself. However, consult a professional for complex wiring or unfamiliar setups.
Conclusion
Switching out a light fixture is easier than it seems. Turn off the power to stay safe. Take your time and follow each step carefully. Use the right tools and double-check your work. A new fixture can brighten your room and mood.
Enjoy the fresh look and improved lighting. Keep these tips handy for future projects. Simple changes can make a big difference at home. You can do this with confidence and care. Ready to light up your space?