Are you struggling to hang something heavy on your wall but worried it won’t hold? Knowing how to get a drywall anchor into your wall the right way can make all the difference.
Whether it’s a shelf, a mirror, or a picture frame, using the correct technique ensures your items stay secure and your walls stay damage-free. In this guide, you’ll discover simple steps that anyone can follow to install drywall anchors quickly and safely.
Keep reading, and you’ll gain the confidence to tackle your next wall project with ease.
Credit: www.homeserve.com
Choosing The Right Anchor
Choosing the right drywall anchor is key to a secure and safe hold. Different anchors fit different walls and weights. Picking the right one stops damage and keeps your items safe. Learn about types and how to match them to your wall and load.
Types Of Drywall Anchors
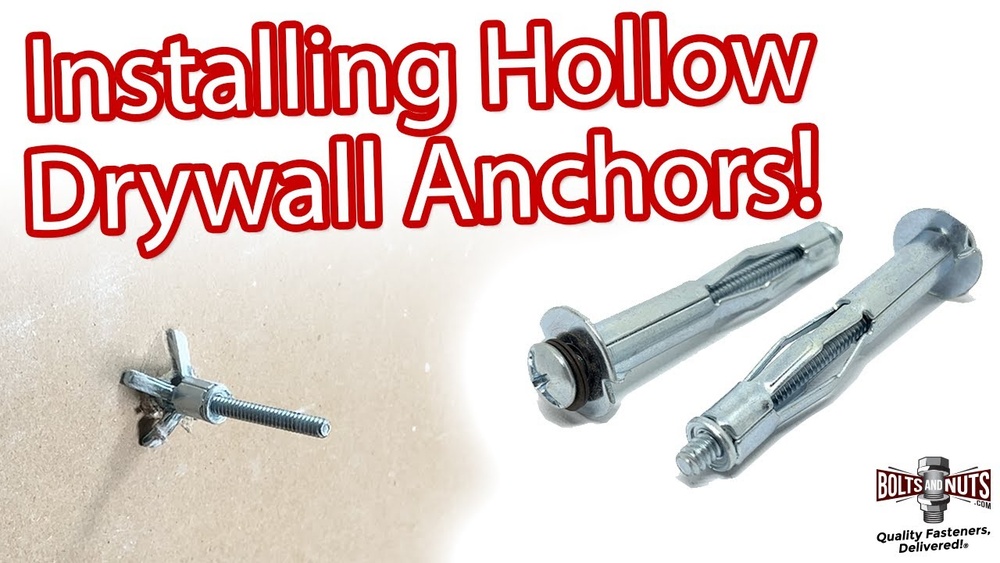
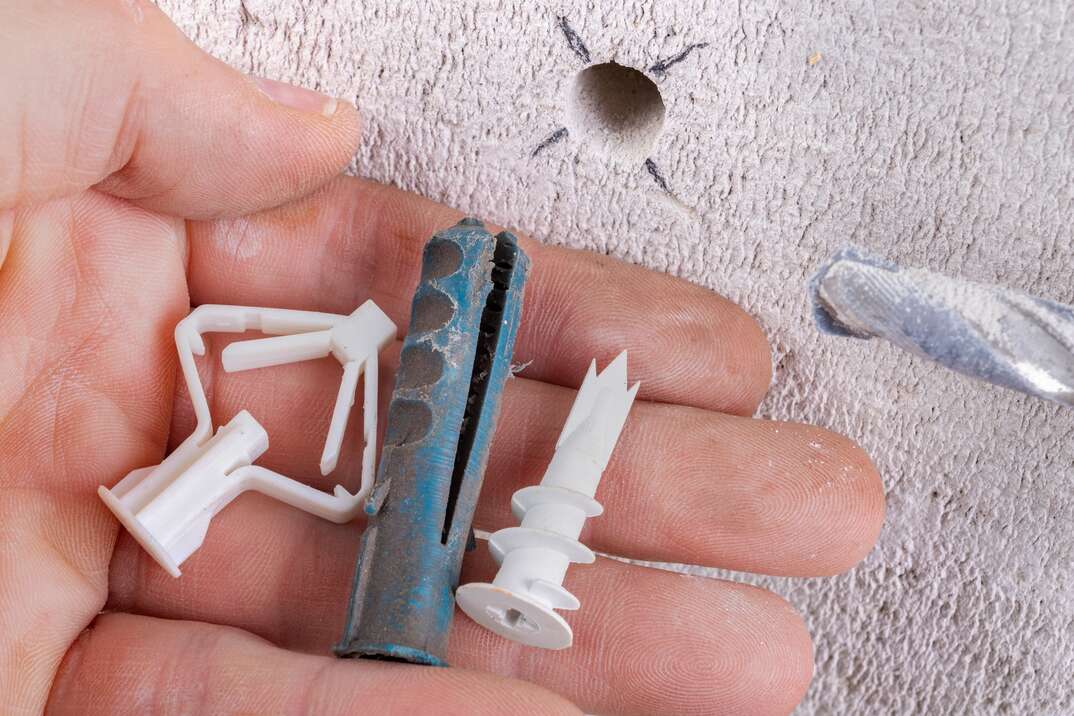
Plastic expansion anchors work for light loads like pictures. They spread inside the wall when you insert the screw. Threaded anchors, or self-drilling anchors, twist directly into drywall. They hold medium weights and do not need a pre-drilled hole. Metal anchors, like molly bolts, expand behind the wall. They hold heavy items like shelves and mirrors. Toggle bolts have wings that open behind the wall. They carry the heaviest loads and are best for large objects.
Matching Anchors To Wall And Load
Check the wall type first. Drywall is soft and needs anchors that expand or grip well. For thin walls, use anchors that spread weight wide. Heavy items require strong anchors like metal or toggle bolts. Light items only need small plastic anchors. Always match the anchor size to the screw size. The anchor must fit tightly in the wall hole. This prevents wobbling and keeps the load secure.
Tools And Materials Needed
Preparing to install a drywall anchor means gathering the right tools and materials. Having everything ready saves time and makes the process smooth. This section lists what you need for the job.
Essential Tools
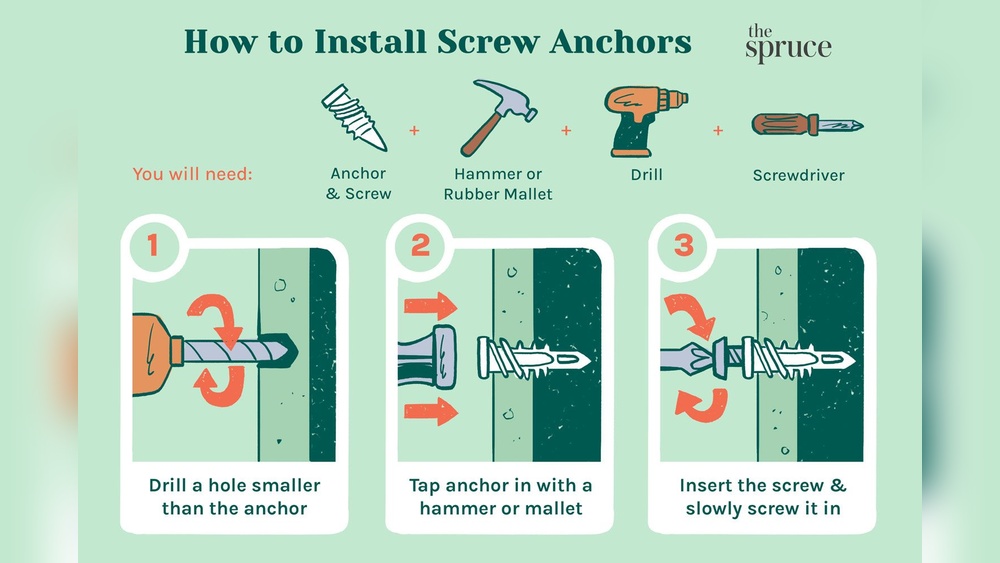
You will need a drill with drill bits suitable for your wall type. A screwdriver, either manual or electric, helps to secure the anchor. A hammer might be required for some anchor types. A tape measure ensures accurate placement. A pencil marks the drilling spot. Lastly, a level keeps the anchor straight on the wall.
Safety Gear
Protect your eyes with safety goggles to avoid dust and debris. Wear a dust mask to keep dust out of your lungs. Gloves protect your hands from sharp tools and rough surfaces. Ear protection is useful if you use loud power tools. These items keep you safe during installation.
Preparing The Wall
Preparing the wall is the first step to install drywall anchors correctly. A well-prepared wall ensures the anchor holds tight and supports weight safely. This step involves finding the right spot on the wall and marking it clearly. Taking time here saves effort later.
Locating The Studs
Studs are the wooden beams behind drywall. Anchors hold better near or in studs. Use a stud finder tool to locate these beams. Move the tool slowly along the wall. It will beep or light up when it finds a stud. Mark the edges of the stud to find its center. This center is the best place for a strong anchor.
Marking The Spot
Marking the spot where the anchor will go is important. Use a pencil to make a small dot on the wall. Check the mark twice before drilling or pushing the anchor in. The mark should be clear but not too big. This helps you drill straight and avoid mistakes. Accurate marking leads to a secure hold for your anchor.
Drilling The Pilot Hole
Drilling the pilot hole is the first step to installing a drywall anchor correctly. This hole guides the anchor into the wall and makes sure it fits tightly. A well-drilled hole prevents damage and helps the anchor hold strong. Taking time with this step improves the overall strength of your hanging project.
Selecting Drill Bit Size
Choose a drill bit that matches the anchor size. The hole should be slightly smaller than the anchor body. This ensures the anchor grips the drywall firmly. Check the anchor package for the recommended bit size. Using the wrong size can cause the anchor to loosen or not fit.
Drilling Tips
Mark the spot on the wall before drilling. Hold the drill steady and start at a slow speed. Drill straight into the wall to avoid angled holes. Stop as soon as you reach the correct depth. Clean out dust from the hole to help the anchor fit better.
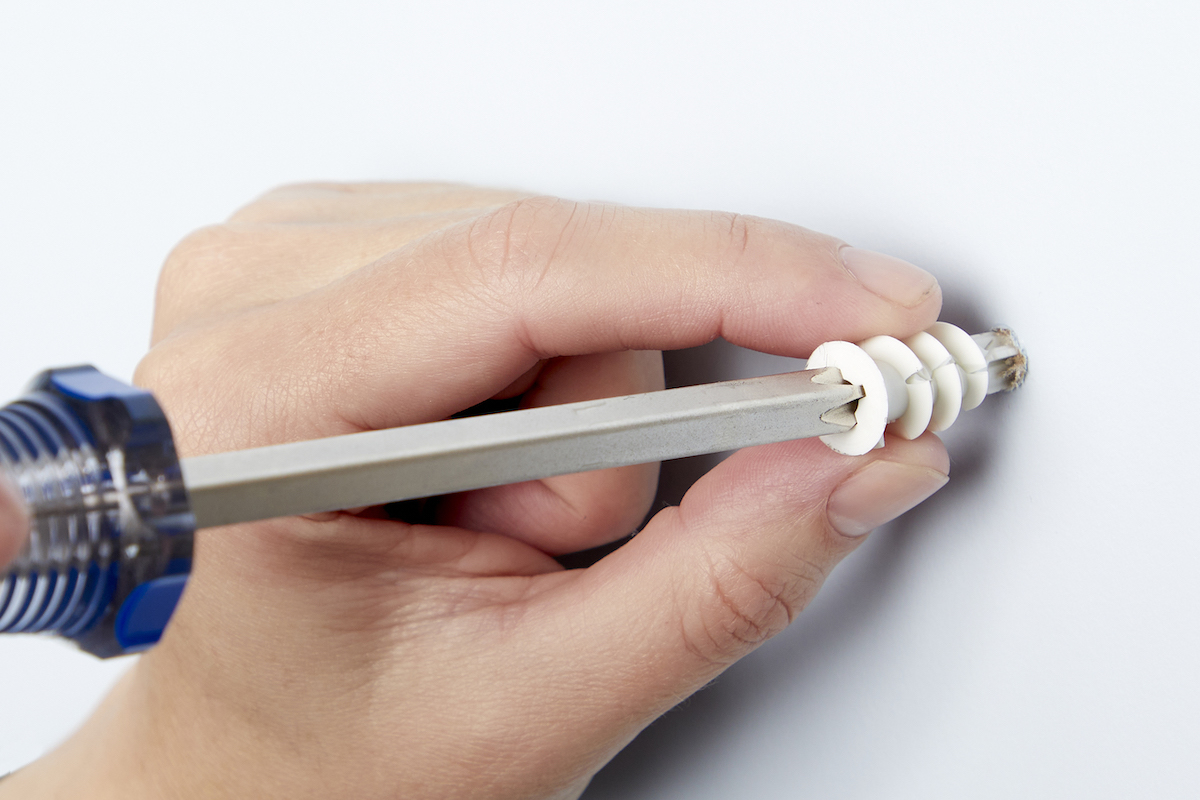
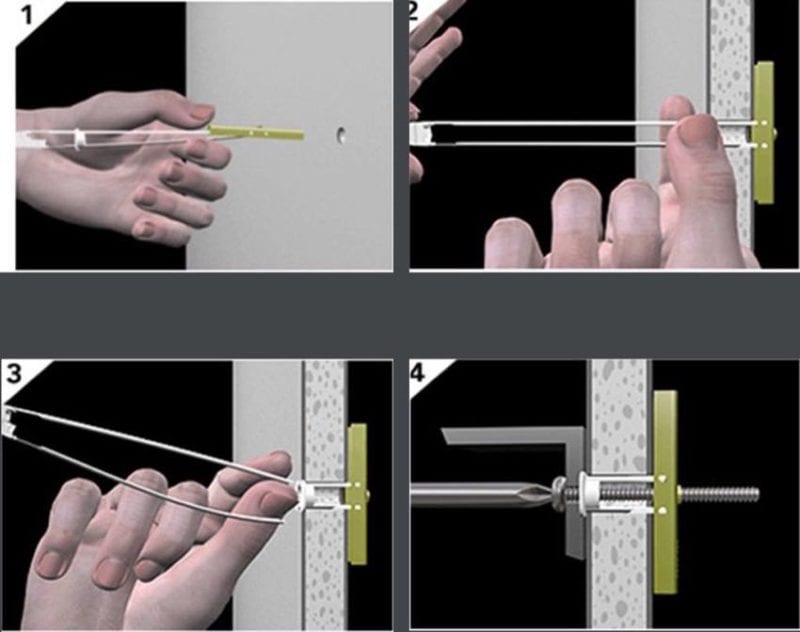
Inserting The Drywall Anchor
Inserting the drywall anchor correctly is key to a strong hold. It helps secure objects to the wall safely. This step needs care and the right tools. Proper insertion prevents damage to the wall and keeps anchors firm.
Two common ways exist to insert drywall anchors: manual and powered. Each method works well depending on the type of anchor and wall material. Choosing the right method saves time and effort.
Manual Vs. Powered Insertion
Manual insertion uses a screwdriver or hand drill. This method offers control and precision. It works best for small anchors or delicate walls. You feel the anchor’s grip and stop if resistance grows.
Powered insertion uses an electric drill or driver. It speeds up the process. This suits larger anchors or multiple holes. Care is needed to avoid pushing the anchor too deep or damaging drywall.
Both methods require steady hands and slow speed at first. Start with light pressure to guide the anchor. Increase force only after the anchor starts threading into the wall.
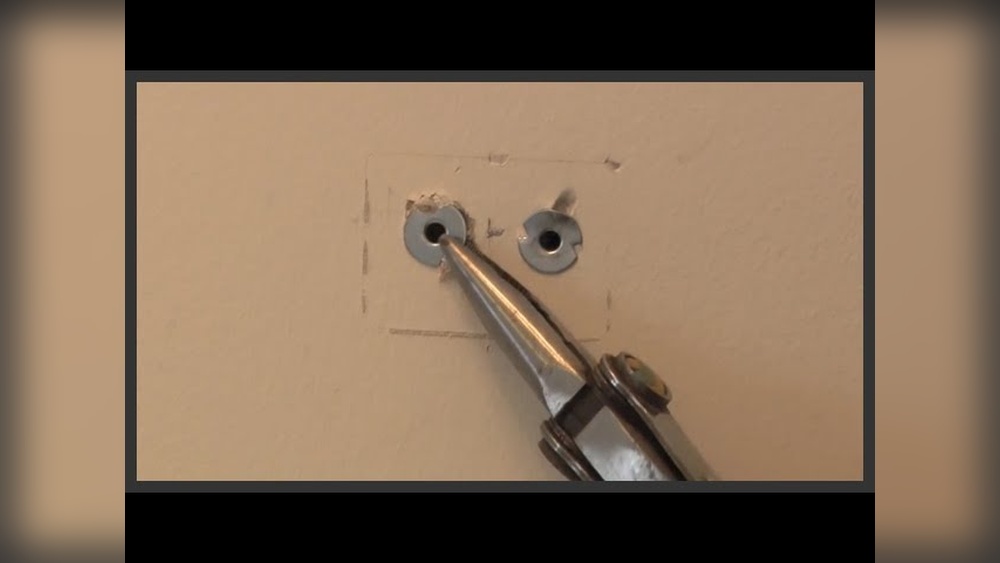
Ensuring Flush Fit
The anchor must sit flush with the wall surface. A raised anchor reduces holding power and looks untidy. Stop inserting once the anchor head matches the drywall.
If the anchor goes too deep, it may lose grip inside the wall. Remove and try again with less force. Use a level or ruler to check the anchor’s position.
A flush fit means the anchor is ready for the screw or hook. This step ensures the mounted object stays secure and stable over time.
Credit: www.bobvila.com
Securing The Anchor
Securing the drywall anchor properly is key to strong wall support. A well-fixed anchor holds heavy items safely. This step needs care and the right method. Avoid rushing to keep the wall intact and the anchor firm.
Tightening Techniques
Start by turning the screw slowly. Use a screwdriver that fits well in the screw head. Tighten until the anchor feels snug but not too tight. Stop if the wall begins to bulge or crack. Tightening too much can break the anchor or damage the drywall. Turn the screw in small steps and check firmness often.
Avoiding Wall Damage
Do not force the anchor into the wall. Use gentle pressure to prevent cracks. Check the wall surface for signs of stress. If the drywall feels soft or crumbly, stop and try a different spot. Use anchors made for drywall to avoid holes that are too big. Protect the wall by handling tools carefully and not rushing the process.
Testing The Anchor Hold
Testing the anchor hold is a key step after installing drywall anchors. It ensures the anchor can support the load without pulling out. This step helps avoid damage to your wall and keeps your items safe.
Check the anchor by applying light pressure first. Use your hand to gently pull or push on the anchor. If it feels loose or moves easily, it may not be secure enough. Gradually increase the pressure to test its strength.
Weight Limit Checks
Each drywall anchor has a weight limit. Check the packaging or product details for this information. Use a scale or estimate the weight of the object you want to hang. Compare this weight to the anchor’s limit to ensure safety.
Hang the item and watch for any signs of strain. Look for cracks or movement around the anchor. If the anchor holds steady, it is safe to use. If not, it requires adjustment or replacement.
Adjusting If Necessary
If the anchor feels loose, try tightening it carefully. Some anchors expand inside the wall when tightened. Turning the screw slowly can increase grip.
For hollow wall anchors, remove and reposition if needed. Choose a stronger anchor type if the original fails. Consider using toggle bolts for heavier items.
Always retest the anchor after adjustments. Make sure it can hold the intended weight before hanging anything important.
Common Mistakes To Avoid
Installing drywall anchors is simple but easy to mess up. Avoiding common mistakes saves time and damage. Understanding these errors helps you get a strong hold on your walls. Learn what to watch out for.
Over-tightening
Turning the screw too hard can break the anchor or wall. It crushes drywall and weakens the hold. Stop once you feel resistance. Tighten slowly and gently. This keeps the anchor secure without damage.
Wrong Anchor Choice
Selecting the wrong anchor for your wall causes failure. Use anchors made for drywall, not plaster or brick. Match anchor size to screw size. Light anchors can’t hold heavy items. Heavy anchors may be too big for small holes. Pick the right type for your project.
Credit: www.protoolreviews.com
Frequently Asked Questions
What Tools Are Needed To Install Drywall Anchors?
You need a drill, screwdriver, drywall anchors, and a pencil. A tape measure and level help ensure correct placement. These tools make installation precise and easy.
How Do You Choose The Right Drywall Anchor Size?
Select an anchor size based on the weight of the object. Heavier items need larger, stronger anchors. Check packaging for weight limits to ensure safety.
Can Drywall Anchors Hold Heavy Pictures Securely?
Yes, heavy-duty anchors support larger frames if installed correctly. Use toggle or molly anchors for maximum strength. Always follow weight guidelines for safe mounting.
How Deep Should You Drill For Drywall Anchors?
Drill a hole slightly smaller than the anchor diameter. This ensures a tight fit for maximum grip. Avoid drilling too deep to prevent wall damage.
Conclusion
Getting a drywall anchor into the wall is easier than it seems. Start with the right tools and take your time. Drill a proper hole, then gently insert the anchor. Make sure it fits snugly for strong support. This simple process helps hold items safely on your wall.
With practice, you will feel confident doing it yourself. Try it out, and see how your walls can hold more without damage. A little care goes a long way.