Have you ever tried hanging something on your wall, only to find the anchor won’t hold? Hollow wall anchors can be tricky.
When they fail, your picture frames, shelves, or mirrors might come crashing down. But don’t worry—you don’t have to call a professional or replace your entire wall. In this guide, you’ll learn simple, step-by-step ways to fix hollow wall anchors quickly and securely.
Keep reading to save your walls and hang your items with confidence every time.
Common Issues With Hollow Wall Anchors
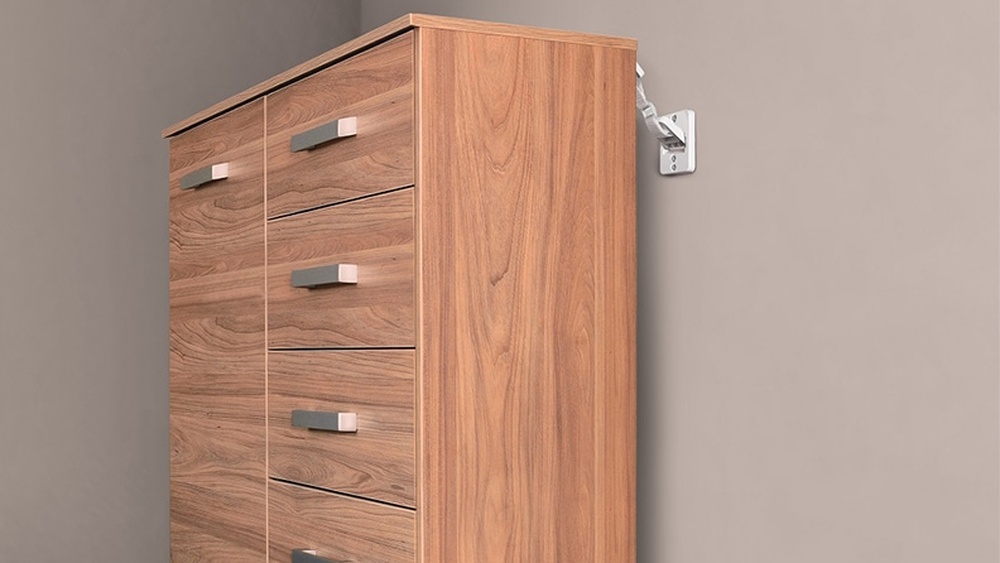
Hollow wall anchors are common tools for hanging items on drywall. They help hold objects in place without needing to find a wall stud. Despite their usefulness, hollow wall anchors can face issues. These problems can weaken the hold and cause damage.
Understanding common issues helps fix anchors quickly. It also prevents more damage to walls and objects.
Loose Anchors And Their Causes
Loose anchors occur when the anchor does not grip the wall tightly. This happens if the hole is too large or the anchor is the wrong size. Over-tightening the screw can also make the anchor loose. A loose anchor fails to hold weight properly.
Signs Of Anchor Failure
Signs include wobbly screws or objects that fall easily. The anchor might spin inside the wall. You may see cracks or gaps around the screw head. These signs show the anchor is losing its grip.
Damage To Drywall Around Anchors
Damage appears as cracks, holes, or crumbling drywall near the anchor. It often happens if the anchor is pulled out forcefully. Using the wrong type of anchor on thin drywall also causes damage. Damaged drywall weakens the wall and makes repairs harder.
Credit: www.gilgharda.com
Tools And Materials Needed
Fixing hollow wall anchors requires the right tools and materials. This helps ensure a strong, lasting repair. Gathering everything before starting saves time and reduces frustration. Below are the key items you need for this task.
Essential Repair Tools
A drill is necessary to remove old anchors or make new holes. Use a screwdriver to unscrew anchors or tighten new ones. Needle-nose pliers help pull out damaged anchors carefully. A utility knife can clean edges or cut away loose drywall. A hammer may be needed for light tapping during the repair.
Recommended Replacement Anchors
Plastic expansion anchors work well for light loads. Metal molly bolts provide stronger support for heavier items. Self-drilling drywall anchors are easy to install and hold tightly. Choose anchors that match the wall thickness and weight needs. Avoid using weak anchors to prevent future damage.
Additional Supplies For Reinforcement
Wall patch kits help repair damaged drywall around the anchor hole. Joint compound smooths the surface after patching. Sandpaper refines the area for painting or finishing. Painter’s tape protects surrounding wall areas during repair. Primer and paint restore the wall’s original look after fixing.
Removing Faulty Anchors
Removing faulty hollow wall anchors is the first step to fixing wall damage. Anchors that no longer hold or have become loose can cause problems. Taking them out carefully prevents further damage to the wall. This section explains safe ways to remove these anchors. It also covers solutions for stuck or broken anchors.
Safe Anchor Extraction Techniques
Start by loosening the anchor gently. Use pliers to grip the anchor’s head. Pull it straight out without twisting. Twisting can enlarge the hole or break the anchor. If the anchor spins, push it deeper and try again. Use a screwdriver to pry the anchor out if needed. Work slowly and with care. Protect the wall surface with a cloth or tape. This prevents scratches during extraction.
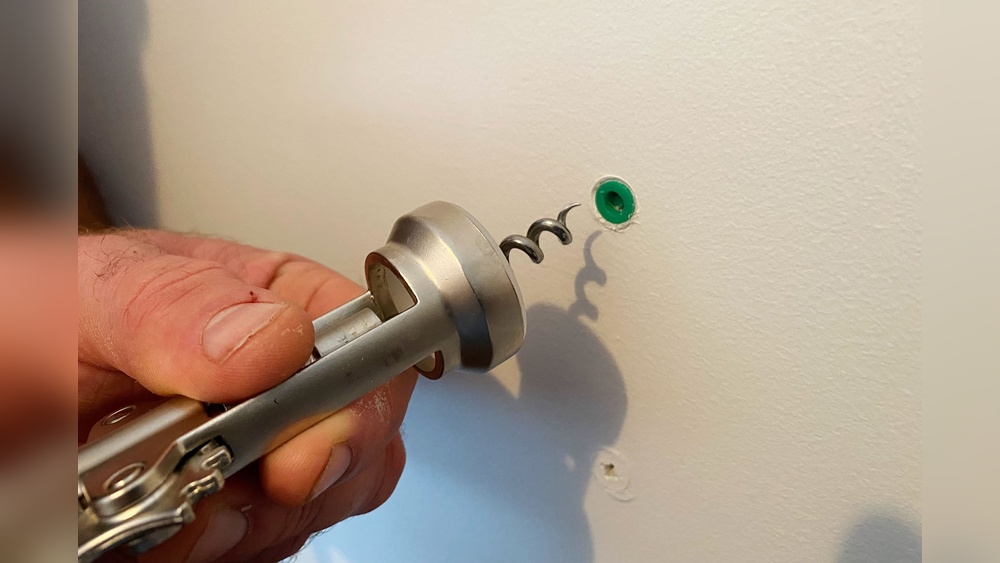
Dealing With Stuck Or Broken Anchors
Some anchors get stuck or break inside the wall. Use a drill bit slightly smaller than the anchor. Drill into the anchor to break it apart. Remove loose pieces carefully with pliers. For metal anchors, try pushing them through the wall cavity. Patch the hole after the anchor is removed. Use joint compound or wall filler to smooth the surface. Sand the area once dry before repainting or reanchoring.
Repairing The Damaged Wall
Repairing the damaged wall after removing hollow wall anchors is important. Small holes can be fixed quickly. Larger damage needs more care. Proper repair helps the wall look smooth and stay strong. Follow simple steps to restore your wall’s surface and strength.
Patching Small Holes
Clean the hole by removing loose debris. Use spackling paste or lightweight filler to fill the hole. Apply with a putty knife and smooth the surface. Let it dry completely. Sand gently until the surface is even. Paint to match the wall color. Small holes become almost invisible after repair.
Reinforcing Larger Wall Damage
Remove loose drywall around the damaged area. Cut a patch from a drywall piece matching the hole size. Secure the patch with drywall screws or adhesive. Cover seams with joint tape and apply joint compound. Apply multiple thin layers, letting each dry. Sand smooth between layers. Reinforced areas hold anchors better and prevent future damage.
Drywall Repair Tips For Durability
Use quality materials for long-lasting repairs. Avoid thick layers of compound; apply thin coats. Allow each layer to dry fully to prevent cracking. Sand with fine-grit paper for a smooth finish. Prime the repaired area before painting. Proper preparation ensures the repair blends well and lasts longer.
Installing New Hollow Wall Anchors
Installing new hollow wall anchors is a key step in securing objects to drywall or hollow walls. Choosing the right anchor and installing it correctly ensures strong support and prevents damage. This section guides you through selecting anchors, following proper steps, and avoiding common mistakes.
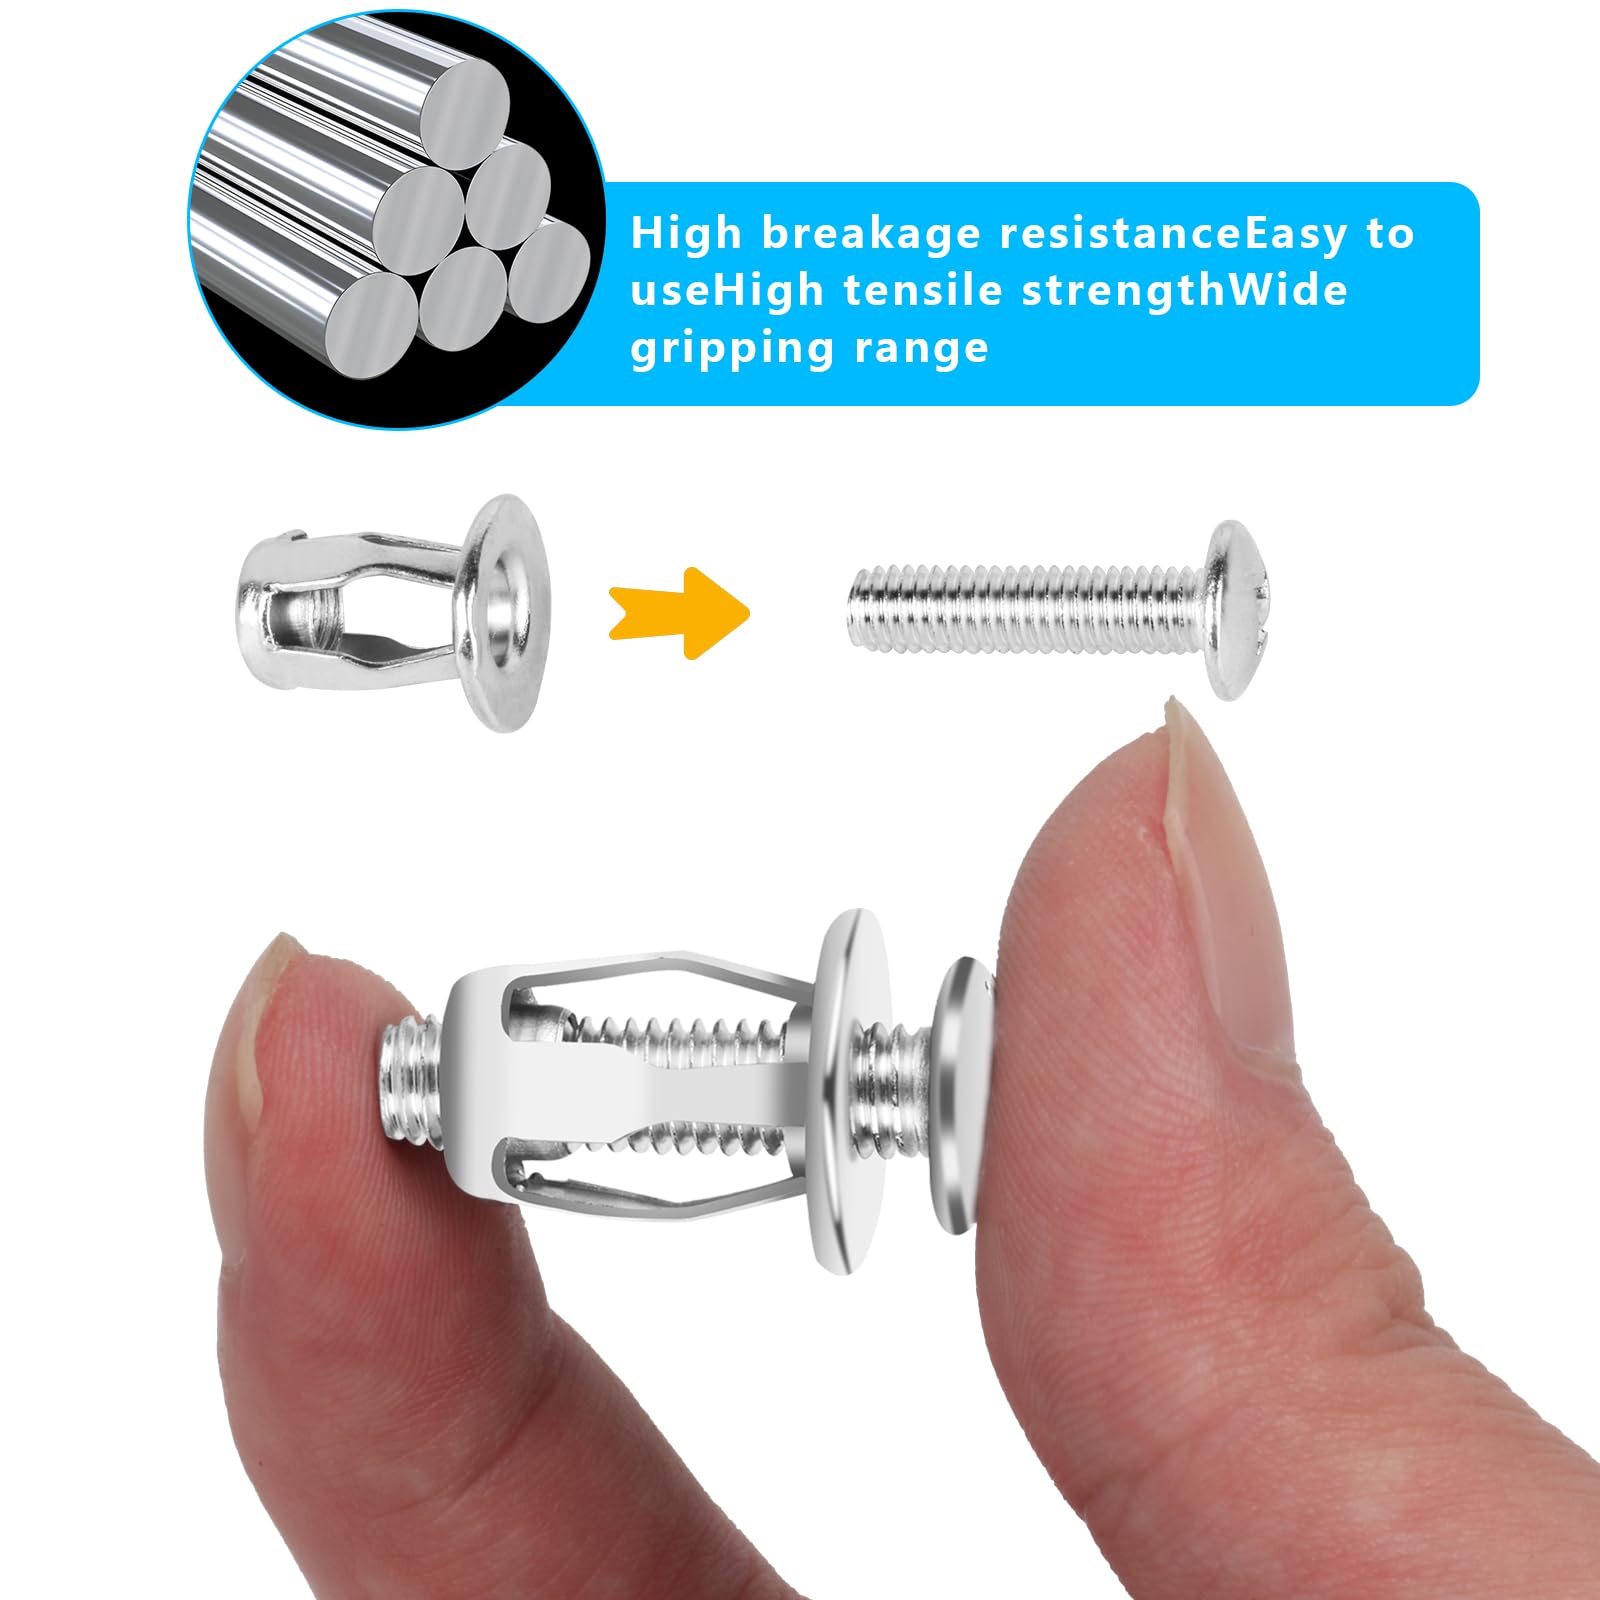
Choosing The Right Anchor Type
Pick anchors based on the wall material and the weight of the object. Plastic expansion anchors work for light loads on drywall. Metal hollow wall anchors hold heavier items. Toggle bolts offer strong support for very heavy objects. Match the anchor size to the screw and hole diameter. Using the right anchor keeps your installation safe and durable.
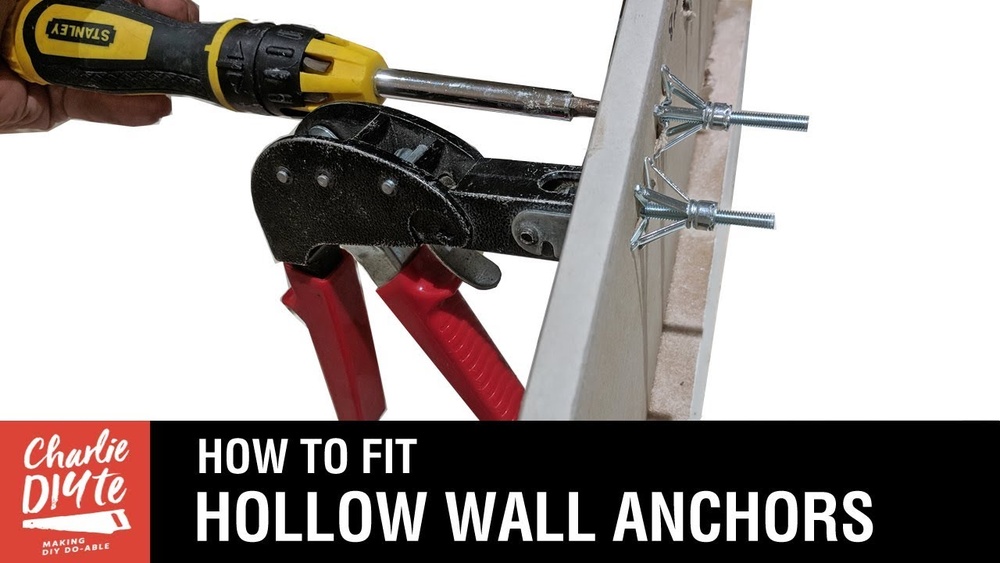
Proper Installation Steps
Start by drilling a hole that fits the anchor snugly. Insert the anchor into the hole until flush with the wall. Tighten the screw slowly to expand the anchor inside the wall cavity. Avoid over-tightening to prevent wall damage. Check the anchor’s grip by gently pulling on it. A secure anchor holds firm without wobbling or slipping.
Avoiding Common Installation Mistakes
Do not use too large or too small anchors for the hole. Avoid drilling holes wider than the anchor size. Never force the anchor if it won’t fit easily. Tightening screws too much may crack the wall or damage the anchor. Skipping proper hole size can cause weak support. Follow instructions carefully for a strong, reliable hold.

Credit: www.youtube.com
Testing Anchor Strength
Testing the strength of hollow wall anchors is key to safe wall mounting. It helps confirm the anchor holds the weight and stays secure over time. Without proper testing, anchors might fail, causing damage or injury.
Careful checks allow you to fix issues early. This section explains how to test anchor strength effectively. Simple steps ensure your anchors support the load and remain stable.
Assessing Load Capacity
Start by checking the anchor’s load capacity. Use a scale or weight to apply force slowly. Notice any movement or loosening in the anchor.
Compare the applied weight to the anchor’s rated limit. If the anchor shifts or pulls out, it cannot hold the load. Replace or upgrade weak anchors to prevent failure.
Ensuring Long-term Stability
Test the anchor’s stability over time. Gently wiggle the mounted object to check for looseness. A solid anchor will stay firm without any play.
Regularly inspect anchors in heavy-use areas. Tighten or reinforce any that show signs of wear. Stable anchors keep your walls safe and objects secure.
Preventive Measures For Future Repairs
Preventing future problems with hollow wall anchors saves time and effort. Taking simple steps can keep your walls strong and anchors secure. Careful choices and regular checks help avoid damage and repairs.
Selecting Quality Anchors
Choose anchors made from sturdy materials. Look for those designed for your wall type. Avoid cheap anchors that break easily. Good anchors hold weight better and last longer. Check the packaging for weight limits and instructions.
Tips For Even Weight Distribution
Spread the weight across several anchors. Use multiple anchors for heavy items. This reduces pressure on any one spot. Place anchors evenly to balance the load. Uneven weight causes anchors to pull out or damage the wall.
Regular Maintenance Checks
Inspect anchors regularly for signs of wear. Tighten any loose screws or bolts. Replace anchors if they feel weak or loose. Keep an eye out for cracks or holes near anchors. Early fixes prevent bigger problems later.

Credit: diy.stackexchange.com
Frequently Asked Questions
What Causes Hollow Wall Anchors To Fail?
Hollow wall anchors often fail due to improper installation or excessive weight. Using the wrong anchor size or type can also cause failure. Moisture and wall material quality impact their grip strength and stability.
How Do I Remove A Stuck Hollow Wall Anchor?
To remove a stuck hollow wall anchor, use pliers to grip the anchor’s rim. Gently pull it out while twisting slightly. If it breaks, push it through the wall and patch the hole afterward.
Can I Reuse Hollow Wall Anchors After Removal?
Reusing hollow wall anchors is not recommended. They lose their grip and structural integrity once removed. Always use new anchors for secure and safe installation.
How To Repair A Wall After Removing Hollow Anchors?
Fill the hole with spackle or joint compound using a putty knife. Let it dry, sand smooth, and repaint. For larger holes, use a patch before applying compound.
Conclusion
Fixing hollow wall anchors does not have to be hard. Use the right tools and follow clear steps. Check the wall for damage before starting. Choose anchors that fit your wall type and weight needs. Take your time and work carefully.
Doing this will make your anchors strong and safe. Now, you can hang shelves, pictures, or mirrors with confidence. Small repairs can save big costs later. Stay patient and enjoy a sturdy wall every time.