Is your wood floor sagging or uneven? You might think it’s a big problem, but fixing it could be simpler than you expect.
Knowing how to jack up a wood floor can save you money and prevent further damage to your home. In this guide, you’ll learn step-by-step how to safely lift and level your floor, even if you have little experience. Stick with me, and by the end, you’ll feel confident tackling this project yourself—no need to wait for costly repairs.
Ready to bring your floor back to life? Let’s get started.
Credit: www.reddit.com
Tools And Materials Needed
Jacking up a wood floor requires the right tools and materials. Using proper equipment makes the job safer and easier. Prepare everything before starting. This helps avoid delays and mistakes. Below is a list of what you need.
Essential Tools
- Floor jack or hydraulic jack for lifting the floor
- Carpenter’s level to check the floor’s evenness
- Socket wrench or adjustable wrench for tightening bolts
- Measuring tape to measure gaps and height
- Hammer for minor adjustments
- Wood shims to fill small gaps under joists
- Crowbar or pry bar to lift floorboards gently
Safety Gear
- Safety glasses to protect your eyes from debris
- Work gloves for hand protection
- Dust mask if the area is dusty
- Steel-toed boots to protect feet
- Hearing protection if using loud tools
Materials Checklist
- Wooden blocks to support the floor during lifting
- Replacement floor joists or beams if damaged
- Wood glue for securing loose boards
- Construction adhesive for extra bonding
- Screws and nails suitable for wood flooring
- Plastic sheeting to cover and protect the work area
Assessing The Floor Condition
Before jacking up a wood floor, assess its condition carefully. This step ensures safety and helps plan the repair. Check the floor for any weaknesses or damage. Understanding the floor’s structure makes the jacking process smoother and more effective.
Identifying Sagging Areas
Walk across the floor slowly. Notice any spots that feel soft or uneven. Sagging areas often appear as dips or low spots. Use a straight board or level to spot dips. Mark these areas clearly for repair.
Locating Joists
Find the floor joists under the wood floor. Joists are the main support beams. Use a stud finder or tap the floor to hear solid sounds. Joists run parallel and are usually spaced 16 or 24 inches apart. Mark their location to place jacks correctly.
Checking For Structural Damage
Look for cracks, splits, or rot in the wood. Check both the floorboards and joists. Damage weakens the floor’s support. Also, inspect for signs of water damage or pests. Repair or replace damaged parts before jacking up the floor.
Preparing The Work Area
Preparing the work area is the first step to safely jack up a wood floor. This stage helps create a safe, clear space to work. It also protects your home’s structure and guides you on where to lift the floor. Taking time now saves trouble later.
Clearing The Space
Remove all furniture and items from the room. Clear the floor completely for easy movement. Sweep the area to remove dust and debris. A clean space prevents accidents and damage to belongings. It also gives you room to place tools and jacks.
Supporting Adjacent Structures
Check walls and nearby supports before lifting the floor. Place temporary braces or supports if needed. This prevents shifting or damage during the lifting process. Use strong wood beams or metal braces. Secure them tightly to hold weight safely.
Marking Lift Points
Identify spots under the floor that need lifting. Mark these points clearly with chalk or tape. Focus on areas with visible sagging or damage. Correct marks guide where to place jacks. Precise lifting avoids uneven pressure and further harm.
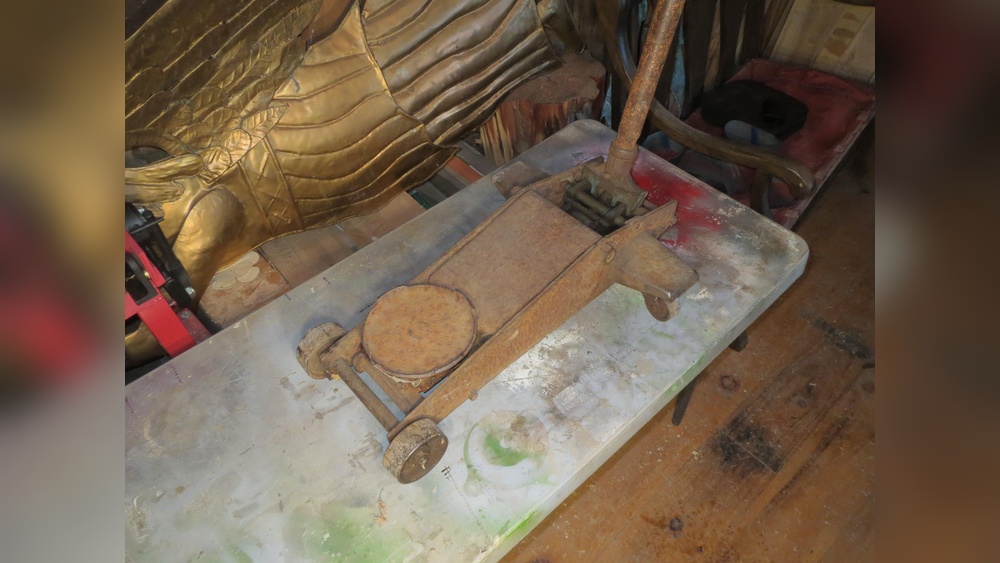
Setting Up The Floor Jack
Setting up the floor jack is a key step before lifting a wood floor. Proper setup helps avoid damage and ensures safety. Take your time to prepare the jack carefully. This will make the jacking process smoother and more efficient.
Choosing The Right Jack
Select a jack made for wood floors or home use. A hydraulic jack or a screw jack works well. Avoid jacks that are too small or weak. The jack should support the weight of the floor and any load above it. Check the jack’s capacity before starting the job.
Positioning The Jack
Place the jack under a strong support beam or joist. The jack must sit on a solid, level surface. Avoid soft or uneven spots that may shift. Center the jack carefully to balance the load. Position it close to the area needing lift.
Protecting The Floor Surface
Put a piece of wood or thick board between the jack and floor. This protects the wood from dents or scratches. Use a wide board to spread the pressure evenly. Never place the jack directly on the floor surface. This step prevents costly damage during lifting.
Jacking Up The Floor
Jacking up a wood floor requires care and patience. The process helps fix uneven floors or sagging areas. It also prevents further damage to your home structure. Safety is very important during this task. Use proper tools and follow each step slowly.
Here are key steps to jack up the floor safely and correctly.
Lifting Slowly And Evenly
Start lifting the floor gently. Use a floor jack placed under a strong beam or joist. Raise the jack just a little at a time. Avoid quick or sudden moves. Lift slowly to avoid cracks or damage in the wood. Check that the floor rises evenly across the area. Uneven lifting can cause more problems.
Monitoring Floor Movement
Watch the floor closely as you lift. Look for any new cracks or shifts in the wood. Use a level tool to check the floor’s flatness. Stop and adjust if the floor moves too much in one spot. Keep an eye on joists and beams for stress signs. Monitoring helps catch issues early and keeps the floor safe.
Stopping At The Desired Height
Decide the height you need before you start. Stop lifting when the floor is level or back to its original position. Don’t raise the floor too high. Over-lifting can strain the structure. Secure the floor in place with shims or blocks once the height is right. This holds the floor steady and prevents it from dropping back down.
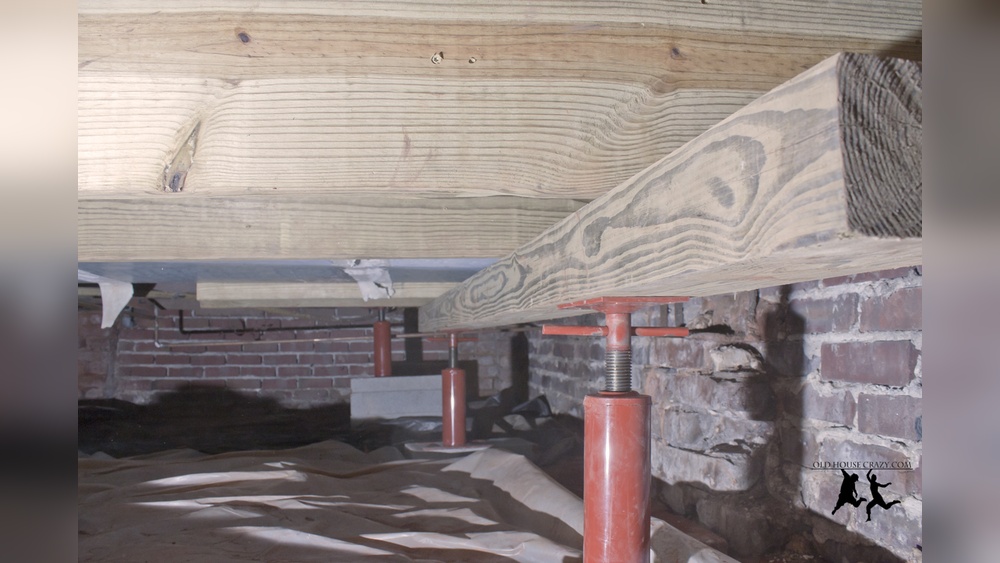
Securing The Floor
Securing the floor is an important step in jacking up a wood floor. It keeps the floor steady and safe during the repair. Without proper support, the floor can shift or fall, causing damage or injury. Follow these steps to secure the floor correctly and avoid problems.
Installing Temporary Supports
Place strong wooden beams or metal posts under the floor joists. These supports hold the floor in place while you work. Make sure they fit tightly and stand firm on a solid base. Adjust them carefully to avoid slipping or tilting. Temporary supports keep the floor stable during the lifting process.
Adding Permanent Reinforcements
After jacking, add strong braces or sister joists to strengthen the floor. Attach these reinforcements to the existing structure using screws or nails. This step prevents future sagging and keeps the floor level. Use quality wood or metal to ensure long-lasting support. Reinforcements improve the floor’s durability and safety.
Checking Stability
Test the floor by gently pushing or walking on it. Look for any movement or creaking sounds. If the floor shifts, add more support or tighten existing braces. Double-check all supports to confirm they hold the floor firmly. Stability is key to a safe and lasting wood floor repair.
Finishing Touches
After jacking up a wood floor, the final steps are important. These finishing touches make the floor look good and last longer. Taking time to repair, clean, and inspect ensures a strong, safe floor. Let’s cover these key tasks.
Repairing Surface Damage
Check the floor for scratches, dents, or cracks. Use wood filler to fix small holes or gaps. Sand the filled areas smooth once dry. For deep scratches, lightly sand the whole floor section. This helps the surface look even and fresh.
Cleaning The Area
Remove all dust and debris from the floor and surrounding space. Sweep or vacuum carefully to avoid leaving particles behind. Wipe the floor with a damp cloth to catch fine dust. Clean floors help new finishes stick better and prevent dirt buildup.
Final Inspection
Look over the floor for any missed spots or problems. Check that the floor is level and stable. Test by walking gently on the raised area to confirm firmness. Fix any issues found before finishing the job. A good final check keeps the floor safe and sound.
Credit: www.reddit.com
Common Mistakes To Avoid
Jacking up a wood floor can fix uneven spots and improve its look. Many people try this job themselves but make common mistakes. These mistakes can cause damage or make the job harder. Avoiding them saves time, effort, and money.
Overlifting The Floor
Raising the floor too much can cause cracks in wood or walls. It can also break nails and joints. Lift the floor slowly and only as high as needed. Stop as soon as the floor feels even and stable.
Ignoring Safety Precautions
Safety matters a lot in this task. Not wearing gloves or goggles can cause injuries. Not supporting the floor properly can lead to sudden drops. Always wear safety gear and use strong supports before jacking up.
Using Incorrect Tools
Wrong tools can damage the floor or make the work unsafe. Avoid using household items like hammers or makeshift jacks. Use a proper floor jack and wood shims designed for this job. These tools give better control and prevent accidents.

Credit: oldhousecrazy.com
Frequently Asked Questions
How Do You Safely Jack Up A Wood Floor?
To safely jack up a wood floor, use a floor jack and sturdy support beams. Place the jack under a strong joist, lift slowly, and secure with temporary supports. Avoid sudden movements to prevent damage or injury.
What Tools Are Needed To Jack Up A Wood Floor?
Essential tools include a floor jack, wooden shims, support beams, a pry bar, and a level. These help lift, stabilize, and align the floor properly during the jacking process.
When Should You Jack Up A Wood Floor?
Jack up a wood floor if it sags, dips, or shows signs of structural damage. Early intervention prevents further damage and maintains floor stability and safety.
Can Jacking Up A Wood Floor Fix Sagging Permanently?
Jacking can temporarily raise a sagging floor, but permanent repair may need joist reinforcement or replacement. Regular inspections help ensure long-term stability.
Conclusion
Raising a wood floor can fix many common problems. Follow the steps carefully for a safe lift. Use the right tools and check your work often. Small lifts can prevent bigger damage later. Take your time to avoid mistakes. This guide helps you keep floors level and strong.
A steady floor makes your home feel better. Try these tips and see the difference yourself.