Are you tired of nails that won’t hold or screws that just spin in your walls? Using wall screw anchors can be the simple solution you need to hang shelves, pictures, or heavy items securely.
But if you’ve never used them before, the process might seem confusing. Don’t worry—you’re about to learn exactly how to use wall screw anchors step-by-step, so your walls stay strong and your items stay put. Keep reading, and you’ll gain the confidence to tackle any hanging project with ease.

Credit: www.picturehangsolutions.com
Types Of Wall Screw Anchors
Wall screw anchors come in different types. Each type works best for certain walls and weights. Choosing the right anchor helps hold your items securely. Understanding these types makes your project easier.
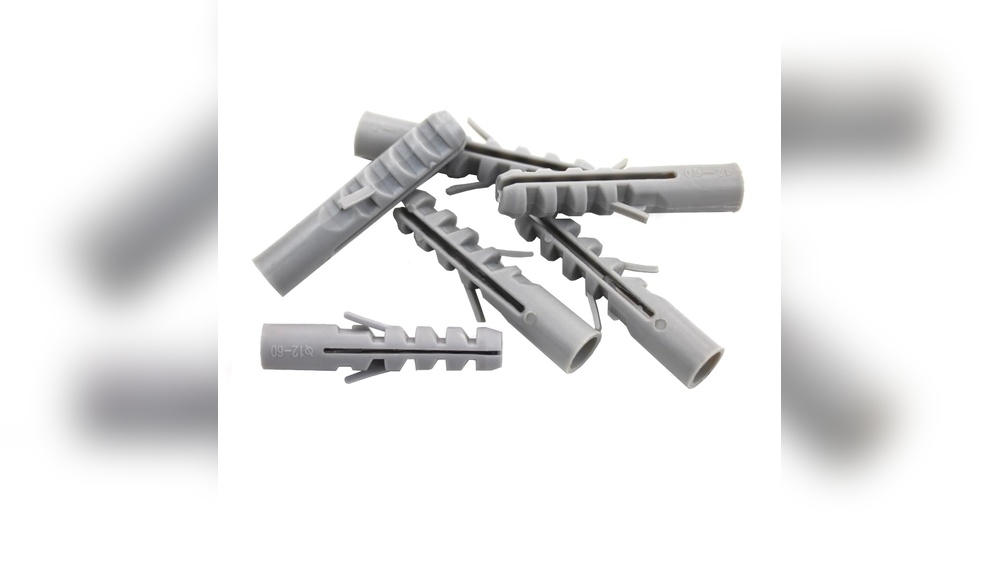
Plastic Expansion Anchors
Plastic expansion anchors are common and easy to use. They work well in drywall and light materials. Insert the anchor into a drilled hole. Screw the screw in to expand the anchor. The anchor grips the wall tightly.
Metal Anchors
Metal anchors offer stronger support than plastic ones. They are good for medium-weight objects. Made of steel or zinc, they resist bending. Insert the metal anchor in the hole. Tighten the screw to secure it firmly.
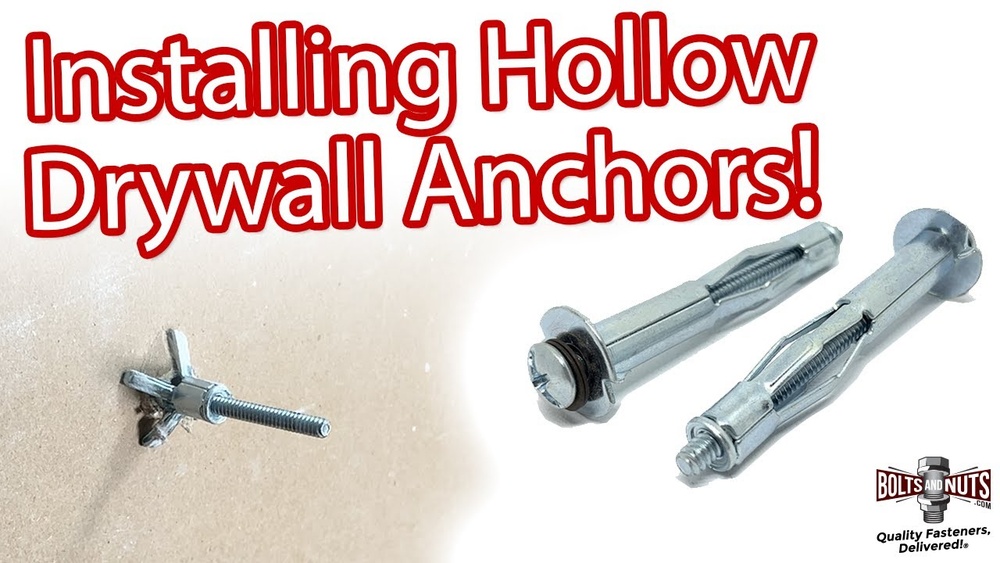
Toggle Bolts
Toggle bolts are best for heavy loads on hollow walls. They have spring-loaded wings that open inside the wall. Push the folded wings through the hole. When open, they spread weight over a larger area. Tighten the screw to lock the bolt in place.
Molly Bolts
Molly bolts are metal anchors with expandable sleeves. Insert the bolt into a drilled hole. Tighten the screw to expand the sleeve behind the wall. This creates a strong hold in drywall or plaster. They support medium to heavy objects well.
Choosing The Right Anchor
Choosing the right wall screw anchor is important for a secure hold. Different walls need different anchors. The wrong anchor can cause damage or fail to hold the weight. This guide helps you pick the best anchor for your project.
Matching Anchor To Wall Material
Walls can be made of drywall, brick, concrete, or plaster. Each material needs a specific anchor type. Use plastic anchors for drywall. Metal anchors work well for brick and concrete. Check the wall surface before buying anchors.
Considering Load Requirements
Think about the weight your anchor must support. Light items like pictures need small anchors. Heavy items like shelves require strong anchors. Always choose anchors that can hold more than the item’s weight.
Anchor Size And Length
Anchor size depends on the screw size and wall thickness. Longer anchors provide more grip in thick walls. Short anchors fit thin walls or hollow spaces. Match the anchor size with the screw for a tight fit.
Tools And Materials Needed
Using wall screw anchors is easier with the right tools and materials. Having these items ready helps you work safely and finish the job quickly. Each tool plays a key role in making sure the anchor holds strong.
Drill And Drill Bits
A drill is needed to make holes in the wall for the anchors. Use drill bits that match the size of the anchor. This ensures a tight fit and strong hold. A cordless drill works well for most jobs.
Screwdriver And Screws
A screwdriver helps to drive screws into the anchors. Choose screws that fit the anchor size and the item you want to hang. Both manual and electric screwdrivers work, but electric ones save time and effort.
Measuring Tape And Pencil
Measure the exact spot where you want to place the anchor. Mark the spot with a pencil. This step prevents mistakes and keeps your work neat. Accurate measurements lead to better results.
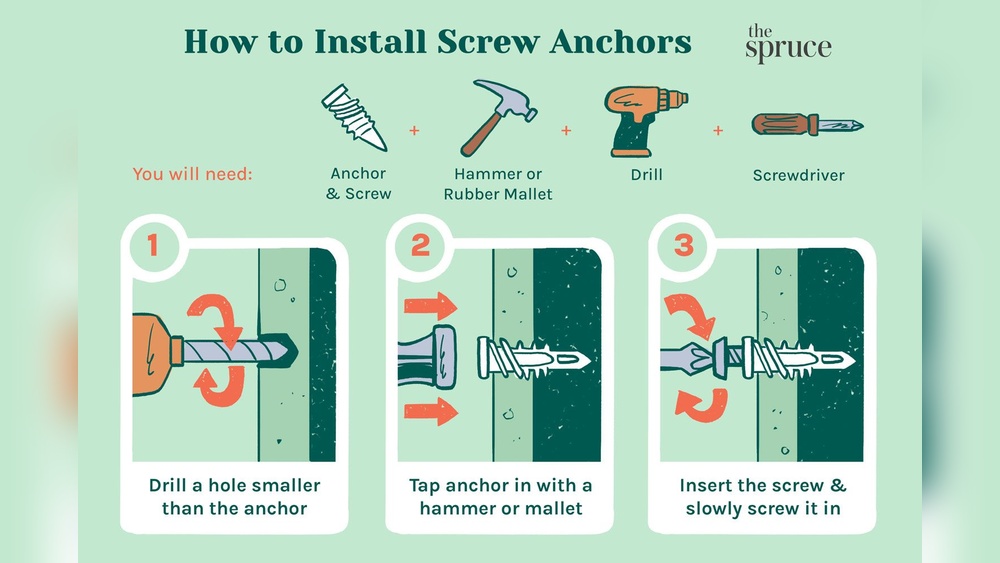
Step-by-step Installation
Installing wall screw anchors is simple with the right steps. Follow each step carefully for a secure hold. This guide breaks down the process into easy parts.
Marking The Spot
Start by deciding where to place the anchor. Use a pencil to mark the exact spot on the wall. Make sure the mark is level and in the right position.
Drilling The Hole
Select a drill bit that fits the anchor size. Drill straight into the marked spot. Drill just deep enough for the anchor to fit fully inside.
Inserting The Anchor
Push the anchor into the hole. Tap gently with a hammer if needed. The anchor should sit flush with the wall surface.
Securing The Screw
Place the screw into the anchor. Turn the screw slowly using a screwdriver. Tighten until the screw is firm and holds the object securely.
Common Installation Mistakes
Installing wall screw anchors might seem simple, but common mistakes can cause problems. These errors reduce the anchor’s hold and can damage your wall. Avoiding these mistakes ensures your anchor works well and keeps items secure.
Using The Wrong Anchor
Choosing the wrong anchor weakens your hold. Different walls need different anchors. Drywall, concrete, and brick each require specific types. Using the wrong kind can cause the anchor to slip or break. Always match the anchor to your wall material for best results.
Overdrilling Or Underdrilling
Drilling the hole too large or too small is a frequent error. An oversized hole means the anchor won’t fit tightly. A hole that is too small can crack the wall or prevent the anchor from inserting. Measure the drill bit size carefully and drill straight to avoid this mistake.
Loose Or Overtightened Screws
Screws that are too loose don’t hold the anchor firmly. This makes the anchor unstable and unsafe. Screws tightened too much can strip the anchor or damage the wall. Tighten screws just until snug. This keeps the anchor secure without causing damage.
Testing Anchor Strength
Testing the strength of wall screw anchors is important for safety. It helps make sure the anchor holds well before adding heavy items. This process avoids accidents and damage to your walls.
Applying Gradual Load
Start by adding a small weight to the anchor. Slowly increase the weight in steps. Watch how the anchor holds the load each time. This method shows the real strength of the anchor.
Checking For Movement
Look closely at the anchor and wall area. See if there is any wiggle or shift. Even small movements can mean weak support. Stop adding weight if you notice any movement.
Reinforcing If Needed
If the anchor moves or feels loose, add extra support. Use a bigger anchor or more anchors nearby. Reinforce the wall area around the anchor. This improves hold and safety for your items.
Removing Wall Anchors
Removing wall anchors can be tricky but is often necessary. Whether you want to repaint or change wall decor, anchors may need to come out. Doing this carefully prevents damage to the wall. Different anchors require different removal methods. Knowing how to handle each type helps keep your walls smooth and clean.
Methods For Different Anchor Types
Plastic expansion anchors often pull out with pliers. Grip the anchor firmly and pull straight out. If it resists, try twisting gently before pulling.
Threaded anchors need a screwdriver. Turn them counterclockwise to unscrew. This method avoids pulling the anchor apart inside the wall.
Toggle bolts are more complex. Open the toggle inside the wall by pulling the bolt out. Then push the toggle through the hole carefully.
Self-drilling anchors can sometimes be unscrewed like screws. Use a screwdriver to back them out slowly.
Repairing The Wall After Removal
Once anchors are out, holes remain. Fill holes with spackle or wall filler. Use a putty knife to smooth the surface.
Let the filler dry completely. Sand lightly to make the surface even.
Prime and paint over the repaired spot. This restores the wall’s original look.
Repairing holes quickly prevents future damage. It keeps walls clean and ready for new anchors or decorations.

Credit: www.youtube.com
Safety Tips For Secure Fixing
Using wall screw anchors can make your home projects easier and stronger. Safety must be a priority during installation. Following simple safety tips helps avoid accidents and ensures a secure fixing.
Wearing Protective Gear
Always wear safety glasses to protect your eyes from dust and debris. Gloves help shield your hands from sharp edges and rough surfaces. Use a dust mask if drilling creates a lot of dust. These simple tools keep you safe throughout the job.
Avoiding Electrical Wires And Pipes
Check for wires and pipes hidden behind walls before drilling. Use a stud finder with wire detection or a special wire detector. Avoid drilling near electrical wires to prevent shocks or damage. Mark safe spots clearly to stay clear of plumbing and wiring.
Working With Proper Lighting
Good lighting lets you see clearly and work precisely. Use a bright lamp or work in daylight to avoid mistakes. Shadows can hide hazards or cause wrong drilling spots. Proper lighting reduces accidents and improves the quality of your work.
:max_bytes(150000):strip_icc()/how-to-use-and-discard-anchor-screws-1822671-002-04-4963da18c2674e6bbf07e5fc07d5b4f0.jpg)
Credit: www.thespruce.com
Frequently Asked Questions
What Are Wall Screw Anchors Used For?
Wall screw anchors provide strong support for screws in drywall or masonry. They prevent screws from pulling out, ensuring secure mounting of shelves, hooks, or fixtures.
How Do I Choose The Right Wall Anchor Size?
Select anchors based on screw size and wall thickness. Use heavier anchors for heavier loads. Always check the manufacturer’s weight rating for safety.
Can I Reuse Wall Screw Anchors?
Most wall anchors are designed for one-time use. Reusing them may reduce holding strength and cause instability. It’s best to replace anchors when removing screws.
How Do I Install A Wall Screw Anchor Correctly?
Drill a hole matching the anchor size. Insert the anchor flush with the wall surface. Then, screw in the screw slowly for a secure fit.
Conclusion
Wall screw anchors make hanging items easier and safer. Choose the right anchor for your wall type. Drill a hole, insert the anchor, then screw in your item. This method holds weight firmly and prevents damage. Using anchors saves time and effort on repairs.
Practice a few times to gain confidence. Soon, hanging shelves or pictures will feel simple. Try these steps for a strong, secure hold every time.