Have you ever tried to remove a screw anchor from your wall, only to end up frustrated and unsure what to do next? You’re not alone.
Removing screw anchors can be tricky, especially if you want to avoid damaging your wall. But don’t worry—this guide will show you simple, effective steps to get those anchors out cleanly and safely. Keep reading, and you’ll learn how to tackle this common home repair challenge like a pro.
Your walls will thank you!

Credit: www.tjlituo.com
Tools Needed
Removing screw anchors from a wall requires specific tools. Having the right tools makes the job easier and safer. This section covers the essential tools needed for removing screw anchors efficiently.
Common Tools For Removal
A screwdriver is the primary tool for this task. Choose a flathead or Phillips, depending on the screw type. Pliers help to grip and pull out stubborn anchors. A drill with a bit can remove anchors embedded deeply. Sometimes, a utility knife is useful to cut around the anchor. A putty knife can help pry loose anchors carefully without damaging the wall.
Safety Gear To Use
Wear safety goggles to protect your eyes from dust and debris. Gloves protect your hands from sharp edges and rough surfaces. A dust mask prevents inhaling particles during removal. Long sleeves shield your arms from scratches. Keep a first aid kit nearby for any minor injuries.

Credit: www.hgtv.com
Types Of Screw Anchors
Screw anchors come in different types. Each type works best for certain walls and weights. Knowing the types helps you remove them without damage.
Some anchors are easy to pull out. Others need tools or special steps. Understanding these types makes the job simpler and safer.
Plastic Expansion Anchors
Plastic expansion anchors are common in drywall. They expand when you insert a screw. This holds them tight in the wall. To remove, unscrew first. Then, gently pull the anchor out. If it won’t come out, push it inside the wall carefully.
Molly Bolts
Molly bolts are metal anchors that expand behind the wall. They hold heavy items well. To remove, unscrew the bolt. The anchor may stay inside the wall. Tap it gently to push it into the wall cavity. Sometimes, cutting the bolt flush with the wall works best.
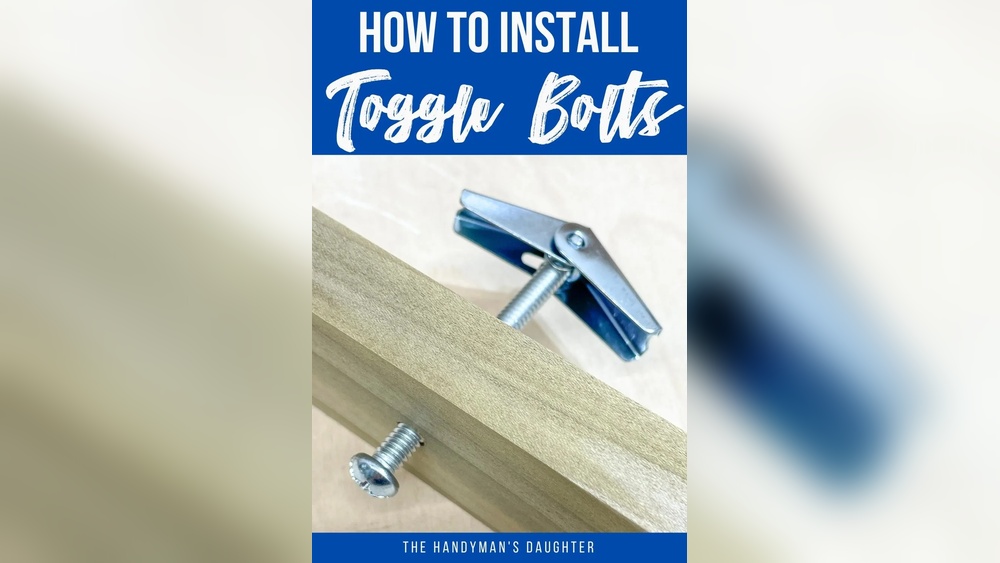
Toggle Bolts
Toggle bolts have wings that open behind the wall. They support very heavy loads. Removing them means unscrewing the bolt. The wings drop inside the wall cavity. You cannot pull the wings back out. Push the bolt and wings into the wall or fill the hole afterward.
Preparation Steps
Before removing screw anchors from a wall, proper preparation is key. This step helps protect your space and makes the task easier. Taking time to prepare saves effort and prevents damage.
Clearing The Area
Clear the area around the wall. Move furniture and objects away from the working space. This creates room to work safely. It also stops any items from getting damaged. A clean space helps you focus on the task.
Protecting The Wall Surface
Cover the wall surface near the anchor. Use painter’s tape or a thin cloth to shield the paint. This prevents scratches and dents during removal. Protecting the wall keeps it ready for new holes or repairs. Handle tools carefully to avoid extra marks.

Credit: diy.stackexchange.com
Removing Plastic Expansion Anchors
Plastic expansion anchors hold screws tightly in drywall or masonry. Removing them carefully avoids wall damage. The process varies by the anchor’s condition and size. Choose the right method to pull out plastic anchors smoothly. Below are two common ways to remove plastic expansion anchors from walls.
Pulling Out With Pliers
Use needle-nose or regular pliers to grip the anchor firmly. Pull the anchor straight out, steady and slow. Wiggle it gently if it feels stuck. Avoid twisting hard to prevent wall damage. This method works best for anchors that stick out slightly from the wall.
Pushing Or Prying Method
Push the anchor deeper into the wall cavity using a screwdriver or similar tool. This hides the anchor inside the wall. Another option is to pry the anchor out carefully with a flathead screwdriver. Place a small piece of wood under the screwdriver for leverage. Work slowly to avoid cracking the wall surface.
Taking Out Molly Bolts
Taking out molly bolts from a wall can be tricky. These anchors expand behind the wall to hold tightly. Removing them needs care to avoid damage. The process involves two main steps. First, unscrew the bolt. Next, collapse the anchor inside the wall. Follow the steps below for easy removal.
Unscrewing The Bolt
Start by turning the screw counterclockwise. Use a screwdriver that fits well. Keep turning until the bolt comes out completely. Sometimes the bolt may be stuck. Apply steady pressure without forcing it. Removing the bolt frees the anchor to move.
Collapsing The Anchor
After the bolt is out, push the anchor inside the wall. Use a flat tool or screwdriver. Press firmly to collapse the metal wings. This allows the anchor to fall into the cavity. Avoid pulling hard to prevent wall damage. The hole can later be filled and painted.
Extracting Toggle Bolts
Extracting toggle bolts can be tricky but not impossible. Toggle bolts hold heavy items securely inside walls. They have two parts: a bolt and a spring-loaded toggle. The toggle opens inside the wall to hold the bolt tight. Removing these requires care to avoid wall damage. Follow steps to remove toggle bolts smoothly and safely.
Unscrewing The Bolt First
Start by turning the bolt counterclockwise. Use a screwdriver that fits the bolt head well. Keep turning until the bolt loosens completely. Sometimes, the bolt may spin without coming out. This happens if the toggle stays inside the wall. In such cases, try to pull the bolt gently while unscrewing.
Dealing With The Toggle
The toggle part stays inside the wall after the bolt is removed. It is spring-loaded and usually too wide to pass back through the hole. Push the toggle into the wall cavity if you want to hide it. Use a thin tool or wire to push it inward. If you want to remove it, widen the hole carefully. Use a drill or a small saw to enlarge the opening. Then, pull the toggle out with pliers.
Fixing Wall Damage
Removing screw anchors can leave holes and marks on your wall. Fixing this damage helps your wall look smooth and clean again. It also prepares the wall for new paint or decorations. Follow simple steps to restore your wall’s surface.
Filling Holes
Start by cleaning the holes from dust and loose bits. Use a putty knife to apply wall filler or spackle. Press the filler firmly into the holes for a tight seal. Let the filler dry according to the instructions on the package. Avoid adding too much filler at once to prevent cracking.
Sanding And Painting
After the filler dries, sand the area with fine-grit sandpaper. Smooth the surface until it feels even with the wall. Wipe away dust with a dry cloth before painting. Choose paint that matches your wall color for the best look. Apply paint with a brush or roller in thin layers. Allow each layer to dry before adding another coat.
Tips For Easier Removal
Removing screw anchors from a wall can be tricky. Sometimes, they get stuck or hard to pull out. Using the right tricks makes the job easier. These tips help you remove anchors without damaging the wall.
Using Lubricants
Lubricants reduce friction between the anchor and wall. Apply a small amount of oil or WD-40 around the anchor. Let it sit for a few minutes. The lubricant helps the anchor slide out smoothly. Avoid using too much to prevent wall stains.
Applying Gentle Force
Pull the anchor slowly with steady pressure. Use pliers or a screwdriver to grip it firmly. Avoid sudden yanks that can damage the wall. Wiggle the anchor gently to loosen it first. This softens the hold and makes removal easier.
Frequently Asked Questions
How Do You Safely Remove Screw Anchors From Drywall?
To remove screw anchors safely, first unscrew the screw. Then, grip the anchor with pliers and gently pull it out. If it resists, push it inward to fall behind the wall. Patch the hole with spackle for a smooth finish.
What Tools Are Needed To Remove Wall Anchors?
You need a screwdriver, pliers, and possibly a utility knife. A hammer might help for stubborn anchors. These tools ensure safe removal without damaging the wall surface. Having spackle and sandpaper is helpful for post-removal repair.
Can Wall Anchors Be Reused After Removal?
Most wall anchors cannot be reused once removed. Removal often damages their gripping mechanism. It’s best to use new anchors for a secure hold. Reusing old anchors may weaken the fixture’s stability and cause damage.
Why Do Some Anchors Get Stuck In The Wall?
Anchors get stuck due to expansion inside the wall cavity. Some types grip tightly to drywall or masonry. Improper removal can cause anchor remnants to remain. Using the right technique reduces damage and makes removal easier.
Conclusion
Removing screw anchors from a wall is easier than it seems. With the right tools and steps, you can do it safely. Take your time and avoid damaging the wall. Small holes can be fixed with simple patching. This keeps your walls looking neat and clean.
Now you can hang new items or repaint without worry. Practice makes the process smoother next time. Keep these tips in mind for any wall project.