Are you struggling to hang heavy items on your walls without worrying about them falling down? Installing wall anchors with wings might be the simple solution you need.
These anchors provide extra support and grip, making your walls stronger and more reliable. In this guide, you’ll learn exactly how to install wall anchors with wings step-by-step, so you can secure your shelves, mirrors, or decorations with confidence. Keep reading to discover the easy tricks that will save you time and prevent damage to your walls.
Your next DIY project just got a lot easier!
Choosing The Right Wall Anchors
Choosing the right wall anchors with wings is important for a strong hold. The right anchor keeps your items safe and secure on the wall. Different anchors work best for different walls and weights. Picking the correct type helps avoid damage to walls and falling objects.
Types Of Winged Anchors
Winged wall anchors come in several types. Some have metal wings that open behind the wall. Others have plastic wings that expand inside the wall. Toggle bolts are common metal winged anchors. They hold heavy items well on drywall or hollow walls. Plastic winged anchors work for light to medium loads. Each type fits different wall materials and weights.
Materials And Weight Considerations
Wall anchors are made from metal or plastic. Metal anchors are stronger and support heavier loads. Plastic anchors suit light items like picture frames or small shelves. Consider the weight of the object before choosing. Heavy items need sturdy anchors with wide wings. Light items do not need strong anchors. Matching anchor strength to weight keeps the wall safe and stable.
Tools You’ll Need
Installing wall anchors with wings requires specific tools. Using the right tools makes the job easier and safer. Prepare all tools before starting. It saves time and avoids frustration.
Drill And Bits
A drill is necessary to make holes in the wall. Choose a drill with variable speed control. This helps to adjust power for different wall types. Use drill bits matching the anchor size. A wrong size causes poor fitting or wall damage. Keep extra bits in case one breaks.
Screwdrivers And Other Essentials
Use a screwdriver to fasten screws into the anchors. A Phillips head screwdriver fits most screws. Some anchors may require a flat-head screwdriver. Have both types ready. A hammer might help to tap anchors gently into the hole. Also, a measuring tape and pencil help mark anchor spots accurately.
Preparing The Wall
Preparing the wall is a key step before installing wall anchors with wings. It ensures the anchors hold firmly and safely. Taking time to prepare helps avoid mistakes and weak spots in the wall. Follow these simple steps for the best results.
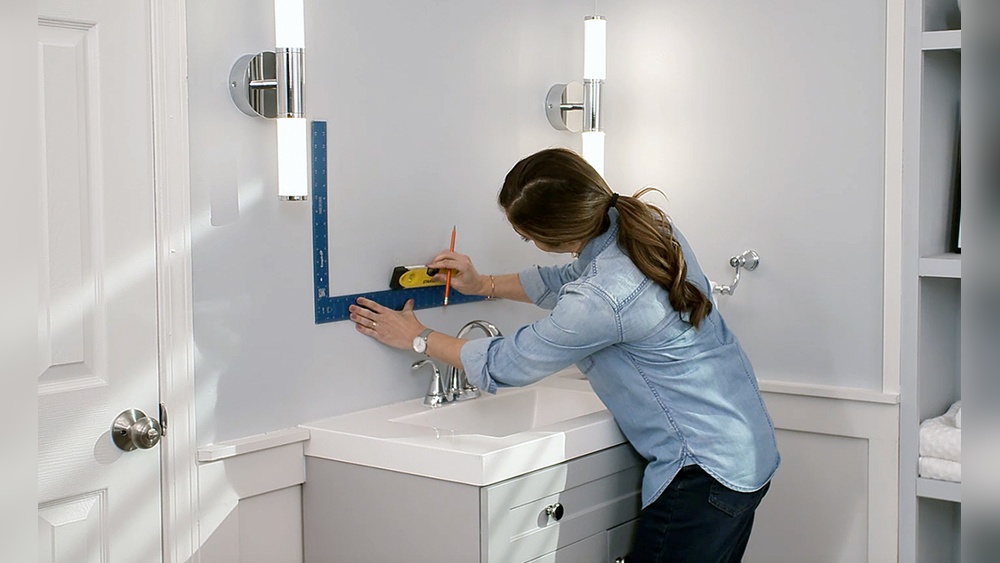
Marking Anchor Points
Start by deciding where to place the anchors. Use a pencil to mark the exact points on the wall. Measure carefully to keep the marks level and evenly spaced. Double-check the marks before drilling. Clear, precise marks make the job easier and cleaner.
Drilling Pilot Holes
Choose a drill bit that matches the anchor size. Drill straight pilot holes at the marked points. Drill slowly to avoid damaging the wall surface. The pilot holes guide the anchors and help them open properly. Clean out dust from the holes before inserting anchors.

Credit: www.homedepot.com
Installing The Wing Anchors
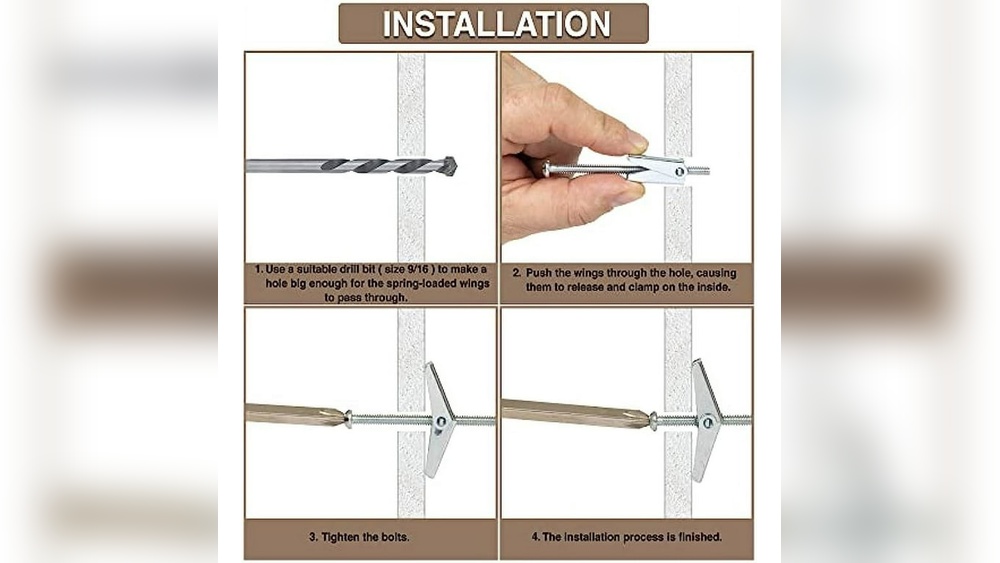
Installing wing anchors is a smart way to hang heavy items on drywall or hollow walls. These anchors spread their wings inside the wall, giving strong support. The process needs care to make sure the wings open properly. Follow these steps for a secure hold.
Inserting The Anchor
Start by drilling a hole in the wall. Choose a drill bit that matches the anchor size. Push the wing anchor into the hole. The wings should be folded to fit inside easily. Insert the anchor until it sits flush with the wall surface.
Securing The Wings
Once inside, the wings will open up behind the wall. Pull the anchor gently to check if the wings are fully expanded. The wings hold the anchor tightly against the inside of the wall. This stops the anchor from pulling out and keeps it stable.
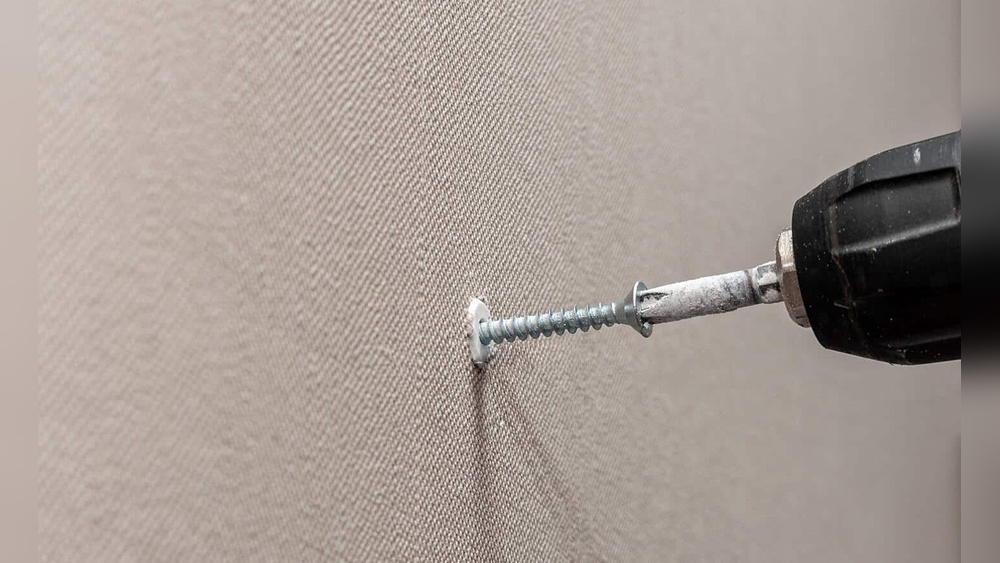
Driving The Screw
Insert the screw into the anchor’s center. Turn it slowly with a screwdriver. As the screw goes in, it tightens the wings even more. Stop when the screw is snug but not too tight. Over-tightening can damage the wall or anchor.
Testing Anchor Stability
Testing the stability of wall anchors with wings is key for safety. It ensures the anchor holds firm under load. This step prevents damage to walls and keeps items secure.
Weight Tests
Start by applying gentle pressure to the anchored object. Use your hands to pull or push slightly. Observe if the anchor stays tight and doesn’t move. Gradually add weight to the item. Watch how the anchor reacts to increased load. Stop if you notice any shifting or loosening. This process shows if the anchor can handle the expected weight.
Adjusting If Necessary
If the anchor feels loose, remove the item carefully. Check the anchor position inside the wall. Reinsert or tighten the anchor to improve grip. Sometimes, a larger anchor or different size is needed. Test the anchor again after adjustments. Repeat until the anchor holds firmly without movement.
Common Mistakes To Avoid
Installing wall anchors with wings seems simple, but many make avoidable errors. These mistakes can cause poor support and damage to walls. Knowing what to avoid helps your project succeed and last longer.
Wrong Anchor Size
Choosing the wrong anchor size weakens the hold. Too small anchors can pull out easily. Too large anchors may crack the wall. Match the anchor size with the weight of your item. Also, check the hole size before drilling. Use anchors that fit snugly for best results.
Improper Drilling Technique
Drilling mistakes cause trouble when installing anchors. Drilling too large a hole makes anchors loose. Drilling too small a hole may break the anchor wings. Keep the drill steady and straight. Drill slowly to avoid cracking the wall. Use a drill bit that matches the anchor size perfectly.
Tips For Different Wall Types
Wall anchors with wings work differently on various surfaces. Knowing how to install them on each wall type helps you get the best hold. Different walls need different tools and methods to stay strong and safe.
Drywall Installation
Drywall is soft and fragile. Use wall anchors with wings designed for drywall. Start by drilling a small hole. Insert the anchor carefully. The wings open behind the drywall. This spreads the weight evenly. Tighten the screw slowly to avoid damage. Avoid heavy items without extra support.
Concrete And Brick Walls
Concrete and brick are hard and dense. Use a hammer drill to make a hole first. Choose anchors made for masonry. Clean dust from the hole before inserting the anchor. Push the anchor in until flush with the wall. Tighten the screw gently. The wings will grip inside the hole firmly. This gives a strong hold for heavy objects.
:max_bytes(150000):strip_icc()/how-to-use-and-discard-anchor-screws-1822671-003-05-a4247920f04c4a6788692e29d4c55add.jpg)
Credit: www.thespruce.com

Credit: www.youtube.com
Frequently Asked Questions
What Are Wall Anchors With Wings Used For?
Wall anchors with wings provide strong support in drywall or hollow walls. They expand behind the wall to hold heavy items securely. These anchors prevent screws from pulling out, making them ideal for shelves, mirrors, and cabinets.
How Do You Install Winged Wall Anchors Correctly?
Drill a hole matching the anchor size first. Insert the anchor into the wall until wings open inside. Tighten the screw slowly to secure the anchor firmly against the wall’s back surface.
Can Winged Wall Anchors Hold Heavy Objects?
Yes, winged anchors distribute weight evenly and hold heavy objects well. They are designed for hollow walls where regular anchors fail. Always check the weight limit on the packaging before use.
What Tools Are Needed For Installing Wall Anchors With Wings?
You need a drill with the right drill bit size, a screwdriver, and the winged wall anchors. A level can help to ensure proper alignment of the installation.
Conclusion
Wall anchors with wings hold items firmly on walls. They spread weight evenly for strong support. Use the right drill size to fit anchors perfectly. Push wings into the wall until they open fully. Tighten screws slowly to avoid damage.
This method works well in drywall and plaster. Take your time for steady, safe results. Practice makes the process easier and quicker. Now, you can hang shelves, pictures, or hooks securely. Simple steps lead to strong, lasting wall fixtures.