Changing the keys to your Kwikset deadbolt might seem tricky, but it’s easier than you think. Imagine having full control over who can enter your home, without the cost of a locksmith.
By learning how to rekey your deadbolt yourself, you save money and gain peace of mind. In this guide, you’ll discover simple, step-by-step instructions to take charge of your home’s security quickly and confidently. Ready to make your keys work for you?
Let’s get started.
Tools Needed
Before starting to rekey a Kwikset deadbolt, gather the right tools. Having everything ready makes the process smooth and fast. Using the right tools helps avoid damage to the lock and ensures it works well after rekeying.
Essential Tools
- Flathead screwdriver – for removing screws and the lock cover
- Phillips screwdriver – needed for some screw types on the lock
- Kwikset rekeying kit – includes new keys and pins to reset the lock
- Follower tool – helps push out the plug without losing pins
- Needle-nose pliers – useful for handling small pins carefully
- Work surface or tray – keeps tiny parts organized and prevents loss
Optional Accessories
- Magnifying glass – helps see small pins clearly
- Key gauge – measures key cuts to match new pins accurately
- Lubricant spray – keeps lock parts moving smoothly after reassembly
- Flashlight – improves visibility inside the lock during rekeying
Credit: www.kwikset.com
Preparing The Deadbolt
Preparing the deadbolt is the first step in rekeying your Kwikset lock. This stage ensures the lock is ready for the rekeying process. Proper preparation saves time and prevents damage to the lock.
Start by carefully removing the deadbolt from your door. Then, inspect all parts to spot any wear or damage. Clean parts work better and last longer.
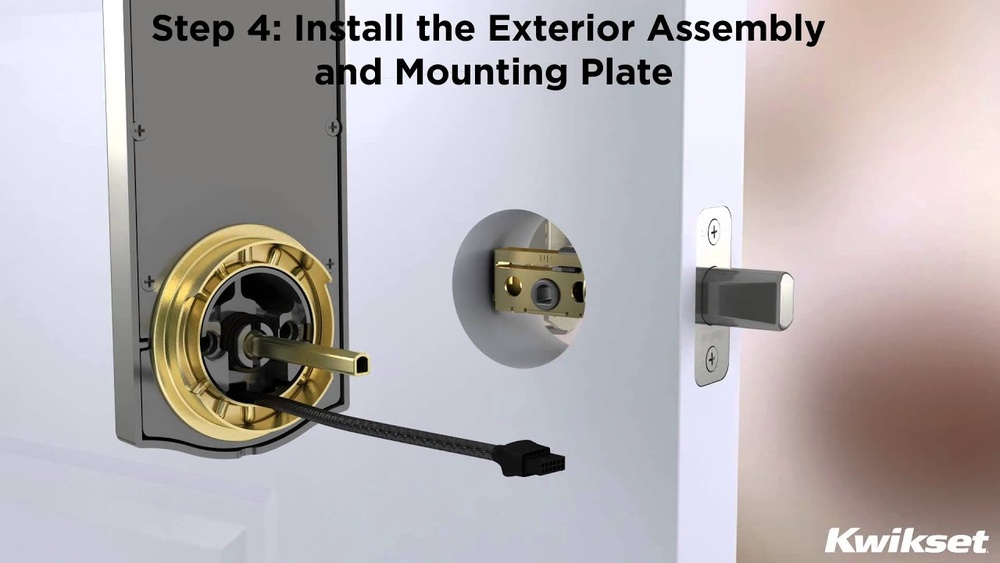
Removing The Lock
Locate the screws on the interior side of the deadbolt. Use a screwdriver to remove these screws. Gently pull the interior and exterior parts away from the door. Remove the latch from the edge of the door. Keep all screws and parts in a safe place. Avoid forcing any parts to prevent breaking them.
Inspecting The Components
Check the cylinder for dirt or rust. Look at the pins inside the cylinder for signs of wear. Inspect the springs to ensure they are not bent or broken. Clean all parts with a soft cloth and mild cleaner. Replace any damaged parts before rekeying. Proper inspection helps the lock work smoothly after rekeying.
Removing Old Pins
Removing old pins from a Kwikset deadbolt is a key step in rekeying. It allows you to change the lock’s combination. This process makes the lock work with a new key. Understanding how to remove these pins safely is important.
Accessing The Cylinder
Start by removing the deadbolt from the door. Use a screwdriver to take off the screws. Pull the lock apart gently. You will see the cylinder inside. This is where the pins are located. Take the cylinder out carefully. Place it on a clean surface for the next step.
Extracting The Pins
Look inside the cylinder with a good light. You will see small pins lined up. Use a pinning tray or a small container. Tap the cylinder lightly to let pins fall out. Remove each pin with tweezers or a small tool. Keep the pins in order if you want to reuse them. Clean the cylinder before adding new pins. This clears dirt and old grease.
Selecting New Pins
Selecting new pins is a key step in rekeying your Kwikset deadbolt. The pins inside the lock cylinder control how the key turns. Using the right pins ensures the lock works smoothly and only with your new key. Choosing the correct pins takes care and attention. It keeps your lock safe and reliable.
Matching Pin Sizes
Each pin must match the cuts on your new key. Pins come in different lengths. Shorter pins fit shallow cuts. Longer pins fit deeper cuts. Use pins that fit exactly. Pins too long or short cause the lock to jam. Check each pin carefully before placing it in the cylinder. This step ensures your key will turn easily.
Using A Pinning Chart
A pinning chart shows which pin size matches each key cut. It helps you find the right pins fast. The chart lists key depths and corresponding pin lengths. Use it to pick pins for every position in the lock. Follow the chart closely to avoid mistakes. The chart makes the rekeying process smooth and accurate.
Installing New Pins
Installing new pins is a key step in rekeying your Kwikset deadbolt. These pins control how the lock works with your new key. Each pin must fit perfectly inside the plug to match the cuts on your key. Careful handling ensures smooth operation of the lock after rekeying.
Keep pins organized by size and order. This helps avoid mistakes during installation. Use tweezers for better control. Take your time to place each pin correctly in the plug. Precision here prevents jammed locks and key problems.
Inserting Pins Correctly
Start by matching each pin to the key’s cuts. Insert the shortest pins first. Push each pin firmly into its slot inside the plug. Make sure the pins sit flush and do not stick out. Double-check the order and size before moving on. Incorrect pin placement can cause the lock to fail.
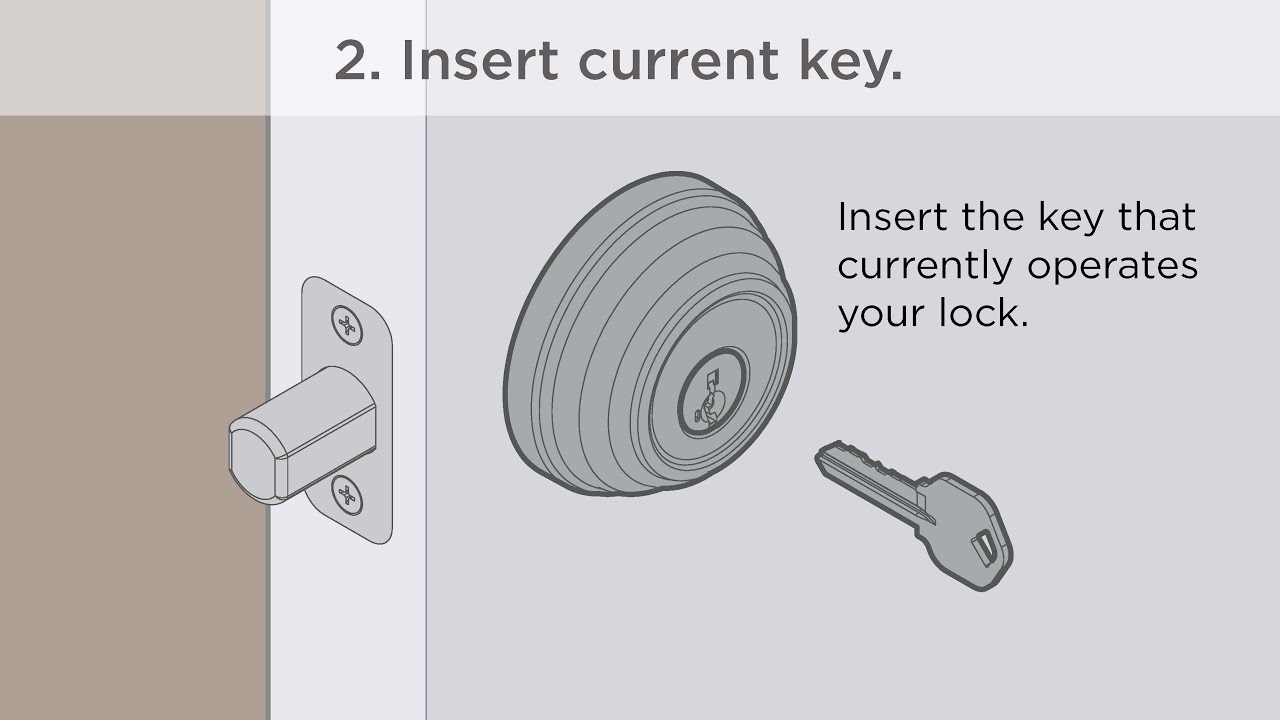
Testing The New Key
Once all pins are in place, insert your new key into the lock. Turn the key gently to test smooth movement. The lock should turn without resistance. If the key sticks, remove the pins and try again. Repeat until the key works perfectly. Proper testing saves time and frustration later.

Credit: www.ifixit.com
Reassembling The Deadbolt
Reassembling the deadbolt is the final step in rekeying your Kwikset lock. This process puts all the parts back together so the lock works properly. Careful assembly ensures your door stays secure and the lock turns smoothly.
Follow each step carefully. Take your time to avoid mistakes. The right fit means your new key will operate the lock without trouble.
Putting The Cylinder Back
Start by sliding the cylinder into the lock housing. Align it carefully with the tailpiece inside. Make sure the pins and springs stay in place. Push the cylinder gently but firmly until it fits snugly. Avoid forcing the parts to prevent damage.
Securing The Lock
Next, reattach the lock to the door with screws. Tighten each screw evenly to keep the lock stable. Check that the bolt slides in and out smoothly. Test the lock with your new key to confirm it works well. This step finishes the rekeying process and secures your door.
Troubleshooting Tips
Troubleshooting is key when rekeying a Kwikset deadbolt. Small problems can stop the process. Knowing what to check saves time and stress.
Some issues happen often. Fixes can be simple. Understanding common problems helps you fix the deadbolt fast.
Common Issues
The key does not turn after rekeying. The lock feels stuck or hard to move. The new key does not work at all. Pins inside the lock may not be set right. The lock cylinder might not be aligned properly. Sometimes, parts can fall inside the lock during rekeying.
Quick Fixes
Check the key cuts to match new pins. Turn the lock cylinder slightly to align pins. Apply a little graphite lubricant in the keyhole. Reinsert the key and try turning gently. Make sure all parts are clean and free of debris. If pins fell inside, remove the cylinder and reset the pins carefully.

Credit: www.youtube.com
Maintaining Your Deadbolt
Maintaining your deadbolt is key to keeping your home safe. A well-kept deadbolt works smoothly and lasts longer. Simple care steps help avoid problems and costly repairs. Regular checks ensure your lock stays strong and reliable.
Regular Upkeep
Clean the deadbolt with a soft cloth to remove dust. Use graphite powder to lubricate the lock, not oil. Oil can attract dirt and cause jams. Check the screws and tighten them if loose. Test the key and lock action every month. Fix small issues quickly to avoid bigger problems.
When To Rekey Again
Consider rekeying if you lose your keys. Change locks after moving into a new home. Rekey if someone you don’t trust had a key. Also, rekey if the lock feels stiff or hard to turn. Regular rekeying keeps control of who can enter your home.
Frequently Asked Questions
How Do I Rekey A Kwikset Deadbolt?
To rekey a Kwikset deadbolt, remove the lock cylinder, take out the old pins, and insert new pins matching your new key. Then, reassemble the lock. This process changes the lock to work with your new key only.
What Tools Are Needed To Rekey A Kwikset Deadbolt?
You need a key gauge, pinning kit, tweezers, and a screwdriver. These tools help you remove old pins and insert new ones accurately. Having the right tools ensures a smooth rekeying process.
How Long Does It Take To Rekey A Kwikset Deadbolt?
Rekeying a Kwikset deadbolt typically takes 15 to 30 minutes. The time depends on your skill level and tool availability. Following instructions carefully can speed up the process.
Can I Rekey A Kwikset Deadbolt Without Removing It?
No, you must remove the lock cylinder to access the pins. Rekeying without removal is not possible because you need to replace the internal pins inside the cylinder.
Conclusion
Rekeying a Kwikset deadbolt is a simple way to improve home security. You can save money by doing it yourself. Follow the steps carefully to avoid mistakes. Take your time and use the right tools. Now, your lock works with a new key.
Feel confident knowing your home is safer. Try rekeying again if needed. It’s a useful skill for any homeowner.