Struggling to remove a Kwikset deadbolt that’s keyed on both sides? You’re not alone.
This type of lock can be tricky because it doesn’t have the usual twist or thumb turn inside. But don’t worry—whether you need to replace it, fix a jam, or just get it out safely, you’re in the right place.
Keep reading, and you’ll discover simple, step-by-step instructions to remove your Kwikset deadbolt quickly and without damage. By the end, you’ll feel confident handling this lock on your own. Let’s get started!
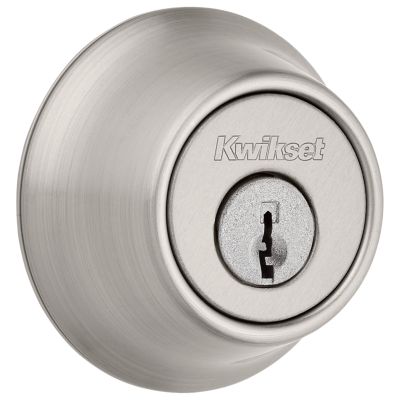
Credit: www.kwikset.com
Tools Needed
Removing a Kwikset deadbolt keyed on both sides requires specific tools. These tools help you take apart the lock safely and quickly. Having the right tools makes the process easier and less frustrating.
Some tools are common and easy to find. Others are special but important for this task. Prepare all tools before starting to avoid delays.
Phillips Screwdriver
A Phillips screwdriver is essential for removing screws. Most deadbolts use Phillips head screws. It fits well and prevents stripping the screws.
Flathead Screwdriver
A flathead screwdriver helps pry parts gently. It can remove trim or covers without damage. This tool also assists in pressing release tabs.
Allen Wrench (hex Key)
Some Kwikset deadbolts use Allen screws. An Allen wrench fits these hex-shaped screws. Keep different sizes ready to match the lock.
Needle-nose Pliers
Needle-nose pliers grip small pieces firmly. They help pull out pins or clips. These pliers reach tight spaces inside the lock.
Lubricant Spray
Lubricant spray loosens stuck parts. It makes screws and pins easier to move. Use it sparingly to avoid mess.
Identify Deadbolt Type
Before removing a Kwikset deadbolt keyed on both sides, identify the deadbolt type. Knowing the exact model helps in choosing the right tools and method. Different deadbolts have different parts and designs. This step saves time and prevents damage.
Kwikset deadbolts come in several styles. Each style has unique features. Recognizing these features is important for proper removal.
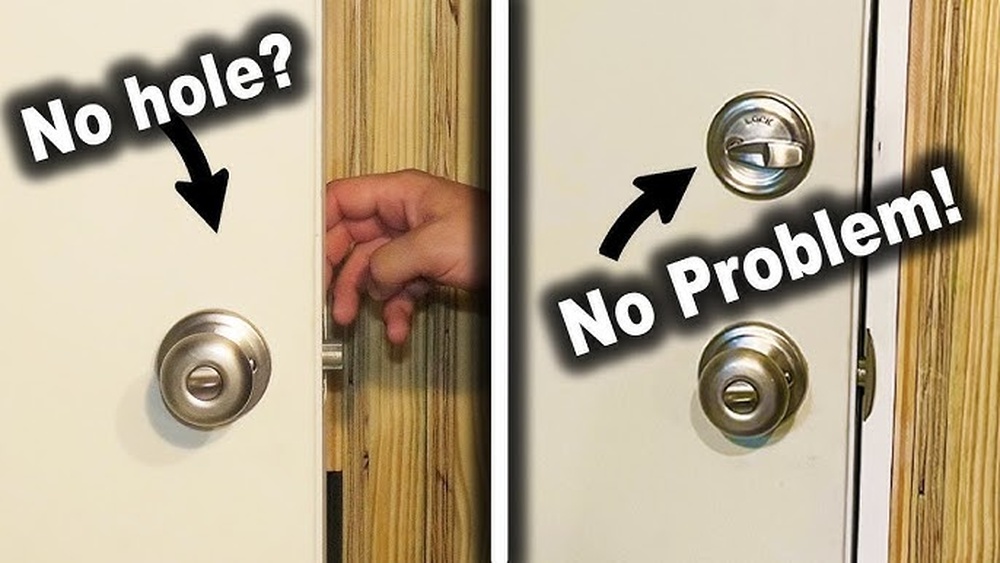
Check The Exterior Side
Look at the outside of the door. Note if there is a keyhole on the exterior side. Kwikset deadbolts keyed on both sides have a keyhole here. The keyhole usually looks like a small round hole or slot.
Observe the shape and size of the keyhole. Some models have a smooth finish around the keyhole. Others may have a decorative plate. This detail helps identify the deadbolt type.
Inspect The Interior Side
Open the door and check the inside of the lock. Kwikset deadbolts keyed on both sides often have a similar keyhole inside. Sometimes, the interior side has a turn knob instead. Confirm which type your lock has.
Look for screws or covers on the interior plate. These parts may need removal before taking out the deadbolt. Identifying these features helps plan the next steps.
Look For Model Numbers
Check for any labels or stamps on the lock. Kwikset usually prints model numbers on the faceplate or inside the lock. These numbers help find exact instructions online.
Use a flashlight to see small prints clearly. Write down or take a photo of the model number. This information is useful for further research or buying parts.
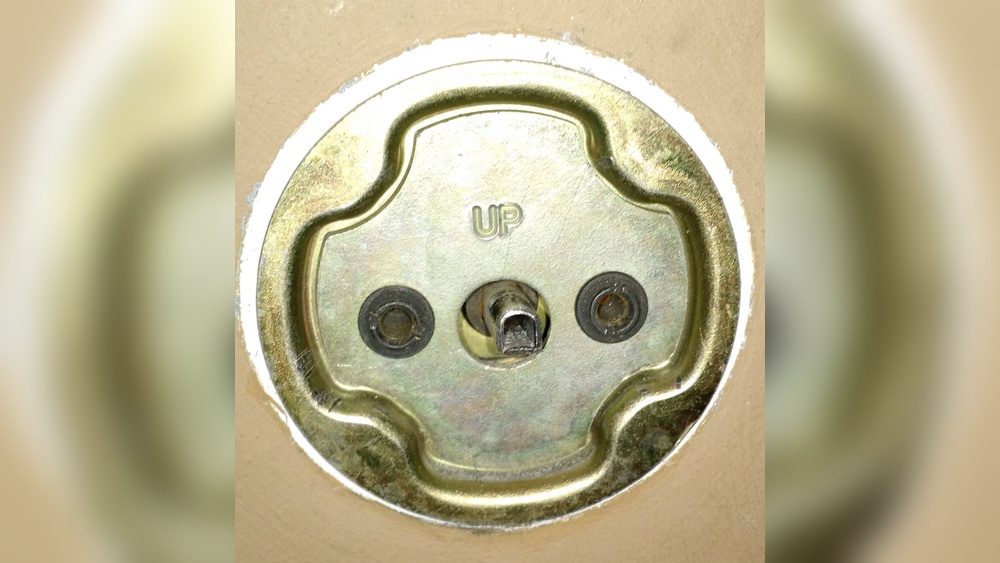
Remove Interior Plate
Removing the interior plate is a key step in taking out a Kwikset deadbolt keyed on both sides. This plate holds the inside parts of the lock in place. Removing it carefully makes the rest of the process easier and safer. Follow these simple steps to remove the interior plate without damage.
Gather The Right Tools
Start by getting a screwdriver that fits the screws on the interior plate. Usually, a Phillips head screwdriver works best. Having the right tool helps avoid slipping and damaging the lock or door.
Locate And Remove Screws
Look closely at the interior plate. You will see two or more screws holding it. Unscrew each one slowly and keep them safe. Do not force the screws; turn gently to avoid stripping them.
Gently Pry Off The Interior Plate
After removing the screws, the plate may still stick. Use a flat tool or your fingers to lift it carefully. Move slowly to avoid scratching the door surface or bending the plate.
Set The Plate Aside Safely
Place the interior plate and screws on a clean surface. Keep them together to prevent losing any pieces. This makes reassembly easier after the deadbolt removal.
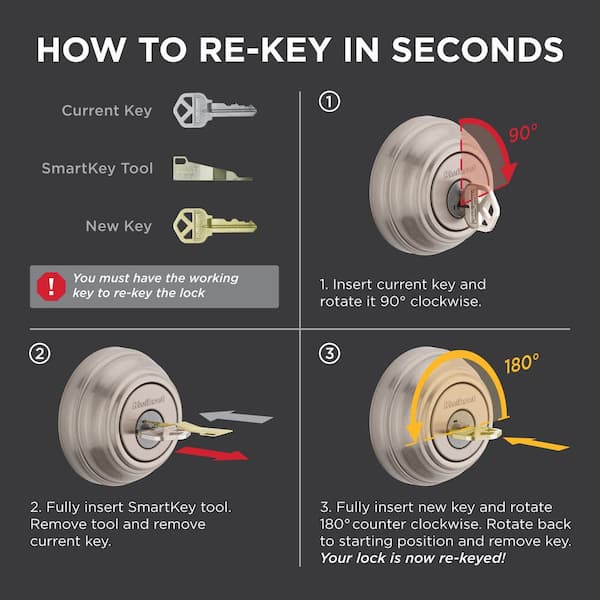
Credit: www.kwikset.com
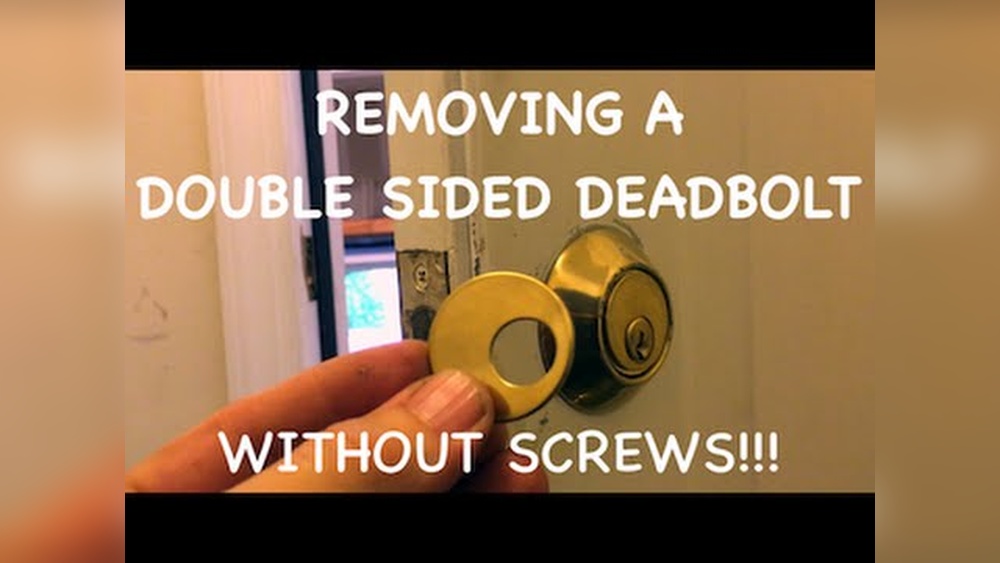
Extract Deadbolt Cylinder
Extracting the deadbolt cylinder is a key step in removing a Kwikset deadbolt keyed on both sides. This part holds the lock mechanism and must come out carefully to avoid damage. The process requires some simple tools and patience.
Start by locating the screws that hold the lock cylinder in place. These screws are usually on the interior side of the door. Removing them frees the cylinder for extraction.
Remove The Interior Thumb Turn
First, take off the interior thumb turn if your lock has one. This piece often blocks access to the cylinder. Use a screwdriver to unscrew it gently. Keep the screws safe for reassembly.
Unscrew The Cylinder Mounting Screws
Look for screws on the edge or inside the door near the cylinder. Use a proper screwdriver to remove them. These screws secure the cylinder to the door, so removing them loosens the lock.
Pull Out The Deadbolt Cylinder
With screws removed, grip the cylinder firmly. Pull it straight out from the door. If it sticks, wiggle it gently to loosen. Avoid forcing it, which can cause damage.
Handle The Cylinder Carefully
The cylinder contains small pins and springs. Handle it with care to prevent losing parts. Place it on a clean surface for inspection or replacement.
Handle Stuck Or Jammed Locks
A stuck or jammed handle on a Kwikset deadbolt can cause frustration. It stops the lock from turning smoothly. This problem often happens when the lock is keyed on both sides. Dirt, rust, or misalignment may cause the jam. Fixing it requires patience and simple tools.
Follow these steps to handle a stuck or jammed lock safely. Avoid forcing the handle, which can cause more damage. Small fixes often solve the problem quickly.
Identify The Cause Of The Jam
Check the lock for visible dirt or rust. Try to see if the key turns freely in both sides. Look for signs of damage or wear on the handle. Notice if the lock feels tight or loose. This helps to know what needs fixing.
Apply Lubricant To The Lock
Use a graphite-based lubricant for best results. Spray or apply a small amount inside the keyholes. Avoid oil-based lubricants, as they can attract dirt. Turn the key gently back and forth to spread lubricant. This can free up stuck parts.
Check Lock Alignment
Look at the door and lock position carefully. The deadbolt should line up with the strike plate on the doorframe. Misalignment can cause the handle to jam. Adjust the screws on the strike plate if needed. Test the handle after each adjustment.
Remove And Inspect The Handle
Use a screwdriver to remove the handle and lock cover. Inspect the internal parts for broken or worn pieces. Clean out dust, dirt, and old lubricant. Replace any damaged parts before reassembling the lock.
Credit: www.homedepot.com
Reassemble Or Replace Deadbolt
After removing the Kwikset deadbolt keyed on both sides, the next step is to decide whether to reassemble or replace it. This choice depends on the condition of the lock and your security needs. Reassembling the deadbolt can save time and money. Replacing it might be best if the lock is damaged or outdated.
Reassembling The Deadbolt
Start by cleaning all parts carefully. Check for broken or worn components. Align the lock cylinder and latch properly. Tighten screws to secure the lock firmly. Test the lock with both keys before finalizing. A smooth turn of the key means success. Take your time to avoid mistakes.
Replacing The Deadbolt
Choose a new deadbolt that fits your door. Remove old screws and parts completely. Insert the new latch into the door edge. Attach the new lock cylinder on both sides. Secure all screws tightly for safety. Test the new lock using both keys. Ensure it works smoothly and locks firmly.
Final Tips For Both Options
Use a screwdriver that fits screws well. Avoid forcing parts during assembly. Keep all parts organized and clean. Test the lock multiple times for reliability. Consider professional help if unsure. Proper installation ensures home security and peace.
Tips For Maintaining Kwikset Locks
Maintaining Kwikset locks keeps them working smoothly and lasts longer. Simple care steps avoid common problems like jamming or rust.
Taking time to clean and check your lock helps prevent damage. Small efforts save money on repairs and replacements.
Keep The Lock Clean
Remove dust and dirt from your Kwikset deadbolt regularly. Use a soft cloth to wipe the surface gently. Avoid harsh chemicals that can damage the finish.
Lubricate Moving Parts
Apply graphite or silicone spray to the keyhole and bolt. This reduces friction and helps the lock turn smoothly. Do this twice a year for best results.
Check For Loose Screws
Tighten any loose screws on the lock and door hardware. Loose parts can cause misalignment and difficulty in turning the key. Use a screwdriver to secure them firmly.
Use The Correct Key
Always use the original or properly cut keys for your Kwikset lock. Wrong keys can damage the pins inside the lock cylinder. Keep spare keys safe and avoid bending them.
Avoid Forceful Turning
Turn the key gently without forcing it in the lock. Forcing can break the key or damage the internal mechanism. If the key sticks, clean and lubricate the lock.
Frequently Asked Questions
How Do I Remove A Kwikset Deadbolt Keyed On Both Sides?
To remove a Kwikset deadbolt keyed on both sides, first remove the screws on the interior side. Then, carefully pull off both the interior and exterior knobs. Finally, slide out the deadbolt mechanism from the door edge.
What Tools Are Needed To Remove A Kwikset Deadbolt?
You need a Phillips screwdriver, a flathead screwdriver, and possibly a hex wrench. These tools help remove screws and pry off the lock components safely.
Can I Remove The Deadbolt Without The Key?
Yes, you can remove the deadbolt without the key by unscrewing the interior side and pulling off the lock cylinder. However, avoid forcing parts to prevent damage.
How Long Does It Take To Remove This Deadbolt?
Removing a Kwikset deadbolt keyed on both sides usually takes about 10 to 15 minutes with proper tools and instructions.
Conclusion
Removing a Kwikset deadbolt keyed on both sides can be simple. Follow the steps carefully and take your time. Use the right tools to avoid damage. Keep safety in mind during the process. Doing it yourself saves money and helps you learn.
If you face trouble, ask for help from a locksmith. Now you have the knowledge to handle this task. Stay patient, and the job will be done well.