Are you struggling with an old Kwikset deadbolt that just won’t budge? Removing it might seem tricky, but you’re closer to a simple fix than you think.
Whether you want to replace it for better security or just upgrade your door’s look, this step-by-step guide will make the process quick and hassle-free. Keep reading, and you’ll soon have your deadbolt off without any stress or extra tools.
Let’s get your door working the way you want!

Credit: www.youtube.com
Tools Needed
Removing an old Kwikset deadbolt needs the right tools. Having these tools ready makes the job easier and faster. Each tool plays a key role in taking out the deadbolt without damage.
Screwdriver
A screwdriver is needed to remove screws from the deadbolt. Most Kwikset deadbolts use Phillips head screws. A flathead screwdriver may also help in some cases.
Allen Wrench
Some Kwikset models have small hex screws. An Allen wrench fits these screws to loosen them. Keep a set of different sizes handy to match the screw.
Utility Knife
A utility knife helps cut any paint or sealant around the deadbolt. This makes it easier to remove the trim and plate without damage.
Pliers
Pliers can grip and pull small parts or stuck screws. They help when screws are tight or damaged. Needle-nose pliers work best for tight spaces.
Tape
Tape protects the door surface from scratches. Apply tape around the deadbolt area before starting the removal. It keeps the door safe during the process.

Credit: www.youtube.com
Prepare The Door
Preparing the door is the first step to remove an old Kwikset deadbolt. It helps make the process safe and smooth. Before you start unscrewing, check the door and the lock area carefully. Clear any items around the door to avoid accidents. Good preparation saves time and effort later.
Gather Necessary Tools
Collect all tools before starting. You need a screwdriver, usually a Phillips head. A flathead screwdriver might help for some parts. A flashlight can be useful if the area is dark. Having tools ready avoids interruptions.
Clear The Work Area
Remove objects near the door. Clear floor space to move freely. Keep children and pets away. This reduces distractions and hazards. A clean area lets you focus on the task.
Inspect The Deadbolt
Look closely at the deadbolt on both sides. Note the screws and their positions. Check if the lock is stuck or damaged. This helps understand how to remove it. Make a mental note of the lock’s parts.
Unlock The Deadbolt
Turn the key or thumb turn to unlock the deadbolt. An unlocked lock is easier to remove. Do not force the lock if it feels stuck. Gentle movements prevent damage to the door or lock.
Remove The Interior Thumb Turn
Removing the interior thumb turn is the first step to take out an old Kwikset deadbolt. This part lets you lock and unlock the door from inside. Taking it off makes the rest of the deadbolt easier to remove. Follow these simple steps to remove the thumb turn safely and quickly.
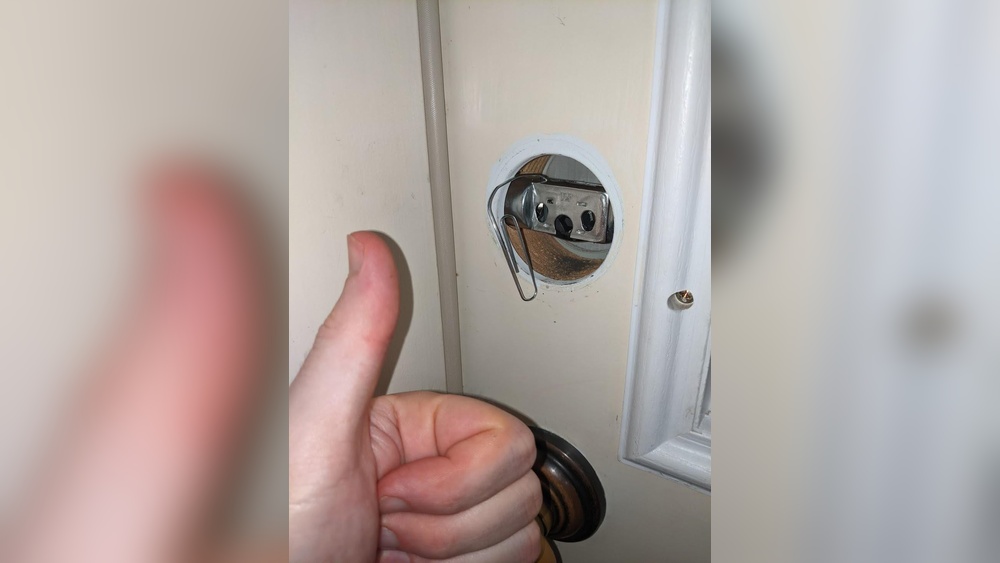
Locate The Thumb Turn
Look at the inside side of your door. The thumb turn is the small knob you twist to lock or unlock. It is attached to the center of the deadbolt plate. Find it before starting the removal.
Find And Remove The Retaining Screw
Check the edge of the thumb turn for a small screw. This screw holds the thumb turn in place. Use a screwdriver to turn the screw counterclockwise. Remove the screw completely and keep it safe.
Pull The Thumb Turn Off
After removing the screw, gently pull the thumb turn away from the door. It should come off easily. Do not force it. If it feels stuck, check for any hidden screws.
Set The Thumb Turn Aside Safely
Place the thumb turn and screw in a safe spot. You might need them later if you reuse the deadbolt. Keep all parts together to avoid losing anything.
Unscrew The Exterior Lock
Removing the exterior part of a Kwikset deadbolt is the first step in taking out the old lock. This part is the faceplate and keyhole that you see on the outside of the door. Unscrewing it carefully helps avoid damage to the door or lock parts.
Use a screwdriver that fits the screws well. This makes the process faster and safer. Usually, a Phillips head screwdriver works best for Kwikset deadbolts. Keep the screws in a safe place for later use.
Locate The Screws On The Exterior Lock
Find the screws on the faceplate around the keyhole. These screws hold the lock to the door. They are usually on the inside edge of the lock, facing the door frame. Check carefully to spot all screws.
Remove The Screws Carefully
Turn the screws counterclockwise to loosen them. Do this slowly to avoid stripping the screw heads. Hold the lock steady as you unscrew to stop it from falling. Keep your hand under the lock to catch it.
Pull The Exterior Lock Away From The Door
Once the screws are out, gently pull the lock away. It should come off easily. If it feels stuck, wiggle it slightly while pulling. Avoid using force that could harm the door surface.
Extract The Deadbolt Mechanism
Extracting the deadbolt mechanism is a key step in removing an old Kwikset deadbolt. This part controls the locking and unlocking of your door. Removing it carefully allows you to replace or repair the lock without damaging the door.
Follow clear steps to take out the deadbolt safely. Use the right tools and stay organized. This process is simple with patience and the right approach.
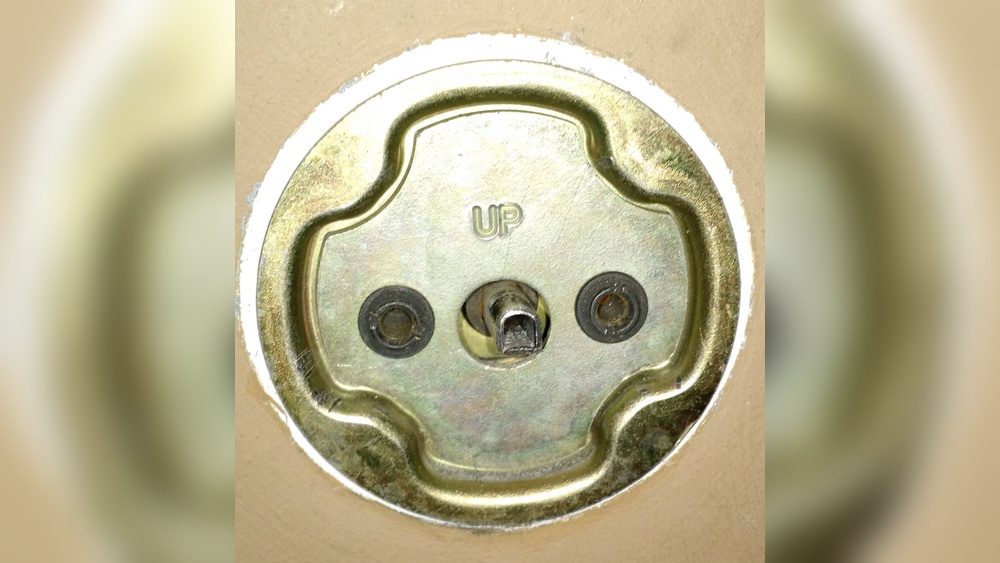
Remove The Screws From The Edge Of The Door
Start by locating the screws on the door’s edge. These screws hold the deadbolt in place. Use a screwdriver to remove them. Keep the screws safe for reinstallation or disposal.
Pull Out The Deadbolt From The Door
After removing the screws, gently pull the deadbolt mechanism out. It should slide smoothly from the door’s edge. Avoid using force to prevent damage to the door.
Inspect The Deadbolt For Damage Or Wear
Check the removed deadbolt for any signs of wear or damage. Look for broken parts or rust. This inspection helps decide if replacement is necessary.

Credit: diy.stackexchange.com
Check For Damage
Checking for damage is a key step before removing an old Kwikset deadbolt. It helps you understand the condition of the lock and the door. This step can save time and effort during removal. Look closely at the deadbolt and the surrounding area.
Inspect The Deadbolt Surface
Look for scratches, dents, or rust on the deadbolt. These signs show wear and tear. Rust may cause the lock to stick or jam. Scratches might mean the lock was forced or tampered with. Surface damage can affect how easily you remove the deadbolt.
Check The Door Around The Lock
Examine the door area near the deadbolt. Look for cracks, chips, or splinters. Damage here can make removal tricky. It can also affect the door’s strength. Note any loose parts or gaps around the lock.
Test The Lock’s Function
Try turning the key or thumb turn. See if the deadbolt moves smoothly. Stiff or stuck locks might have internal damage. This can mean broken parts inside the lock. Knowing this helps you prepare tools or extra steps for removal.
Look At The Strike Plate
Check the strike plate on the door frame. It should be secure and undamaged. Loose or bent strike plates can cause problems. They may need fixing after deadbolt removal. Make sure it lines up well with the bolt.
Clean The Door Edge
Cleaning the door edge is an important step before removing an old Kwikset deadbolt. Dirt and grime can build up around the edge, making it harder to take out the lock smoothly. A clean door edge helps the new lock fit better and work properly. It also prevents damage to the door during removal.
Take a little time to clean the door edge carefully. This step makes the whole process easier and safer for your door. Here are simple ways to clean the door edge properly.
Remove Dust And Debris
Use a soft brush or cloth to wipe the door edge. Remove loose dust and dirt from the surface. Pay special attention to the area around the deadbolt hole.
Use Mild Soap And Water
Mix a small amount of mild soap with water. Dip a cloth in the solution and wring it out. Wipe the door edge gently to remove grease and stains.
Dry The Door Edge Thoroughly
Use a dry cloth to remove moisture from the door edge. Ensure no water stays in the deadbolt hole. This stops rust and damage to the door.
Tips For Installing A New Deadbolt
Installing a new deadbolt improves your door’s security and appearance. Follow simple steps to make sure it fits well and works smoothly. Careful installation helps avoid future problems and saves time. Use these tips for a strong, reliable deadbolt setup.
Choose The Right Deadbolt Size
Measure the door thickness before buying a new deadbolt. Most deadbolts fit doors between 1 3/8 and 1 3/4 inches thick. Check the backset distance too. The backset is the distance from the door edge to the center of the hole. Common backsets are 2 3/8 or 2 3/4 inches. Picking the right size ensures the lock fits perfectly.
Prepare The Door Properly
Remove any old hardware and clean the surface well. Check the holes for damage or wear. Use wood filler if the holes are too big or uneven. Sand the area smooth to help the new lock sit flush. Proper preparation helps the deadbolt work better and last longer.
Install The Deadbolt Carefully
Follow the instructions from the manufacturer step by step. Insert the latch first and secure it with screws. Align the deadbolt on both sides of the door. Tighten all screws firmly but avoid over-tightening. Test the lock several times during installation to ensure smooth operation.
Check The Door Frame
Inspect the strike plate on the door frame. Make sure it is aligned with the deadbolt. Use longer screws to secure the strike plate firmly into the frame. This adds strength and prevents forced entry. Adjust the plate if the deadbolt does not slide in easily.
Frequently Asked Questions
How Do I Remove An Old Kwikset Deadbolt Lock?
Start by unscrewing the interior screws holding the lock. Remove both the interior and exterior parts. Then, take out the latch mechanism from the door edge. Keep screws safe for reinstallation or replacement.
What Tools Are Needed To Remove A Kwikset Deadbolt?
You only need a Phillips screwdriver to remove most Kwikset deadbolts. A flathead screwdriver can help pry off trim if needed. No specialized tools are required for standard Kwikset deadbolt removal.
Can I Remove A Kwikset Deadbolt Without Damaging The Door?
Yes, carefully unscrew and gently pull the lock parts away. Avoid forcing parts to prevent door or lock damage. Using the right tools ensures a clean removal without scratches.
How Long Does It Take To Remove A Kwikset Deadbolt?
Removing a Kwikset deadbolt typically takes 5 to 10 minutes. It depends on your familiarity with the process. With basic tools and instructions, it’s a quick, straightforward task.
Conclusion
Removing an old Kwikset deadbolt is simple with the right steps. Take your time and follow each part carefully. Keep your tools ready and work slowly to avoid damage. You can replace the lock or fix it easily afterward. This guide helps make the process clear and stress-free.
Now, you can handle your door lock with confidence and ease.