Have you ever tried to remove a plastic nail anchor from your wall, only to find it stuck fast and frustrating? You’re not alone.
These little anchors are great at holding things up, but getting them out without damaging your wall can be tricky. If you want a smooth, clean removal without extra holes or mess, this guide is exactly what you need. Keep reading to discover simple, effective ways to get those stubborn plastic nail anchors out of your wall—fast and hassle-free.
Tools Needed
Removing plastic nail anchors from a wall requires the right tools. Using proper tools makes the task easier and prevents damage. Prepare these tools before starting the removal process.
Flathead Screwdriver
A flathead screwdriver helps pry the anchor out gently. Choose a size that fits the anchor’s edge. It works well to loosen the anchor from the wall.
Needle-nose Pliers
Needle-nose pliers grip the anchor firmly. They allow you to pull the anchor straight out. This tool works best for anchors that stick out slightly.
Utility Knife
A utility knife cuts around the anchor if it is flush with the wall. This helps separate the anchor from the drywall. Use it carefully to avoid wall damage.
Putty Knife
A putty knife slides under the anchor’s edge. It helps lift the anchor gently. This tool reduces the risk of wall surface damage during removal.
Drill With A Screwdriver Bit
A drill with a screwdriver bit can twist out anchors. It works if the anchor has a screw inside. Use slow speed to avoid wall damage.
Types Of Plastic Anchors
Plastic nail anchors come in several types. Each type suits different wall materials and weight needs. Knowing the types helps remove them safely and easily.
Some anchors expand inside the wall for a tight fit. Others use wings or ribs to hold firmly. Understanding these types helps you choose the right removal method.
Types Of Plastic Expansion Anchors
These anchors expand as you insert a screw. The plastic sleeve spreads inside the wall hole. They work well in drywall and plaster. Removing them needs careful pulling or pushing.
Toggle Or Winged Plastic Anchors
These have wings that open inside the wall cavity. They hold heavy items securely. The wings make removal tricky. You may need to collapse the wings first.
Ribbed Plastic Anchors
Ribbed anchors have small ridges along the sides. The ribs stop the anchor from spinning in the hole. They fit tightly in drywall and wood. Removal may require gentle twisting and pulling.
Self-drilling Plastic Anchors
These anchors cut into drywall without pre-drilling. Their sharp tips create threads inside the wall. Pulling them out can damage drywall. Use the right tools to avoid wall damage.
Assessing The Anchor Situation
Before removing plastic nail anchors from your wall, it helps to assess the situation. Knowing the anchor type and the wall material will guide your removal method. This step prevents damage and saves time.
Anchor Size And Type
Plastic nail anchors come in different sizes and shapes. Some are small and simple, while others are larger with complex designs. Check if the anchor has wings, a split body, or a smooth surface. This detail tells you how tightly it grips the wall. Larger anchors may need special tools or more care to remove.
Also, identify if the anchor expands inside the wall or stays flush. Expanding anchors can be harder to pull out. Knowing the type helps choose between pulling, pushing, or drilling it out.
Wall Material
Walls vary in material and thickness. Drywall is soft and common. It may crumble if you pull the anchor hard. Plaster walls are harder but can crack easily. Concrete or brick walls hold anchors tight but resist drilling.
Check the wall surface near the anchor. Soft walls need gentle removal methods. Hard walls may require stronger tools. Understanding the wall type helps avoid extra damage or holes.
:max_bytes(150000):strip_icc()/how-to-use-and-discard-anchor-screws-1822671-Final-ec8091ccf65241b1b1f888549f25003a.jpg)
Credit: www.thespruce.com
Removing Anchors Without Wall Damage
Removing plastic nail anchors from walls can be tricky. The goal is to take them out without causing any damage to the wall surface. Damaged walls need patching and repainting, which takes extra time and money. Using the right tools and techniques helps keep the wall intact and smooth. Below are simple methods to remove anchors safely.
Using Pliers
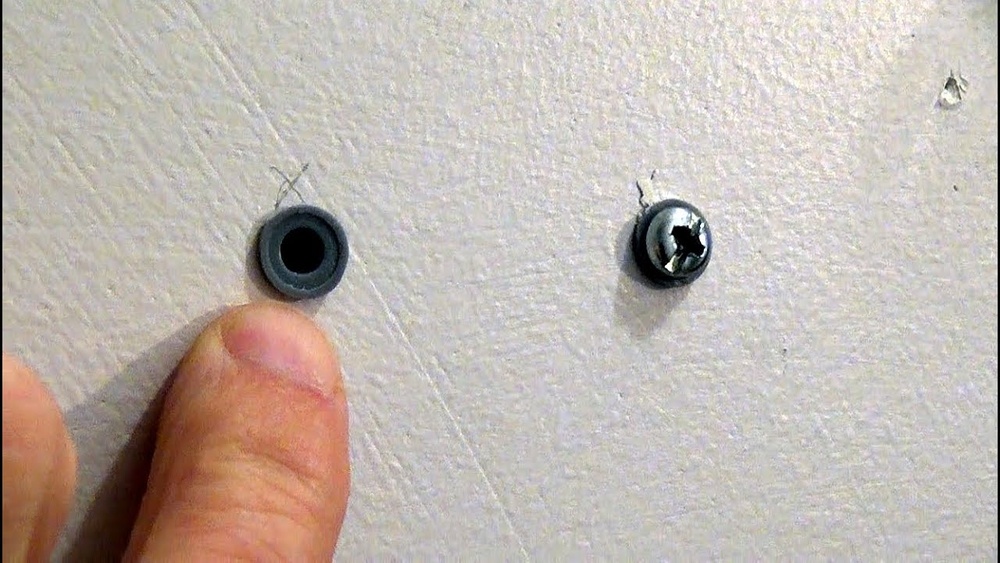
Grab a pair of needle-nose pliers for this task. Hold the anchor firmly but gently to avoid breaking it. Pull the anchor straight out with steady force. Wiggle it slightly if it feels stuck. Avoid twisting too hard as this can widen the hole. Keep the wall surface stable during the process. This method works well for anchors that stick out slightly from the wall.
Twisting And Pulling Technique
Use your fingers or pliers to twist the anchor slowly. Twist in one direction to loosen its grip inside the wall. Once loose, pull the anchor straight out carefully. This technique helps break the anchor’s hold without ripping the drywall. Take your time to avoid sudden jerks that can damage the wall. If the anchor resists, twist and pull in small motions until it comes free.
Removing Stubborn Anchors
Removing stubborn plastic nail anchors from walls can be tricky. These anchors often stay stuck deep inside the drywall. Pulling them out by hand usually does not work. A careful approach helps avoid wall damage. Use the right tools and techniques to remove anchors safely.
Drilling Out Anchors
Drilling out anchors works well for tough cases. Use a drill bit slightly smaller than the anchor. Drill slowly into the center of the anchor. The drill will break the anchor into small pieces. This method clears the hole without pulling hard. Wear safety glasses to protect your eyes from debris. After drilling, remove the loose pieces with pliers or a vacuum.
Cutting Flush With The Wall
Cutting flush is a simple way to hide anchors. Use a utility knife or a small saw. Carefully cut the anchor at wall level. Avoid cutting too deep to protect the drywall. Once cut, push the anchor pieces inside the wall cavity. Fill the hole with spackle or wall filler. Sand smooth after drying. This method leaves a clean surface ready for painting.
Repairing The Wall After Removal
Removing plastic nail anchors from your wall leaves behind holes and marks. Repairing these spots restores your wall’s smooth look. Follow simple steps to fix the damage quickly and easily. This helps the wall look like new again.
Filling Holes
Start by cleaning the hole and removing dust. Use a putty knife to apply wall filler or spackle. Press the filler firmly into the hole to fill it completely. Smooth the surface with the putty knife to make it even. Let the filler dry as the package instructs. Dry filler hardens and is ready for the next step.
Sanding And Painting
After the filler dries, gently sand the area with fine sandpaper. Sand until the surface feels smooth and flat. Wipe away any dust with a clean cloth. Choose paint that matches your wall color. Use a brush or roller to apply paint over the patched area. Allow the paint to dry fully before touching or hanging anything.
Preventing Future Damage
Removing plastic nail anchors can damage walls. Preventing this damage saves time and keeps walls smooth. Proper planning helps avoid common mistakes. Use the right tools and methods for best results.
Choosing the correct anchor and installing it well makes a big difference. These steps protect your walls and hold items securely.
Choosing The Right Anchor
Pick anchors based on wall type and weight needs. Drywall anchors suit light to medium loads. For heavy items, use toggle bolts or metal anchors. Use anchors that fit the screw size. Avoid oversized anchors that can crack the wall. Always check the product’s weight limit before buying. Correct anchors reduce wall damage and improve hold.
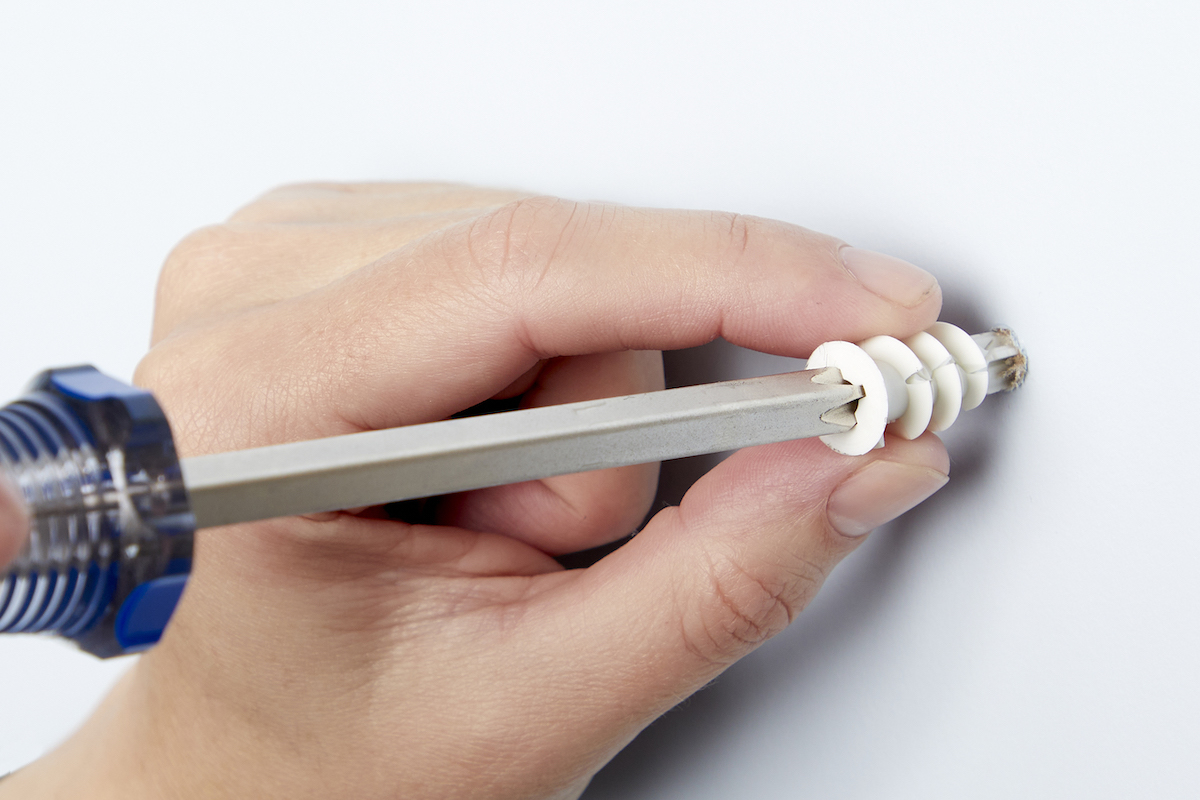
Proper Installation Tips
Drill a hole matching the anchor size exactly. Too big holes cause anchors to loosen. Insert anchors gently without forcing them. Over-tightening screws can break anchors and damage walls. Use a level to align holes properly. Secure anchors firmly but avoid excess pressure. Take your time during installation for best results.
Credit: www.bobvila.com

Credit: www.youtube.com
Frequently Asked Questions
How Do You Remove Plastic Nail Anchors From Walls?
To remove plastic nail anchors, first unscrew any attached screws. Then, gently pull the anchor out with pliers or push it through the wall if possible. Use a putty knife to minimize wall damage and fill the hole afterward for a smooth finish.
Can Plastic Anchors Damage My Wall During Removal?
Yes, plastic anchors can damage walls if removed improperly. Pulling too hard may cause drywall to crumble. Using the right tools and techniques minimizes damage. Always be gentle and consider patching any holes afterward to restore your wall’s appearance.
What Tools Are Best For Extracting Plastic Anchors?
Pliers and a putty knife are ideal for removing plastic anchors. Pliers help grip and pull the anchor, while a putty knife assists in loosening it from the wall. A screwdriver may be needed to remove any screws first.
Is It Safe To Reuse Plastic Nail Anchors?
Plastic nail anchors are generally not reusable. Removal often damages their structure, reducing holding strength. It’s better to use new anchors for a secure and safe hold when rehanging items.
Conclusion
Removing plastic nail anchors from walls can be simple with the right steps. Use gentle tools and patience to avoid wall damage. Small holes can be fixed easily with filler and paint. Taking your time helps keep your walls looking good.
Now, you can remove anchors without stress or mess. Try these tips next time you need to fix your wall.