Are you ready to upgrade your home security without the hassle of complicated tools or confusing instructions? Installing a Veise Keypad Digital Deadbolt is easier than you think, and it can give you peace of mind with just a few simple steps.
Whether you want to keep your family safer or make your daily routine smoother, this guide will walk you through the installation process clearly and quickly. Keep reading, and by the end, you’ll have your new digital deadbolt working perfectly—no stress, no confusion.
Tools And Materials Needed
Installing a Veise Keypad Digital Deadbolt needs some tools and materials. Having the right items makes the job easier and faster. You can avoid mistakes by preparing everything before starting.
Each tool has a role in the installation process. Using proper materials ensures the lock works well and stays secure. Below are the essential tools and materials you will need.
Basic Tools
A screwdriver set is a must. Both flathead and Phillips head screwdrivers are helpful. A drill with drill bits will make holes for screws and the lock. A measuring tape helps check door thickness and placement.
Materials Included With The Lock
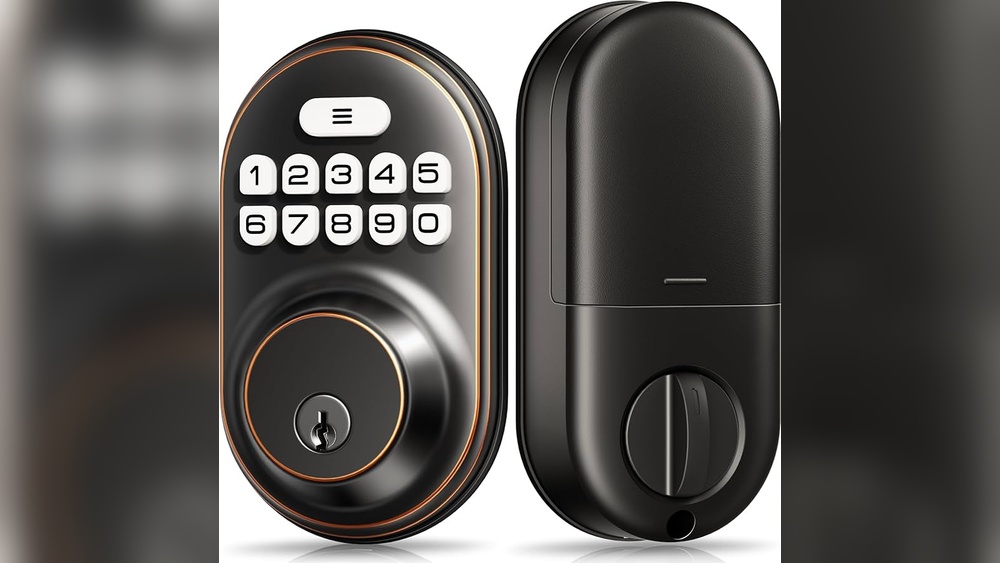
The Veise lock comes with screws, the keypad unit, and the interior lock assembly. It also includes a strike plate and mounting plate. Make sure all these parts are present before starting.
Additional Materials
You might need extra screws for thick doors. A pencil is useful for marking drill spots. Sandpaper can smooth rough edges on the door if needed. Batteries for the keypad are often included but check first.
Credit: iveise.com
Preparing The Door
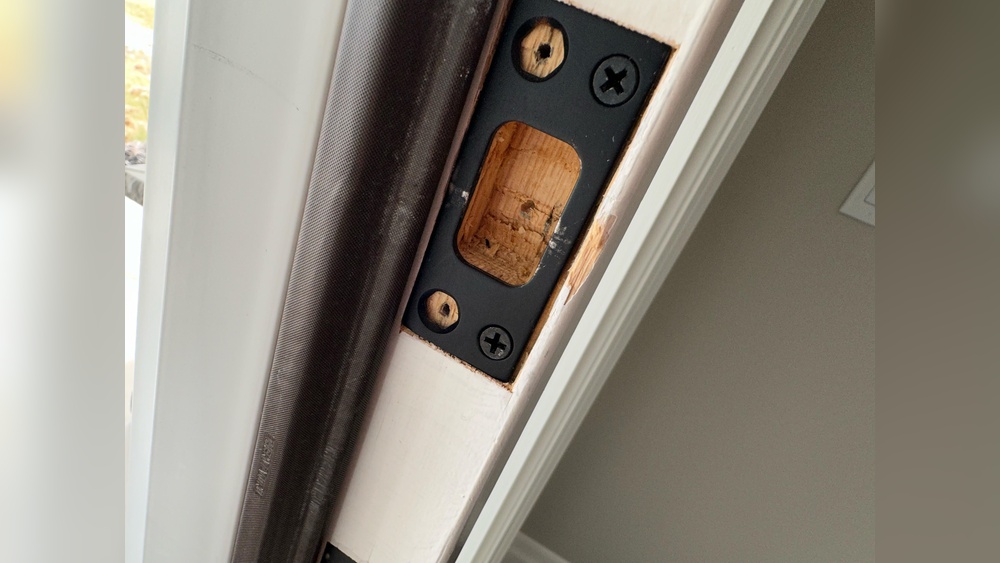
Start by removing the old deadbolt and cleaning the door edge. Check that the door fits well and the holes line up for the new lock. Make sure the surface is smooth for easy installation of the keypad deadbolt.
Before installing the Veise Keypad Digital Deadbolt, prepare the door carefully. This step ensures the lock fits well and works smoothly. Proper preparation saves time and prevents damage. Follow simple steps to get the door ready for installation.
Remove Existing Deadbolt
Start by removing the old deadbolt from your door. Use a screwdriver to take out screws on the interior side of the lock. Pull the lock apart gently to avoid damaging the door. Remove the latch from the edge of the door by unscrewing it. Keep the screws in a safe place; you may need them later. Clean the area around the lock hole to remove dirt or paint.
Check Door Compatibility
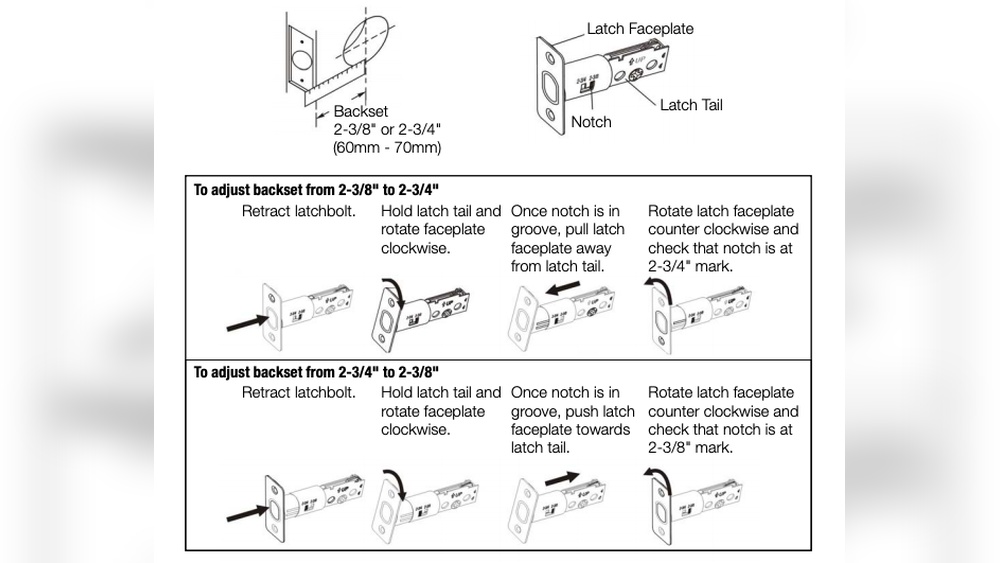
Check if your door fits the Veise keypad lock. The door should be at least 1.75 inches thick. Measure the hole where the lock will go. It should be 2 1/8 inches in diameter. The backset, or distance from the door edge to the hole center, must be 2 3/8 or 2 3/4 inches. Make sure the door edge is flat and smooth for the latch. If your door does not match these sizes, the lock may not fit properly.
Installing The Deadbolt Mechanism
Installing the deadbolt mechanism is a key step in setting up your Veise Keypad Digital Deadbolt. This part holds the lock in place and lets the bolt slide smoothly. Careful installation ensures your door locks securely and works well every time.
Follow each step closely to fit the deadbolt mechanism correctly. This process is simple but needs attention to detail to avoid any problems later.
Insert The Latch
Start by sliding the latch into the hole on the door’s edge. Make sure the slanted side of the latch faces the door frame. Push it in until it fits snugly and the faceplate rests flat against the door. Check that the latch moves freely by pressing the bolt in and out.
Secure The Latch With Screws
Use the screws provided to fasten the latch plate firmly to the door. Tighten each screw evenly, so the latch does not shift or wiggle. Avoid overtightening, which can strip the holes or crack the wood. Confirm the latch stays in place and operates smoothly before moving to the next step.
Mounting The Keypad And Exterior Assembly
Mounting the keypad and assembling the exterior parts are key steps in installing a Veise Keypad Digital Deadbolt. These steps ensure the lock works smoothly and looks neat on your door. Follow each instruction carefully to avoid damage or poor fit.
Align The Keypad
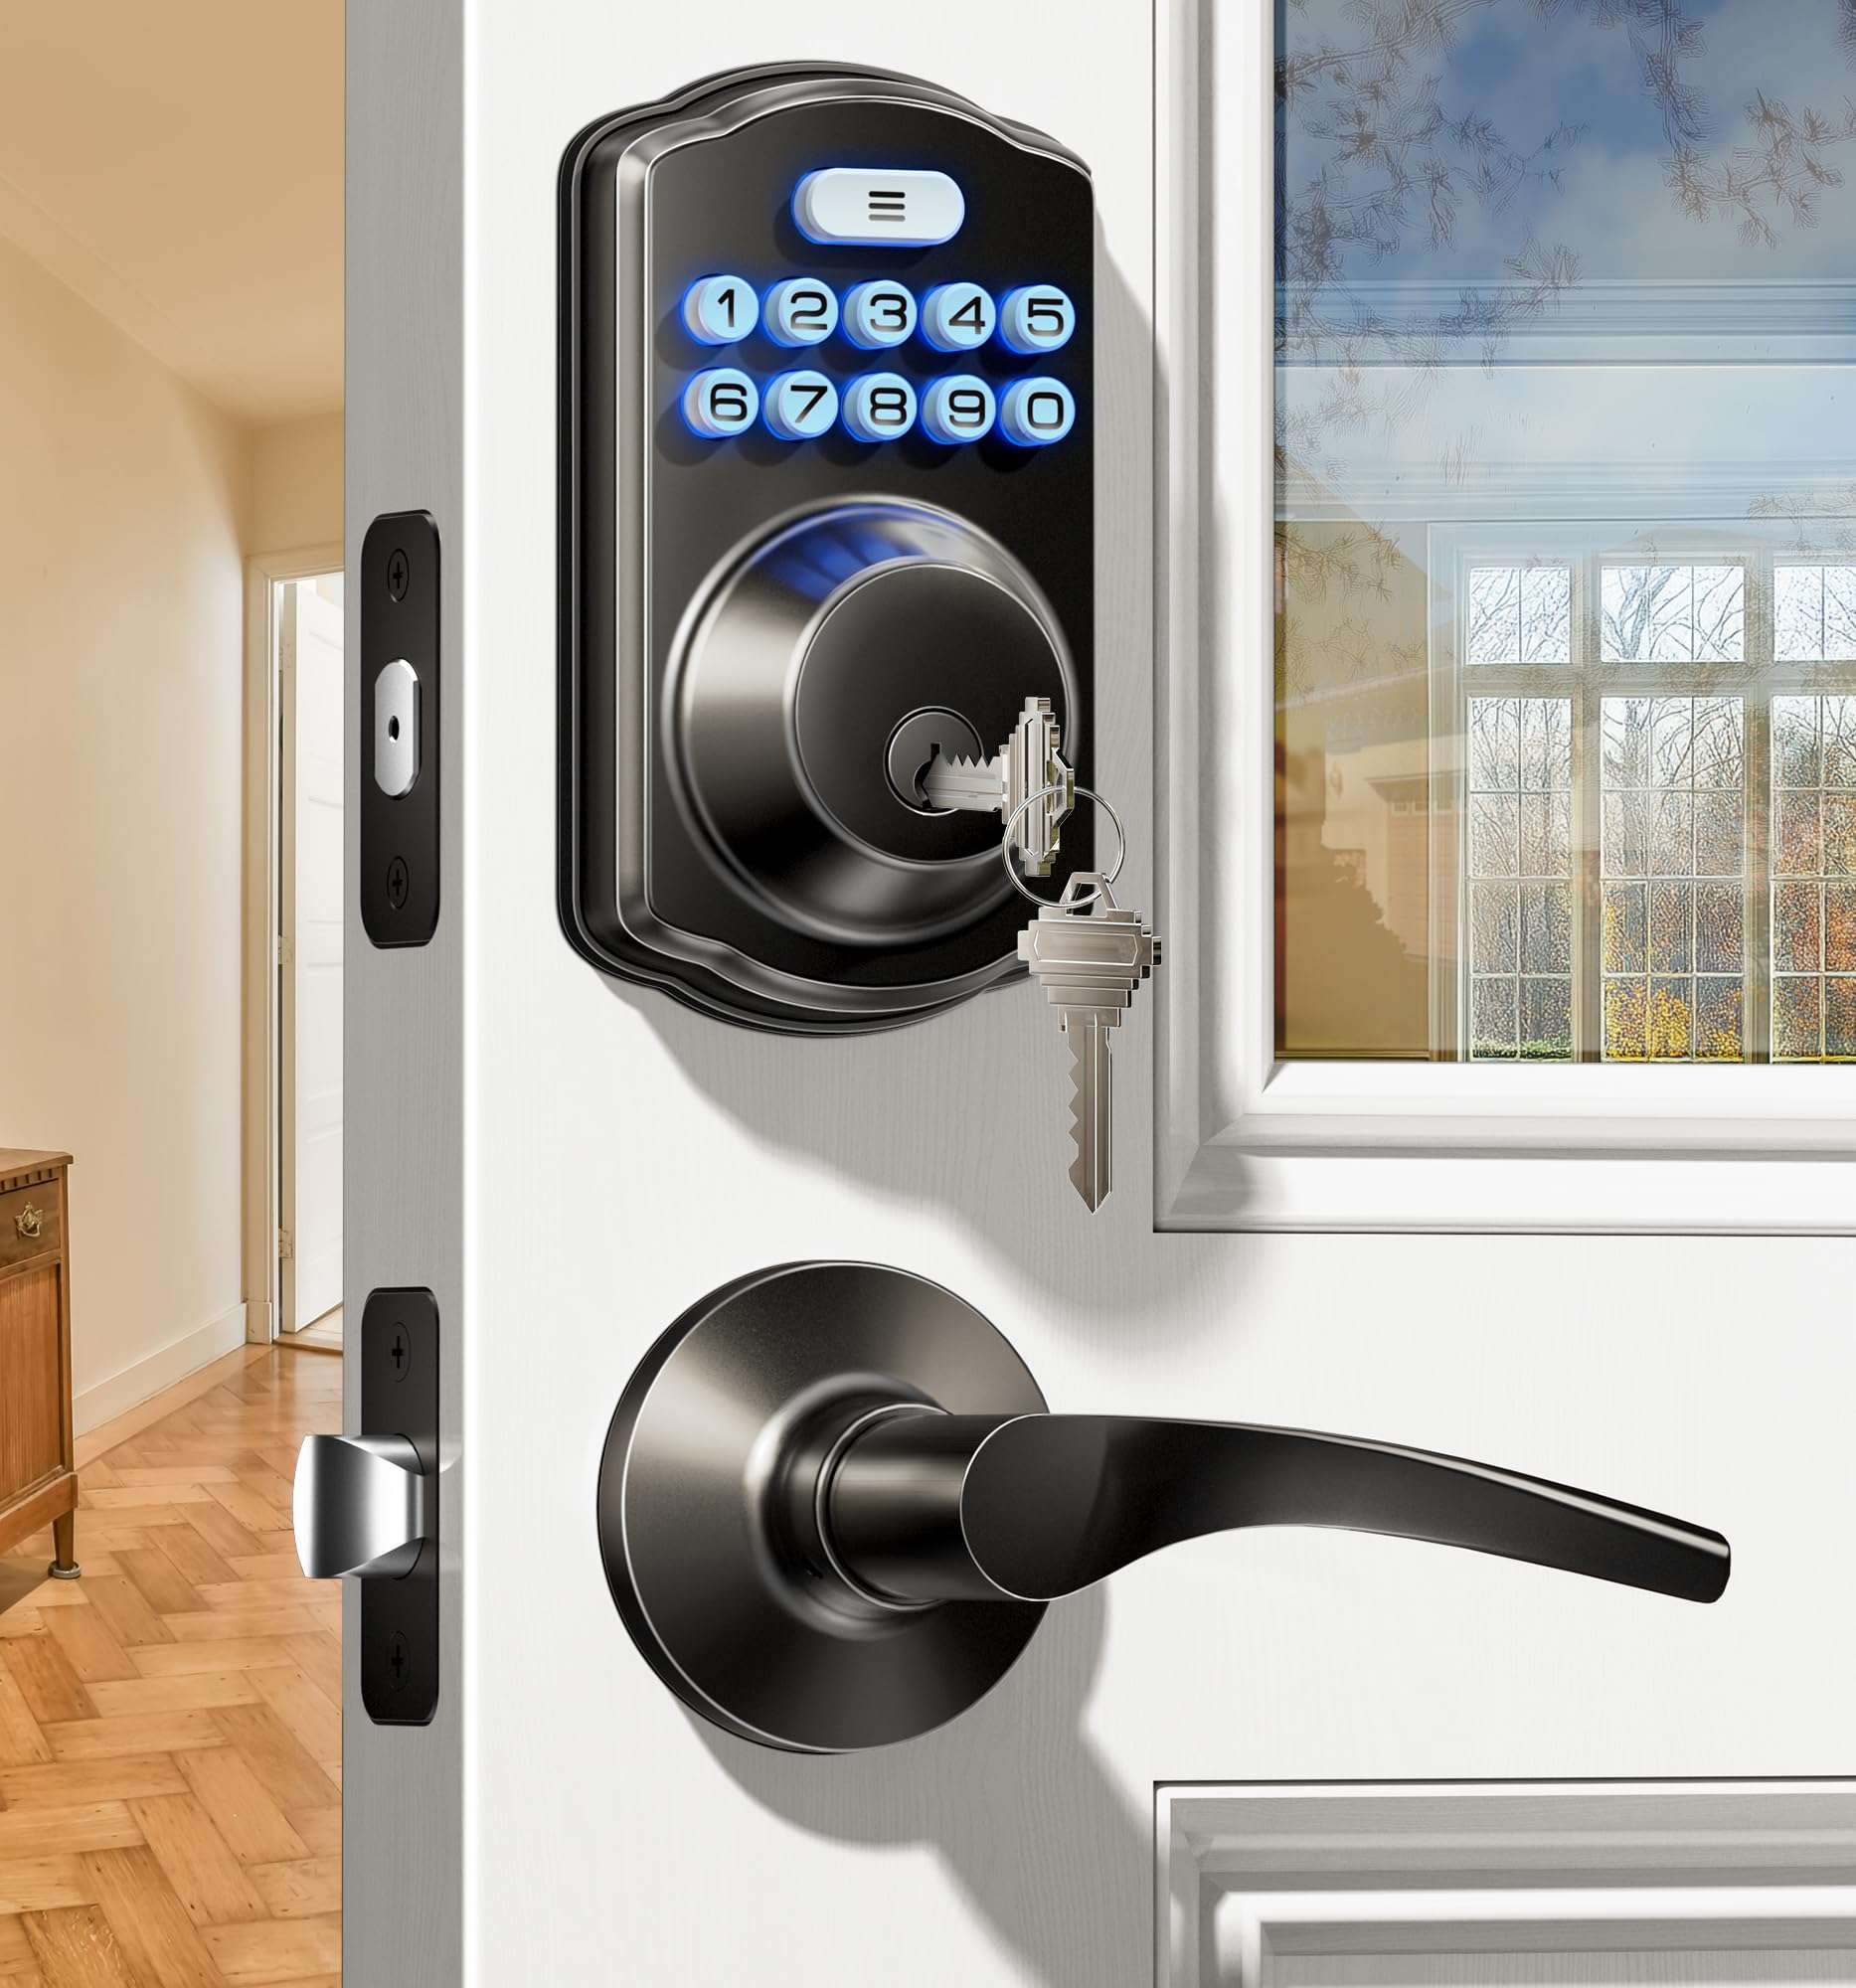
Place the keypad on the outside of the door. Check that the bolt holes line up with the door holes. The keypad should sit flat without gaps or tilts. Hold it firmly and mark the spots for screws. Proper alignment keeps the lock secure and easy to use.
Connect The Cable
Locate the cable hanging from the keypad. Insert it gently into the matching connector on the interior assembly. Make sure the plug fits snugly without forcing it. A loose or wrong connection can cause the lock to fail. After connecting, secure the keypad with screws to finish the exterior assembly.
Attaching The Interior Assembly
Attaching the interior assembly is a key step in installing your Veise Keypad Digital Deadbolt. This part holds the lock’s battery and controls the locking mechanism inside your door. Proper attachment ensures smooth operation and security.
Take your time to position the interior unit correctly. Align it with the screws and the tailpiece from the exterior keypad. Make sure the wires inside do not get pinched or twisted.
Position The Interior Unit
Hold the interior unit against the door’s inside surface. Line it up so the tailpiece fits into the slot on the unit. Check that the screw holes match the holes in the door. The wires should sit neatly through the hole without strain.
Fasten With Screws
Insert the screws into the holes and tighten them carefully. Use a screwdriver and turn clockwise until the unit feels secure. Avoid over-tightening to prevent damaging the door or the lock. The unit should be snug but not forced.

Credit: www.amazon.com
Setting Up The Batteries
Setting up the batteries is an important step in installing your Veise Keypad Digital Deadbolt. Without power, the lock will not work properly. This step is simple and quick. Follow these instructions carefully to ensure your lock functions smoothly.
Opening The Battery Compartment
Locate the battery cover on the interior side of the lock. It usually slides down or lifts off easily. Use your fingers to open it gently. Avoid using sharp tools to prevent damage.
Inserting The Batteries Correctly
Use four AA alkaline batteries for the lock. Insert each battery following the polarity marks inside the compartment. Match the plus (+) and minus (-) ends with the signs shown. This ensures proper power flow.
Closing The Battery Compartment
After inserting the batteries, put the cover back on. Slide or snap it into place firmly. Make sure it is secure so the batteries stay in position.
Testing The Battery Setup
Press any button on the keypad to check power. The lock should light up or beep. If it does not, recheck the battery placement or try fresh batteries.
Programming The Keypad
Programming the Veise Keypad digital deadbolt is simple and quick. This step lets you control who can open your door using the keypad. You start by setting a main code. Then, you add other user codes for family or friends. Follow these steps carefully to keep your home safe.
Create Master Code
First, power on the keypad by pressing the reset button. Enter the default factory code to access programming mode. Press the star () key to start creating your master code. Choose a code between 4 to 8 digits for security. Enter your new master code twice to confirm. The keypad will beep to show the code is set. This code controls all programming functions later.
Add User Codes
Enter programming mode using your master code. Press the pound () key to add a new user code. Pick a user code with 4 to 8 digits. Enter the new code and press pound () again. The keypad will beep to confirm the user code is saved. Repeat this step for each user you want to add. Each user gets a unique code to unlock the door.
Testing The Lock
Testing the Veise Keypad Digital Deadbolt is a vital step. It confirms the lock works correctly. This ensures your door stays secure and convenient to use.
Test the lock right after installation. This saves time and prevents future problems. Pay attention to how the lock responds to commands.
Check Lock And Unlock Functions
Start by locking the deadbolt manually. Turn the thumb turn or use the keypad to lock it. Ensure the bolt extends fully into the door frame.
Next, unlock the deadbolt the same way. The bolt should retract smoothly. Try both manual and keypad unlocking methods. Confirm the lock opens without resistance.
Test Keypad Response
Press each button on the keypad one by one. Check if the buttons respond quickly and clearly. Enter your access code carefully. The lock should unlock immediately after the correct code.
Try entering a wrong code to test security. The lock should not open or react to incorrect entries. This confirms the keypad’s security features function well.
Troubleshooting Common Issues
Troubleshooting common issues helps keep your Veise Keypad Digital Deadbolt working smoothly. Problems can happen anytime, but many have simple fixes. Quick solutions can save time and avoid frustration. Let’s explore some frequent problems and how to solve them.
Battery Problems
Low battery power often causes lock failure. Replace batteries with fresh ones regularly. Use the recommended battery type for best results. Check battery contacts for dirt or corrosion. Clean contacts gently if needed. Always test the lock after changing batteries.
Lock Jamming
Jamming happens when the deadbolt does not move smoothly. Check for dirt or debris in the lock mechanism. Clean the bolt and surrounding parts carefully. Avoid using oil-based lubricants; use graphite powder instead. Make sure the lock aligns properly with the door frame.
Keypad Not Responding
The keypad might stop working due to power or connection issues. Confirm the batteries are installed correctly. Reset the lock by pressing the reset button if available. Check for any damage to the keypad surface. Keep the keypad clean and dry for proper function.

Credit: iveise.com
Frequently Asked Questions
How Do I Install A Veise Keypad Digital Deadbolt?
To install, first remove your old deadbolt. Align the new lock with your door holes. Secure screws tightly. Insert batteries. Follow keypad setup instructions carefully for programming codes.
What Tools Are Needed For Installation?
You typically need a screwdriver, drill, and measuring tape. A pencil helps mark holes. Most kits include necessary screws and templates. Check your Veise manual for any specific tools.
How To Program The Veise Digital Deadbolt Keypad?
After installation, press the programming button inside the lock. Enter your master code. Follow prompts to add or delete user codes. Test each code to ensure proper access.
Can I Install The Deadbolt On Any Door Type?
Veise digital deadbolts fit standard door thicknesses, usually 1-3/8 to 2 inches. Suitable for wood and metal doors. Always confirm your door dimensions before purchasing.
Conclusion
Installing a Veise Keypad Digital Deadbolt is simple and quick. Follow each step carefully for best results. Make sure the lock fits your door properly. Test the keypad and locking mechanism after installation. Enjoy the added security and convenience it provides.
Keep your user manual nearby for future reference. This upgrade helps protect your home easily. Feel confident in your ability to install the lock yourself. A secure home starts with a strong deadbolt.