Are you tired of struggling to hang shelves, pictures, or fixtures securely on your walls? Knowing how to hammer an anchor into the wall correctly can make all the difference between a sturdy hold and a costly mess.
In this guide, you’ll discover simple, step-by-step tips that anyone can follow—no matter your experience level. By the end, you’ll have the confidence to tackle your wall projects with ease and keep your items firmly in place. Ready to learn the trick to a perfect wall anchor every time?
Let’s get started!
Choosing The Right Anchor
Choosing the right anchor is key to a strong, safe hold in your wall. The right anchor stops damage and keeps things secure. Different tasks need different anchors. Picking carefully helps your project last longer and stay steady.
Types Of Hammer Anchors
Hammer anchors come in many types. Some are metal, some plastic. Drop-in anchors sit flush with the wall. Sleeve anchors expand inside the hole for a tight fit. Wedge anchors hold well in concrete. Choose the type that fits your wall and job.
Material Compatibility
Match the anchor to your wall material. Drywall needs different anchors than concrete or brick. Metal anchors work best in concrete or brick. Plastic anchors suit drywall and hollow walls. Using the right material keeps the anchor strong and stable.
Weight And Load Considerations
Think about the weight your anchor must hold. Heavy items need strong anchors. Light items can use smaller anchors. Check the anchor’s weight rating. Use anchors that support more than your item’s weight. This prevents accidents and damage.
Tools And Materials Needed
Before you start hammering anchors into a wall, gather the right tools and materials. This ensures the job goes smoothly and safely. Using the correct items makes the process easier and prevents damage to your wall.
Below are the key tools and materials needed for this task.
Hammer And Drill
A hammer is essential to drive the anchor into the wall. Choose one with a comfortable grip and enough weight.
You also need a drill to make a pilot hole. This helps the anchor fit tightly and stay secure. Use a drill bit that matches the anchor size for the best fit.
Measuring Tools
Measuring tools help mark the exact spot for the anchor. A tape measure or ruler works well.
Mark the wall with a pencil before drilling. Accuracy prevents mistakes and ensures proper placement.
Safety Gear
Wear safety glasses to protect your eyes from dust and debris.
Use gloves to guard your hands while handling tools. Safety is important to avoid injuries during the task.
Preparing The Wall
Preparing the wall is the first step to hammering an anchor correctly. This stage ensures the anchor fits well and holds securely. Proper preparation prevents damage and makes installation easier. Follow these simple steps to get the wall ready.
Locating The Spot
Find the exact place where the anchor will go. Choose a spot that can hold weight safely. Avoid weak or cracked areas on the wall. Use a level to keep the spot straight and even.
Marking Drill Points
Mark the points clearly for drilling. Use a pencil for precise marks on the wall. Check the size of the anchor to match the drill bit. Mark all points carefully to avoid mistakes.
Checking For Obstructions
Check inside the wall for wires or pipes. Use a stud finder or similar tool. Avoid drilling into electrical wires or plumbing. Clear space keeps you safe and prevents damage.
:max_bytes(150000):strip_icc()/how-to-use-and-discard-anchor-screws-1822671-Final-ec8091ccf65241b1b1f888549f25003a.jpg)
Credit: www.thespruce.com
Drilling The Hole
Drilling the hole is the first step in hammering an anchor into the wall. It creates space for the anchor to fit tightly. A clean, precise hole helps the anchor hold strong. This part needs care and the right tools. The size of the drill bit and the wall type affect the drilling process.
Selecting The Drill Bit Size
Choose a drill bit that matches the anchor size exactly. Too small, and the anchor will not fit. Too big, and the anchor will be loose. Check the anchor package for the recommended drill bit size. Use a sharp drill bit for easier drilling.
Drill Techniques For Different Walls
For drywall, drill slowly to avoid making large holes. For concrete or brick, use a hammer drill for better results. Apply steady pressure without pushing too hard. For plaster walls, drill gently to prevent cracks.
Ensuring Clean Holes
Remove dust and debris after drilling. Use a small brush or blow into the hole. A clean hole helps the anchor grip better. Avoid rough or uneven holes to prevent anchor failure.
Installing The Hammer Anchor
Installing a hammer anchor is a simple task that makes wall mounting secure. This process helps fix objects firmly to concrete or brick walls. Follow clear steps for a strong hold.
Positioning The Anchor
Start by marking the exact spot on the wall. Use a pencil or marker for precision. Ensure the spot is clean and free of dust. Proper positioning prevents anchor slipping.
Hammering Techniques
Hold the anchor straight against the wall. Use a hammer to tap it gently at first. Gradually increase force to avoid bending the anchor. Drive it until the collar is flush with the wall.
Checking Anchor Stability
After installation, test the anchor’s firmness. Pull it lightly to check if it moves. A stable anchor will stay tight and secure. If loose, remove and try again at the same spot.

Credit: www.picturehangsolutions.com
Securing The Fixture
Securing the fixture is a key step after hammering the anchor into the wall. This step makes sure the item you want to hang stays safe and steady. Proper securing avoids damage to your wall and keeps the fixture from falling.
Follow simple steps to attach bolts or screws correctly. Then tighten carefully to prevent harm. Finally, check the stability to be sure everything holds well.
Attaching Bolts Or Screws
Start by choosing bolts or screws that fit the anchor size. Insert them gently into the anchor hole. Use your hand to turn them a little at first. This helps avoid cross-threading and keeps the anchor steady.
Tightening Without Damage
Use a screwdriver or wrench to tighten slowly. Stop if you feel strong resistance. Over-tightening can crack the wall or strip the anchor. Tighten just enough to hold the fixture firmly in place.
Final Stability Check
After tightening, test the fixture by gently shaking it. If it moves or feels loose, tighten a bit more. If it stays solid, the job is done. A stable fixture means safe and long-lasting support.
Common Mistakes To Avoid
Hammering an anchor into a wall might seem simple. Yet, many people make mistakes that cause weak holds or damage. Avoiding common errors improves safety and strength. Here are key mistakes to watch out for.
Incorrect Anchor Size
Choosing the wrong anchor size is a frequent error. Too small anchors will not hold heavy items. Too large anchors can crack the wall or not fit properly. Always match anchor size to the weight and wall type.
Improper Drilling Depth
Drilling too shallow stops the anchor from fitting fully. Drilling too deep weakens the wall and wastes effort. Measure the anchor length before drilling. Drill only as deep as needed for a tight fit.
Over-hammering
Hammering too hard can break the anchor or wall. It may also bend the anchor and reduce grip. Tap gently and steadily until the anchor is flush with the wall surface. Let the anchor do its job without forcing it.
Tips For Long-lasting Fixings
Ensuring your hammer anchors last long is essential for strong, safe fixings. Proper care and attention can prevent damage and keep anchors secure. Follow these simple tips to extend the life of your wall fixings.
Regular Inspections
Check your anchors often for signs of wear or damage. Look for cracks, rust, or looseness. Early detection helps avoid failures and costly repairs. Tighten any loose fixings to keep them firm.
Using Protective Coatings
Apply a protective coating to metal anchors to prevent rust. Use paint or a rust-resistant spray. This layer shields the anchor from moisture and corrosion. It helps maintain strength over time.
Avoiding Overloading
Do not exceed the weight limit of your anchors. Overloading can cause anchors to pull out or break. Know the maximum load for each fixing type. Distribute weight evenly for better support.
:max_bytes(150000):strip_icc()/how-to-use-and-discard-anchor-screws-1822671-002-01-034c777d5b054419be8c2fdc26b34bed.jpg)
Credit: www.thespruce.com
Frequently Asked Questions
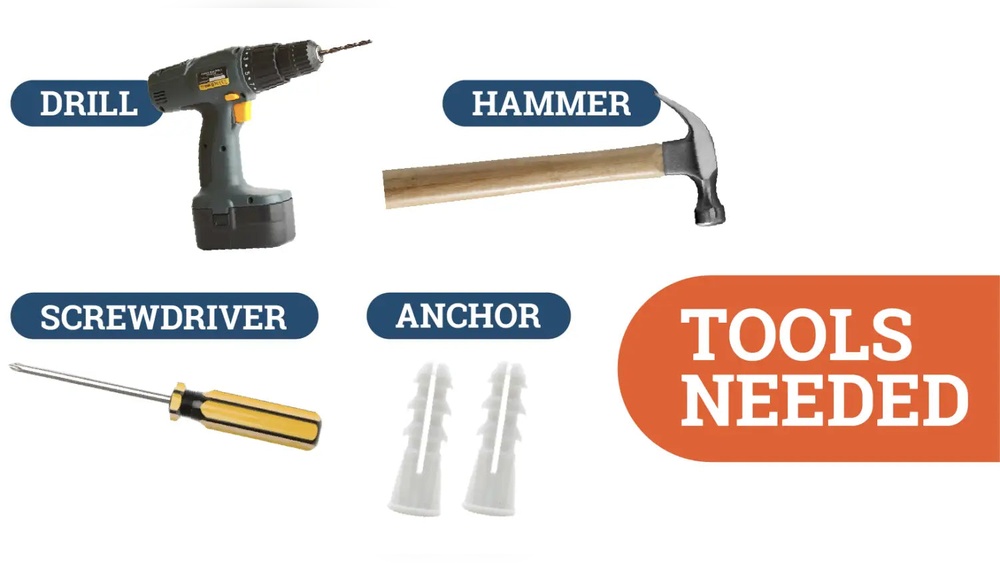
What Tools Do I Need To Hammer Anchor Into Wall?
You need a hammer, anchor, drill, and screwdriver. A drill creates the hole, and the hammer drives the anchor. A screwdriver helps tighten screws into the anchor for secure fastening.
How Deep Should I Drill Before Hammering Anchor?
Drill a hole slightly deeper than the anchor length. This ensures the anchor fits fully inside the wall. Proper depth provides a strong hold and prevents damage to the wall.
Can I Hammer Anchor Into Drywall Safely?
Yes, but use anchors designed for drywall. Plastic expansion anchors or toggle bolts work best. Avoid hammering standard anchors directly into drywall to prevent wall damage and weak support.
How Do I Know If Anchor Is Securely Hammered?
The anchor should sit flush with the wall surface. It must feel tight and stable when you gently wiggle it. A secure anchor prevents screws from loosening or pulling out.
Conclusion
Hammering an anchor into a wall is simple with the right steps. Choose the correct anchor size and type for your wall. Mark the spot and drill a proper hole before hammering. Tap the anchor gently until it fits snugly.
Check that it holds firm and straight. This method helps secure objects safely and strongly. Practice these tips to feel more confident with wall anchors. Small efforts bring good results. Keep tools ready and stay patient. You can do this!