Are you struggling to remove those stubborn butterfly wall anchors from your walls? You’re not alone.
These anchors hold tight, making it tricky to get them out without damaging your wall. But don’t worry—removing them doesn’t have to be a headache. You’ll discover simple, step-by-step methods that anyone can follow to safely and easily remove butterfly wall anchors.
Keep reading, and you’ll have your walls looking smooth and ready for your next project in no time.

Credit: www.hgtv.com
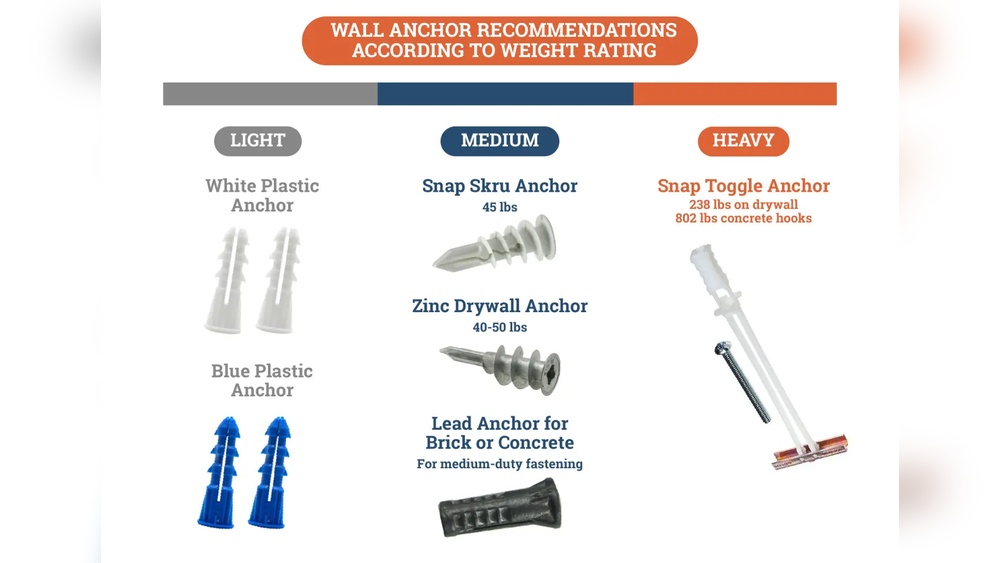
Types Of Butterfly Anchors
Butterfly wall anchors come in different types. Each type has unique features for various wall materials and weights. Knowing the types helps in choosing the right anchor and removing it properly.
Common Materials
Butterfly anchors are usually made from metal or plastic. Metal anchors are strong and used for heavy items. Plastic ones suit lighter objects and drywalls. Steel is a popular metal choice for durability. Nylon plastic offers flexibility and resistance to cracking. The material affects how the anchor grips the wall and how easy it is to remove.
Design Variations
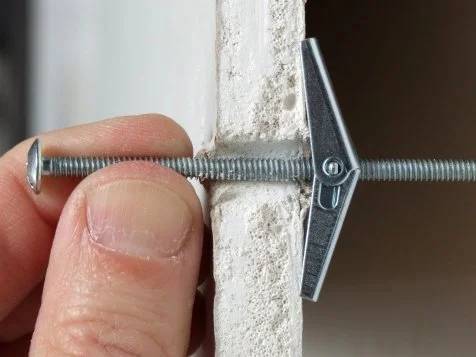
Butterfly anchors have different shapes and sizes. Some have wide wings that spread behind the wall for better hold. Others feature a narrower design for tight spaces. Some anchors include screws, while others need separate screws. The wing design can be fixed or spring-loaded. These differences impact removal methods and the tools needed.
Credit: www.hgtv.com
Tools Needed For Removal
Removing butterfly wall anchors requires the right tools. Using proper tools makes the process easier and safer. This section covers basic hand tools and power tools options needed for removal.
Basic Hand Tools
Start with simple hand tools for small or easy jobs. A flathead screwdriver helps to pry the anchor gently. Needle-nose pliers grip and pull the anchor out carefully. A putty knife can push the anchor inside if pulling is tough. These tools are affordable and easy to find. They work well on drywall and light materials.
Power Tools Options
Power tools speed up the removal for tough anchors. A drill with a screwdriver bit can loosen stuck anchors quickly. Use a rotary tool with a cutting attachment to trim the anchor flush with the wall. Be cautious to avoid damaging the wall surface. Power tools require more care but save time on bigger projects.
Preparation Before Removal
Before removing butterfly wall anchors, proper preparation is key. Taking time to prepare helps avoid damage and keeps you safe. It also makes the removal process smoother and faster.
Clearing The Area
Start by removing objects near the anchor. Clear furniture, decorations, and fragile items. This prevents accidental damage or breakage. A clean workspace gives you room to work comfortably.
Lay down a drop cloth or old towel under the wall anchor. It catches dust and small debris. This keeps your floor clean and makes cleanup easier after removal.
Safety Precautions
Wear safety glasses to protect your eyes from dust and debris. Use gloves to protect your hands from sharp edges. Ensure good lighting so you can see clearly while working.
Use the right tools for the job. Avoid using excessive force to prevent wall damage. Take breaks if you feel tired to stay focused and safe.

Credit: www.youtube.com
Method 1: Manual Extraction
Removing butterfly wall anchors can be simple with the right approach. Manual extraction is a common method that works well for many types of walls. This technique uses basic tools and careful handling to avoid wall damage. Follow these steps to remove the anchor safely and easily.
Loosening The Anchor
Start by loosening the anchor inside the wall. Use a screwdriver to turn the anchor slightly. This helps to reduce the grip of the wings behind the wall. Gently wiggle the anchor back and forth to free it. Avoid forcing it, as this can cause damage.
Pulling It Out Gently
Once loosened, pull the anchor out slowly. Use pliers for a better grip if needed. Pull straight out to keep the hole clean and neat. If the anchor resists, loosen it more before trying again. Stop if you feel strong resistance to protect your wall.
Method 2: Using Pliers
Method 2: Using pliers offers a simple way to remove butterfly wall anchors. This tool gives a strong grip and helps pull the anchor out carefully. It works well for anchors that do not come out easily by hand. Follow the right steps to avoid damage to your wall and make the process smooth.
Gripping Techniques
Start by choosing pliers with a good grip. Needle-nose or slip-joint pliers work best. Hold the anchor’s metal wings firmly but gently. Squeeze the pliers just enough to keep a steady hold without crushing the anchor. Pull the anchor straight out to avoid bending or breaking it. Small, steady tugs work better than sudden force.
Avoiding Wall Damage
Protect your wall by pulling the anchor slowly. Avoid twisting or jerking motions. Keep the pliers close to the wall surface to limit pressure on drywall. Use a piece of cloth between pliers and wall to prevent scratches. If the anchor feels stuck, try loosening it slightly before pulling again. This reduces risk of wall cracks or holes.
Method 3: Drill And Screw Removal
Method 3: Drill and Screw Removal is a practical way to take out butterfly wall anchors. This method uses a drill to break or loosen the anchor. It works well for anchors stuck deep inside the wall. The process needs a bit of care to avoid wall damage. Follow the steps below to remove the anchor cleanly and prepare the hole for repairs.
Drilling Out The Anchor
Start by choosing a drill bit slightly smaller than the anchor’s width. This helps avoid making the hole bigger. Drill slowly into the center of the anchor. The goal is to weaken or break the anchor inside the wall. Stop once the anchor feels loose or breaks apart. Do not push too hard to protect the wall surface. After drilling, pull out the anchor pieces with pliers. If the anchor does not come out easily, drill a bit more.
Cleaning The Hole
After removing the anchor, clean the hole well. Use a vacuum or a small brush to remove dust and debris. Cleaning helps new filler or patch stick better. Check the hole size and smooth any rough edges. This step ensures a neat surface for repairs. Once clean, the hole is ready for filling or new anchors.
Repairing Wall After Removal
Removing butterfly wall anchors often leaves holes or marks on your wall. Repairing these spots restores the wall’s smooth look. This step improves your room’s overall appearance.
Fixing the wall is simple with a few basic materials. Take your time for a neat finish.
Filling Holes
Start by cleaning dust from the holes. Use a putty knife to apply wall filler. Press the filler firmly into each hole. Smooth the surface to match the wall. Let the filler dry completely before moving on.
Sanding And Painting
Once dry, sand the filled area gently. Use fine-grit sandpaper for a smooth finish. Remove dust with a clean cloth. Choose paint that matches your wall color. Apply paint in thin, even coats. Allow each coat to dry before adding more.
Tips To Prevent Wall Damage
Removing butterfly wall anchors can cause holes or cracks in walls. Protecting your wall during removal keeps it smooth and clean. Use careful methods to avoid extra damage. Follow these tips to keep your wall intact while removing anchors.
Slow And Steady Removal
Pull out the anchor gently. Quick force can tear the wall surface. Take your time to ease the anchor out slowly. Small, steady tugs reduce risk of damage. Patience helps keep the wall safe and undamaged.
Using Proper Tools
Use the right tools for removing butterfly anchors. Needle-nose pliers grip the anchor firmly. A flathead screwdriver can help pry it out carefully. Avoid tools that might dig or scratch the wall. Proper tools make the process smooth and less harmful.
Frequently Asked Questions
What Tools Are Needed To Remove Butterfly Wall Anchors?
To remove butterfly wall anchors, you need pliers, a screwdriver, and a utility knife. These tools help grip, unscrew, and cut around the anchor for easier removal.
Can Butterfly Anchors Be Removed Without Damaging The Wall?
Yes, carefully pulling the anchor with pliers while gently prying can minimize wall damage. Using a utility knife to cut around the anchor also helps prevent tearing.
How Do I Patch The Wall After Removing Anchors?
Fill the hole with spackle or wall filler, then sand smooth after drying. Finally, repaint the area to match the wall for a seamless finish.
Are Butterfly Wall Anchors Reusable After Removal?
No, butterfly anchors usually deform during removal and cannot be reused. It’s best to replace them with new anchors for secure mounting.
Conclusion
Removing butterfly wall anchors does not have to be hard. Use the right tools for safe and easy work. Take your time and be gentle to avoid wall damage. After removal, fill holes for a smooth finish. Clean the area well before painting or decorating.
With careful effort, your wall will look as good as new. Trust the process and stay patient throughout the task. You can handle this project without stress or extra help.