Have you ever needed to remove anchors from a concrete wall but didn’t know where to start? It can feel frustrating and tricky, especially if you want to avoid damaging your wall.
But don’t worry—removing anchors doesn’t have to be a headache. In this guide, you’ll learn simple, step-by-step methods to get the job done cleanly and safely. Keep reading, and you’ll discover easy tips that save you time, effort, and stress.
Your concrete wall will look just like new again!
Types Of Concrete Anchors
Concrete anchors hold objects firmly to concrete walls. Different types suit different needs. Understanding these types helps in safe removal and replacement.
Expansion Anchors
Expansion anchors work by expanding inside the drilled hole. They grip the concrete tightly. These anchors are common in light to medium loads.
They often have a cone-shaped end. Tightening the bolt pushes this cone, causing expansion. This creates a strong hold in the wall.
Sleeve Anchors
Sleeve anchors consist of a bolt and a metal sleeve. When tightened, the sleeve expands against the hole walls. This makes them strong and reliable.
They are suitable for heavy-duty applications. They work well in cracked or solid concrete. Removal can be tricky due to their tight grip.
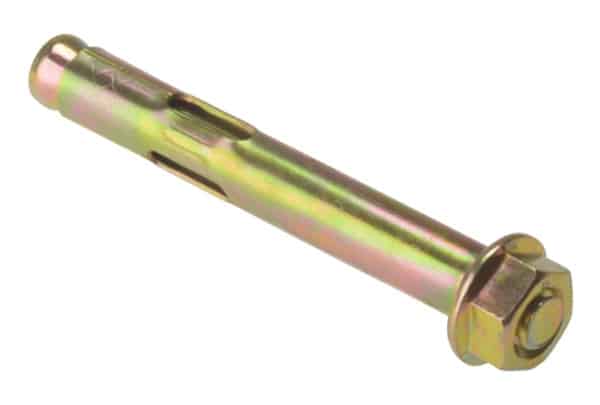
Wedge Anchors
Wedge anchors use a wedge-shaped end to hold in place. They fit into pre-drilled holes. Tightening pulls the wedge into the anchor body, expanding it.
These anchors offer high strength. They are ideal for heavy loads and outdoor use. Removing wedge anchors often requires drilling out.
Adhesive Anchors
Adhesive anchors use a special glue inside the hole. The bolt or rebar is inserted into the adhesive. The glue hardens, bonding the anchor to concrete.
They provide very strong hold in many conditions. Suitable for irregular or weak concrete surfaces. Removal involves cutting or drilling through the hardened adhesive.
Tools Needed For Anchor Removal
Removing anchors from a concrete wall needs the right tools. Using proper tools makes the job easier and safer. These tools help you remove anchors without damaging the wall. Below are the key tools you need for anchor removal.
Hammer And Chisel
A hammer and chisel work well to loosen anchors. The chisel fits around the anchor’s edge. Tap it gently with the hammer. This helps break the bond between the anchor and concrete. Use steady, controlled hits for best results. This method works best for smaller anchors.
Drill And Bits
A drill with the right bits helps remove stubborn anchors. Use a drill bit sized for the anchor hole. Drill into the anchor carefully. This can loosen or break the anchor inside the wall. Choose bits made for concrete or masonry for best performance. Always keep the drill steady to avoid wall damage.
Pliers And Wrenches
Pliers and wrenches help pull out anchors after loosening. Grip the anchor firmly with pliers or a wrench. Twist or pull the anchor out slowly. This tool set works best for anchors with exposed heads. Avoid using too much force to prevent breaking the anchor.
Safety Gear
Safety gear protects you during anchor removal. Wear safety goggles to protect your eyes. Use gloves to guard your hands. A dust mask helps avoid breathing concrete dust. Wear ear protection if using loud power tools. Safety gear is a must for a safe work environment.
Removing Expansion And Sleeve Anchors
Removing expansion and sleeve anchors from a concrete wall requires care and the right method. These anchors hold tightly, but they can be removed without much damage to the wall. Choosing the correct removal technique depends on the type of anchor and the tools you have.
Expansion anchors expand inside the hole, gripping the concrete firmly. Sleeve anchors work by expanding a sleeve against the hole walls. Both need different approaches to remove them cleanly.
Loosening With Pliers
Start by trying to loosen the anchor with pliers. Grip the anchor head firmly. Twist it back and forth to break the hold inside the hole. This method works best for anchors that are slightly loose or have a visible head. Avoid forcing the pliers too hard to prevent damage.
Using A Hammer And Chisel
Place a chisel at the base of the anchor. Tap gently with a hammer to push the anchor inward. This loosens the grip inside the concrete. Repeat tapping around the anchor to ease it out. This works well for anchors that do not turn easily.
Drilling Out The Anchor
Choose a drill bit slightly smaller than the anchor diameter. Drill into the center of the anchor carefully. This breaks the anchor into pieces inside the hole. Remove the remaining parts with pliers or a punch. Drilling is the most effective for stuck or rusted anchors.
Credit: blog.qrfs.com
Removing Wedge Anchors
Removing wedge anchors from a concrete wall needs care and the right steps. Wedge anchors hold tightly, so patience is key. Follow simple methods to get them out without damage.
Unscrewing The Nut
Start by turning the nut counterclockwise. Use a wrench that fits well. This loosens the nut and may release the anchor. Sometimes the nut comes off easily. If tight, try applying some lubricant first.
Tapping Out The Anchor
After removing the nut, tap the anchor out gently. Use a hammer and a punch or a similar tool. Place the punch on the anchor’s end. Tap lightly to push it back through the hole. Avoid hitting too hard to prevent wall damage.
Drilling For Stubborn Anchors
If the anchor won’t budge, drill it out carefully. Use a drill bit the same size as the anchor. Drill slowly to avoid cracking the concrete. Clear dust often to keep the hole clean. This method helps remove stuck anchors safely.
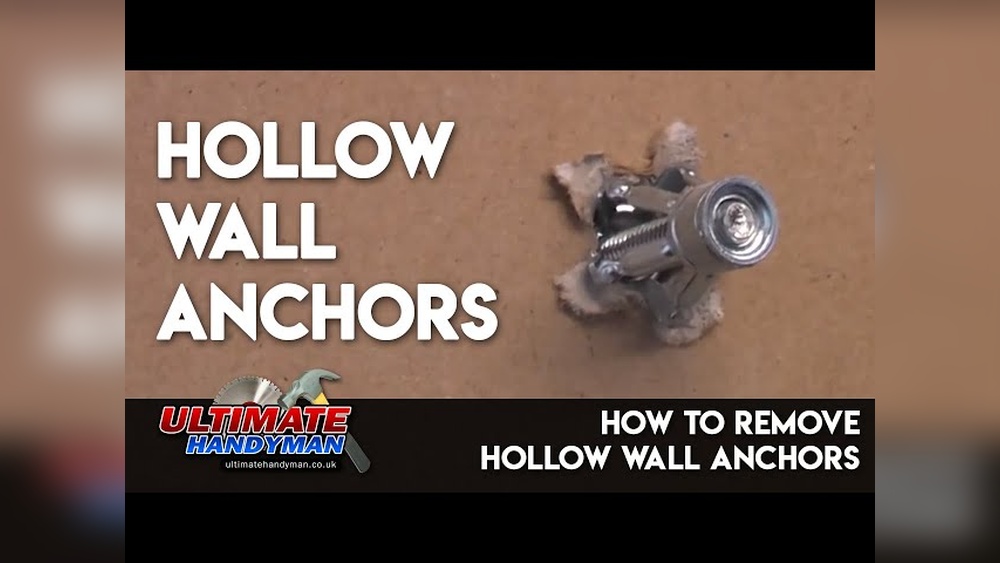
Removing Adhesive Anchors
Removing adhesive anchors from a concrete wall can be tricky. These anchors stick firmly with strong glue. The removal process needs care to avoid wall damage. Follow these simple steps to clear the anchor safely.
Applying Heat
Heat softens the glue holding the adhesive anchor. Use a heat gun or a hairdryer for this step. Hold the heat source close to the anchor. Move it slowly around the anchor’s base. Heat for about 5 to 10 minutes. The glue will become softer and easier to remove.
Drilling Out The Adhesive
After heating, use a drill with a masonry bit. Start drilling slowly into the center of the anchor. The goal is to break the glue bond inside the hole. Drill carefully to avoid damaging the wall. Remove any loose pieces of anchor or glue as you drill.
Cleaning The Hole
Clear out the remaining glue and debris from the hole. Use a wire brush or a vacuum cleaner. Make sure the hole is clean and smooth. A clean hole is ready for new anchors or repairs. Proper cleaning improves the hold of new adhesives or fillers.

Credit: www.youtube.com
Repairing Concrete After Anchor Removal
Removing anchors from a concrete wall often leaves holes and rough spots. Repairing these areas is key to restoring the wall’s strength and appearance. Proper repair prevents water damage and keeps the wall looking neat. Follow clear steps to fill, smooth, and finish the surface.
Filling Holes With Patch
Start by cleaning the holes and removing dust. Use a concrete patch or filler made for walls. Apply the patch with a putty knife, pressing it firmly inside the hole. Overfill slightly to cover the surface fully. Let the patch dry as the product instructions say.
Sanding And Smoothing
After the patch dries, sand the area with medium-grit sandpaper. Smooth out bumps and rough edges carefully. Check that the patched area matches the wall’s surface level. Use a finer sandpaper for a polished finish. This step helps the repair blend with the wall.
Painting And Finishing
Choose paint that matches your concrete wall color. Apply primer first to help paint stick well. Use a small brush or roller for even coverage. Paint over the patched area and blend the edges. Let the paint dry fully before touching or hanging anything on the wall.
Safety Tips During Anchor Removal
Removing anchors from a concrete wall needs care. Safety is key to avoid injury. Follow these tips to stay safe and finish the job well.
Wearing Protective Gear
Always wear safety glasses to protect your eyes. Concrete dust and small chips can fly during removal. Use gloves to protect your hands from sharp edges and tools. Wear a dust mask to avoid breathing harmful particles. Closed-toe shoes help protect your feet from falling debris.
Handling Tools Properly
Use the right tool for the anchor type. Hold tools firmly to avoid slips. Keep your work area clear to prevent trips. Turn off power tools when not in use. Follow the tool instructions carefully to avoid accidents.
Working In A Well-ventilated Area
Concrete dust can harm your lungs. Work near open windows or outdoors if possible. Use fans to move fresh air around. Avoid working in small, closed spaces. Good airflow reduces dust buildup and keeps air clean.

Credit: www.youtube.com
Frequently Asked Questions
How Do You Safely Remove Anchors From Concrete Walls?
To safely remove anchors, first loosen them with a wrench or screwdriver. Use pliers to pull out the anchor carefully. Avoid damaging the wall by applying steady, gentle force. If stuck, drill around the anchor to loosen it before removal.
What Tools Are Needed To Remove Concrete Wall Anchors?
Common tools include a hammer, screwdriver, pliers, wrench, and a drill with a masonry bit. These help loosen and extract anchors without damaging the concrete. Using the right tools ensures a smooth, efficient removal process.
Can I Repair Holes After Anchor Removal In Concrete?
Yes, you can repair holes with concrete patch or epoxy filler. Clean the hole, apply the patch, and smooth the surface. Allow it to dry completely before painting or drilling new anchors. Proper repair maintains wall strength and appearance.
Why Are Some Anchors Difficult To Remove From Concrete?
Anchors may be stuck due to corrosion, expansion, or improper installation. Over time, concrete can grip the anchor tightly. Using the right tools and techniques helps loosen them without damaging the wall.
Conclusion
Removing anchors from a concrete wall is easier than it seems. Use the right tools and follow clear steps. Take your time and work carefully to avoid damage. Small repairs after removal keep the wall smooth and strong. Practice makes the process faster and cleaner.
This simple task saves money and keeps your space neat. You can do it yourself with some patience and care. Ready to fix your concrete wall? Just follow these easy tips.