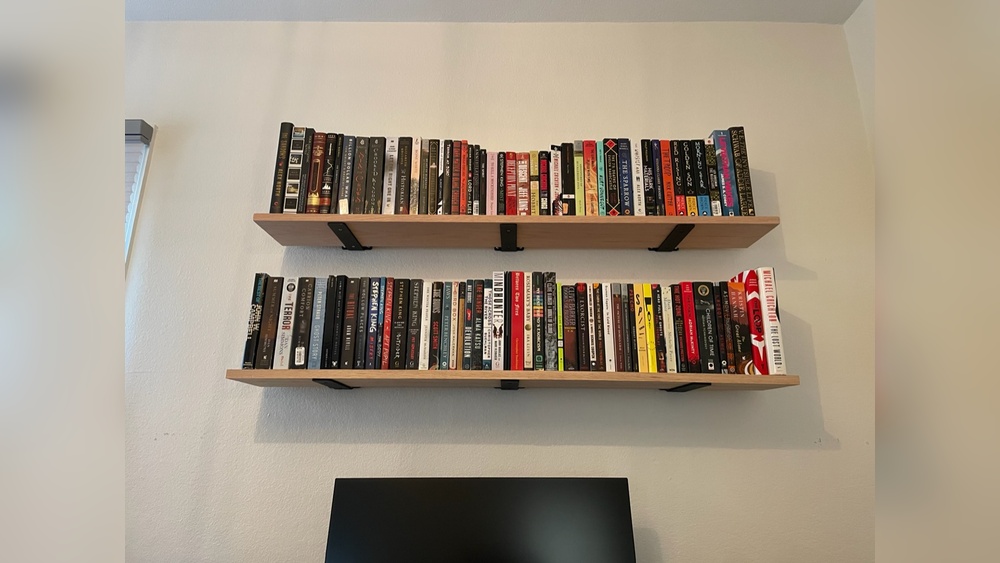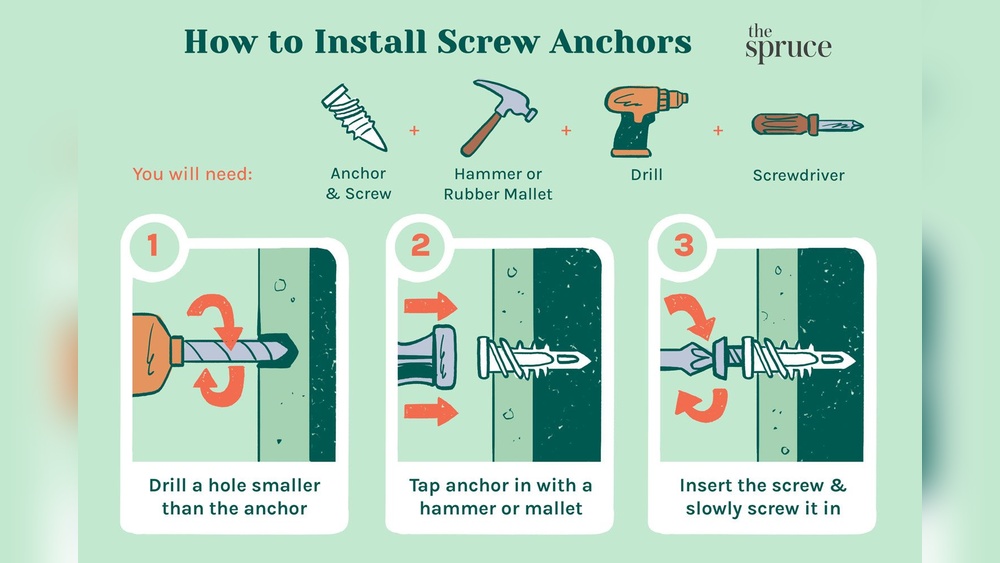
Are you tired of hanging pictures or shelves only to have them fall down? Knowing how to put a screw and anchor in your wall the right way can make all the difference.
It’s a simple skill that saves you time, money, and frustration. In this guide, you’ll learn easy steps to securely fasten anything to your wall, even if you don’t have a lot of experience. Keep reading, and soon you’ll feel confident tackling your next home project like a pro.
Credit: www.youtube.com
Choosing The Right Anchor
Choosing the right anchor is key to a strong hold in your wall. Not all anchors work the same way. The wall type and the weight of what you hang matter. Using the wrong anchor can cause damage or failure. Here is a simple guide to help you pick the best anchor.
Types Of Wall Anchors
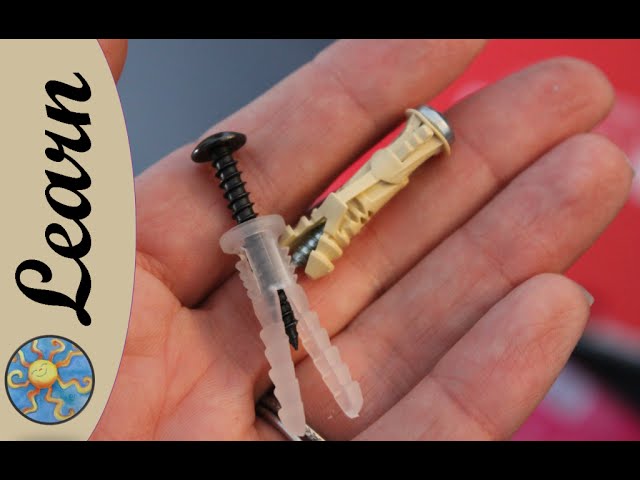
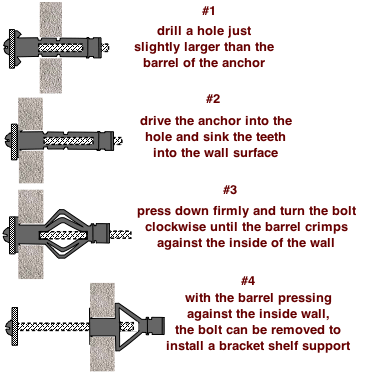
Plastic anchors are common and easy to use. They work well for light loads in drywall. Metal anchors offer more strength and grip tighter. They suit heavier objects and tougher walls. Toggle bolts spread weight over a larger area. Ideal for hollow walls and ceilings. Molly bolts expand inside the wall for a firm hold. Great for medium loads and drywall.
Matching Anchors To Wall Materials
Drywall needs anchors that expand or spread out. Plastic anchors or toggle bolts fit this well. For brick or concrete, use anchors made for masonry. These anchors grip into hard surfaces tightly. Plaster walls require gentle anchors to avoid cracks. Choose anchors with wide flanges to spread pressure. Wood walls usually only need screws without anchors. But anchors help if the wood is soft or thin.
Credit: www.do-it-yourself-help.com
Gathering Necessary Tools
Gathering the right tools makes putting screws and anchors in the wall easier. It helps you work faster and avoid mistakes. Preparing all items before starting saves time and effort. Safety also comes first to protect yourself during the task.
Essential Tools List
You need a drill to make holes in the wall. Choose the correct drill bit size for your anchor. A screwdriver is necessary to drive screws into anchors. A hammer helps gently tap anchors into holes. A tape measure ensures you place anchors in the right spot. A pencil marks where you want to drill. A level keeps your work straight and even.
Safety Equipment
Wear safety goggles to protect your eyes from dust and debris. Use gloves to keep your hands safe from sharp edges. Dust masks prevent inhaling tiny particles while drilling. Ear protection reduces noise from power tools. Work in a well-lit area to see clearly. Keep your workspace clean to avoid trips and falls.
Preparing The Wall
Preparing the wall is an important first step before putting a screw and anchor. It makes sure the screw holds strong and stays safe. Taking time to prepare helps avoid damage to the wall and ensures your item hangs properly.
Marking Drill Points
Start by deciding where you want to place the screw. Use a pencil to mark the exact spot on the wall. Measure twice to be sure the mark is in the right place. Clear marks help guide the drill and keep the hole accurate. A small, visible mark avoids mistakes during drilling.
Checking For Obstructions
Before drilling, check for pipes, wires, or studs inside the wall. Use a stud finder or wire detector for safety. Drilling into wires or pipes can cause damage or injury. Avoid drilling near electrical outlets or switches. Knowing what is behind the wall protects your home and your tools.

Credit: www.youtube.com
Drilling The Hole
Drilling the hole is the first important step to put a screw and anchor in the wall. A well-drilled hole helps the anchor fit snugly. This makes the screw hold strong and safe. The right tools and technique make the job easier and the result better.
Selecting The Drill Bit
Choose a drill bit that matches the size of your anchor. The hole must not be too big or too small. Check the anchor package for the recommended drill bit size. Use a masonry bit for brick or concrete walls. For drywall, a regular twist bit works fine. Picking the right bit stops the wall from cracking.
Drilling Techniques
Mark the spot where you want to drill. Hold the drill steady and start slowly. Push the drill straight into the wall. Avoid tilting it to keep the hole even. Drill to the depth of the anchor length. Pull the drill out gently to clear dust. Clean the hole with a small brush or air. This helps the anchor grip better.
Inserting The Anchor
Inserting the anchor into the wall is a key step to hold screws tightly. The anchor gives the screw a strong base in drywall, plaster, or masonry. This prevents the screw from slipping or pulling out under weight. Follow the right steps to place and fit the anchor correctly.
Proper Placement
Choose the spot carefully before inserting the anchor. Mark the point on the wall where you want the screw. Use a level to keep it straight if needed. Drill a hole that matches the anchor size exactly. Too big or too small holes cause weak support. Clean the hole of dust and debris for a smooth fit.
Ensuring A Secure Fit
Push the anchor into the hole gently but firmly. Use your thumb or a hammer with light taps. The anchor should sit flush with the wall surface. Avoid forcing it too hard to stop damage. Check that it does not wiggle or move. A tight anchor holds the screw steady and safe.
Driving The Screw
Driving the screw into the wall is a key step for a secure hold. It requires the right tools and careful technique. A proper approach helps the anchor and screw work together. This avoids damage and keeps your items safe on the wall.
Choosing The Right Screw
Select a screw that fits the anchor size. Check the length to go deep into the wall. The screw head must match your screwdriver type. Use screws made from strong materials like steel. Avoid screws that are too short or too thin. This ensures the screw holds tight and lasts long.
Screwing Techniques For Stability
Start by placing the screw tip in the anchor hole. Turn the screw slowly and steadily with a screwdriver. Push gently but firmly to keep the screw straight. Stop when the screw head is flush with the wall. Do not over-tighten; this can break the anchor. Use a power drill on low speed if needed. Good technique keeps the screw steady and secure.
Testing The Fixing
Testing the fixing is an important step after placing a screw and anchor in the wall. It makes sure the item is secure and safe. A proper test can prevent damage and accidents later. Take a moment to check your work before hanging anything heavy or valuable. This process helps you feel confident about the strength of your fixing.
Checking For Firmness
Gently pull or push the fixed item to check its firmness. It should not wiggle or move. Use your hand to apply light pressure in different directions. If the screw feels tight and the anchor stays in place, the fixing is firm. A solid hold means the wall and anchor support the weight well.
Troubleshooting Loose Fixtures
Loose fixtures need quick attention to avoid falling. First, try tightening the screw with a screwdriver. If it still moves, remove it and check the anchor. The anchor might be damaged or too small for the hole. Replace it with a bigger anchor or a different type. Make sure the hole matches the anchor size exactly. Repeat the fixing process for a strong hold.
Tips For Stronger Fixings
Strong fixings keep your shelves, pictures, and fixtures safe on the wall. Using the right tools and methods makes your screw and anchor hold better. Follow these tips to make sure your fixings last long and stay secure.
Using Wall Plugs Effectively
Choose wall plugs that fit your screw size. The plug should match the hole diameter and wall type. Insert the plug fully into the hole for a tight grip. Tap gently with a hammer to avoid damage. Use plastic or nylon plugs for drywall and masonry. Make sure the plug sits flush with the wall surface. This prevents wobbling and keeps the screw straight. Use longer plugs for heavier items to increase support.
Avoiding Common Mistakes
Do not use a drill bit that is too big or small. A loose hole weakens the anchor’s grip. Avoid over-tightening screws; this can crack the wall or damage the plug. Never skip cleaning dust from the hole before inserting plugs. Dust reduces friction and weakens the hold. Avoid forcing screws into the plug without a pilot hole. This can split the plug and ruin the fixing. Check wall material before choosing anchors to prevent failure.
Frequently Asked Questions
How Do I Choose The Right Wall Anchor?
Select wall anchors based on wall type and weight load. Use plastic anchors for light loads and metal anchors for heavy items. Confirm the anchor size matches the screw for a secure fit and proper support.
What Tools Are Needed To Install Screws And Anchors?
You need a drill with the correct bit size, a screwdriver, a hammer, and a pencil. These tools help make precise holes and secure anchors and screws efficiently.
Can I Use Anchors On Drywall And Concrete Walls?
Yes, plastic anchors work well on drywall, while metal or sleeve anchors suit concrete. Choose anchors specifically designed for your wall material for the best hold.
How Deep Should I Drill Holes For Anchors?
Drill holes slightly deeper than the anchor length. This ensures the anchor fits completely and holds the screw firmly without damaging the wall.
Conclusion
Putting a screw and anchor in the wall is simple with the right steps. Start by choosing the correct anchor for your wall type. Drill a hole that fits the anchor snugly. Insert the anchor carefully, then screw in firmly.
This method keeps your items secure and prevents damage. Practice makes it easier over time. Now, you can hang shelves, pictures, or decorations safely. Trust the process and take your time. Your wall will hold strong and look great.