Are you struggling with a stubborn Yale deadbolt that just won’t budge? Whether you need to replace it, fix a jam, or upgrade your home security, knowing how to remove your Yale deadbolt quickly and safely can save you time and frustration.
In this guide, you’ll discover simple, step-by-step instructions that anyone can follow—even if you’ve never handled a lock before. Keep reading to unlock the secrets to removing your Yale deadbolt with confidence and ease.
Tools Needed
Removing a Yale deadbolt needs some basic tools. Having the right tools makes the job easier and faster. This section covers the essential tools you need.
Screwdrivers
Screwdrivers are the main tools for this task. Most Yale deadbolts use Phillips or flathead screws. A Phillips screwdriver fits cross-shaped screws. A flathead screwdriver works with straight, single-slot screws. Choose the right size to avoid stripping the screws.
Pliers
Pliers help hold small parts and turn stubborn screws. Needle-nose pliers are good for tight spaces. They also help pull out the deadbolt components gently. Use pliers carefully to avoid damaging the lock or door.
Optional Tools
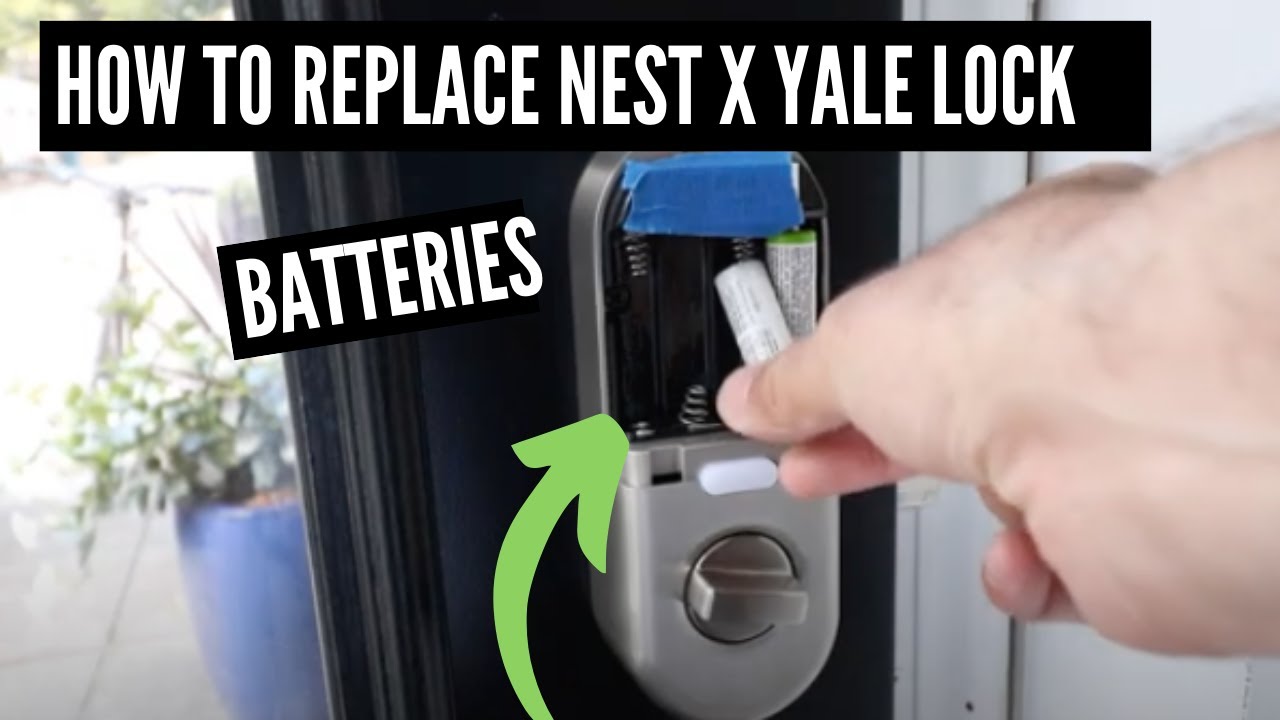
Some extra tools might make the job smoother. A power drill speeds up screw removal but needs careful use. A flashlight helps you see inside the lock area. A small container keeps screws safe and prevents loss. These tools are not required but can help.

Credit: support.shopyalehome.com
Preparing The Door
Preparing the door is the first step to remove a Yale deadbolt safely and effectively. This stage ensures the work area is ready and safe for the task. Proper preparation helps avoid mistakes and damage.
Take your time. A well-prepared door makes the removal process much easier.
Clear The Area
Remove any objects near the door. Clear furniture, rugs, or decorations that block access. This space gives you room to work comfortably. Avoid distractions and accidents by keeping the area tidy.
Make sure tools and parts stay organized. Lay them out in an easy-to-reach place.
Ensure Safety
Wear safety glasses to protect your eyes from dust and debris. Gloves can shield your hands from sharp edges. Check that the door is stable and won’t move while you work.
Turn off any alarm systems linked to the lock. This prevents false alarms during removal. Safety is key to a smooth, hassle-free task.
Locating Screws
Removing a Yale deadbolt starts with finding the screws. These screws hold the lock together and keep it on the door. Without locating them, you cannot take the deadbolt apart safely. The screws are usually hidden under parts of the lock. Knowing where to look makes the job easier and faster.
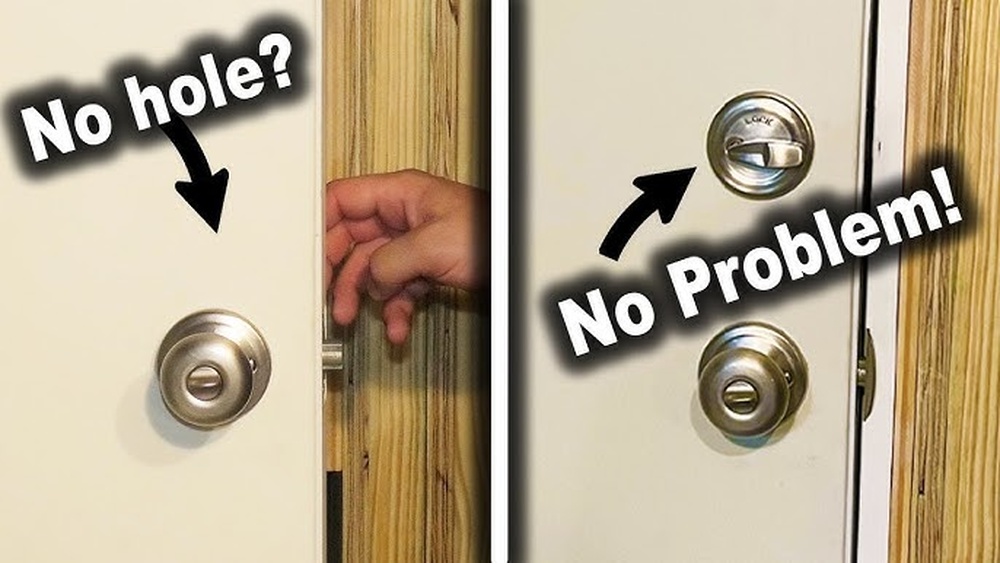
Inside Faceplate
The inside faceplate is the first place to check. This is the part of the lock on the interior side of the door. Look closely at the faceplate for small screws. They are often near the edges or under small covers. Use a screwdriver to remove these screws. Removing them lets you pull off the inside lock piece.
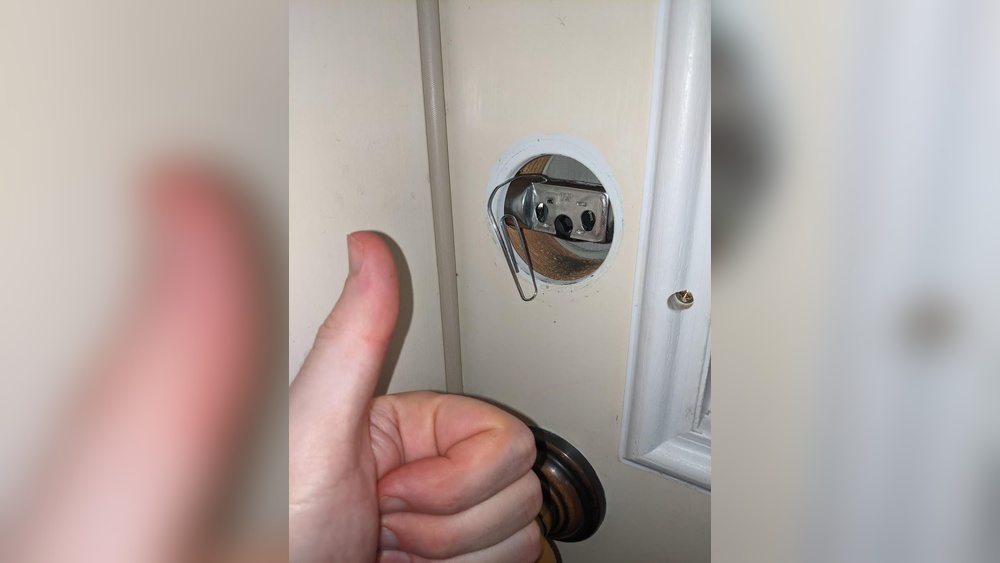
Outside Components
The outside components hold the key cylinder and handle. These parts also have screws that keep them in place. Sometimes screws are hidden under a decorative plate. Gently pry this plate off to find the screws. Unscrew them carefully to avoid damage. Once loose, the outside parts will come off easily.
Credit: www.youtube.com
Removing The Deadbolt
Removing a Yale deadbolt is a simple task with the right steps. This guide breaks down the process into easy parts. Follow along to take out the deadbolt safely and quickly.
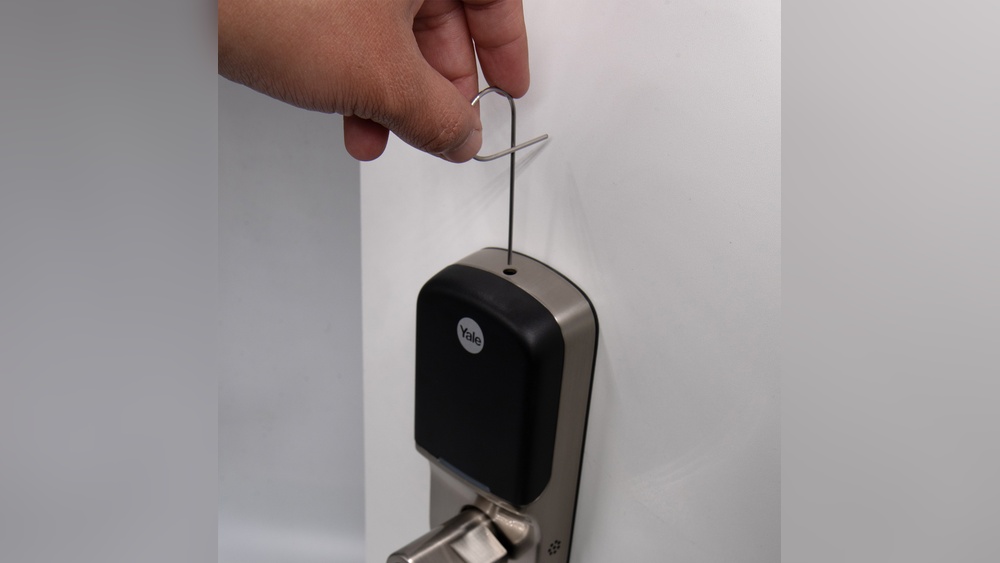
Unscrewing The Faceplate
Start by locating the screws on the faceplate. Use a screwdriver to remove them carefully. Keep the screws in a safe place for later use. The faceplate will come off, revealing the lock parts inside.
Extracting The Lock Cylinder
Next, find the lock cylinder inside the door. Turn the key slightly to align the cylinder. Pull the cylinder out gently with your hand. If it feels stuck, wiggle it slowly. Avoid using force to prevent damage.
Removing The Bolt Mechanism
Look inside the door edge to see the bolt mechanism. Unscrew the bolts holding it in place. Pull the bolt mechanism straight out from the door. Check the door for any leftover parts. Clean the area before installing a new lock.
Handling Stubborn Deadbolts
Stubborn deadbolts can cause frustration during removal. They may stick or resist turning. Understanding simple techniques helps loosen them safely. Use patience and care to avoid damage. The right approach saves time and effort.
Using Lubricants
Lubricants reduce friction inside the lock mechanism. Apply a small amount of graphite or silicone spray. Avoid oil-based lubricants as they attract dirt. Let the lubricant sit for a few minutes. This softens rust and grime. Then try turning the key or knob again.
Applying Gentle Force
Use gentle force to ease the deadbolt free. Avoid strong or sudden pushes. Try rocking the key or knob slowly back and forth. This movement helps loosen stuck parts. Use a rubber grip for better control. Stop if you feel resistance to prevent damage.

Credit: www.youtube.com
Post-removal Tips
Removing a Yale deadbolt is just the first step. After removal, take time to check the door carefully. Proper care now prevents problems later. Follow these post-removal tips for a smooth next step.
Inspecting The Door
Look at the door surface closely. Check for scratches, dents, or holes left by the deadbolt. Notice if the wood is cracked or soft around the lock area. These issues can affect the new lock’s fit and security. Clean the area to remove dust and debris. A clean surface helps the new lock sit well.
Preparing For New Installation
Measure the hole size and depth carefully. Make sure it matches the new lock’s requirements. Fill any large holes or gaps with wood filler. Sand the area smooth once it dries. This creates a solid base for the new lock. Have all tools and parts ready before starting installation. This saves time and avoids frustration.
Frequently Asked Questions
How Do I Remove A Yale Deadbolt Lock?
To remove a Yale deadbolt, first unscrew the interior plate. Next, remove the screws holding the lock cylinder. Carefully pull the deadbolt mechanism out. Always keep screws safe for reinstallation or replacement.
What Tools Are Needed To Remove A Yale Deadbolt?
You will need a screwdriver, usually a Phillips head. Sometimes a flathead screwdriver helps with prying. A drill may be needed for stubborn screws. Having a flashlight is useful to see inside the lock area.
Can I Remove A Yale Deadbolt Without Damaging The Door?
Yes, removing a Yale deadbolt properly won’t damage the door. Use the correct tools and follow the steps carefully. Avoid forcing parts out to prevent scratches or holes. Always handle the lock components gently.
How Long Does It Take To Remove A Yale Deadbolt?
Removing a Yale deadbolt typically takes 10 to 20 minutes. Time depends on your experience and the lock’s condition. Having the right tools ready speeds up the process.
Conclusion
Removing a Yale deadbolt can be simple with the right steps. Take your time and follow each instruction carefully. Use basic tools like a screwdriver to avoid damage. Remember to keep all parts safe for reassembly or replacement. Practice makes the task easier and faster next time.
Stay calm and work slowly to prevent mistakes. Now, you can handle this project with confidence and ease.