If you’re looking to remove a Brinks deadbolt, you might be feeling a bit stuck or unsure where to start. Don’t worry—removing this type of lock doesn’t have to be complicated or stressful.
With the right steps, you can do it quickly and safely, even if you’re not an expert. In this guide, you’ll discover simple, clear instructions that make the process straightforward. By the end, you’ll have the confidence to handle your deadbolt removal like a pro.
Keep reading to learn exactly how to get the job done right the first time.
Tools Needed
Removing a Brinks deadbolt needs the right tools. Using proper tools makes the job easier and faster. It also prevents damage to your door and lock parts.
Gather these tools before you start. This saves time and avoids frustration. Each tool has a specific role in the removal process.
Phillips Screwdriver
A Phillips screwdriver is essential for removing screws. Most Brinks deadbolts use Phillips head screws. The screwdriver fits well into these screws, allowing easy removal.
Flathead Screwdriver
A flathead screwdriver helps to pry parts apart gently. It can also assist in pressing release tabs. This tool provides leverage without damaging the lock.
Allen Wrench
Some Brinks deadbolts use hex screws. An Allen wrench fits these screws perfectly. Make sure to have the right size for your lock.
Needle-nose Pliers
Needle-nose pliers help to grip small parts tightly. They are useful for pulling out pins or clips. Their thin shape fits into tight spaces easily.
Work Gloves
Wear work gloves to protect your hands. Removing a deadbolt can involve sharp edges. Gloves keep your hands safe and comfortable.

Credit: www.reddit.com
Locate The Deadbolt Screws
Before removing a Brinks deadbolt, finding the screws is key. These screws hold the lock together. Knowing their exact location makes the process easier and faster.
Deadbolt screws often sit on the interior side of the door. They keep the lock firmly attached. Spotting them saves time and avoids damage to the door or lock.
Check The Inside Face Of The Door
Start by opening the door. Look at the side where you turn the lock. The screws usually sit under the lock’s cover plate. Use a flashlight if needed. Look closely around the edges of the lock.
Remove Any Decorative Covers
Some Brinks deadbolts have small covers hiding the screws. These covers snap on or slide off. Use a flat tool or your fingernail to gently lift the cover. Be careful not to scratch the door.
Locate The Mounting Screws
Once the cover is off, see the screws holding the deadbolt. These screws often run vertically. They connect the lock’s inside and outside parts. Use a screwdriver to remove them carefully.
Remove The Interior Plate
Removing the interior plate of a Brinks deadbolt is an important step. This part holds the lock mechanism inside the door. Taking it off carefully helps avoid damage. It also makes it easier to access the screws and inner parts.
Handle the interior plate gently. It has small components that can break easily. Follow each step to remove it safely and cleanly.
Gather Basic Tools
Get a screwdriver that fits the screws on the plate. Usually, a Phillips head screwdriver works best. Keep a small container nearby to hold the screws. This keeps them safe and easy to find later.
Locate The Screws On The Interior Plate
Look closely at the inside part of the door. Find the screws holding the plate in place. Most Brinks deadbolts have two or three screws. They are usually at the corners or edges of the plate.
Unscrew The Interior Plate
Turn the screwdriver counterclockwise to remove the screws. Do this slowly to avoid stripping the screw heads. Take out all screws and place them in the container.
Remove The Plate From The Door
After the screws are out, gently pull the plate away from the door. It may feel tight at first. Wiggle it slightly to loosen it. Pull straight out to avoid bending or breaking the plate.

Credit: www.walmart.com
Take Out The Deadbolt Cylinder
Removing the deadbolt cylinder is a key step in taking out a Brinks deadbolt. The cylinder holds the key mechanism. You must remove it carefully to avoid damage.
This part controls the lock’s function. Taking it out allows you to replace or fix the deadbolt. The process is simple but requires attention.
Locate The Cylinder Retaining Screw
First, find the screw that holds the cylinder in place. This screw sits on the edge of the door, near the deadbolt. Use a screwdriver to remove it. Keep the screw safe for later use.
Insert The Key And Turn
Next, insert the key into the cylinder. Turn the key slightly to align the cylinder for removal. This step frees the cylinder from the lock housing. Be gentle to avoid breaking the key.
Pull Out The Cylinder
Hold the key firmly and pull the cylinder out of the door. It should slide out smoothly if the screw is removed and the key is turned. If it sticks, try turning the key a bit more.
Inspect The Cylinder And Components
After removing, check the cylinder and parts for wear or damage. Clean any dirt or debris to improve function. Replace the cylinder if it looks worn or broken.
Remove The Exterior Plate
Removing the exterior plate of a Brinks deadbolt is an important step in the removal process. This plate covers the lock mechanism and holds the deadbolt in place. Careful removal prevents damage to the door and lock parts.
Focus on this step to make the rest of the removal easier and safer. Follow clear instructions and use the right tools for best results.
Gather The Necessary Tools
Use a screwdriver that fits the screws on the plate. Usually, a Phillips head screwdriver works well. Prepare a flat surface to keep screws safe after removal.
Locate And Remove The Screws
Look for screws around the edge of the exterior plate. They hold the plate firmly on the door. Unscrew all of them carefully, turning counterclockwise. Keep screws in a small container to avoid loss.
Gently Pry Off The Exterior Plate
After removing screws, the plate may still be tight. Use a flat tool or your fingers to gently lift it. Avoid forcing the plate to prevent damage. Work slowly around the edges until it comes off easily.
Inspect The Plate And Door Surface
Check the exterior plate and door for any damage. Clean the door surface to remove dirt or debris. This helps if you plan to install a new lock or reinstall the old one.
Extract The Deadbolt Latch
Extracting the deadbolt latch is a key step in removing a Brinks deadbolt. This part secures the door and must come out carefully. Removing it allows access to the lock’s inner parts. Follow simple steps to avoid damage and keep tools safe.
Remove The Screws Holding The Latch
Locate the screws on the edge of the door. Use a screwdriver to turn them counterclockwise. Keep the screws in a safe place. These screws hold the latch firmly.
Pull Out The Deadbolt Latch
After removing screws, gently pull the latch from the door edge. If it feels stuck, wiggle it slowly. Avoid forcing the latch to prevent damage.
Inspect The Latch For Damage
Check the latch for wear or cracks. A damaged latch may need replacement. This step helps ensure the lock works well later.
Tips For Stubborn Deadbolts
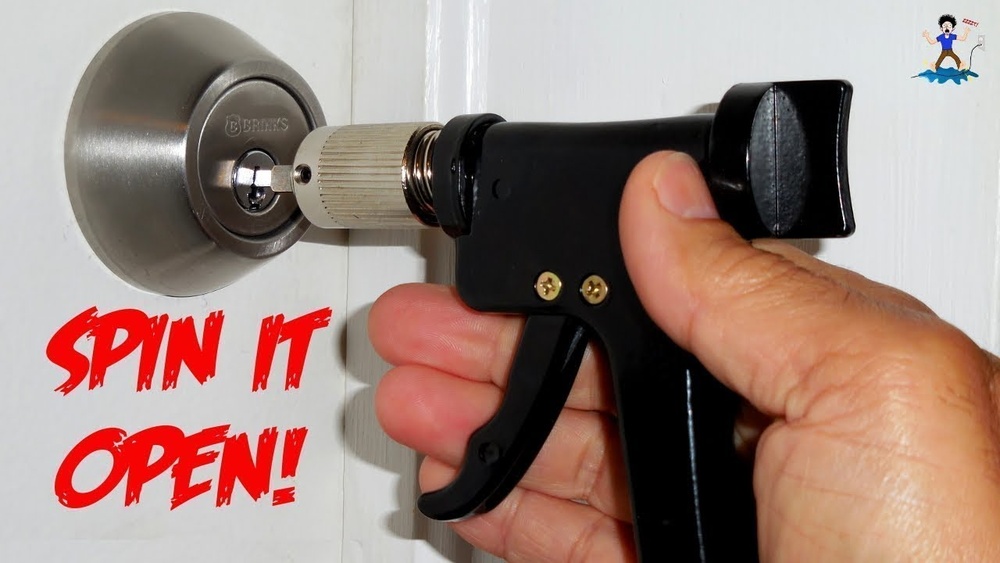
Stubborn deadbolts can cause frustration and delay your work. They may stick, jam, or refuse to turn. Patience and the right approach help remove them safely. Try simple tricks first. Avoid force that might damage the lock or door.
Use Lubricant To Loosen The Mechanism
Spray a small amount of lubricant into the keyhole and around the deadbolt. Let it sit for a few minutes. This helps reduce friction inside the lock. Try turning the key or thumb turn gently afterward. Repeat if needed but do not overuse.
Tap Lightly With A Hammer
Use a small hammer or rubber mallet to tap the lock lightly. Tap around the faceplate and cylinder area. This can help free stuck parts inside. Avoid strong hits that may break the lock. Gentle taps often work better.
Check For Screws Holding The Deadbolt
Look closely for screws on the inside plate of the deadbolt. Some models have hidden screws under covers or paint. Remove these screws carefully with a screwdriver. This step often releases the lock from the door.
Use A Flathead Screwdriver To Pry Gently
Insert a flathead screwdriver between the deadbolt and door surface. Twist it gently to create space. This can help loosen stuck parts. Do not force it hard to avoid damage. Work slowly and carefully.
Apply Heat To Expand Metal Parts
Use a hairdryer to warm the deadbolt area for a few minutes. Heat expands metal slightly, which can ease tight parts. Avoid using open flames or high heat. Heat and lubricant together can improve results.

Credit: www.youtube.com
Safety Precautions
Removing a Brinks deadbolt requires care and attention to safety. Taking the right safety steps protects you and the lock. It also helps avoid damage to your door.
Before starting, prepare your workspace well. Clear the area to avoid trips or falls. Work in good light to see all parts clearly.
Wear Protective Gear
Wear safety glasses to protect your eyes from dust or metal bits. Gloves protect your hands from sharp edges on the lock or tools. Use sturdy shoes to guard your feet in case something drops.
Use Proper Tools
Select tools that fit the screws and lock parts exactly. Using wrong tools can slip and cause injury. Keep tools in good condition to avoid accidents.
Turn Off Power Nearby
If your door has electronic components, cut off power first. This stops electric shocks during removal. Check for wires hidden behind the lock.
Work Slowly And Carefully
Take your time to avoid mistakes. Rushing can lead to slips or broken parts. Follow each step with care and check your progress.
Frequently Asked Questions
How Do I Remove A Brinks Deadbolt Lock?
To remove a Brinks deadbolt, first unscrew the interior mounting screws. Then, pull off both interior and exterior lock parts carefully. Finally, remove the latch mechanism from the door edge.
What Tools Are Needed To Remove Brinks Deadbolt?
You will need a Phillips screwdriver and a flathead screwdriver. Sometimes a drill may be helpful for stubborn screws. Having a tape measure helps check lock dimensions for replacement.
Can I Remove Brinks Deadbolt Without The Key?
Yes, you can remove the deadbolt without the key by unscrewing the interior mounting screws. The lock cylinder can be removed once screws and faceplate are taken off. No key is required to dismantle the lock.
How Long Does It Take To Remove Brinks Deadbolt?
Removing a Brinks deadbolt usually takes 5 to 15 minutes. It depends on your experience and if screws are rusted or stripped. Preparation and proper tools speed up the process.
Conclusion
Removing a Brinks deadbolt can be simple with the right steps. Take your time and follow each part carefully. Use the proper tools to avoid damage. After removal, check the door for any issues. This guide helps you save money and effort.
Keep safety in mind throughout the process. Now, you can change or fix your lock easily. Trust yourself to handle this task well.