If you want to boost your home’s security, installing a deadbolt is one of the best steps you can take. But drilling into your door frame can feel tricky if you’ve never done it before.
Don’t worry—this guide will walk you through each step clearly and simply. By the end, you’ll have the confidence to drill the perfect hole for your deadbolt, making your home safer without any guesswork or damage. Keep reading, and you’ll learn exactly how to get it done right the first time.

Credit: www.youtube.com
Tools And Materials Needed
Before drilling a door frame for a deadbolt, gather all needed tools and materials. This preparation saves time and ensures the job goes smoothly. Each tool plays a key role in the process. Knowing what to use helps you work safely and accurately.
Drill And Bits
A power drill is essential for making holes in the door frame. Use a drill with variable speed for better control. Choose drill bits that match the size of the deadbolt. Typically, a hole saw bit is needed for the main hole. A spade bit or twist bit works for smaller holes. Keep extra bits nearby in case they wear out.
Measuring Tools
Accurate measurements are critical. Use a tape measure to mark where to drill. A pencil helps mark drill points clearly. A combination square or ruler ensures straight lines. Mark the door frame carefully to avoid mistakes. Double-check measurements before drilling any holes.
Safety Gear
Protect yourself during the drilling process. Wear safety glasses to shield your eyes from wood chips and dust. Use hearing protection to reduce noise from the drill. Gloves protect your hands from splinters and sharp edges. A dust mask keeps you safe from inhaling fine particles.
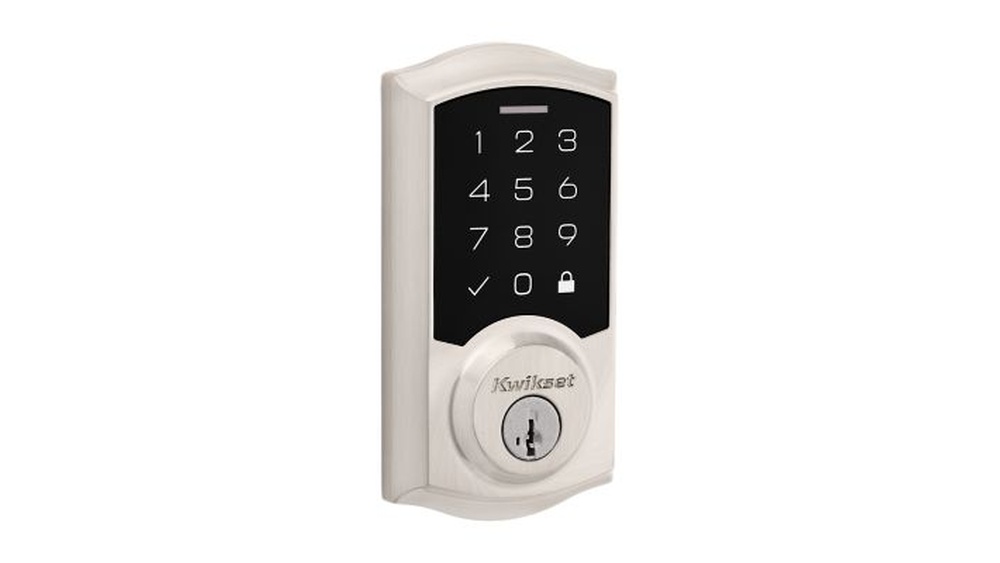
Deadbolt Kit Components
The deadbolt kit comes with all necessary parts. It includes the deadbolt lock, strike plate, and screws. Some kits have a template for marking drill spots. Read the instructions to understand each component’s use. Having all parts ready makes installation easier and faster.

Credit: www.reddit.com
Preparing The Door Frame
Preparing the door frame is the first step to install a deadbolt properly. It ensures the lock fits securely and works well. Taking time to prepare helps avoid mistakes and saves effort later. You need to follow clear steps before drilling.
Choosing The Right Height
Pick the correct height for your deadbolt. Usually, it sits about 6 to 12 inches above the door handle. This height is easy to reach and adds security. Measure carefully and mark the spot clearly. Consistency in height helps the deadbolt work smoothly.
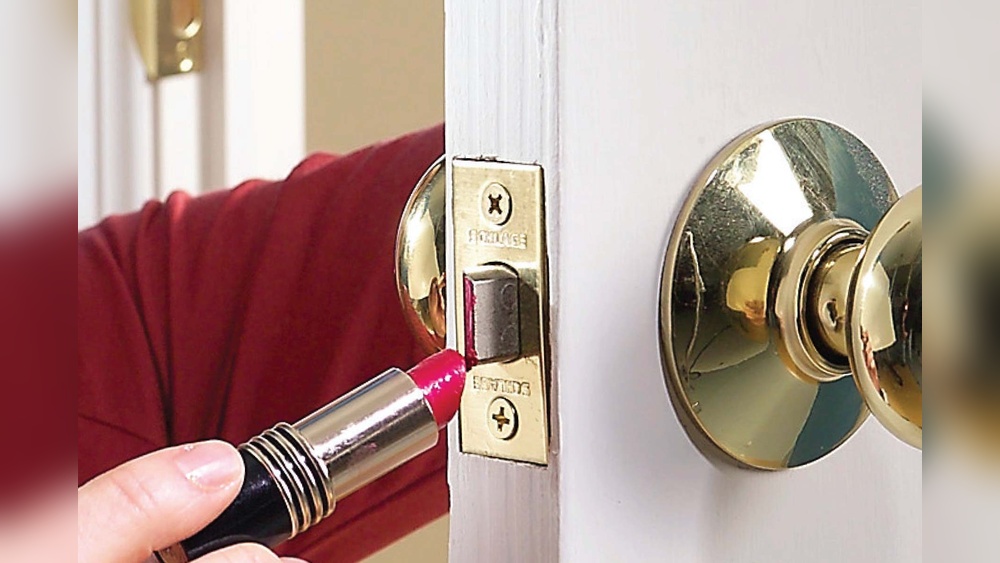
Marking Drill Points
Mark the exact places to drill holes on the door frame. Use a pencil for clear, easy-to-remove marks. Check the deadbolt template for hole sizes and positions. Mark both the edge and face of the frame. Accurate marks prevent drilling errors.
Checking Frame Material
Identify what material your door frame is made of. Wood, metal, or composite frames need different drill bits and care. Wood is easier to drill but can split. Metal requires special bits and steady pressure. Knowing the material helps choose the right tools and technique.
Drilling The Hole
Drilling the hole in your door frame is a key step for installing a deadbolt. It must be done carefully to ensure the lock fits well and works smoothly. Taking your time during this process helps avoid mistakes that could weaken the door or cause the deadbolt to function poorly.
Selecting Drill Bit Size
Choose a drill bit that matches the deadbolt size exactly. Check the deadbolt instructions for the right diameter. Using a bit that is too big will make the hole loose. Too small, and the deadbolt won’t fit.
Most deadbolts need a 2 1/8 inch hole for the main cylinder. A smaller 1-inch hole is for the latch. Make sure you have both sizes ready before starting.
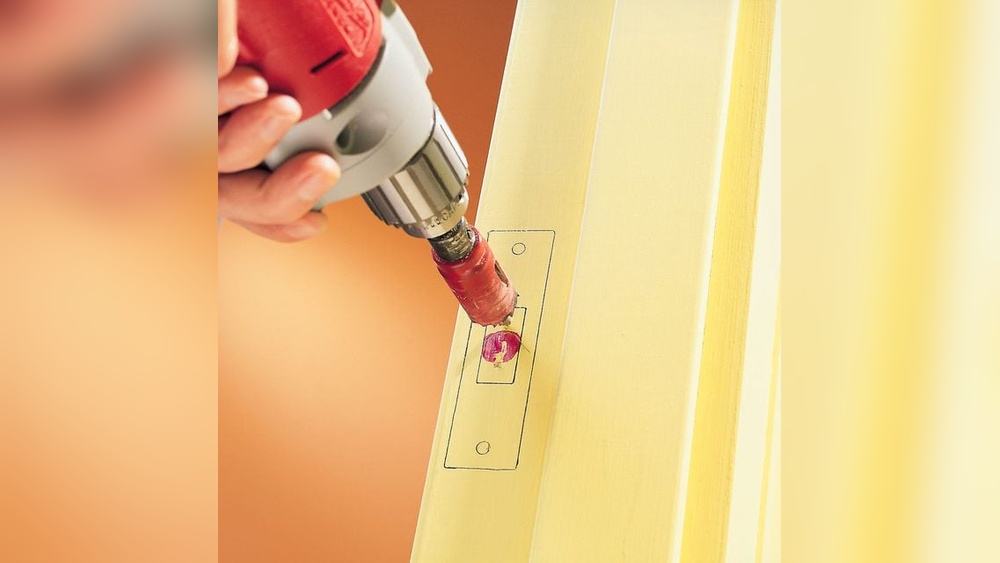
Drilling Straight And Clean Holes
Hold the drill steady and straight at the door frame. Angled holes can cause the deadbolt to jam. Use a drill guide or clamp to keep the drill bit level.
Start drilling slowly to make a small pilot hole. This helps guide the larger bit. Drill all the way through the door frame in one smooth motion. Avoid stopping mid-way to prevent rough edges.
Avoiding Splintering
Protect the wood by placing painter’s tape over the drilling spot. The tape holds wood fibers in place. Drill slowly and steadily to reduce splintering risks.
Using a sharp drill bit also helps create clean cuts. After drilling, lightly sand any rough edges. This keeps the deadbolt fitting tight and secure.

Credit: www.youtube.com
Installing The Deadbolt
Installing the deadbolt is the step where the lock becomes part of your door. It involves placing the bolt mechanism into the drilled hole and securing it tightly. This ensures your door locks safely and works smoothly every day. Follow each step carefully for the best results.
Fitting The Bolt Mechanism
Start by sliding the bolt mechanism into the hole on the edge of the door. The bolt should fit snugly without forcing it. Align the faceplate with the door edge so it sits flat. Use a chisel to adjust if the faceplate does not fit flush. Proper fitting keeps the lock steady and helps it operate well.
Securing With Screws
Insert the screws through the faceplate holes into the door. Tighten them evenly to hold the bolt mechanism in place. Avoid overtightening, which can damage the wood or the lock. Use a screwdriver instead of a drill for better control. Secure screws make the lock strong and reliable.
Testing The Lock Function
Turn the key or thumb turn to test the bolt movement. The bolt should slide out and retract smoothly without sticking. Close the door and check if the bolt fits into the strike plate correctly. Adjust the strike plate if the bolt does not catch properly. Test multiple times to ensure the lock works well every time.
Tips For Enhanced Security
Enhancing the security of your deadbolt starts with smart installation steps. These tips help your door frame resist force and keep your home safe. Small changes make a big difference in protection.
Reinforcing The Frame
Strengthen the door frame to support the deadbolt better. Use a metal reinforcement plate on the frame. This plate spreads the force from any impact. It stops the frame from cracking or breaking easily. Reinforcing adds a tough layer to protect your entry.
Using Longer Screws
Replace short screws with longer ones in the strike plate and hinges. Screws that reach the wall studs hold the door firmly. This stops the door from being forced open quickly. Longer screws increase the deadbolt’s grip and stability.
Adding Strike Plate Reinforcement
Install a heavy-duty strike plate made of strong metal. It covers the area where the deadbolt enters the frame. A reinforced strike plate resists kicking and prying attempts. Use screws that go deep into the frame for best security. This simple step makes breaking in much harder.
Common Mistakes To Avoid
Drilling a door frame for a deadbolt needs care and attention. Avoiding common mistakes makes the job easier and ensures the lock fits well. These errors can cause damage or make the deadbolt less secure. Learn about the most frequent mistakes to keep your door safe and your work clean.
Misaligned Holes
Misaligned holes cause the deadbolt to stick or not fit at all. Measure twice before drilling to keep holes straight. Use a template or guide to mark exact spots. Drilling off-center weakens the door frame and ruins the lock’s function. Take your time to get the alignment right.
Wrong Drill Bit Usage
Using the wrong drill bit can crack the wood or metal. Choose a drill bit that matches the lock’s hole size. A spade bit works well for wood, while a metal bit suits metal frames. Avoid bits that are too large or too small for clean holes. Sharp bits reduce effort and prevent splinters.
Overtightening Screws
Overtightening screws can strip holes or crack the frame. Tighten screws just enough to hold the lock firmly. Use a screwdriver instead of a power drill for better control. Loose screws make the lock unstable, but overtight screws cause damage. Balance is key to a secure deadbolt installation.
Frequently Asked Questions
How Do I Drill A Door Frame For A Deadbolt?
Mark the deadbolt height on the door frame. Use a drill with the correct hole saw size. Drill straight through the frame carefully. Ensure the hole is clean and smooth for proper deadbolt fit.
What Size Hole Do I Need For A Deadbolt?
Typically, a 2 1/8-inch hole saw is required. This size fits most standard deadbolts. Confirm your deadbolt specifications before drilling to ensure accuracy and proper installation.
Can I Drill A Door Frame Without Splitting The Wood?
Yes, use a sharp drill bit and drill slowly. Start with a small pilot hole to guide the larger bit. Support the wood behind the drilling area to reduce splitting risk.
How Deep Should The Hole Be For A Deadbolt?
The hole depth should match the deadbolt’s length, usually about 1 inch. Measure your deadbolt and drill accordingly. Avoid drilling too deep to maintain frame strength.
Conclusion
Drilling a door frame for a deadbolt adds extra security to your home. Follow each step carefully for the best fit. Use the right tools and measure twice before drilling. Take your time to avoid mistakes or damage. A well-installed deadbolt keeps your door strong and safe.
Now, you can feel more confident about your home’s protection. Simple steps, big difference.