Have you ever tried to remove a plastic anchor from your wall, only to find it stuck tight and frustrating? If you’re staring at that stubborn anchor wondering how to get it out without damaging your wall, you’re not alone.
Removing plastic anchors can be tricky, but with the right tips and tricks, you can do it quickly and cleanly. Keep reading, and you’ll learn simple, effective methods to free your wall from those pesky anchors—no extra holes or mess needed.

Credit: www.youtube.com
Tools Needed
Removing plastic anchors from walls requires the right tools. Choosing proper tools makes the job easier and prevents wall damage. You can use simple household items or specialized tools designed for this task.
Common Household Tools
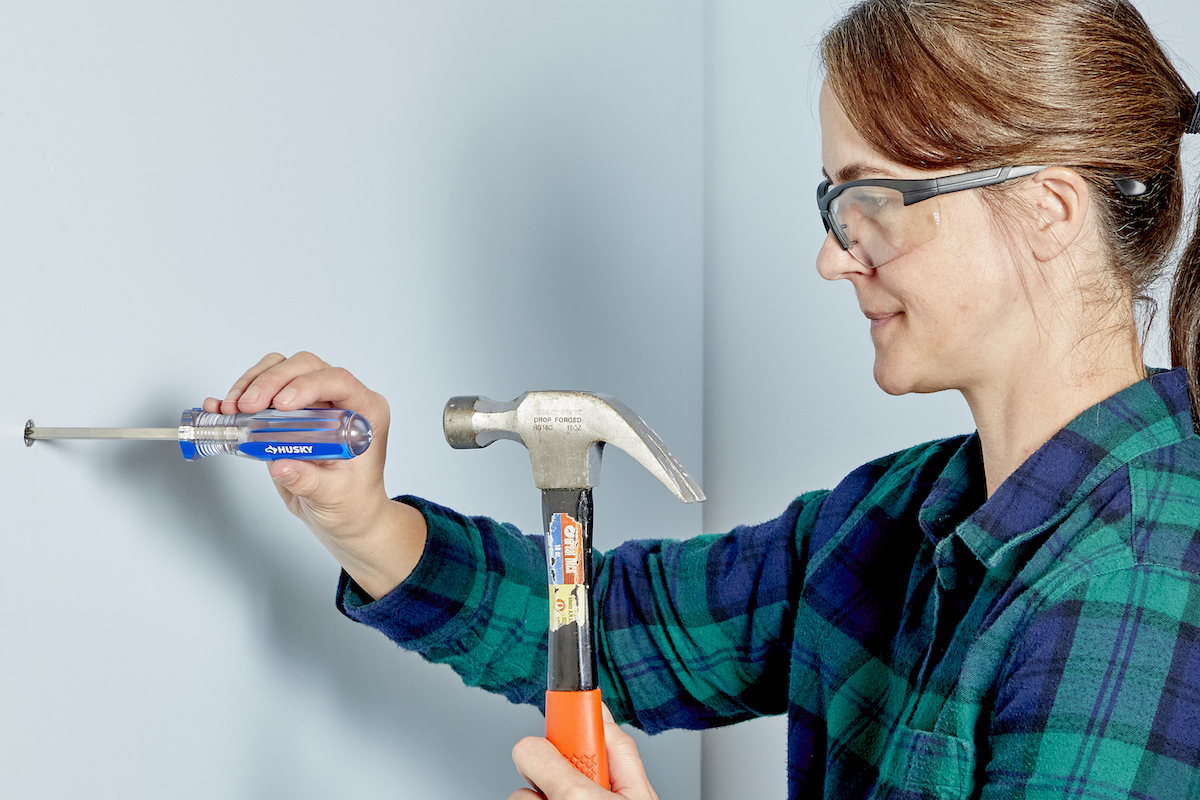
Many plastic anchors can be removed using tools found at home. A flathead screwdriver helps pry the anchor gently. Needle-nose pliers can grip and pull small anchors out. A hammer can tap the screwdriver to loosen stubborn anchors. Sometimes, a utility knife helps cut around the anchor for easier removal.
Specialized Removal Tools
Special tools make plastic anchor removal faster and cleaner. An anchor removal tool is designed to pull anchors without breaking the wall. A drill with a small bit can help remove anchors by spinning them out. Wall patch kits often come with tools to fix holes after anchor removal. These tools reduce damage and save repair time.

Credit: www.wikihow.com
Preparation Steps
Before removing plastic anchors from your wall, some preparation helps a lot. Taking time to prepare makes the process easier and safer. It protects your wall and keeps your space tidy. Follow these key steps to get ready.
Clear The Area
Remove furniture and objects near the wall. This gives you space to work freely. It also stops things from getting damaged. Clear the floor to avoid tripping on tools or debris. A clean area helps you focus on the task.
Protect The Wall Surface
Cover the wall around the anchor with painter’s tape. This prevents paint or drywall from chipping. Use a soft cloth or small piece of cardboard to shield the area. Protecting the wall keeps it smooth and ready for repairs. This step reduces extra work later.
Removing Anchors Without Damage
Removing plastic anchors without causing damage to your wall is possible with the right approach. Patience and gentle techniques help keep the wall surface intact. Avoid rushing or using too much force. This section explains simple ways to remove anchors safely and cleanly.
Using Pliers
Start by gripping the anchor’s outer edge with pliers. Use needle-nose pliers for better control. Pull straight out slowly and steadily. Avoid twisting or jerking. This method works best for anchors that stick out slightly from the wall. If the anchor moves easily, keep pulling until it comes free.
Twisting And Pulling Method
Insert a screwdriver into the anchor’s center hole. Turn it gently in a twisting motion. The anchor will loosen inside the wall. While twisting, pull the anchor outward carefully. This helps the anchor slide out without breaking the wall surface. Stop if you feel strong resistance to avoid damage.
Leveraging With A Screwdriver
Place a flathead screwdriver between the anchor and wall. Use it as a lever to pry the anchor out. Apply slow and steady pressure. Support the wall around the anchor to prevent dents. This technique works well for anchors flush with the wall. Take care not to gouge the drywall or plaster.
Handling Stubborn Anchors
Stubborn plastic anchors can be tough to remove. They sometimes stay stuck deep in the wall. This can cause damage if pulled too hard. Handling these anchors carefully keeps your wall safe. Two easy methods can help: drilling them out or cutting them flush.
Drilling Out Anchors
Drilling is a useful way to remove stuck anchors. Use a drill bit slightly smaller than the anchor. Drill slowly and steadily into the center of the anchor. This breaks the anchor inside the wall. Then, push or pull out the broken pieces. Take care not to drill too deep and damage the wall behind.
Cutting Flush With The Wall
Cutting the anchor flush works well when removal is tricky. Use a sharp utility knife or a small saw blade. Carefully cut the anchor at wall level. This leaves a smooth surface for patching later. Avoid pushing the anchor deeper into the wall. After cutting, fill the hole with spackle or wall filler for a clean finish.
Repairing The Wall After Removal
Removing plastic anchors from a wall often leaves holes or marks behind. Fixing these spots helps restore the wall’s smooth surface. A clean repair makes the wall ready for painting or new decorations. The process is simple and needs just a few tools and materials.
Filling Holes
Start by cleaning dust from the holes. Use a putty knife to apply wall filler or spackle. Press the filler into the hole firmly to fill all gaps. Smooth the surface with the knife to make it even. Let the filler dry completely before touching it. Drying time depends on the product but usually takes a few hours.
Sanding And Painting
After the filler dries, gently sand the area with fine sandpaper. Sand until the surface feels smooth and blends with the wall. Wipe away dust with a damp cloth. Choose paint that matches the wall color. Use a small brush or roller to cover the repaired spot. Apply thin layers and let each dry before adding more. The wall will look like new without any signs of repair.
Preventing Future Damage
Preventing damage to walls after removing plastic anchors is very important. Small mistakes can cause holes, cracks, or weak spots. Taking the right steps helps keep walls strong and smooth. This saves time and money for repairs later.
Choosing the right anchor and installing it properly stops many problems. These tips make sure your walls stay safe and look good.
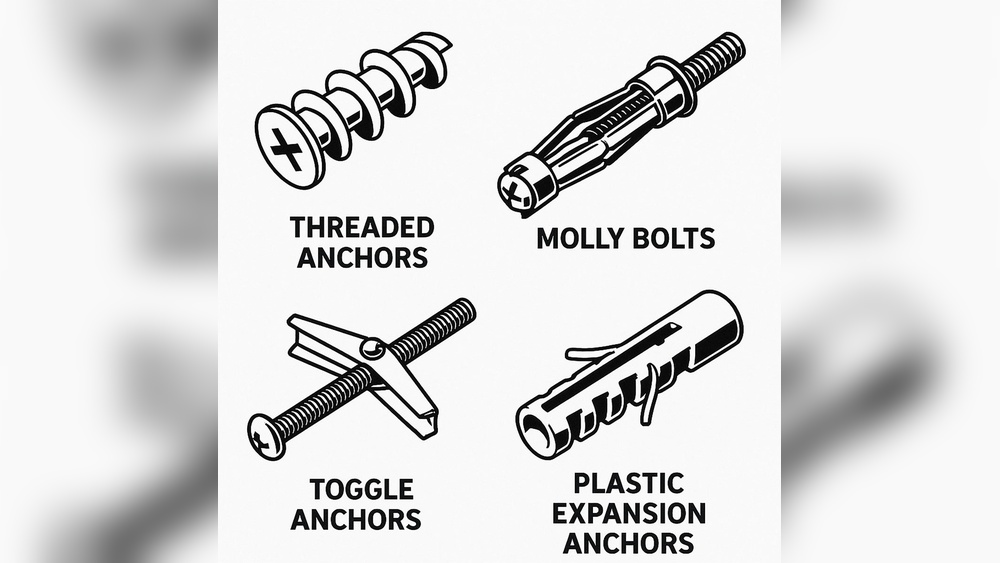
Choosing The Right Anchor
Select anchors that match the wall type and weight load. Drywall needs different anchors than concrete or brick. Using too large or too small anchors can cause cracks or loose fittings. Plastic anchors work well for light items. For heavier things, metal anchors may be better. Always check the package instructions before buying.
Proper Installation Techniques
Drill holes at the right size for the anchor. Too big holes make anchors loose, too small can crack walls. Insert anchors gently without forcing. Push straight into the hole to avoid wall damage. Do not over-tighten screws; this can break the anchor or damage the wall. Use a level to keep items straight. Take time to install carefully for best results.
Credit: www.bobvila.com
Frequently Asked Questions
How Can I Safely Remove Plastic Anchors From Walls?
To safely remove plastic anchors, first unscrew any attached screws. Use pliers to gently pull out the anchor without damaging the wall. If it resists, push it through the wall using a screwdriver and patch the hole afterward.
What Tools Are Needed To Remove Plastic Anchors?
You need a screwdriver, pliers, and possibly a utility knife. A drill may help if the anchor is stuck. These tools help loosen and extract the anchor carefully without wall damage.
Can Plastic Anchors Damage My Wall During Removal?
Yes, improper removal can damage drywall or plaster. Use gentle pulling or pushing techniques to minimize damage. Always patch holes after removal to restore wall integrity.
How Do I Fix Holes Left By Plastic Anchors?
Fill holes with spackle or wall filler using a putty knife. Allow it to dry, then sand smooth. Finally, paint over the repaired area for a seamless look.
Conclusion
Removing plastic anchors from walls can be easy with the right steps. Start by loosening the anchor gently to avoid wall damage. Use tools like pliers or a screwdriver for better grip. Take your time and be patient to prevent holes or cracks.
After removal, fill any leftover holes with spackle or putty for a smooth finish. These simple tips help keep your walls clean and ready for new decor. Practice makes perfect, so don’t worry if it takes a few tries. You can do this!