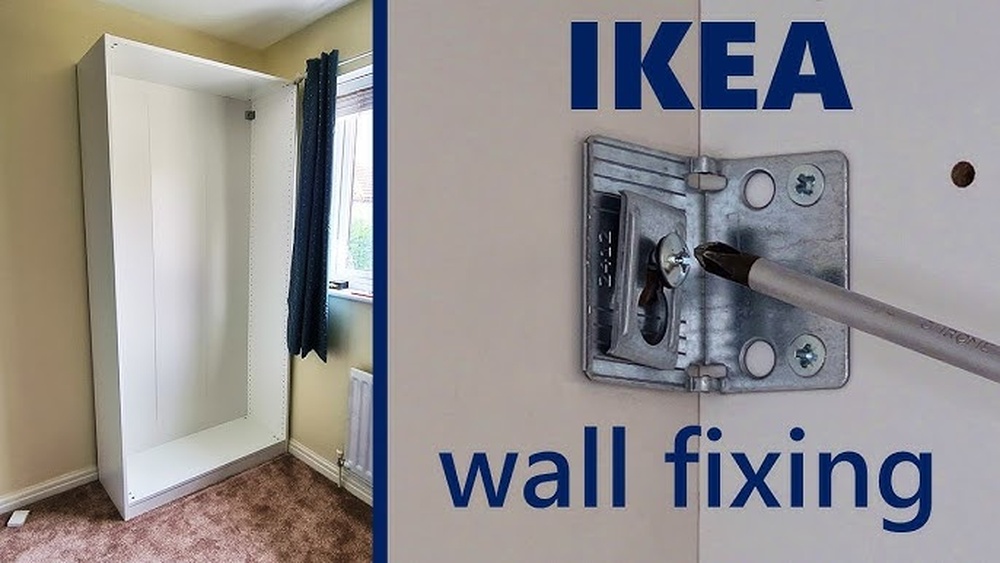
Are you tired of nails slipping out and leaving holes in your walls? Knowing how to use wall anchors can change everything.
With the right technique, you can hang shelves, pictures, and heavy items securely—no more worrying about damage or accidents. In this guide, you’ll discover simple, step-by-step tips to choose and install the perfect wall anchors for your needs. Keep reading, and you’ll gain the confidence to tackle your next project like a pro.
Types Of Wall Anchors
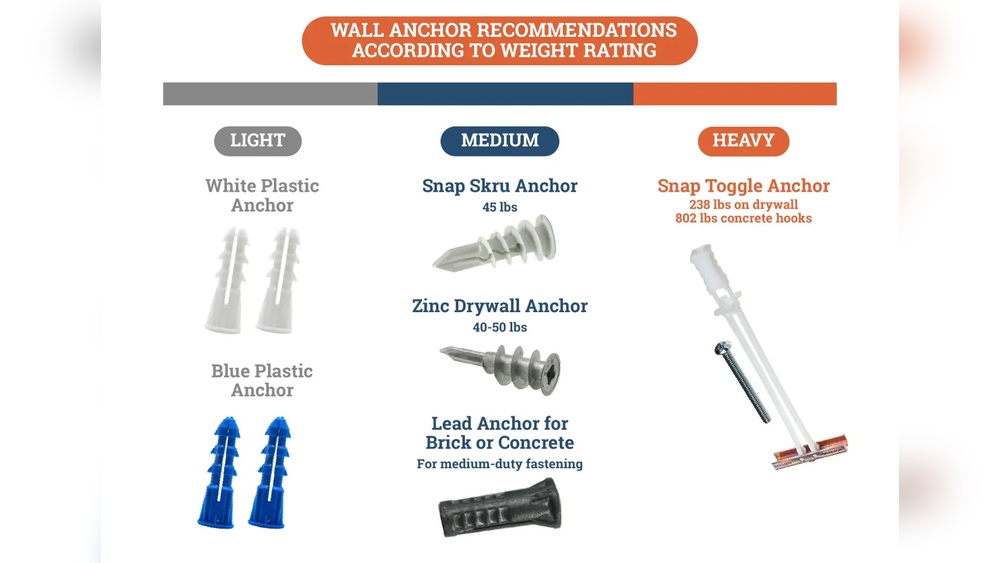
Wall anchors hold screws firmly in place. They help when walls cannot support screws alone. Different anchors work best for different wall types and weights. Knowing the types of wall anchors helps you choose the right one for your project.
Below are common types of wall anchors used for various tasks. Each has a unique design and purpose.
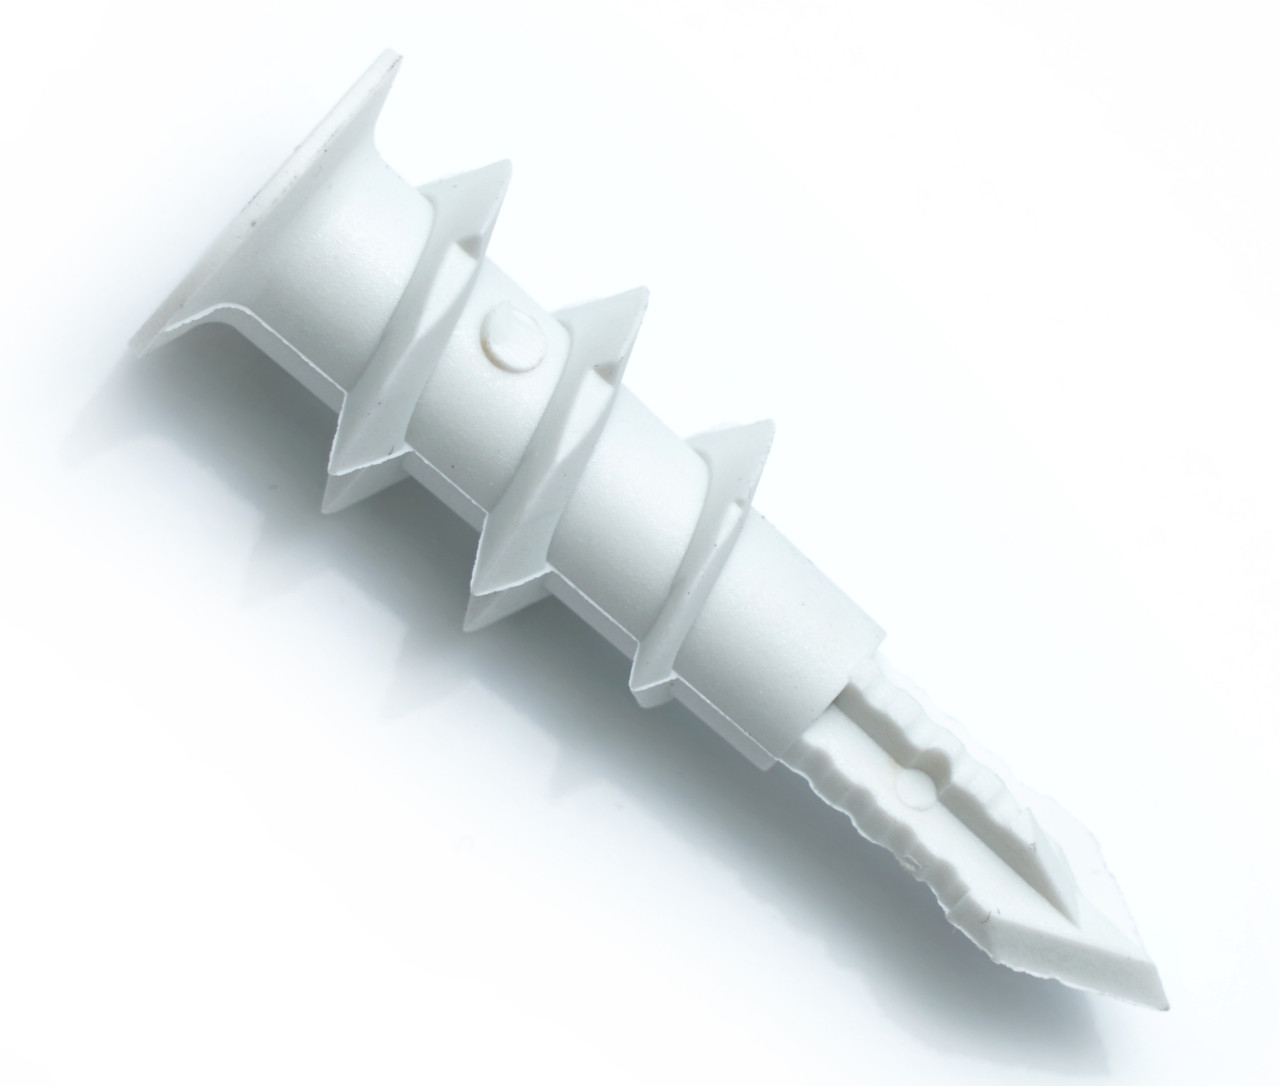
Plastic Expansion Anchors
Plastic expansion anchors are simple and popular. They work well in drywall and light materials. Insert the anchor into a drilled hole, then screw in. The anchor expands and grips the wall tightly. Best for light to medium loads.
Toggle Bolts
Toggle bolts hold heavy items on hollow walls. They have spring-loaded wings that open inside the wall. The wings spread the load over a larger area. Great for hanging shelves or heavy frames on drywall.
Molly Bolts
Molly bolts are metal anchors with expandable sleeves. Insert them into a drilled hole and tighten the screw. The sleeve expands behind the wall for a strong hold. Ideal for medium to heavy loads in drywall or plaster.
Threaded Drywall Anchors
Threaded drywall anchors screw directly into drywall without pre-drilling. They have sharp threads for easy installation. Provide a solid grip for light to medium weights. Perfect for hanging pictures or small shelves.
Self-drilling Anchors
Self-drilling anchors are metal or plastic and drill into drywall easily. No need for a drill hole first. They have wide threads that hold tightly. Suitable for light to medium loads and quick installation.
:max_bytes(150000):strip_icc()/how-to-use-and-discard-anchor-screws-1822671-Final-ec8091ccf65241b1b1f888549f25003a.jpg)
Credit: www.thespruce.com
Choosing The Right Anchor
Choosing the right wall anchor is key for a strong hold. Picking an anchor that matches your wall and load needs keeps your items safe. This guide helps you find the best anchor for your project.
Assessing Wall Material
Identify your wall type before selecting an anchor. Drywall, concrete, brick, and plaster all need different anchors. Some anchors work well in soft walls, others in hard walls. Matching the anchor to your wall ensures good support.
Weight And Load Considerations
Know the weight of the item you want to hang. Light items need smaller anchors. Heavy items need anchors designed for more weight. Overloading an anchor can cause damage or failure. Always check the anchor’s weight rating.
Anchor Size And Length
Choose the right size and length for your wall thickness. Longer anchors grip deeper and hold better in thick walls. Too short anchors may not hold well. The size must fit the screw or bolt you plan to use.
Tools Needed For Installation
Installing wall anchors requires a few simple tools. These tools help make the job easier and ensure the anchors hold firmly. Having the right tools is important for a safe and strong installation. Below are the key tools needed to install wall anchors effectively.
Drill And Drill Bits
A drill is essential to create holes in the wall for the anchors. Choose a drill with enough power to handle your wall material. Use drill bits that match the size of the wall anchor. Different anchors need different hole sizes. Using the correct drill bit size ensures a snug fit and strong hold.
Screwdriver Types
Screwdrivers drive screws into the wall anchors. A Phillips head screwdriver fits most screws used with anchors. Sometimes a flathead screwdriver is needed. A power screwdriver or drill with a screwdriver bit can speed up the work. Match the screwdriver type to the screw head for better control and less damage.
Measuring And Marking Tools
Measure and mark the exact spot for the wall anchor. Use a tape measure or ruler to get accurate distances. A pencil or marker helps mark the drilling points clearly. A level ensures the marks are straight and aligned. Proper measurement and marking prevent mistakes and uneven installation.
Preparing The Wall
Preparing the wall is the first step before installing wall anchors. This process helps ensure strong and secure support for your items. Taking time to prepare the wall carefully prevents damage and improves anchor performance.
Locating Studs
Studs are the wooden or metal beams behind the drywall. Anchors placed in studs hold more weight than those in drywall alone. Use a stud finder tool to locate studs easily. Move the tool slowly across the wall to find the edges of each stud.
Mark the center of the stud with a pencil. This mark shows where to place heavy-duty anchors. Avoid putting anchors too close to the edges of studs.
Marking Anchor Points
Measure the space where you want to hang or mount your item. Use a level to keep marks straight and even. Mark spots with a pencil where each anchor will go. Double-check spacing to match the item’s mounting holes.
Make clear, small marks. These help guide your drilling and keep holes in the right place.
Drilling Pilot Holes
Choose a drill bit size that matches the anchor size. Drill pilot holes at the marked points to make anchor installation easier. Keep the drill steady and straight to avoid angled holes.
Drilling pilot holes reduces the risk of wall damage. It also helps anchors fit tightly and hold firm.
Installing Different Anchors
Installing wall anchors correctly ensures a strong hold for your fixtures. Different anchors suit different wall types and weights. Understanding how to install each type helps you choose the best one for your project.
Plastic Expansion Anchor Installation
Start by drilling a hole matching the anchor size. Push the plastic anchor into the hole until flush with the wall. Insert the screw and tighten. The anchor expands inside the wall, securing the screw firmly.
Toggle Bolt Installation
Drill a large hole to fit the folded toggle. Thread the screw through the fixture and into the toggle bolt. Push the toggle through the hole. It opens inside the wall, gripping tightly. Tighten the screw to secure the fixture.
Molly Bolt Installation
Drill a hole for the molly bolt size. Insert the molly bolt into the hole. Tighten the screw until the bolt legs expand behind the wall. Remove the screw, attach your fixture, then reinsert and tighten the screw fully.
Threaded Drywall Anchor Installation
Mark the spot and push the threaded anchor into the drywall. Use a screwdriver to twist it in slowly. The anchor bites into the drywall for a secure hold. Insert the screw into the anchor and tighten.
Self-drilling Anchor Installation
Position the self-drilling anchor on the drywall. Use a screwdriver to twist it directly into the wall. No pre-drilling needed. The anchor cuts into the drywall and holds firmly. Insert the screw and tighten securely.

Credit: www.wikihow.com
Tips For Secure Mounting
Mounting items on walls needs care for safety and strength. Using wall anchors correctly stops damage and keeps things stable. Follow these tips for secure mounting that lasts and holds well.
Avoiding Common Mistakes
Choose the right type of anchor for your wall material. Drilling holes that are too big or too small weakens the hold. Do not force anchors into tight holes. Make sure the wall is clean and dry before installation. Avoid over-tightening screws; this can break the anchor or wall.
Ensuring Proper Anchor Depth
Drill holes deep enough for the entire anchor to fit. Anchors must sit flush or slightly below the wall surface. Too shallow placement reduces grip and can cause failure. Measure the anchor length and mark the drill bit. Keep the hole straight to ensure full anchor depth.
Double Checking Load Capacity
Check the anchor’s weight rating before use. Consider the weight of the item and any extra force it may face. Use stronger anchors for heavy or frequently moved objects. Do not guess load limits; follow manufacturer instructions strictly. When in doubt, choose a higher capacity anchor for safety.
Removing Wall Anchors
Removing wall anchors can be tricky. Different anchors need different methods. Some pull out easily, while others require more care. This section shows how to remove anchors safely. It also covers how to fix the wall after removal.
Techniques For Different Anchors
Plastic expansion anchors often come out by pulling gently. Use pliers for a better grip. Twist slowly to avoid breaking the anchor inside the wall.
Threaded anchors may need unscrewing. Turn counterclockwise with a screwdriver. If stuck, push slightly while turning.
Toggle bolts require pressing the toggle inside the wall. Push the bolt inward to release the toggle. Then pull the bolt and toggle out carefully.
Molly bolts need to be unscrewed until the anchor loosens. After that, pull the anchor out. Use a drill for stuck anchors, but be gentle.
Repairing Wall Damage
Wall damage can happen after removing anchors. Small holes need filling with spackle or putty. Apply with a putty knife and smooth the surface.
For bigger holes, use a patch kit. Cut a mesh patch to cover the hole. Apply spackle over the patch and let it dry.
After drying, sand the area smooth. Paint over the repaired spot to match the wall color. This restores the wall’s clean look.
Safety Precautions
Safety is very important when using wall anchors. Taking the right steps protects you and your home. It helps avoid accidents and damage. Always prepare before you start. Keep your workspace clean and organized. Focus on safety to complete your task with confidence.
Protective Gear
Wear safety glasses to protect your eyes. Dust and small debris can cause injury. Use gloves to keep your hands safe from sharp edges. Closed-toe shoes help protect your feet from falling tools. Dress comfortably but avoid loose clothing that may catch on tools.
Handling Tools Safely
Hold tools firmly to keep control. Use the right tool for the job to prevent damage. Keep tools sharp and clean for better performance. Store tools safely after use to avoid accidents. Always check for power cords or batteries before starting work.
Credit: www.concretefasteners.com
Frequently Asked Questions
What Are Wall Anchors Used For?
Wall anchors provide extra support when mounting heavy items. They prevent screws from pulling out of drywall or plaster. Anchors distribute weight evenly, ensuring secure attachments. They are essential for hanging shelves, mirrors, or TVs safely.
How Do You Install Wall Anchors Correctly?
First, drill a hole matching the anchor size. Insert the anchor flush with the wall surface. Then, screw into the anchor slowly until tight. Avoid overtightening to prevent wall damage. Proper installation ensures maximum holding strength.
Which Wall Anchor Type Is Best For Drywall?
Plastic expansion anchors are common for light loads. Toggle bolts offer strong support for heavy items. Molly bolts work well for medium loads. Choose based on item weight and wall thickness for best results.
Can Wall Anchors Be Removed Easily?
Yes, most wall anchors can be removed with care. Unscrew the fastener and gently pull the anchor out. Some anchors may require drilling or pushing through the wall. Patch holes afterward to restore the surface.
Conclusion
Wall anchors hold heavy items on walls safely and securely. Choose the right anchor for your wall type. Drill carefully and insert anchors with steady hands. Tighten screws just enough to hold the item firmly. Test the strength before hanging anything heavy.
Small steps lead to strong and safe results. Practice makes the process easier and faster. Use these tips to hang pictures, shelves, or mirrors with confidence. Wall anchors protect your walls and keep items stable. Simple tools and clear steps make the job smooth.