Are you looking to hang something sturdy and secure on your wall? Knowing how to put a J hook in the wall can make your life so much easier.
Whether you want to hang pictures, tools, or decorations, a J hook is a simple and reliable solution. But if you’ve never done it before, you might wonder where to start or worry about making mistakes. Don’t worry—this guide will walk you through every step.
By the end, you’ll feel confident and ready to hang anything safely and neatly. Keep reading, and you’ll discover easy tips that save you time and effort.
Choosing The Right J Hook
Choosing the right J hook is important for a safe and secure hold. The right hook supports the weight and fits the object you want to hang. Different hooks work better for different tasks. Understanding types, weight limits, and materials helps you pick the best one.
Types Of J Hooks
There are several types of J hooks. Some have a simple open design. Others have a small lip to keep items from slipping off. Some hooks are made for cables, while others hold tools or decorations. Pick the type that matches what you want to hang.
Weight Capacity
J hooks have different weight limits. Light-duty hooks hold small items like keys or cords. Heavy-duty hooks support large items like bicycles or heavy tools. Check the weight capacity before buying. Using a hook that holds too little weight can cause damage or accidents.
Materials And Finishes
J hooks come in metal, plastic, or coated materials. Metal hooks are strong and last long. Plastic hooks suit lighter objects and resist rust. Some hooks have a finish to prevent scratching walls or objects. Choose a material that matches your needs and environment.
Credit: sft2tactical.com
Gathering Necessary Tools
Putting a J hook in the wall needs the right tools. Gathering tools before starting makes the job easier. It saves time and helps you avoid mistakes. This section lists the basic tools needed for the task.
Measuring Tools
Accurate measurements are key to a good job. Use a tape measure to find the spot for the hook. A ruler or measuring tape works well. Mark the exact place to prevent errors.
Drill And Drill Bits
A drill makes holes for the J hook. Use the right drill bit size for the hook. A small bit first, then the correct size, helps avoid wall damage. Choose a drill with good power and control.
Level And Pencil
A level keeps the hook straight on the wall. It helps to avoid crooked hanging. Use a pencil to mark points. Pencil marks are easy to erase and adjust.
Preparing The Wall
Preparing the wall is the first step to install a J hook safely and securely. It helps to find the right place to hold the hook firmly. Taking time to prepare the wall makes the installation easier and prevents damage.
Finding Studs
Studs are the wooden beams inside the wall. They hold heavy things better than drywall. Use a stud finder tool to locate the studs. Move the tool slowly along the wall. Mark the edges of the stud to know its center. This is the best spot for the J hook.
Marking The Spot
Mark the exact spot for the hook on the wall. Use a pencil to make small, clear marks. Check that the mark is on the stud center. Measure the height carefully for the hook’s purpose. Clear markings help to drill holes accurately.
Checking For Obstacles
Walls hide pipes, wires, and cables inside. Avoid drilling into these. Use a wire detector or stud finder with live wire detection. Scan the wall near your marks. Adjust the spot if you find any obstacles. Safety comes first to prevent accidents.

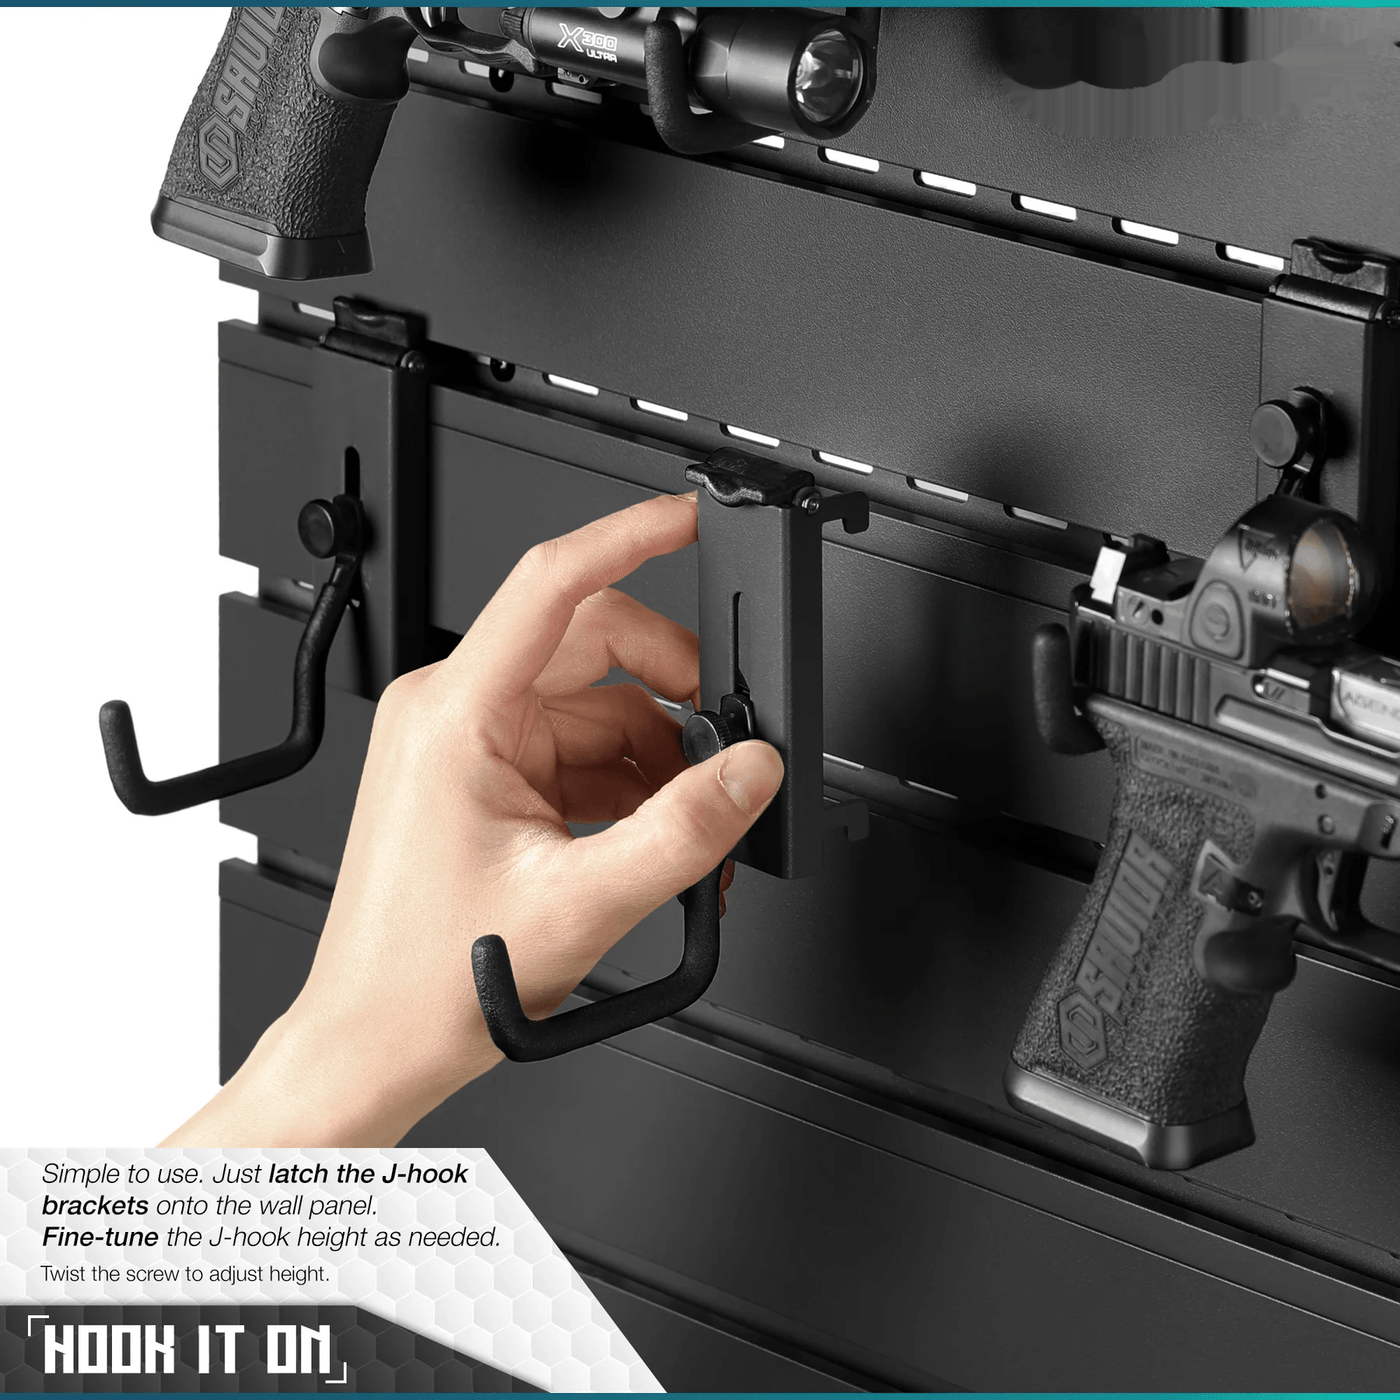
Credit: www.amazon.com
Installing The J Hook
Installing a J hook in the wall is a simple task that anyone can do. The key steps involve drilling pilot holes, securing the hook tightly, and testing its stability. Doing this right will ensure your J hook holds well and lasts a long time.
Drilling Pilot Holes
Start by marking where the J hook will go. Use a pencil to make a small mark. Choose a drill bit smaller than the screw size. Drill holes at the marked points carefully. This makes screwing easier and prevents wall damage.
Securing The Hook
Place the J hook over the pilot holes. Insert screws through the hook’s holes into the wall. Use a screwdriver or drill to tighten them firmly. Make sure the hook sits flush against the wall surface. Tight screws keep the hook stable and safe.
Testing Stability
After securing, gently pull on the J hook. Check if it moves or feels loose. If it does, tighten the screws more. Test with light weight first to be sure it holds well. Proper testing avoids accidents and keeps your items secure.
Tips For Perfect Hanging
Placing a J hook on the wall seems simple but needs care. Small details make the difference between a secure hang and a damaged wall. Follow these tips for perfect hanging.
These ideas help keep your items safe and your wall clean. Let’s explore how to do it right every time.
Even Weight Distribution
Place the hook where the item’s weight spreads evenly. This stops the hook from bending or pulling out. Avoid hanging heavy items on one hook alone. Use two hooks if the item is wide or heavy. Check the item’s weight before picking a hook size.
Avoiding Wall Damage
Choose the right wall anchors for your wall type. Drywall needs anchors, but wood may not. Use a level to mark the spot. Drill a small pilot hole to prevent cracks. Do not hammer the hook directly into thin walls. Always use tools carefully to protect your wall.
Adjusting Hook Placement
Check the hook position before final fixing. Hang the item lightly to see if it aligns well. Move the hook a little if the item tilts or hangs unevenly. Small changes can fix balance problems quickly. Keep adjusting until the item looks straight and stable.
Common Mistakes To Avoid
Putting a J hook in the wall sounds simple. Yet, many make mistakes that cause problems later. Avoiding common errors makes your job easier. It helps keep your items safe and secure on the wall.
Ignoring Wall Material
Different walls need different hooks and methods. Drywall, plaster, and concrete all act differently. Using the wrong hook type can damage the wall. It can also cause the hook to fall out. Always check the wall material before choosing the hook.
Overloading The Hook
J hooks have weight limits. Putting too much weight can bend or pull the hook. This risks your items falling and breaking. Know the weight of what you hang. Choose a hook that can safely hold that weight.
Improper Tools Use
Using the right tools is key. A drill, screwdriver, or hammer must fit the job. Wrong tools can damage the hook or wall. They can also make the hook loose. Always use tools made for installing J hooks.

Credit: utrdecorating.com
Frequently Asked Questions
What Tools Are Needed To Install A J Hook In The Wall?
You need a J hook, drill, wall anchors, screws, a screwdriver, and a level. These tools ensure secure and accurate installation.
How Do You Find The Right Spot For A J Hook?
Locate a stud or use wall anchors for drywall. Mark the spot at desired height and level before drilling.
Can J Hooks Hold Heavy Items On Drywall?
Yes, with proper wall anchors, J hooks can support medium to heavy weights safely on drywall.
How Deep Should You Drill Holes For J Hooks?
Drill holes slightly smaller than the wall anchors to ensure a tight fit and strong hold.
Conclusion
Placing a J hook in the wall is simple and useful. Start by choosing the right spot and tools. Mark the wall, drill a hole, and insert the hook firmly. This method helps hang items securely without damage. With practice, you will do it quickly and safely.
A steady hand and patience make all the difference. Now you can hang pictures, cables, or decorations easily. Try it yourself and see how neat your space looks. Small steps bring big results.