Have you ever wanted to turn simple latch hook projects into beautiful wall hangings that brighten up your space? You’re in the right place.
Making a latch hook into a wall hanging is easier than you think, and it lets you add a personal touch to any room. Whether you’re new to latch hooking or looking to upgrade your craft, this guide will walk you through every step.
By the end, you’ll have a unique piece of art that you’ll be proud to display. Ready to transform your latch hook into something amazing? Let’s dive in.
Materials Needed
Preparing your workspace is the first step in creating a beautiful latch hook wall hanging. A well-organized area makes the process easier and more enjoyable. It helps you stay focused and reduces mistakes. Follow these tips to set up your workspace right.
Setting Up A Comfortable Area
Choose a space with good light. Natural light is best, but a bright lamp works well too. Sit at a table or desk that is the right height. Your back and neck will thank you later. Use a comfortable chair with support. Keep your feet flat on the floor. Make sure you have enough room to spread out your materials. Avoid clutter to keep your mind clear.
Organizing Materials For Efficiency
Gather all your latch hook tools and yarn before you start. Sort the yarn by color in small containers or bags. Keep your latch hook tool, canvas, and scissors close. Use a tray or box to hold loose pieces. This prevents losing small parts and saves time. Arrange everything so you can reach it easily. Staying organized helps you focus on your project.
Preparing Your Workspace
Basic latch hook techniques form the foundation for creating beautiful wall hangings. Understanding these simple steps helps beginners start with confidence. These techniques focus on handling the tool, making knots, and keeping yarn tension steady.
How To Use A Latch Hook Tool
The latch hook tool has a small latch that opens and closes. Hold the tool like a pencil for better control. Insert the hook under a square on the canvas. Slide a piece of yarn onto the hook. Pull the hook back to secure the yarn. The latch closes to hold the yarn in place.
Creating Simple Knots
Cut yarn into equal lengths for easy knotting. Fold a yarn piece in half before hooking. Place the folded yarn on the hook. Pull the hook through the canvas hole. The yarn forms a loop around the canvas fibers. Pull the yarn ends through this loop. Tighten the knot by pulling the ends down.
Tips For Consistent Tension
Keep your yarn tension even to avoid loose loops. Hold the yarn firmly but do not pull too hard. Check the canvas regularly for tight knots. Adjust your pulling force as you work. Consistent tension keeps the design neat and durable.
Basic Latch Hook Techniques
Starting a latch hook project is exciting and fun. It sets the base for your beautiful wall hanging. Careful preparation helps you avoid mistakes and creates a neat finish. Follow simple steps for a smooth start.
Beginning At The Edges
Begin your latch hook at the edges of the canvas. Edges help you keep the shape of the design. Work from one corner to another to make straight lines. This method makes it easier to fill the middle later. It also stops the canvas from bending or stretching.
Filling In The Design
After edges, fill the center of your pattern. Use the colors as shown in your chart. Fill small sections at a time to avoid errors. Check your work often to keep the design clear. Take breaks to rest your hands and eyes.
Common Mistakes To Avoid
Do not pull the yarn too tight or too loose. Both cause uneven knots and a messy look. Avoid skipping knots; it weakens the wall hanging. Keep your yarn pieces the same length for a smooth surface. Use the right hook size for your canvas and yarn.

Credit: abeautifulmess.com
Designing Your Pattern
Finishing touches give your latch hook wall hanging a neat, polished look. They protect your work and prepare it for display. Small steps here make a big difference in how your piece looks and lasts.
Trimming Excess Yarn
Cut the loose yarn ends close to the knots. Use sharp scissors for clean cuts. Trim evenly to keep the surface smooth. This step stops fraying and makes the design clear.
Securing The Backing
Attach a fabric or felt backing to hide knots. Use glue or sew it carefully along the edges. The backing adds strength and makes your piece sturdy. It also hides messy threads for a tidy finish.
Adding A Hanging Mechanism
Choose a strong rod, dowel, or hanger for your wall piece. Sew or glue loops to the top edge for support. Make sure it hangs straight and balanced. This step makes your art ready to show on any wall.
Starting The Latch Hook Project
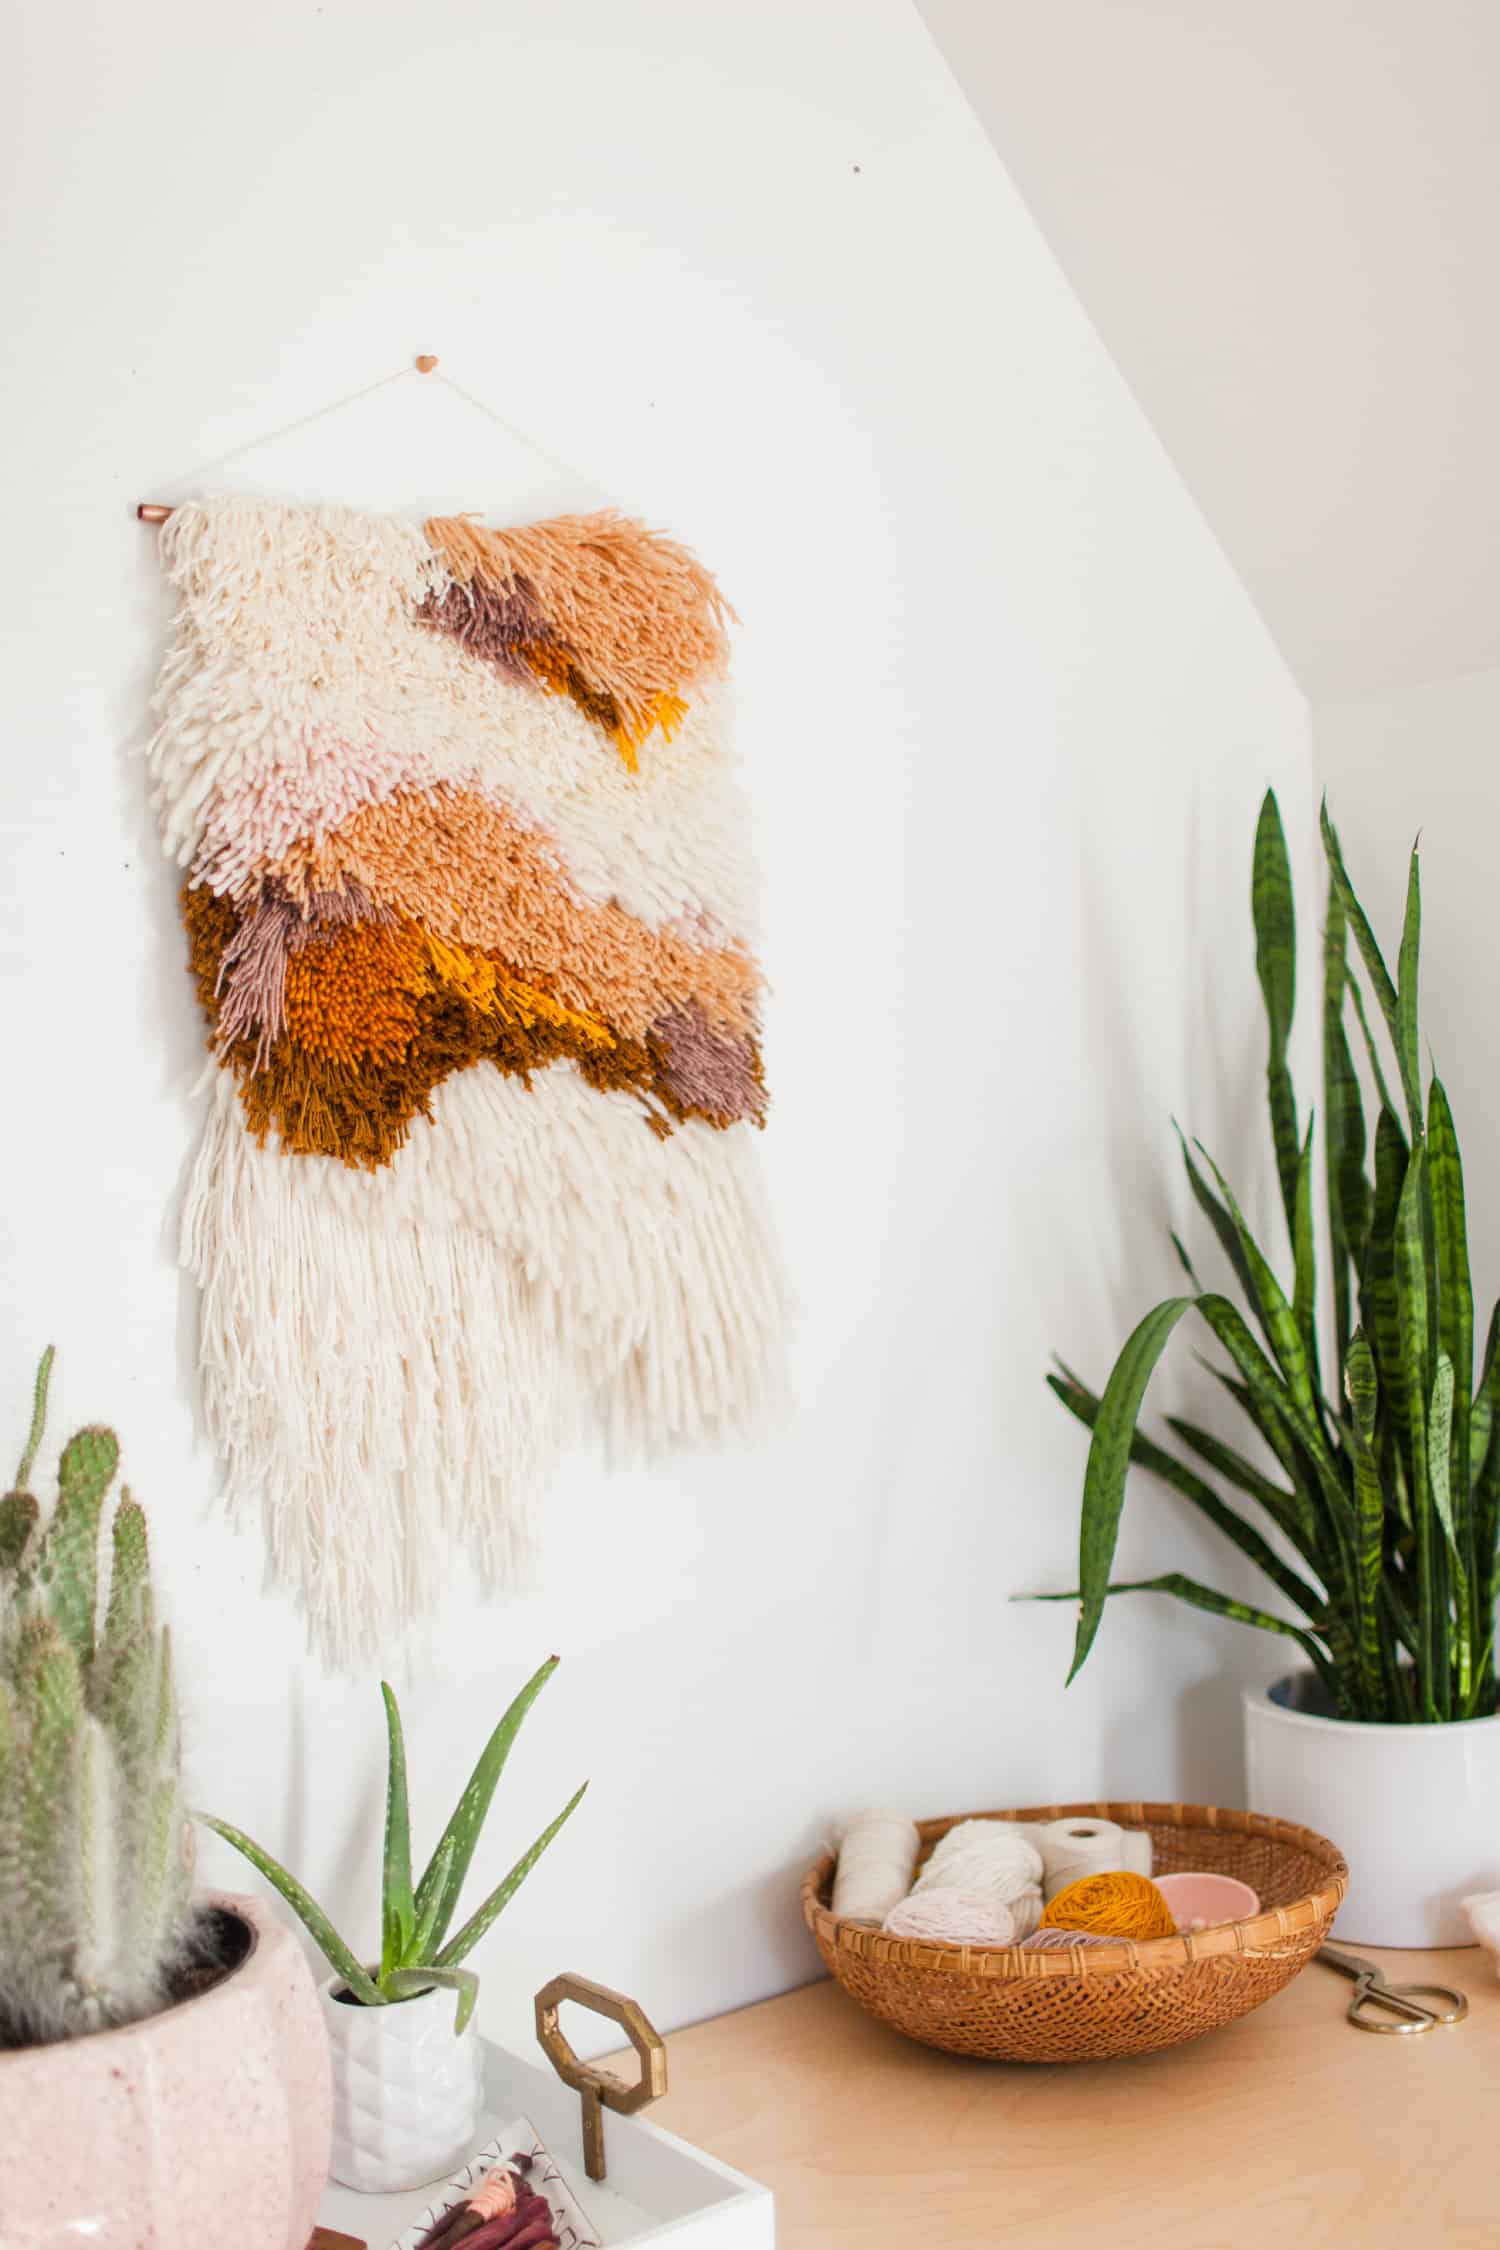
Displaying your latch hook wall hanging is the final step in your creative project. This step lets you show off your hard work and add charm to your space. Picking the right spot and caring for your art will keep it looking great for a long time.
Choosing The Perfect Spot
Select a place with good lighting but no direct sunlight. Too much sun can fade the colors quickly. Walls near sofas, beds, or entryways work well for decoration. Make sure the wall is clean and smooth to hang your piece securely. The size of the wall hanging should match the space available. Avoid crowded walls to let your art stand out. Eye level placement helps people notice and enjoy it easily.
Caring For Your Latch Hook Art
Keep your wall hanging dust-free by gently shaking or vacuuming with a soft brush. Avoid using water or harsh cleaners that may damage the yarn. Protect it from moisture to prevent mold or mildew. Rotate your piece occasionally to prevent uneven fading. Handle your latch hook with clean hands to stop dirt buildup. Store it flat or rolled if you need to keep it safely away. Simple care helps maintain the vibrant colors and texture.
Credit: www.youtube.com
Finishing Touches
Troubleshooting is key to perfecting your latch hook wall hanging. Small issues can affect the final look. Fixing them early saves time and effort. Keep your project neat and strong with a few simple fixes.
Fixing Loose Knots
Loose knots can make your design look messy. Gently pull the yarn ends to tighten each knot. Use a small hook or needle to pull the yarn through the canvas again. Avoid pulling too hard to keep the knots secure. Check knots regularly to stop unraveling early.
Repairing Damaged Areas
Damaged spots may appear as missing or frayed yarn. Cut loose or torn yarn carefully with scissors. Use matching yarn to fill gaps or replace damaged pieces. Attach new yarn by making fresh knots in the same spot. Press the repaired area flat for a smooth finish.
Credit: abeautifulmess.com
Frequently Asked Questions
What Materials Are Needed For Latch Hook Wall Hangings?
You need latch hook canvas, yarn, a latch hook tool, and a wooden dowel or frame. Optional items include scissors and a comb to tidy yarn ends.
How Do You Start A Latch Hook Wall Hanging?
Begin by cutting yarn into equal lengths. Use the latch hook tool to pull yarn through the canvas loops, following your design pattern.
Can I Customize My Latch Hook Wall Hanging Design?
Yes, you can create any design by choosing yarn colors and arranging them on the canvas grid before hooking.
How Do You Finish And Display A Latch Hook Wall Hanging?
Secure yarn ends by trimming and combing. Attach the canvas to a wooden dowel or frame. Hang it on a wall hook or nail.
Conclusion
Creating a latch hook wall hanging is fun and simple. You only need a few tools and patience. Follow the steps carefully for the best results. This craft adds a personal touch to any room. It also lets you show your creativity.
Try different colors and patterns to make it unique. Enjoy the process, and be proud of your work. Your new wall art will brighten your space. Keep practicing to improve your skills. Crafting can be relaxing and rewarding. Give it a try today!