Have you ever wished you could control your room’s light from two different spots? Adding a second switch to an existing light can make your daily routine easier and more convenient.
Whether it’s for a hallway, staircase, or large room, this simple upgrade lets you turn the light on or off from multiple locations. In this guide, you’ll discover clear, step-by-step instructions that anyone can follow—even if you’re not an expert.
Stick with me, and you’ll soon have the power to control your lighting exactly how you want. Ready to make your home smarter and more comfortable? Let’s get started!

Credit: diy.stackexchange.com
Tools And Materials Needed
Adding a second switch to an existing light requires the right tools and materials. Having everything ready makes the job easier and safer. This section lists the essential items needed for this task. Prepare well to work efficiently and avoid mistakes.
Basic Tools
Start with basic tools for electrical work. A screwdriver set with flathead and Phillips tips is necessary. Wire strippers help remove insulation from wires carefully. A voltage tester checks if wires are live before touching them. Pliers are useful for bending and twisting wires.
Electrical Components
You need specific electrical parts to add a second switch. A new switch, usually a three-way switch, is essential. Electrical wire, often 14/3 with three conductors plus ground, connects the switches. Wire nuts secure wire connections safely. Electrical tape helps insulate exposed wire ends.
Safety Gear
Safety gear protects you during electrical work. Insulated gloves prevent electric shocks. Safety goggles shield your eyes from dust and sparks. Wear comfortable clothing that covers your skin. Always turn off power at the circuit breaker before starting.
Safety Precautions
Safety is the top priority when adding a second switch to an existing light. Working with electricity can be dangerous without the right precautions. Taking simple safety steps protects you from shocks and accidents. Always prepare well before starting any electrical work.
Turn Off Power
Switch off the power at the circuit breaker. Do not rely on the wall switch alone. Confirm that the correct circuit is off to avoid electric shock. Lock or tag the breaker to keep others from turning it on.
Test For Live Wires
Use a voltage tester to check wires before touching them. Test all wires in the switch box. Never assume wires are dead. Double-checking prevents shocks and injuries during the project.
Work In Dry Conditions
Keep the work area dry and free of water. Wet hands or tools increase the risk of electric shock. Avoid working in damp or rainy environments. Safety improves in dry, well-lit spaces.
Types Of Switch Setups
Adding a second switch to control a light can make your home more convenient. Different switch setups allow for different control options. Understanding the types of switches helps you choose the right one. This section explains the most common types and when to use them.
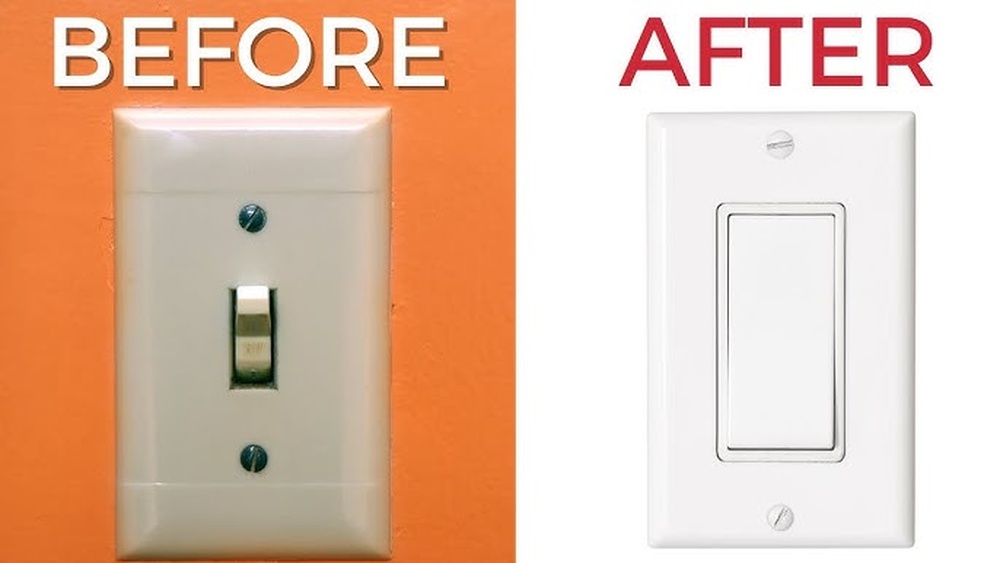
Single-pole Switch
A single-pole switch controls one light or set of lights from one location. It has two terminals and a simple on/off function. This switch is easy to install and works well for basic lighting setups. It does not allow control from multiple places.
Three-way Switch
A three-way switch lets you control one light from two different locations. It has three terminals and works with a matching three-way switch. This setup is common in hallways, stairs, or large rooms. It offers flexibility and convenience in lighting control.
When To Use Each
Use a single-pole switch for simple on/off control from one spot. Choose a three-way switch if you want to control the light from two places. For example, stairs or long hallways benefit from three-way switches. This choice depends on how you want to operate your lighting.
Preparing The Existing Wiring
Preparing the existing wiring is the first step to add a second switch to a light. It ensures safety and smooth installation. Understanding the current setup helps avoid mistakes and saves time. Follow these steps to prepare the wiring properly.
Locate The Current Switch
Find the switch that controls the light now. Turn off the power from the circuit breaker for safety. Remove the switch cover carefully. Use a voltage tester to confirm no electricity flows. This step prevents electric shocks during work.
Check Wire Types
Look inside the switch box to see the wires. Common types are black (hot), white (neutral), and green or bare (ground). Note if the wires are copper or aluminum. Some older homes have different wiring. Knowing the wire types helps connect the new switch correctly.
Plan The New Switch Location
Decide where to place the second switch. Choose a spot near the area where you want control. Make sure the location is easy to reach. Check if there is space inside the wall for wiring. Planning avoids extra work and keeps the setup neat.
Installing The Second Switch
Start by turning off the power to ensure safety. Connect the new switch wiring to the existing circuit carefully. Test the switches to confirm both control the light correctly.
Turn Off Circuit Breaker
Safety is the first step in installing a second switch. Find the correct circuit breaker for your light. Switch it off to cut power. Use a voltage tester to confirm no electricity flows. Never work on live wires. This step prevents shocks and accidents.
Run New Wire
Next, run a new wire from the existing switch box to the new switch location. Use a cable suitable for your home wiring, usually 14/3 or 12/3 with three wires inside. Carefully pull the wire through walls or conduits. Leave enough length on both ends for connections. Keep wires neat and avoid damage.
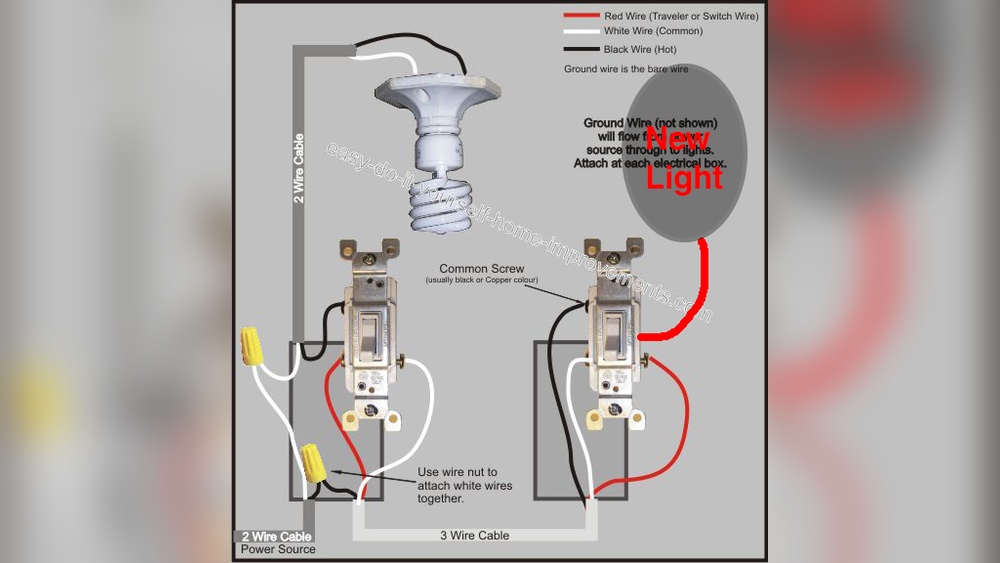
Connect Wires To Switch
Strip the wire ends to expose copper. Attach the wires to the second switch’s terminals. Connect the traveler wires to the brass screws. The common wire goes to the black or dark-colored terminal. Tighten screws firmly to ensure good contact. Follow the switch manufacturer’s instructions for wire placement.
Secure The Switch
Push the wires gently into the electrical box. Align the switch with the box holes. Use screws to fasten the switch securely. Attach the switch cover plate. Turn the circuit breaker back on. Test the new switch to confirm it controls the light properly.
Testing The Setup
Testing the setup is an important step after installing a second switch. This step ensures both switches control the light correctly. It also helps find and fix any wiring problems early. Follow these steps carefully for a smooth process.
Restore Power
Turn the power back on at the circuit breaker. This step makes the switches live again. Be careful and avoid touching wires during this step. Use a voltage tester to confirm the power is on if needed.
Test Both Switches
Flip the first switch and watch the light. It should turn on or off as expected. Next, try the second switch and check the light. Both switches must work independently and together. Test each switch multiple times to be sure.
Troubleshoot Common Issues
If the light does not work, check the wiring connections. Loose or wrong wires cause most problems. Make sure all wires are tight and connected to correct terminals. If the light flickers, check for poor wire contact. Use a screwdriver to tighten any loose screws. Double-check the circuit breaker is fully on. Replace faulty switches if needed.
Tips For A Professional Finish
Getting a professional finish on your second light switch makes the project look neat. It also helps keep the wiring safe and reliable. Small details matter. They show in the final look and function of your work.
Follow these simple tips to make your second switch look like it was done by a pro. These steps help avoid common mistakes and keep your installation clean.
Use Proper Wire Connectors
Choose the right wire connectors for your wires. Twist-on wire nuts work best for most home wiring. Make sure the connector fits tightly over the wires. Loose connectors can cause bad connections or sparks. Always check the wires inside the connector are secure.
Label Wires
Label each wire before you disconnect or move it. Use small tape pieces or tags with clear writing. This helps you match wires easily when you connect them to the new switch. It also makes future repairs or changes safer and faster.
Mount Switch Boxes Securely
Fix the switch boxes firmly to the wall studs. Loose boxes can move and damage the wiring. Use screws that hold the box tight. Check the box is flush with the wall surface for a clean look. Proper mounting prevents switch damage and keeps the wall safe.
Credit: www.reddit.com

Credit: www.finehomebuilding.com
Frequently Asked Questions
How Do I Add A Second Switch To One Light?
To add a second switch, use a three-way switch setup. This involves wiring two switches to control one light. Ensure power is off before starting. Connect traveler wires between switches and a common wire to the light fixture. Follow wiring diagrams carefully for safety.
What Tools Are Needed For Installing A Second Switch?
You need a voltage tester, wire stripper, screwdriver, electrical tape, and wire nuts. Also, have a three-way switch and appropriate wiring. Safety gloves and goggles are recommended. These tools help ensure a safe and efficient installation process.
Can I Add A Second Switch Without Rewiring The Entire Circuit?
Yes, if existing wiring supports three-way switching. Use the traveler wires between switches for control. Sometimes, minor rewiring is needed near switches or the light fixture. Check your current wiring layout before starting to avoid major changes.
Is It Safe To Install A Second Switch Myself?
Yes, if you follow safety guidelines and local codes. Always turn off power at the breaker before working. Use a voltage tester to confirm no power is present. If unsure, consult a professional electrician to avoid hazards.
Conclusion
Adding a second switch to your light is easier than it seems. With the right tools and steps, you can control your light from two places. Always stay safe and turn off power before working. Take your time and follow instructions closely.
This small change makes your room more convenient. Try it yourself and enjoy the new setup. Simple upgrades like this improve daily life. You’ll feel proud after finishing the task. Give it a go and see the difference!