Have you ever wished you could control your light fixture more easily? Adding a toggle switch can give you that simple, instant power at your fingertips.
Whether you want to upgrade an old setup or make your lighting more convenient, this guide will walk you through every step. By the time you finish reading, you’ll know exactly how to add a toggle switch to your light fixture safely and quickly—no confusion, no hassle.
Ready to take control of your lighting? Let’s get started!
Tools And Materials Needed
Adding a toggle switch to a light fixture is a simple way to control your lighting. Having the right tools and materials makes the job easier and safer. Prepare everything before starting the installation.
Gather all items to avoid interruptions. This ensures smooth work and saves time.
Tools Needed
- Voltage tester – checks power is off
- Wire stripper – removes insulation from wires
- Screwdriver – for mounting the switch and fixture
- Drill – makes holes if needed
- Needle-nose pliers – bends and holds wires
- Electrical tape – insulates wire connections
- Wire nuts – secure wire joins
Materials Needed
- Toggle switch – choose a switch rated for your fixture
- Electrical wire – matches existing wire gauge
- Light fixture – the lamp or bulb holder
- Wall plate – covers the switch
- Wire connectors – for safe joins
- Mounting screws – to fix the switch and plate
Safety Precautions
Working with electrical fixtures involves risks. Safety must be your top priority. Taking the right precautions protects you and your home. Follow these key safety steps before adding a toggle switch to a light fixture.
Turn Off The Power
Always switch off the circuit breaker that controls the light fixture. Use a voltage tester to confirm no electricity flows. Never trust the wall switch alone to cut power.
Use Proper Tools
Select tools designed for electrical work. Insulated screwdrivers and wire strippers reduce shock risk. Avoid using damaged or worn tools during installation.
Wear Safety Gear
Wear rubber-soled shoes to insulate from the floor. Use safety goggles to protect your eyes from sparks. Gloves can help but must be rated for electrical work.
Check Wiring And Connections
Inspect wires for damage or wear before starting. Replace any frayed or exposed wires. Secure connections tightly to prevent shorts or loose contacts.
Follow Local Electrical Codes
Read your local electrical rules before beginning. Codes ensure safe and proper installation. Use approved materials and techniques to meet standards.
Turn Off Power Supply
Turning off the power supply is the first and most important step. It keeps you safe from electric shock. Never start working on a light fixture without cutting the power first.
Electricity can cause serious injuries or worse. Always double-check that the power is off before touching any wires or parts.
Locate The Circuit Breaker
Find the main electrical panel in your home. It is usually in the basement, garage, or utility room. Look for the breaker that controls the light fixture you want to work on.
Switch Off The Correct Breaker
Flip the breaker switch to the “off” position. This stops electricity flow to the fixture. If unsure, turn off the main breaker to cut power to the entire house.
Confirm The Power Is Off
Use a voltage tester or a non-contact voltage detector. Test the wires in the light fixture. No light or beep means the power is off and safe to work on.
Inform Others In The House
Tell family or housemates that you turned off the power. This prevents someone from turning it back on by mistake. Safety first.
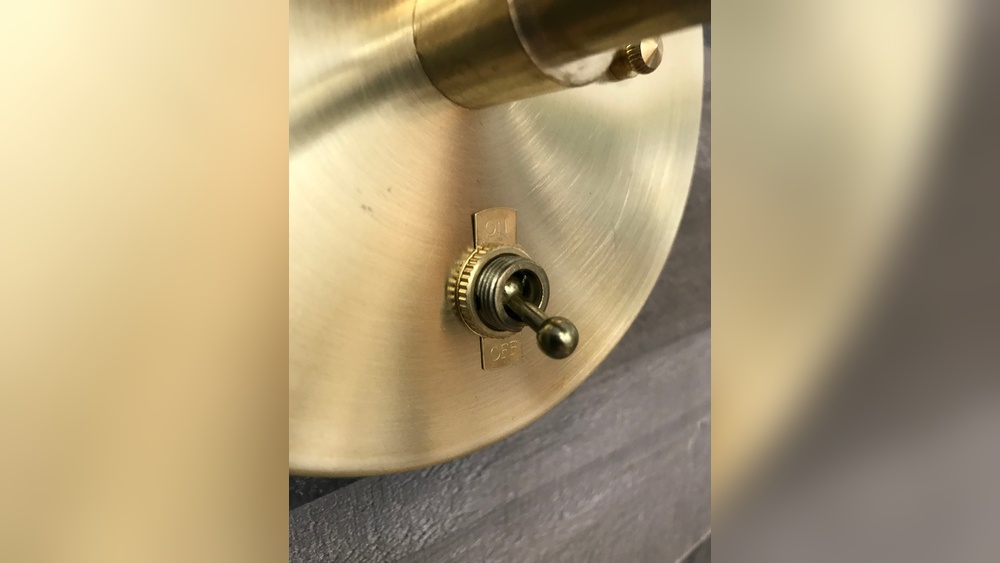
Credit: www.etsy.com
Remove Existing Fixture Or Switch
Removing the existing fixture or switch is the first step in adding a toggle switch to a light fixture. Safety is crucial. Always turn off the power at the circuit breaker before touching wires or fixtures.
Take your time and work carefully. This step sets the stage for a smooth installation process.
Turn Off The Power
Locate the correct circuit breaker and switch it off. Use a voltage tester to confirm the power is off. Never skip this step to avoid electric shock.
Remove The Fixture Or Switch Cover
Unscrew the cover plate from the light switch or fixture. Keep the screws in a safe place. This gives you access to the wiring inside.
Disconnect The Wires
Loosen the wire nuts or screws holding the wires. Carefully pull the wires apart. Note the wire positions for easier reconnection later.
Remove The Old Fixture Or Switch
Unscrew the fixture or switch from the wall or ceiling box. Gently pull it out without damaging wires. Set it aside safely.
Identify Wiring Components
Start by finding the wires connected to the light fixture. Identify the hot, neutral, and ground wires before installing the toggle switch. This step ensures safe and correct wiring for your light control.
Understanding The Power Source
The power source supplies electricity to your light fixture. It usually comes from the circuit breaker. You will find a black (hot) wire, a white (neutral) wire, and a green or bare copper (ground) wire. The black wire carries current to the fixture. The white wire returns the current to the electrical panel. The ground wire ensures safety by preventing shocks.
Recognizing The Fixture Wires
Light fixtures have wires that connect to the power source. These often include a black or red wire and a white wire. The black or red wire is the hot wire that powers the light. The white wire is the neutral wire. Some fixtures also have a green or bare wire for grounding. Knowing these wires helps you connect the switch correctly.
Identifying Switch Wires
A toggle switch has two terminals for wires. One terminal connects to the power source’s hot wire. The other terminal connects to the fixture’s hot wire. The switch controls the flow of electricity by opening or closing the circuit. Switch wires are usually black or red. Ground wires connect to the switch’s metal frame if it has one.
Choose The Right Toggle Switch
Choosing the right toggle switch makes installing a light fixture easier and safer. Pick one that fits your wiring and matches your room’s style. Simple steps help you connect wires and secure the switch properly.
Understand The Types Of Toggle Switches
Toggle switches come in various types. Single-pole switches control one light or fixture from one location. Double-pole switches handle higher voltage or two circuits. Three-way switches control a fixture from two locations. Identify the type that fits your wiring and needs.
Check The Electrical Ratings
Every toggle switch has electrical ratings. Look for voltage and current limits. Common ratings include 120V and 15A for home lighting. Ensure the switch matches or exceeds your fixture’s power requirements. This step prevents damage and ensures safety.
Pick The Right Size And Style
Toggle switches vary in size and shape. Choose one that fits your light fixture’s design. Some switches have larger toggles for easier use. Others blend into the wall for a clean look. Consider both function and appearance.
Consider The Installation Environment
Think about where the switch will be installed. For outdoor or damp places, select a weatherproof or sealed toggle switch. Indoor switches do not need special protection. Matching the switch to the environment extends its life.
Look For Quality And Durability
Choose switches made from sturdy materials. Metal toggles last longer than plastic ones. Check product reviews or brand reputation. A durable switch saves money and reduces maintenance.
Connect The Wires To Switch
Connecting the wires to the switch is a key step in adding a toggle switch to a light fixture. This process controls the flow of electricity to the light. Proper wiring ensures the switch works safely and correctly.
Before starting, always turn off the power at the breaker. Use a voltage tester to confirm no electricity flows to the wires. Safety first.
Identify The Wires
Look for the black (hot) wire, white (neutral) wire, and green or bare copper (ground) wire. The black wire carries power to the switch. The white wire usually bypasses the switch and goes to the light fixture. The ground wire protects against electrical shocks.
Attach The Ground Wire
Connect the green or bare copper wire to the green screw on the switch. This ground connection is essential for safety. It prevents electric shocks if a fault occurs.
Connect The Hot Wire
Attach the black (hot) wire to one of the brass screws on the switch. This wire brings power from the electrical source. It must be connected firmly to ensure the switch functions well.
Connect The Load Wire
Attach the other black wire, which leads to the light fixture, to the second brass screw. This wire carries power to the light when the switch is on. Secure this wire tightly to avoid loose connections.
Credit: diy.stackexchange.com
Secure The Switch In Place
Securing the switch in place is a key step in adding a toggle switch to a light fixture. A properly fixed switch ensures safety and reliable operation. Loose switches can cause shorts or fail to work correctly.
Follow clear steps to mount the switch firmly and neatly. Use the right tools and parts to avoid damage or accidents.
Prepare The Switch Box
Choose a switch box that fits your toggle switch size. Clean the box and remove any debris. This helps the switch sit properly and stay stable.
Align The Switch With The Box
Hold the switch against the box opening. Check that the toggle lever moves freely. Make sure the switch fits flush with the wall or fixture surface.
Fasten The Switch With Screws
Use the screws that come with the switch. Insert screws into the mounting holes. Tighten screws evenly to avoid tilting the switch.
Check The Switch Stability
After tightening, gently wiggle the switch. It should feel solid with no movement. A stable switch prevents wiring strain and enhances safety.
Test The Toggle Switch
Testing the toggle switch is a key step after installation. It ensures the switch works correctly and safely. This step helps catch wiring errors or faulty parts early. A proper test gives peace of mind before finalizing the setup.
Prepare For Testing
Turn off the main power at the circuit breaker. Double-check that no electricity flows to the fixture. Use a voltage tester to confirm the power is off. Safety first. Never skip this step.
Turn The Power Back On
Restore power from the circuit breaker. Stand clear of the fixture. Do not touch wires or the switch during this step. Power must be on to test the toggle switch function.
Operate The Toggle Switch
Flip the switch up and down. Watch the light fixture closely. The light should turn on and off with each flip. If it does, the switch works well.
Check For Issues
Listen for unusual sounds like buzzing or crackling. Smell for any burning odors. These may indicate wiring problems. If any issues appear, turn off power immediately. Recheck wiring or consult an electrician.
Finalize The Installation
Once testing is successful, secure the switch cover plate. Tighten screws gently to avoid damage. Clean the area of tools and debris. Your toggle switch is now ready for use.
Troubleshooting Common Issues
Adding a toggle switch to a light fixture can be simple. Yet, some common problems might appear during or after installation. Troubleshooting these issues saves time and keeps your light working safely.
Check each step carefully. Small mistakes often cause big problems. Use this guide to find and fix common toggle switch issues.
Check The Power Source
First, ensure the power is off before working. Use a tester to confirm no electricity flows. Sometimes, the circuit breaker may be off or tripped. Turn it on or reset it to restore power.
Inspect The Wiring Connections
Loose or wrong connections cause flickering or no light. Tighten all wire nuts and screws. Match wires by color: black to black, white to white. Ground wires should connect to the metal box or green screw.
The switch itself may be faulty. Use a multimeter to test for continuity. Replace the switch if it does not work properly. Do not force a switch that feels stuck or rough.
Look For Damaged Wires Or Fixtures
Damaged wires can cause shorts or no power. Check for cuts, burns, or exposed wires. Replace damaged wires or fixtures immediately. Use proper tools and safety gear to avoid shocks.
Verify The Light Bulb
Sometimes the bulb is the problem. Test the bulb in another fixture. Replace it if it does not light. Always use the right wattage and type for your fixture.
Confirm Proper Grounding
Grounding prevents electric shock and interference. Ensure the switch and fixture are grounded. Connect the green or bare copper wire correctly. Use a grounding tester if unsure.

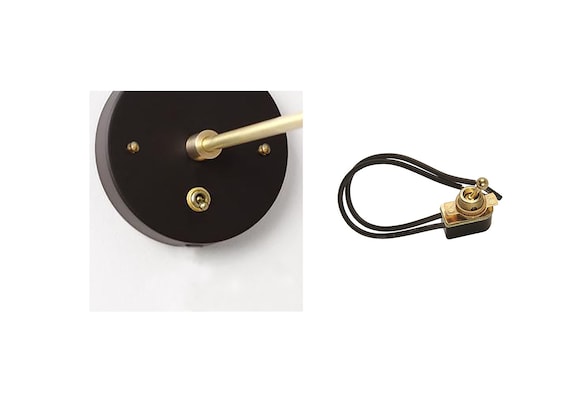
Credit: kdfoundation.org
Frequently Asked Questions
How Do I Safely Add A Toggle Switch To A Light Fixture?
First, turn off the power at the circuit breaker. Use a voltage tester to confirm no power. Follow wiring diagrams carefully. Connect the switch wires to the fixture wires using wire nuts. Always use insulated tools and follow local electrical codes for safety.
What Tools Are Needed To Install A Toggle Switch?
You will need a screwdriver, wire stripper, voltage tester, wire nuts, and electrical tape. A drill may be required for mounting. Having a wiring diagram handy is helpful. These tools ensure a secure and safe installation of your toggle switch.
Can I Add A Toggle Switch To Any Light Fixture?
Most light fixtures can have a toggle switch added if wiring access is available. Avoid fixtures with integrated controls or smart features. Check the fixture’s design and electrical specifications before installation to ensure compatibility.
How Do I Choose The Right Toggle Switch For My Fixture?
Select a toggle switch rated for your fixture’s voltage and current. Consider switch size, style, and mounting type. Ensure it matches your electrical circuit requirements. Using the correct switch prevents electrical hazards and ensures long-term performance.
Conclusion
Adding a toggle switch to a light fixture is simple and useful. It lets you control lights easily and save energy. Follow safety steps and use the right tools for best results. Take your time and check your work carefully.
Soon, you will enjoy the convenience of your new switch. This small change makes a big difference in your home. Try it yourself and see how easy it can be.