Have you ever tried to remove a robe hook from your wall, only to worry about damaging the paint or leaving ugly holes behind? You’re not alone.
Taking down a robe hook might seem simple, but doing it the right way can save you time, effort, and frustration. In this guide, you’ll learn easy, step-by-step methods to remove your robe hook cleanly and quickly—no expert skills needed.
Keep reading, and you’ll discover tips that protect your walls and make the whole process smooth from start to finish.

Credit: www.reddit.com
Tools Needed
Removing a robe hook from the wall needs the right tools. Having the proper tools makes the job easier and faster. It also helps avoid damage to your wall or the hook.
Some tools are essential for all removals. Others are useful for harder jobs. Knowing what to use saves time and effort.
Basic Tools Checklist
- Screwdriver (Phillips or flathead) for unscrewing hooks
- Utility knife to cut around paint or caulk
- Putty knife to pry gently if needed
- Measuring tape to check hook placement
- Safety glasses to protect your eyes
- Drop cloth to protect the floor
Optional Tools For Tricky Removals
- Power drill with screwdriver bits for stuck screws
- Heat gun to soften glue or paint around the hook
- Plastic scraper to avoid wall damage
- Wall patching kit for repairs after removal
- Stud finder to locate wall supports
Prepare The Area
Preparing the area is the first step before removing a robe hook from the wall. A clean and organized workspace makes the task easier and safer. It helps prevent damage to nearby items and surfaces.
Taking time to prepare the area can save effort later. It also keeps your tools and materials within reach. This way, you can focus on the removal without interruptions.
Clear Surrounding Space
Remove any objects near the robe hook. Take down towels, clothes, or decorations close to the hook. This prevents them from falling or getting dirty.
Keep the area free of clutter. A clear space gives you room to work comfortably. It also reduces the chance of accidents or broken items.
Protect Walls And Floors
Place a drop cloth or old towel on the floor below the hook. This catches any dust, debris, or small screws that might fall. It also protects your floor from scratches.
Use painter’s tape around the hook on the wall. The tape guards the paint from scratches or chipping during removal. It creates a clean edge and keeps the wall safe.
Identify Hook Type
Before removing a robe hook from the wall, first identify the hook type. This helps you choose the right removal method. Different hooks attach to the wall in different ways. Knowing the type saves time and prevents damage to the wall. Here are the main types of robe hooks you might find.
Screw-in Hooks
Screw-in hooks are the most common type. They have screws that go directly into the wall or a mounting plate. You can usually see the screws or the screw heads on the hook base. Use a screwdriver to remove the screws. Once the screws are out, the hook will come off easily.
Adhesive Hooks
Adhesive hooks stick to the wall with a strong glue or tape. They do not have screws or nails. You can tell these hooks by the smooth base and lack of visible screws. To remove, gently pull or peel the hook off the wall. Sometimes, heat from a hairdryer softens the glue and makes removal easier.
Mounted Hooks
Mounted hooks attach to a bracket or plate fixed on the wall. The hook usually slides or snaps onto this bracket. Check for small screws or clips holding the hook in place. Unscrew or unclip these to remove the hook without harming the wall. Mounted hooks offer a stable hold and easy removal.
Removing Screw-in Hooks
Start by turning the robe hook counterclockwise to unscrew it from the wall. If stuck, try using pliers gently. Clean any leftover marks or holes after removal.
Unscrewing The Hook
Start by turning the robe hook counterclockwise. Use your hand or a screwdriver if needed. Keep turning until the hook comes free from the wall. Avoid forcing it to prevent damage. If it feels stuck, try a gentle wiggle to loosen it. This step removes the visible part of the hook easily.
Handling Anchors And Plugs
Check the hole left in the wall after removing the hook. Many screw-in hooks have anchors or plugs inside the wall. These support the hook and keep it stable. Use pliers to pull out plastic anchors carefully. If the anchors stay firmly, push them inside the wall cavity. For metal anchors, unscrew or pry them out gently. This clears the wall and prepares it for repair or new hooks.
Removing Adhesive Hooks
Removing adhesive robe hooks can be tricky. They stick firmly to walls. Removing them carefully avoids damage. Follow simple steps to loosen the adhesive without leaving marks. Patience and gentle handling work best.
Loosening Adhesive Gently
Start by peeling the hook slowly from the wall. Pull the tab or edge without rushing. Stretch the adhesive strip sideways, not outward. This helps release the glue gradually. Avoid pulling hard, which can peel paint or drywall.
Using Heat Or Solvent
Apply gentle heat with a hairdryer to soften the glue. Warm the adhesive for about 30 seconds. This makes it easier to remove. Alternatively, use rubbing alcohol or a mild solvent. Dab a small amount on the adhesive edges. Let it sit briefly to weaken the bond. Then, peel off the hook slowly.
/how-to-remove-towel-bar-5221017-hero-01-c6a21614aaeb4e9ca8071b79bd398ef6.jpg)
Credit: www.thespruce.com
Removing Mounted Hooks
Removing mounted robe hooks can be simple with the right steps. Most hooks attach firmly, but careful handling helps avoid damage. You need the right tools and a gentle touch to remove hooks safely. Follow these tips to take off robe hooks without hurting your walls.
Prying Off Carefully
Start by finding a flat tool like a putty knife or a small screwdriver. Slide it gently under the hook base. Work slowly to lift the hook from the wall. Do not force it too hard. Prying too fast can crack the paint or drywall. Move the tool side to side to loosen the hook. Keep checking if it comes free easily. Stop if you feel strong resistance.
Dealing With Wall Damage
Small holes or marks may appear after removing the hook. Use spackle or wall filler to cover any holes. Apply a thin layer and smooth it with a putty knife. Wait for it to dry fully. Lightly sand the area for a smooth finish. Repaint if needed to match the wall color. Fixing damage quickly keeps your walls looking fresh.
Fixing Wall Damage
Removing a robe hook can leave holes and marks on your wall. Fixing these damages is important to keep your wall looking neat. Small repairs can make a big difference. This section shows simple steps to restore your wall after taking down the hook.
Filling Holes And Cracks
Start by cleaning the holes and cracks. Remove any loose debris or dust. Use a putty knife to apply spackling paste or wall filler. Press the filler into the holes firmly. Smooth the surface slightly above the wall level. Let the filler dry completely before moving on.
Sanding And Smoothing
Once dry, sand the patched area gently. Use fine-grit sandpaper for a smooth finish. Sand in small circles to blend the patch with the wall. Avoid rough sanding to prevent new scratches. Wipe the dust with a damp cloth before painting.
Touch-up Painting Tips
Choose paint that matches your wall color. Use a small brush or roller for better control. Apply thin coats and let each layer dry. Blend the edges carefully to avoid visible lines. Repeat until the patch matches the rest of the wall.
Preventing Future Damage
Preventing damage to your walls is important when removing or installing robe hooks. Careful choices and proper steps help keep walls intact. This saves time and money on repairs later. Follow these tips to protect your walls and enjoy a neat, sturdy hook.
Choosing The Right Hook
Pick a hook made from strong, lightweight material. Avoid heavy hooks that pull on the wall. Choose a size that fits your space and needs. Use hooks with anchors if your walls are drywall. This spreads the weight and lowers damage risk.
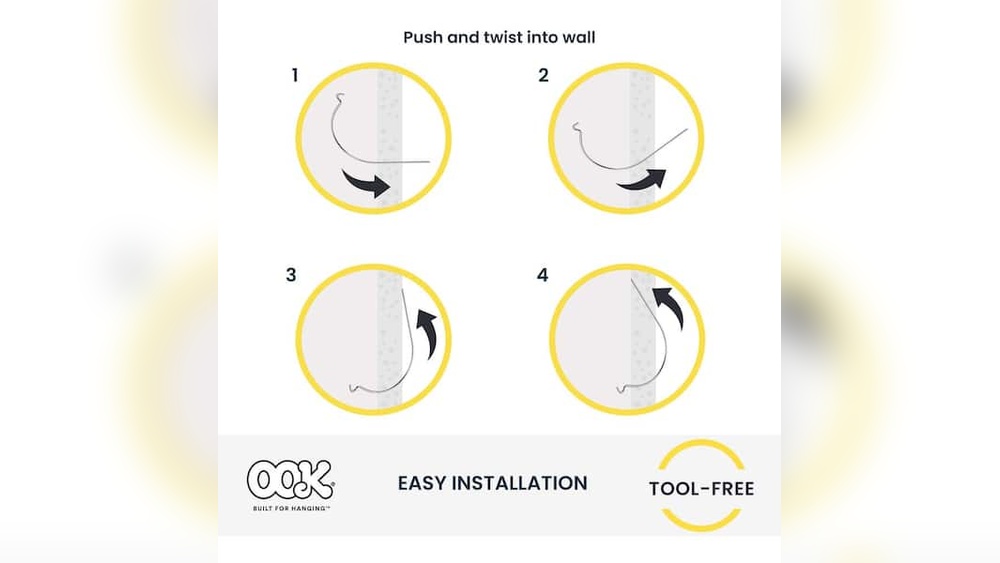
Proper Installation Tips
Mark the spot carefully before drilling or nailing. Use a level to keep the hook straight. Drill small pilot holes to avoid cracking the wall. Insert anchors for extra support on drywall. Tighten screws slowly to prevent wall damage. Test the hook’s strength gently before full use.

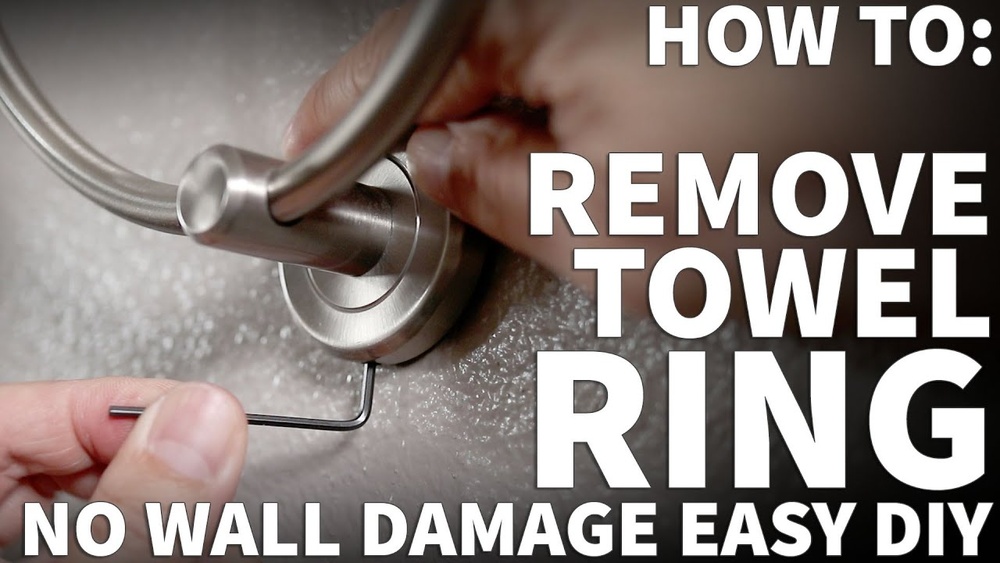
Credit: www.youtube.com
Frequently Asked Questions
How Do I Safely Remove A Robe Hook From Drywall?
First, unscrew the robe hook using a screwdriver. Then, gently pry the mounting plate off the wall. Use a putty knife if needed. Finally, patch holes with spackle and sand smooth for repainting.
What Tools Are Needed To Remove A Robe Hook?
You need a screwdriver, putty knife, spackle, sandpaper, and possibly a drill. These tools help remove screws, detach the hook, and repair the wall.
Can I Reuse The Robe Hook After Removal?
Yes, if the robe hook is undamaged, you can reuse it. Clean any old adhesive or debris before reinstalling it elsewhere.
How To Fix Wall Damage After Removing A Robe Hook?
Fill holes with spackle or wall filler using a putty knife. Let it dry, then sand smooth. Repaint the area for a clean finish.
Conclusion
Removing a robe hook from the wall is simple with the right steps. Use basic tools and work carefully to avoid damage. Take your time to pull out screws or anchors safely. After removal, patch any holes with filler and paint if needed.
This keeps your wall looking neat and clean. Following these easy tips helps you finish the task quickly. Now, your wall is ready for a new hook or decoration.