Have you ever faced the frustration of a jammed deadbolt and wondered how to fix it yourself? Taking apart a deadbolt might sound tricky, but with the right steps, you can handle it safely and easily.
Whether you want to repair, replace, or simply understand how your lock works, this guide is made just for you. Keep reading, and you’ll gain the confidence to take control of your deadbolt without calling a locksmith. Your home’s security is important, and knowing how to take apart a deadbolt is the first step to mastering it.
Tools Needed
Taking apart a deadbolt needs the right tools. Having these tools ready makes the job easier and safer. Each tool plays a specific role in removing parts without damage.
Gathering the correct tools before starting helps avoid delays. This section covers the basic tools needed for this task.
Screwdrivers
Screwdrivers are the main tools for removing screws from a deadbolt. Use a flathead screwdriver for flat screws. A Phillips screwdriver fits cross-shaped screws. Choose screwdrivers that match the screw size. This helps prevent stripping the screw heads. A magnetic screwdriver can hold screws better during removal.
Pliers And Hammer
Pliers help grip and pull small parts from tight spaces. Needle-nose pliers work well for this. They also hold pins or clips firmly. A hammer is useful to tap parts gently loose. Use a small hammer, like a ball-peen hammer, for control. Avoid heavy hits to prevent damage.
Additional Supplies
Keep extra items handy. A flashlight helps see inside dark areas. A small container holds screws and parts safely. Lubricant spray can loosen stuck components. Cleaning cloths remove dirt and grease. These supplies make the process smoother and cleaner.
Credit: www.hunker.com
Prepare The Door
Preparing the door is an important step before taking apart a deadbolt. It helps you work safely and avoid damage. This step makes the process easier and faster. Take time to prepare well. Clear the area around the door to have enough space to work.
Next, focus on removing any decorations on or near the door. These can get in the way or break during the work. After that, ensure your safety by using the right tools and protecting your hands. A prepared door means a smooth deadbolt removal.
Remove Decorations
Look for any stickers, signs, or hanging items on the door. Take them off carefully. Decorations can block screws or parts of the deadbolt. Removing them stops damage to these items. It also gives you a clear view of the deadbolt and door surface.
Use a gentle tool like a plastic scraper to avoid scratching the door. Clean the door surface if needed. A clean door helps you find screws and parts easily. This step saves time and prevents problems during removal.
Ensure Safety
Wear gloves to protect your hands from sharp edges and tools. Use eye protection to guard against dust or small debris. Keep a flashlight nearby for better visibility if needed. Make sure tools like screwdrivers fit the screws well to avoid slipping.
Work slowly and carefully. Avoid forcing parts to prevent damage or injury. If the door moves, secure it with a wedge or ask for help. Safety first makes the deadbolt removal safer and smoother.
Remove Interior Components
Removing the interior components of a deadbolt is a key step. It gives access to the lock mechanism. This step needs care to avoid damage.
Prepare a screwdriver and keep screws safe. Work in a clean space to avoid losing parts.
Unscrew Interior Plate
Locate the screws on the interior plate. Usually, two or three screws hold it in place. Use a screwdriver to turn them counterclockwise. Remove the screws and set them aside safely. Gently pull the interior plate away from the door. If it sticks, wiggle it slightly to loosen. Do not force it hard to avoid breaking the plate.
Take Out The Turn Knob
After removing the plate, the turn knob will be visible. Check if it has a small screw on the side. If yes, unscrew it carefully. Pull the turn knob straight out from the spindle. Some knobs may slide off without screws. Keep the turn knob in a safe place. This part controls the bolt inside the door.
Detach Exterior Components
Detach the exterior components to start taking apart a deadbolt. This step helps you access the inner parts. It also makes the removal process easier and safer.
Handle the exterior carefully to avoid damage. Keep all screws and parts in a safe place. This will help you reassemble the deadbolt later.
Unscrew Exterior Plate
Locate the screws on the exterior plate. Use a screwdriver that fits the screw heads. Turn the screws counterclockwise to remove them. Set the screws aside for later use. Gently pull the exterior plate away from the door. This reveals the key cylinder underneath.
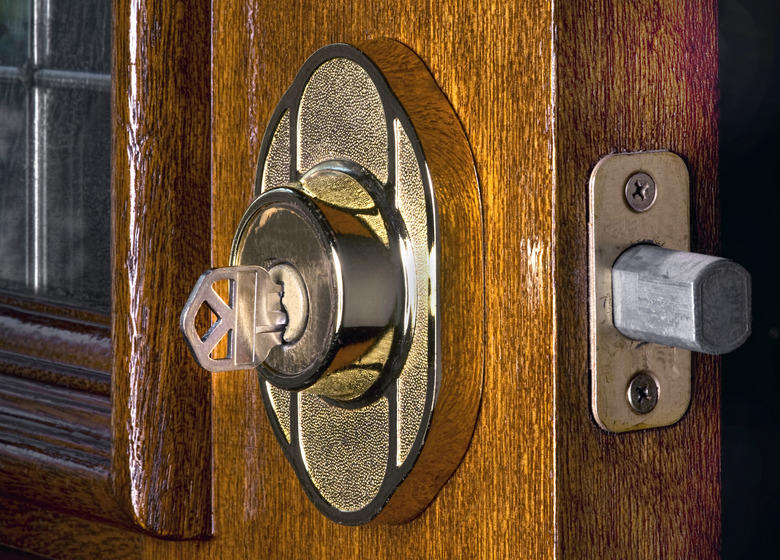
Remove The Key Cylinder
After removing the plate, focus on the key cylinder. Insert the key and turn it slightly to the unlock position. This aligns the cylinder for removal. Look for a retaining screw on the edge of the door. Unscrew it to free the cylinder. Pull the key cylinder straight out carefully. Avoid forcing it to prevent damage.
Extract The Deadbolt Mechanism
Extracting the deadbolt mechanism is a key step in taking apart a deadbolt lock. This process lets you remove the internal parts safely. It helps to fix or replace the lock easily. Follow these steps carefully to avoid damage.
Unscrew The Bolt Faceplate
Start by locating the faceplate on the edge of the door. Use a screwdriver to remove the screws holding it. Keep the screws safe for later use. The faceplate covers the bolt inside the door. Removing it gives access to the deadbolt mechanism.
Pull Out The Deadbolt
After removing the faceplate, gently pull the deadbolt out of the door. Use steady force to avoid breaking parts. The deadbolt should slide out smoothly once the screws are removed. If it sticks, check for any remaining screws or obstacles. Removing the deadbolt fully clears the way for repairs or replacement.
Troubleshooting Tips
Troubleshooting is key when taking apart a deadbolt. Small problems can stop the process. Knowing how to fix them saves time and effort.
Some common issues include stuck screws and rust. Each requires a different approach. These tips help you handle these problems safely and effectively.
Handling Stuck Screws
Stuck screws are a frequent issue. Start by applying a small drop of lubricant. Let it sit for a few minutes. This loosens the screw and eases removal.
Use the right screwdriver size. A loose fit can strip the screw head. Turn the screw slowly and steadily. Avoid forcing it to prevent damage.
If the screw still won’t budge, try tapping the screwdriver gently with a hammer. This can break the rust seal. Patience is important to avoid breaking the screw.
Dealing With Rust Or Damage
Rust can make deadbolt parts hard to move. Soak a cloth in vinegar or a rust remover. Wrap it around the rusty area. Leave it for about 30 minutes.
After soaking, use a wire brush to scrub off rust. Be gentle to avoid damaging the metal. For severe rust, repeat the process as needed.
If parts are damaged or too rusted, replacing them is safer. Trying to force broken parts may cause more harm. Always inspect parts carefully before reassembly.
Reassembly Tips
Reassembling a deadbolt needs care and attention. Taking it apart is only half the job. Putting it back together the right way ensures it works smoothly and lasts longer.
Follow clear steps to avoid common mistakes. Small errors can stop the lock from working properly. Here are important tips to help you reassemble your deadbolt correctly.
Inspect Parts For Wear
Check each part closely. Look for cracks, rust, or damage. Worn parts cause the lock to jam or fail.
Replace any broken or damaged pieces. This saves time and prevents future problems.
Keep screws and springs in good condition. These small parts are easy to lose or break.
Align Components Correctly
Place each part in its exact position. Misalignment stops the deadbolt from moving smoothly.
Match the bolt with the latch and turn the key slowly. Feel for any resistance or tight spots.
Tighten screws evenly. Over-tightening can bend parts out of shape.
Test the lock several times before final assembly. Make sure it locks and unlocks without force.
Credit: www.reddit.com

Credit: www.youtube.com
Frequently Asked Questions
How Do I Remove A Deadbolt Lock Safely?
First, remove the screws on the interior side of the deadbolt. Next, gently pull both interior and exterior parts apart. Finally, take out the latch mechanism from the door edge carefully.
What Tools Are Needed To Disassemble A Deadbolt?
You typically need a screwdriver, usually Phillips or flathead. Sometimes an Allen wrench might be required. Having a flashlight helps to see screws clearly.
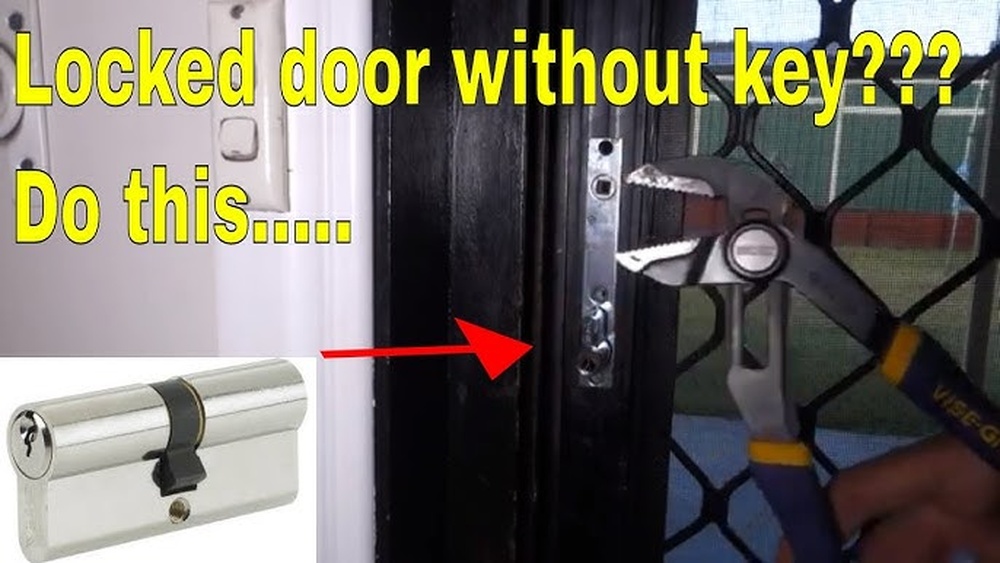
Can I Take Apart A Deadbolt Without A Key?
Yes, but only if the lock is unlocked. If locked, you must first unlock it to remove the deadbolt safely. Forcing it can damage the lock or door.
How Long Does It Take To Disassemble A Deadbolt?
It usually takes 5 to 15 minutes. The time depends on your experience and tool availability. Following the correct steps ensures a quick process.
Conclusion
Taking apart a deadbolt can seem hard at first. Step-by-step, it becomes much easier. Using the right tools helps avoid damage. Always keep track of small parts you remove. This guide can save time and frustration. With practice, you will feel more confident.
Remember to stay patient and work carefully. Safety is important; do not rush. Now, you have the basics to try it yourself.