Are you ready to warm up your space quickly and efficiently? Knowing how to hook up a natural gas wall heater can save you money and keep your home cozy all winter long.
But if you’re unsure where to start or worried about safety, don’t worry. This guide will walk you through each simple step, so you can feel confident handling the installation yourself. Keep reading, and you’ll discover easy tips that make the process smooth and safe—turning your cold room into a warm retreat in no time.
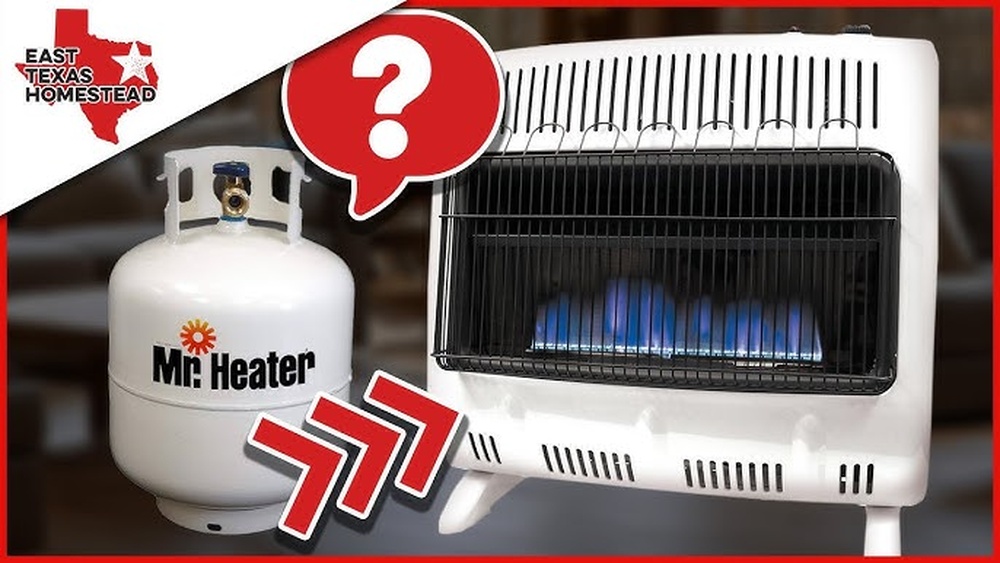
Credit: www.homedepot.com
Tools And Materials Needed
Setting up a natural gas wall heater needs the right tools and materials. Having everything ready makes the installation smooth and safe. This guide lists the basic tools and materials you must have before starting.
Essential Tools
- Adjustable wrench – for tightening gas fittings
- Pipe wrench – to grip and turn pipes
- Pipe cutter – to cut gas pipes cleanly
- Level – to ensure the heater mounts straight
- Drill with bits – for making mounting holes
- Thread seal tape – to seal pipe threads
- Gas leak detector solution – to check for leaks
- Screwdrivers – for screws and connections
- Flashlight – to see in dim spaces
Required Materials
- Natural gas wall heater unit
- Gas piping – usually black iron or flexible tubing
- Gas shut-off valve – to control gas flow
- Pipe fittings – elbows, tees, and connectors
- Mounting brackets or hardware
- Vent pipe and vent caps – for exhaust
- Gas regulator – to control pressure if needed
- Sealant or pipe dope – to prevent leaks

Credit: www.lowes.com
Safety Precautions
Safety is the top priority when hooking up a natural gas wall heater. Gas leaks and poor ventilation can cause serious harm. Following basic safety steps helps prevent accidents and keeps your home safe. Read and apply these safety precautions carefully before starting.
Shutting Off Gas Supply
Always turn off the gas supply before starting any work. Locate the main gas valve and close it completely. This stops gas flow and lowers the risk of leaks. Never skip this step. Use a wrench to ensure the valve is tightly closed. Double-check that no gas is escaping before proceeding.
Ventilation And Fire Safety
Good ventilation prevents dangerous gas buildup. Keep windows or vents open during installation. Avoid installing the heater near flammable materials like curtains or furniture. Maintain a clear space around the heater. Install a smoke detector and carbon monoxide alarm nearby. These devices alert you to fire or gas dangers early.
Using Protective Gear
Wear safety gloves and goggles to protect your hands and eyes. Gas fittings and tools can cause cuts or sparks. Use a mask to avoid inhaling dust or fumes. Proper gear reduces injury risk. Dress in long sleeves and closed shoes. Stay cautious and ready to stop work if you smell gas.
Preparing The Installation Site
Preparing the installation site is the first step in setting up a natural gas wall heater. This step ensures safety and efficiency. It helps avoid problems during and after installation. Careful preparation makes the process smooth and quick.
Selecting The Location
Pick a spot with good airflow and no obstacles. Avoid places near curtains or furniture. Choose a location away from windows and doors. Check for easy access to the gas line. The heater should be placed at the right height on the wall.
Clearing The Area
Remove all items around the chosen spot. Clear furniture, decorations, and any flammable materials. A clean space reduces fire risk. It also gives you room to work safely. Keep the area tidy during installation.
Checking Wall Support
Ensure the wall can hold the heater’s weight. Use a stud finder to locate wall studs. The heater must attach to strong support. Weak walls can cause damage or accidents. Reinforce the wall if needed before starting.

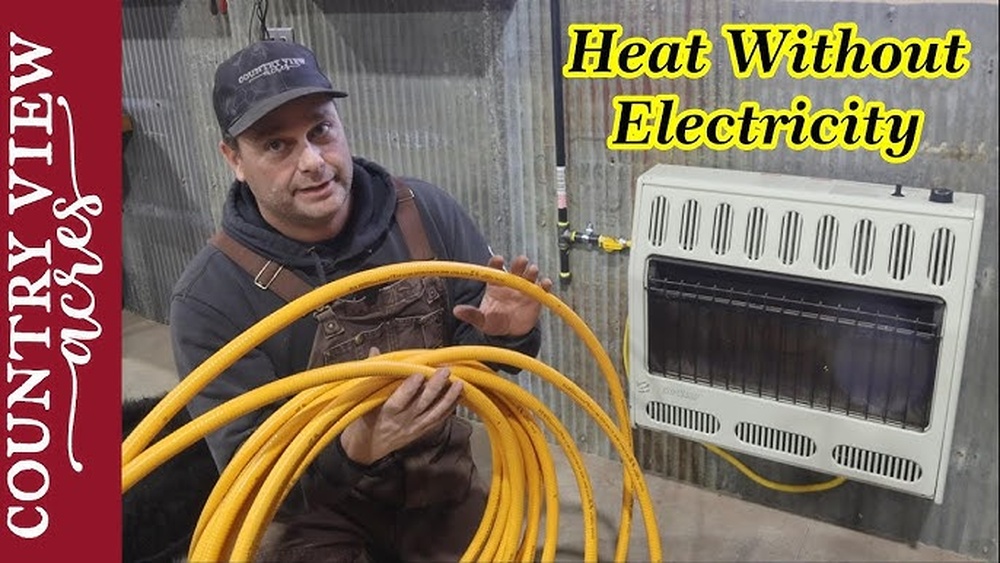
Credit: www.youtube.com
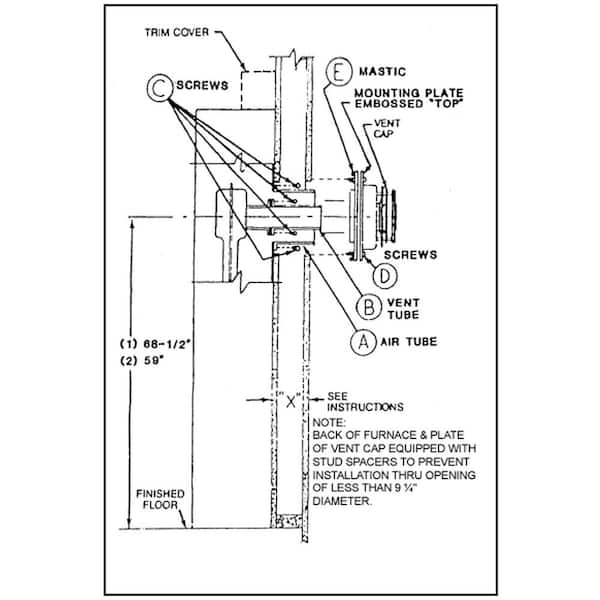
Connecting The Gas Line
Connecting the gas line is a key step in installing a natural gas wall heater. It involves careful work with the gas pipes to ensure safety and efficiency. Follow clear steps to connect the gas line properly. Safety is the top priority during this process.
Locating The Gas Supply
Find the main gas supply line in your home. It is usually near the furnace or water heater. Turn off the gas valve before starting any work. Use a flashlight to see clearly in tight spaces. Mark the spot where you will connect the heater.
Cutting And Fitting The Pipe
Measure the length of pipe needed to reach the heater. Use a pipe cutter to make a clean cut. Remove any burrs or sharp edges with a file. Fit the pipe carefully to avoid leaks. Use connectors that match the pipe size and type.
Sealing Connections
Apply pipe thread sealant or Teflon tape to all threaded connections. Wrap the tape clockwise around the threads three times. Tighten the fittings firmly but do not over-tighten. Check each joint for gaps or loose fittings. Proper sealing prevents dangerous gas leaks.
Mounting The Wall Heater
Mounting the wall heater is a crucial step for safe and efficient operation. Proper installation ensures the heater stays secure and works well over time. Follow each step carefully to avoid damage or hazards.
Marking Mounting Points
Start by choosing a flat wall surface for the heater. Use a pencil to mark the points where screws will go. Check the heater’s manual for the exact measurements. Double-check marks to ensure correct placement before drilling.
Securing The Heater
Drill holes at the marked points using the proper drill bit. Insert wall anchors if needed for extra support. Align the heater with the holes and secure it using screws. Tighten screws firmly but avoid over-tightening to prevent damage.
Ensuring Level Installation
Place a level on top of the heater to check its alignment. Adjust the heater until it sits perfectly horizontal. A level heater prevents uneven heat and reduces wear. Recheck screws to keep the heater stable and secure.
Testing The Heater
Testing your natural gas wall heater ensures it works safely and efficiently. This step is important before regular use. Follow each part carefully to avoid risks. Testing includes turning on the gas, checking for leaks, and igniting the heater.
Turning On The Gas
Start by opening the main gas valve slowly. This lets gas flow to the heater. Listen for any unusual sounds. Keep the area ventilated to avoid gas buildup. Never force the valve if it feels stuck. Be calm and steady during this process.
Checking For Leaks
Use a soap and water mix to check for leaks. Apply the solution to gas connections and joints. Watch for bubbles forming; bubbles mean a leak. If you see bubbles, turn off the gas immediately. Tighten connections and test again until no bubbles appear. Safety is the top priority here.
Igniting The Heater
Follow the heater’s instructions to ignite it safely. Usually, this means turning the knob to the pilot position. Use a long lighter or match to light the pilot. Hold the knob for a few seconds after ignition. Release the knob slowly and watch the flame. The flame should burn steadily and blue in color.
Troubleshooting Tips
Troubleshooting a natural gas wall heater can save time and money. Knowing basic tips helps fix small issues quickly. Often, problems are simple and easy to solve. This section covers common problems and advice on when to get expert help.
Common Issues
The heater does not turn on. Check if the pilot light is out. Make sure the gas valve is open. Sometimes, dirt blocks the burner. Clean the burner gently to remove dust.
The heater smells like gas. This is serious. Turn off the gas supply immediately. Open windows to let fresh air in. Avoid using electrical switches or flames. Call for professional help right away.
The heater cycles on and off too often. This could mean a dirty filter or blocked vents. Clean or replace the filter. Check vents for any obstructions. Also, check the thermostat settings.
The heater is noisy. Noise may come from loose parts or debris. Tighten screws carefully. Remove any debris around the fan or vents.
When To Call A Professional
Do not ignore gas smells. This needs immediate expert attention. If the heater will not light after several attempts, call a technician. Problems with gas connections or leaks require skilled repair. Electrical parts inside the heater should only be handled by professionals. Regular maintenance checks also prevent future problems. Safety is the highest priority with gas heaters.
Frequently Asked Questions
How Do I Safely Connect A Natural Gas Wall Heater?
Turn off the main gas supply before starting. Use approved gas pipes and fittings. Ensure proper ventilation and test for leaks with soapy water after connection.
What Tools Are Needed To Hook Up A Gas Wall Heater?
You need a pipe wrench, adjustable wrench, pipe cutter, gas leak detector, and Teflon tape. Also have a screwdriver and a gas shutoff valve handy.
Can I Install A Natural Gas Heater Myself?
Basic knowledge helps, but professional installation is safest. Incorrect hookup risks leaks and fire. Always follow local codes and manufacturer instructions.
How Do I Check For Gas Leaks After Installation?
Apply soapy water to joints and connections. Look for bubbles indicating leaks. If detected, tighten connections or call a professional immediately.
Conclusion
Hooking up a natural gas wall heater can save you money and keep you warm. Always follow safety steps to avoid risks. Use the right tools and check connections carefully. Test the heater before using it regularly. Simple care can make your heater last longer.
Stay safe and enjoy cozy warmth in your home.