Are you looking to brighten up your space with LED lights but want to keep things simple and neat? Learning how to daisy chain LED lights on one switch can save you time, money, and hassle.
Imagine controlling multiple lights with a single flick—no more cluttered switches or tangled wires. In this guide, you’ll discover easy steps to connect your LED lights efficiently and safely. Ready to transform your lighting setup without the confusion? Keep reading, and you’ll have your LED lights working perfectly together in no time.
Tools And Materials Needed
Before you start daisy chaining LED lights on one switch, gather the right tools and materials. Having the proper items makes the job easier and safer. This section lists everything you need to complete the project smoothly.
Led Strip Lights
Choose LED strip lights that suit your space and style. Make sure they are compatible with your power supply and switch. Pick the right length to avoid cutting or wasting.
Power Supply
Select a power supply that matches your LED lights’ voltage and wattage. A reliable power source ensures your lights work well and last longer. Check the power rating before buying.
Switch
Use a switch designed for LED lights. A simple on/off switch works best for daisy chaining. Confirm it can handle the total current of all lights combined.
Wire Connectors
Wire connectors link your LED strips and switch safely. Use connectors made for low-voltage wiring. They keep connections secure and avoid shorts.
Electrical Wire
Get electrical wire to connect your lights and switch. Choose wire with the right thickness for your setup. Copper wire is common and works well.
Wire Strippers And Cutters
Wire strippers and cutters help prepare your wires. Strip insulation cleanly for good connections. Cut wires to the needed lengths without damage.
Electrical Tape
Electrical tape insulates and protects wire connections. Wrap connections tightly to prevent exposure. Use tape rated for electrical use only.
Screwdriver
A screwdriver is needed to secure terminals and mounts. Choose a size that fits your screws perfectly. Tighten screws firmly but do not overdo it.

Credit: www.wikihow.com
Choosing The Right Led Lights
Choosing the right LED lights is key to a successful daisy chain setup. Not all LED lights work well together. Picking the right type helps avoid flickering and power issues. It also makes installation easier and safer.
Consider the light’s voltage and power needs. Matching these with your switch and power source is important. Using lights designed for daisy chaining simplifies the wiring. Look for LED lights that list compatibility with multi-light setups.
Voltage And Power Compatibility
Check the voltage rating of each LED light. Most household LED lights use 12V or 24V. Your switch and power supply must match this voltage. Using mismatched voltage can damage lights or cause failure.
Also, consider the total power draw. Add up the wattage of all lights in the chain. Ensure the power source can handle the total load. This prevents overheating or tripping the circuit.
Type Of Led Light
Choose LED strip lights or bulb lights designed for daisy chaining. Strip lights usually have connectors for easy linking. Bulb lights may need special adapters or sockets.
Some LED lights have built-in resistors or drivers. These help keep the lights stable in a chain. Avoid basic LED lights without these features for daisy chaining.
Durability And Quality
Pick LED lights made with quality materials. Poor quality lights may fail early or flicker. Durable lights last longer and provide consistent brightness.
Look for waterproof or weather-resistant options if installing outdoors. These lights handle moisture and dust better. Indoor-only lights may break down faster outside.
Planning Your Daisy Chain Layout
Planning your daisy chain layout is the first step to a neat LED light setup. A good plan saves time and prevents mistakes. It helps you know where to place each light and how to connect them.
Think about the space where you will install the lights. Measure the length to find out how many LED strips or bulbs you need. Keep your plan simple to make wiring easier and safer.
Map Out Your Lighting Area
Draw a simple map of your room or area. Mark the spots where each LED light will go. This helps you see the best path for the wires. Avoid running wires across busy paths or sharp corners.
Calculate The Power Load
Check the power rating of each LED light. Add them up to find the total load. Make sure your power source can handle this load. Overloading can cause lights to flicker or fail.
Choose The Right Wire Lengths
Measure the distance between each light. Use wires that are long enough but not too long. Extra wire can create clutter and may cause voltage drop. Proper wire length keeps your setup clean and efficient.
Plan For A Single Switch Control
Decide where to install the switch. It should be easy to reach and control all lights. All wires must run back to this switch. This setup makes turning your lights on and off simple.

Credit: diy.stackexchange.com
Wiring Basics For Daisy Chaining
Daisy chaining LED lights on one switch requires clear understanding of wiring basics. Proper wiring ensures all lights work smoothly and safely. This section explains key points about wiring LED lights in a chain.
Following the right steps avoids electrical problems and improves light performance. Let’s explore the important concepts and safety tips for daisy chaining LED lights.
Understanding Led Wiring
LED lights use positive and negative wires to connect power. The positive wire carries electricity to the light. The negative wire completes the circuit by returning electricity back.
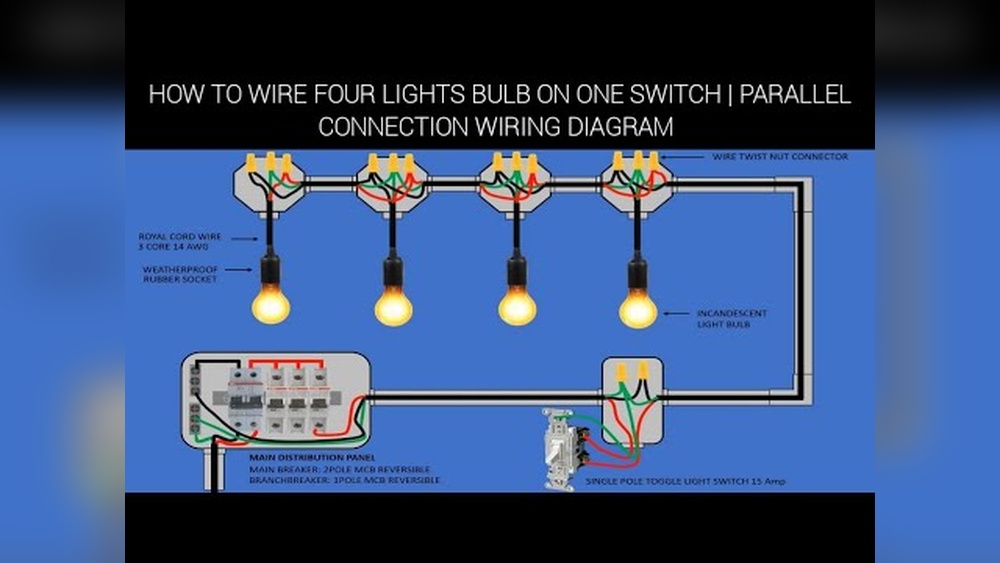
In daisy chaining, connect the positive wire from the first light to the next light’s positive wire. Do the same for the negative wires. This links the lights in a series.
Keep wire connections tight and secure. Loose wires cause flickering or no light. Use proper wire gauge to handle the total current of all lights.
Safety Precautions
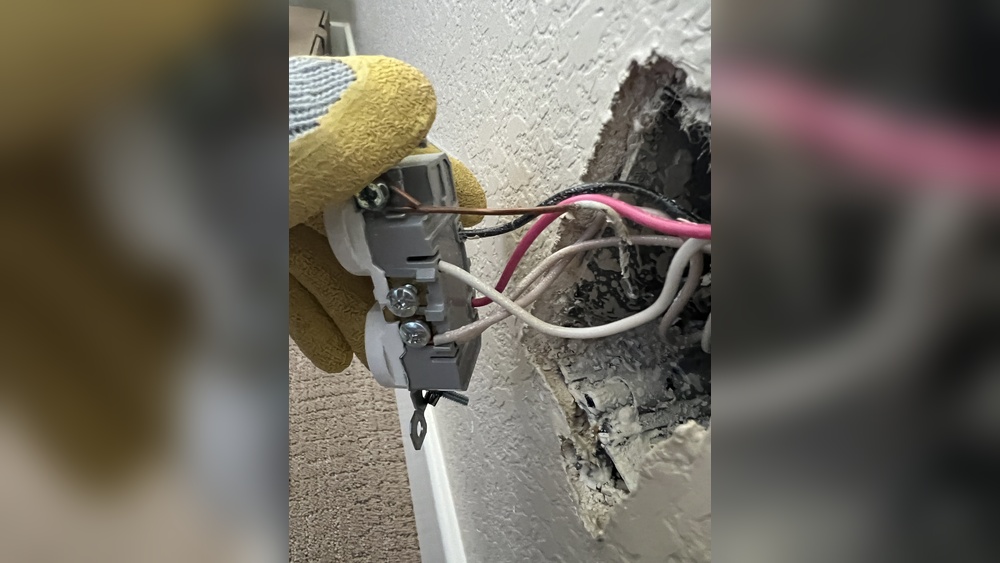
Always turn off power before starting any wiring. Use insulated tools to avoid electric shocks. Check wires for damage and replace if needed.
Do not overload the circuit by connecting too many LED lights. Overloading causes overheating and potential fire risk. Follow the maximum wattage recommended by the LED manufacturer.
Use a fuse or circuit breaker to protect your wiring. Test all connections before turning on the switch. Safety first keeps your LED setup reliable and long-lasting.
Step-by-step Wiring Process
Daisy chaining LED lights on one switch is a simple way to control multiple lights together. This process lets you connect several LEDs in a line. Each LED will turn on or off with the same switch. Follow these clear steps to wire your LEDs safely and correctly.
Preparing The Wires
Start by gathering all the wires and tools needed for the job. Cut the wires to the right length for your setup. Strip about half an inch of insulation from each wire end. This exposes the copper needed for connections. Keep the wires neat and untangled to avoid confusion later.
Connecting The First Led
Take the positive wire from the power source. Connect it to the positive terminal of the first LED light. Then, connect the negative wire from the power source to the negative terminal of the first LED. Make sure each connection is tight and secure. Loose wires can cause flickering or failure.
Adding Additional Leds
Use a new wire to connect the positive terminal of the first LED to the positive terminal of the next LED. Repeat this step for each additional LED. Do the same for the negative terminals. This creates a chain where electricity flows through each LED in order.
Securing Connections
Check every connection to ensure it is firm and safe. Use wire nuts or electrical tape to cover exposed wires. This prevents short circuits and electric shocks. Double-check the entire chain before turning on the power. Secure wires with clips or ties to keep them in place.
Credit: www.youtube.com
Testing The Led Chain
Testing the LED chain is an important step after wiring your lights on one switch. This ensures all lights work correctly and safely. It helps find any loose connections or faulty bulbs before final use. Proper testing saves time and avoids electrical problems later.
Turn On The Power
First, switch on the power source. Watch the entire LED chain carefully. Each light should glow brightly without flickering. A steady light means good connection and proper wiring.
Check Each Led Light
Look closely at every LED bulb. Make sure none are dim or off. If a bulb does not light, check its connection or replace it. Confirm all bulbs have the same brightness level.
Inspect The Switch Function
Test the switch by turning it on and off several times. The LED chain should respond immediately. No delay or flicker should occur. This confirms the switch controls the whole chain properly.
Look For Wiring Issues
Observe the wires along the chain. Check for any loose or exposed wires. Tighten any connections that look weak. Proper wiring prevents short circuits and damage.
Troubleshooting Common Issues
Troubleshooting common issues helps fix problems fast. Daisy chaining LED lights can sometimes cause errors. Knowing how to identify and solve these problems saves time and effort.
This section covers simple ways to check wiring, power supply, and connection issues. Follow these tips to keep your LED lights working smoothly.
Check For Loose Connections
Loose wires often cause lights to flicker or not turn on. Make sure all wires are tightly connected. Look at each connection point and press gently. Secure any loose ends with wire nuts or electrical tape.
Verify Power Supply Capacity
LED lights need enough power to run properly. Using a low-capacity power supply can cause dim or non-working lights. Check the wattage of your power source. Match it with the total wattage of all LED lights in the chain.
Inspect For Damaged Cables
Damaged wires can break the circuit. Look for cuts, kinks, or worn-out sections in cables. Replace any damaged cables immediately. This prevents shorts and keeps the chain working safely.
Confirm Correct Wiring Order
Wiring LED lights in the wrong order stops them from lighting up. Follow the manufacturer’s wiring diagram carefully. Connect positive to positive and negative to negative terminals. Double-check all connections before testing.
Test Each Light Individually
Sometimes one bad LED affects the whole chain. Disconnect each light and test it alone. Replace any defective LED modules. This helps find and fix the problem quickly.
Tips For Long-lasting Led Chains
Keeping your LED light chains working well for a long time saves money and effort. Simple care steps help your lights stay bright and safe. Good habits in use and storage extend the life of LED chains.
Follow these tips to enjoy your LED lights without frequent replacements or problems.
Use The Right Power Supply
Choose a power supply that matches the LED chain’s voltage and wattage. Too much power can burn the lights out quickly. Too little power causes flickering and dim lights. Check the LED package for power needs before buying.
Avoid Overloading The Circuit
Do not connect too many LED chains to one switch. Too many lights draw more current than the switch or wiring can handle. This causes overheating and damage. Spread the load across multiple switches if needed.
Keep Led Chains Dry And Clean
Moisture and dust harm LED chains. Water can short the circuits and cause rust. Dust blocks light and causes heat build-up. Store LED chains in dry places and clean gently with a soft cloth.
Turn Off Lights When Not In Use
Switching off LED lights saves energy and reduces wear. Leaving lights on all the time shortens their lifespan. Use timers or smart plugs to control usage automatically.
Handle Cords And Connectors Carefully
Do not pull or bend cords harshly. Rough handling breaks wires inside. Insert and remove connectors gently to avoid loose connections. Store cords coiled loosely to prevent damage.
Frequently Asked Questions
How Do You Daisy Chain Led Lights On One Switch?
To daisy chain LED lights, connect the positive wire from the switch to the first light. Then, link each light’s positive to the next light’s positive. Repeat this with the negative wires. This setup allows all lights to turn on with one switch.
What Tools Are Needed To Daisy Chain Led Lights?
You will need wire strippers, a screwdriver, electrical tape, and connectors. Also, prepare LED lights and a compatible switch. These tools help ensure secure connections and safe installation for your daisy-chained LED lights.
Can I Daisy Chain Led Lights With Different Voltages?
No, all LED lights in a daisy chain must have the same voltage rating. Mixing voltages can cause malfunction or damage. Always check the LED specifications to ensure compatibility before daisy chaining.
Is It Safe To Daisy Chain Led Lights On One Switch?
Yes, it is safe if done correctly. Use proper wiring, connectors, and follow electrical codes. Avoid overloading the circuit by checking the total wattage. Proper installation ensures a secure and efficient daisy chain setup.
Conclusion
Daisy chaining LED lights on one switch saves space and effort. It lets you control many lights with one simple action. Just follow the right steps to connect wires safely. Check each connection to avoid problems later. This method works well for home or office lighting.
Enjoy a neat setup without extra switches or clutter. Keep your lights bright and easy to manage. Try it yourself and see the difference today.