
Are you ready to set up your Cat5 network quickly and without hassle? Hooking up a wall box for Cat5 might seem tricky at first, but with the right steps, you can do it yourself with confidence.
This guide will walk you through the process, breaking it down into simple, clear actions that anyone can follow. By the end, you’ll have a neat, reliable connection that powers your internet and devices smoothly. Keep reading—you’re just moments away from mastering this essential skill and improving your home or office network!
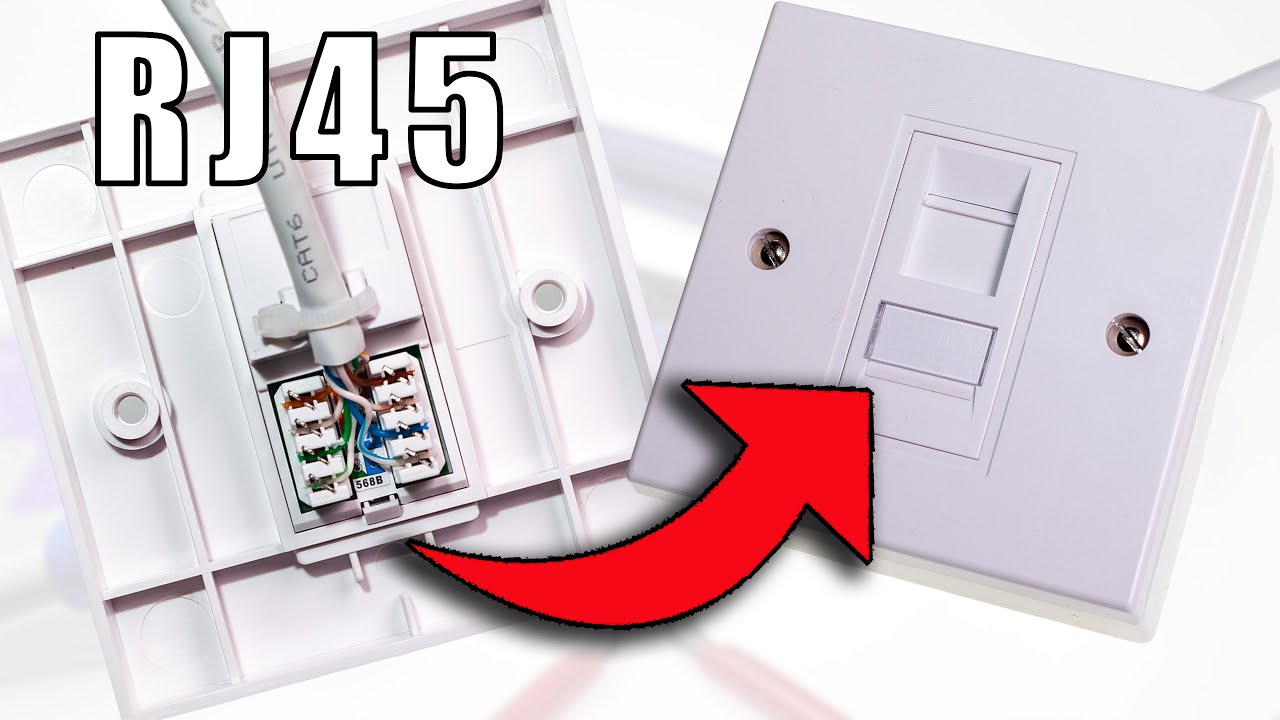
Credit: www.youtube.com
Tools And Materials Needed
Setting up a wall box for Cat5 cable requires the right tools and materials. The process becomes easier and faster with proper preparation. This section covers the basic items needed for a smooth installation. Understanding each part helps avoid mistakes and saves time.
Cat5 Cable Types
Cat5 cables come in different types. The most common are stranded and solid core cables. Solid core cables provide better performance for fixed wiring. Stranded cables are flexible and better for patch cables. Choose the right type for your installation needs.
Wall Box Components
A wall box holds the cable and connectors securely. It includes the box itself, mounting brackets, and faceplates. Some boxes have built-in cable management features. Make sure the box fits into your wall space and supports Cat5 wiring.
Essential Tools
You need a few tools to complete the hookup. A cable stripper removes the outer jacket without damaging wires. A punch-down tool connects wires to the wall jack. Wire cutters trim cables to the correct length. A screwdriver helps secure the box and faceplate. A cable tester checks if the connections work properly.

Credit: www.eufy.com
Preparing The Cable
Preparing the cable correctly is the first step to a solid Cat5 wall box connection. It ensures a clean, reliable link and reduces errors. Take your time and follow each step carefully. The better the preparation, the easier the installation will be.
Measuring And Cutting
Start by measuring the cable length needed. Leave a little extra length for flexibility. Use sharp scissors or a cable cutter. Cut the cable straight to avoid damaging the wires inside. A clean cut helps with easier stripping and connection.
Stripping The Jacket
Remove about 1 to 2 inches of the outer jacket. Use a cable stripper or a sharp knife carefully. Avoid cutting too deep to protect the inner wires. Expose the twisted pairs inside without nicking them. This step needs precision for a strong signal.
Untwisting And Organizing Wires
Untwist each pair of wires gently. Spread them out in the correct order for your wiring standard. Keep the wires straight and tidy. Organizing wires helps them fit well in the wall box slots. Proper order ensures your network works perfectly.
Wiring The Wall Box
Wiring the wall box for Cat5 cables is an important step in setting up your network. It involves connecting the wires correctly to ensure strong and stable internet signals. This process requires attention to detail and some basic tools. Follow these steps carefully to avoid connection problems.
Identifying Color Codes
Cat5 cables have eight wires inside. Each wire has a different color or stripe pattern. The common colors are orange, green, blue, and brown, with each having a solid and striped version. Recognize these colors first. They help you match wires to the right terminals. Knowing the color code ensures proper wiring and avoids confusion.
Matching Wires To Terminals
Inside the wall box, you will see small terminals. These terminals are marked with color codes or letters. Match each wire to the correct terminal using the color code chart. The standard wiring schemes are T568A and T568B. Choose one and keep it consistent on both ends of the cable. This keeps the network working smoothly.
Using A Punch Down Tool
A punch down tool is essential for wiring the wall box. It pushes each wire into the terminal and cuts off extra wire. Hold the wire in the terminal slot and press the tool down firmly. This action secures the wire and makes a strong connection. Avoid loose wires to prevent connection issues later.
Securing And Testing
Securing and testing your Cat5 wall box connection is important for a strong network. Proper steps ensure the cable stays in place. Testing confirms the connection works well. This section guides you through these key tasks.
Securing The Cable
Start by stripping the cable jacket carefully. Leave enough wire length for wiring inside the box. Use cable clips or ties to hold the cable firmly. Avoid tight bends that can damage the wires. Secure the cable to the wall or studs near the box. This stops movement and prevents disconnections.
Mounting The Wall Box
Choose a spot on the wall that is easy to access. Align the wall box with the mounting bracket or wall stud. Use screws to fix the box firmly in place. Check that the box is level before tightening screws. Avoid forcing the box into uneven spaces. A solid mount keeps the connections safe and stable.
Testing Connectivity
Use a network cable tester to check each wire inside the box. Connect the tester to the wall jack and the cable end. The tester will show if all pairs are wired correctly. Look for any breaks or crossed wires. Fix any wiring issues before closing the box. Testing ensures your network runs without problems.
Troubleshooting Tips
Troubleshooting is key to a successful Cat5 wall box setup. Problems can stop your network from working right. Knowing how to find and fix these issues saves time and stress.
Check your wiring carefully. Small mistakes cause big problems. Fixing poor connections improves signal quality. Sometimes parts wear out and need replacing. Here are some tips to help you troubleshoot.
Common Wiring Mistakes
Wrong wire order is a frequent error. Follow the T568A or T568B standard exactly. Twisted pairs must stay twisted until inserted. Avoid mixing colors or flipping wires. Loose wires cause weak or no connection. Always strip cable jackets carefully without cutting wires.
Fixing Poor Connections
Check if wires fit snugly in the terminals. Loose wires create connection drops and noise. Use a punch-down tool to press wires firmly. Trim excess wire to avoid short circuits. Clean terminals if they look dirty or rusty. Test connections with a cable tester for accuracy.
When To Replace Components
Damaged cables cause slow or no network signals. Look for cuts, kinks, or frays on the cable. Wall boxes can crack or lose metal contacts. Replace if terminals are bent or broken. Old cables may fail even if they look fine. Use new Cat5 or better cables for best results.

Credit: www.wikihow.com
Frequently Asked Questions
What Tools Are Needed To Hook Up A Cat5 Wall Box?
You need a punch-down tool, wire stripper, cable tester, and a Cat5 cable. These tools ensure proper connection and testing of the wall box.
How Do You Identify Wire Pairs In A Cat5 Cable?
Cat5 cables have four twisted pairs, color-coded as blue, orange, green, and brown. Each pair includes a solid color and a striped wire for easy identification.
What Is The Correct Wiring Standard For Cat5 Wall Boxes?
Use T568A or T568B wiring standards. Both are accepted, but T568B is more common in the U. S. Consistency in wiring at both ends is crucial.
How To Punch Down Wires In A Cat5 Wall Box Properly?
Strip the cable jacket, untwist pairs, and align wires according to the wiring standard. Use the punch-down tool to secure wires firmly in the IDC terminals.
Conclusion
Hooking up a wall box for Cat5 is a useful skill to learn. It helps create a strong, clear network connection. Follow each step carefully and check your work. Use the right tools and cables for best results. Take your time and stay patient.
Soon, your Cat5 connection will work smoothly. Enjoy faster internet and better communication at home or work. Keep practicing to get better each time. Simple steps lead to great results.


