Are you stuck with a towel hook on your wall that you want gone? Removing it might seem tricky, but it doesn’t have to be.
Whether you’re updating your bathroom or fixing a small mistake, knowing the right way to remove a towel hook can save you time and prevent damage to your wall. In this guide, you’ll discover simple steps to take it off cleanly and easily.
Keep reading—you’ll be surprised how quick and hassle-free this task can be!
Credit: www.youtube.com
Tools Needed
Removing a towel hook from the wall requires a few simple tools. Having the right tools makes the job easier and protects your wall from damage. Prepare these items before starting.
Screwdriver
A screwdriver helps remove screws holding the towel hook. Check if the screws are flathead or Phillips type. Use the correct screwdriver to avoid stripping screws.
Putty Knife
A putty knife lifts any adhesive or paint around the hook base. It helps separate the hook gently from the wall without causing dents.
Utility Knife
A utility knife cuts through caulk or paint sealing the hook edges. It allows easier removal by loosening the hook’s grip on the wall.
Pliers
Pliers grip small parts or stubborn hooks. Use them carefully to pull out hooks or nails without damaging the wall.
Spackle And Sandpaper
After removing the hook, spackle fills holes left behind. Sandpaper smooths the surface for a clean, even finish before painting.
Identify Hook Type
Removing a towel hook starts with knowing what type of hook is on your wall. Different hooks need different removal methods. Identifying the hook type saves time and prevents wall damage. Look closely at the hook’s base and how it holds to the wall.
Adhesive Hooks
Adhesive hooks stick directly to the wall with glue. They often have a plastic or metal base. These hooks leave no holes but may peel paint if pulled too fast. Check if the hook has a flat back without screws or nails. Press gently on the sides to see if it moves.
Screw-in Hooks
Screw-in hooks have a visible screw or bolt holding them. They usually have a round or square plate attached to the wall. These hooks need a screwdriver to remove. Look for a small hole in the base or a visible screw head. Sometimes, the hook itself twists off from the screw.
Nail Hooks
Nail hooks use thin nails hammered into the wall. The hook often looks like a small metal piece with nails on both ends. Nails might be visible or hidden under the hook base. These hooks can leave small holes. Gently tap the hook to check if it moves loose from the nails.
Prepare The Area
Clear the wall around the towel hook. Remove any items or decorations nearby. Protect the floor with a cloth or paper to catch debris.
Clear The Surrounding Space
Start by removing towels and items near the hook. Clear the wall area around the hook. This prevents damage to your belongings. It also gives you room to work safely and comfortably.
Protect The Wall Surface
Place a soft cloth or painter’s tape under the hook. This protects the wall from scratches during removal. It also helps catch any debris or dust that falls.
Gather Necessary Tools
Collect tools like a screwdriver, putty knife, and pliers. Having tools ready speeds up the removal process. Check tool condition to avoid accidents or damage.
Turn Off Power If Needed
Check if the hook is near an electrical outlet or switch. Turn off the power to that area for safety. This prevents electric shocks while working on the wall.
:max_bytes(150000):strip_icc()/how-to-remove-towel-bar-5221017-03-4873175f190548228b867ee5a3dec733.jpg)
Credit: www.thespruce.com
Removing Adhesive Hooks
Removing adhesive towel hooks is simple with the right steps. These hooks stick to walls without nails or screws. They leave no damage if removed carefully. Follow these easy methods to take off adhesive hooks safely.
Slow Pull Method
Start by holding the hook gently. Pull the hook slowly straight down. Keep pulling until the adhesive releases. Avoid pulling too fast to prevent wall damage. This method works best for most adhesive hooks.
Use Heat For Softening
Apply heat to soften the glue. Use a hairdryer on low heat. Hold it a few inches from the hook. Heat the area for about one minute. The adhesive becomes soft and easier to remove.
Apply Adhesive Remover
Use a gentle adhesive remover for sticky residue. Put a small amount on a cloth. Rub the residue softly until it dissolves. Clean the wall with mild soap and water. This leaves the surface smooth and clean.
Removing Screw-in Hooks
Removing screw-in towel hooks is simple with the right steps. These hooks screw directly into the wall, making them easy to remove. You only need a few tools and some patience. Follow the steps below to remove the hooks without damaging your wall.
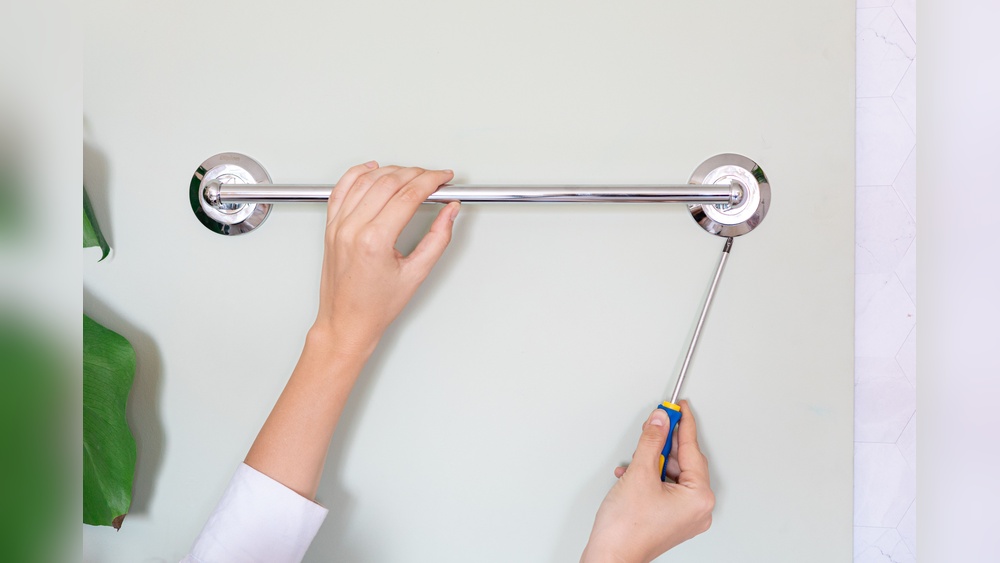
Unscrew With A Screwdriver
Start by selecting the right screwdriver. Most towel hooks use a flathead or Phillips screwdriver. Turn the screw counterclockwise to loosen it. Keep turning until the hook comes off the wall. If the hook spins without coming out, try gripping it with pliers.
Handle Stubborn Screws
Sometimes screws get stuck or are hard to turn. Apply a little oil or lubricant to the screw to ease removal. Let it sit for a few minutes. Use a screwdriver with a firm grip and apply steady pressure. If the screw still won’t budge, use pliers to gently twist it out.
Fill And Repair Holes
After removing the hook, small holes remain on the wall. Use wall filler or putty to cover these holes. Apply it with a putty knife and smooth the surface. Let it dry fully. Sand the area lightly for a clean finish. Paint over the patch to match your wall color.
Removing Nail Hooks
Removing nail hooks from a wall is a simple task with the right method. It requires care to avoid damaging the wall surface. Nail hooks are common for hanging towels, pictures, or light decorations.
Follow these steps to take off nail hooks safely and fix the wall afterward.
Use Pliers Carefully
Start by gripping the nail head with pliers. Pull gently to avoid bending the nail or hurting the wall. Use slow, steady pressure to ease the nail out. If the nail is stuck, wiggle it slightly before pulling. Avoid yanking or sudden force.
Minimize Wall Damage
Pull nails straight out to protect the wall paint. Avoid scraping the wall with the pliers. Place a thin cloth or piece of cardboard behind the nail. It keeps the wall safe while you pull. Work slowly and gently to keep the wall smooth.
Patch Nail Holes
Fill small holes with lightweight spackle or wall filler. Use a putty knife to spread the filler evenly. Let it dry completely before sanding it smooth. Paint over the patch to match the wall color. This restores the wall’s clean look fast.
Cleaning Residue
After removing a towel hook, sticky residue often stays on the wall. This leftover adhesive can attract dirt and look messy. Cleaning this residue is important for a smooth, clean wall surface.
Remove Adhesive Leftovers
Start by gently scraping off large glue pieces with a plastic card. Avoid metal tools to protect the wall. Next, apply a small amount of rubbing alcohol or adhesive remover. Let it sit for a few minutes to soften the residue. Then, wipe the area with a soft cloth. Repeat if needed until the sticky parts disappear.
Clean Wall Surface
After removing the adhesive, clean the wall with warm soapy water. Use a sponge or soft cloth to wipe the area gently. This step removes any leftover chemicals and dirt. Dry the wall with a clean towel. Your wall will look fresh and ready for painting or new hooks.
Tips To Avoid Wall Damage
Removing a towel hook can be tricky without harming the wall. Small mistakes cause big holes or scratches. Protect your wall by following careful steps. Use gentle methods and the right tools. This section shares tips to avoid wall damage.
Use The Right Tools
Choose tools that fit the hook type. A screwdriver or pliers work well. Avoid sharp objects that dig into the wall. A putty knife helps lift the hook gently.
Remove Screws Slowly
Turn screws counterclockwise with steady pressure. Fast twisting can strip the screws or damage the wall. Take your time for a smooth removal.
Protect The Wall Surface
Place painter’s tape around the hook base. This stops paint or drywall from peeling. Tape creates a barrier during removal.
Handle Anchors Carefully
Pull anchors out gently. Push them inside the wall if needed. For stubborn anchors, use pliers but avoid pulling too hard.
Fill Holes Properly
Use spackle or wall filler to cover holes. Apply in thin layers with a putty knife. Sand the area smooth after drying for a clean finish.

Credit: www.reddit.com
Frequently Asked Questions
How Do I Safely Remove A Towel Hook From Drywall?
To safely remove a towel hook from drywall, first unscrew the hook. Then, gently pry the mounting plate using a putty knife. Avoid damaging the wall by working slowly and carefully. Fill holes with spackle and sand smooth for a clean finish.
What Tools Are Needed To Remove A Towel Hook?
You need a screwdriver, putty knife, spackle, sandpaper, and possibly pliers. These tools help remove screws, pry off the hook, and repair the wall afterward. Having the right tools ensures a smooth and damage-free removal process.
Can I Remove A Towel Hook Without Damaging The Wall?
Yes, you can remove a towel hook without wall damage. Unscrew the hook carefully and use a putty knife to detach the mounting plate. Repair any small holes with spackle and sand lightly for a smooth surface.
How Do I Repair Holes After Removing A Towel Hook?
Fill holes with spackle or wall filler using a putty knife. Let it dry completely, then sand the area smooth. Finally, repaint to match the wall color for a seamless repair.
Conclusion
Removing a towel hook from the wall can be simple and quick. Start by loosening the screws or nails holding it. Use the right tools to avoid damage. Take your time to prevent wall marks. After removal, fill holes with putty for a smooth finish.
Sand and paint if needed to restore the wall. This method keeps your wall clean and ready for new hooks or decorations. A small task that saves time and effort in the long run. Easy steps, clear results.