Have you just moved into a new home or lost your keys? Changing your Kwikset deadbolt’s lock might feel tricky, but it doesn’t have to be.
You can save time and money by learning how to rekey your Kwikset deadbolt yourself. Imagine having the confidence to secure your home without waiting for a locksmith or buying a new lock. In this guide, you’ll discover simple, clear steps to get the job done quickly and easily.
Ready to take control of your home security? Let’s dive in.
Credit: www.homedepot.com
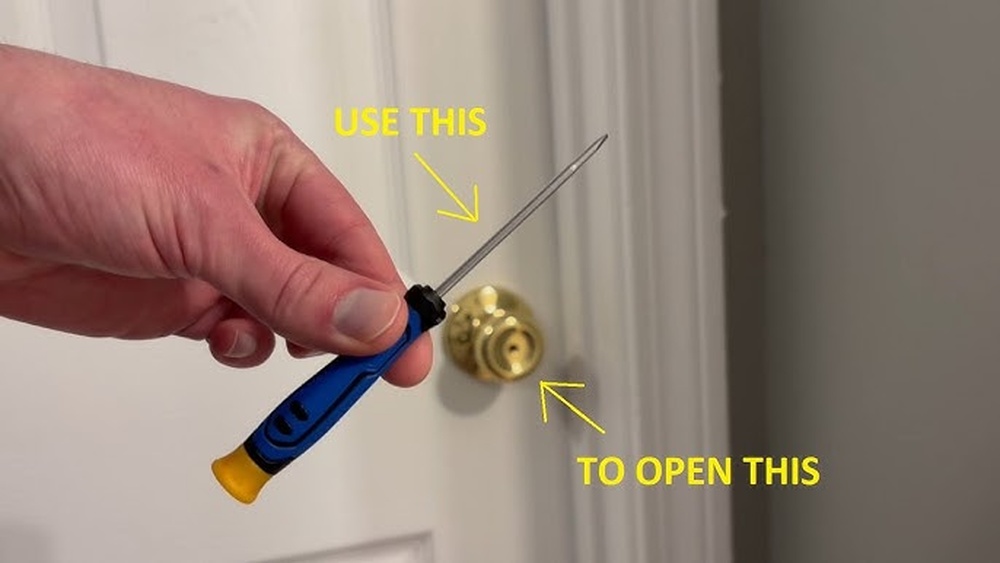
Tools And Materials Needed
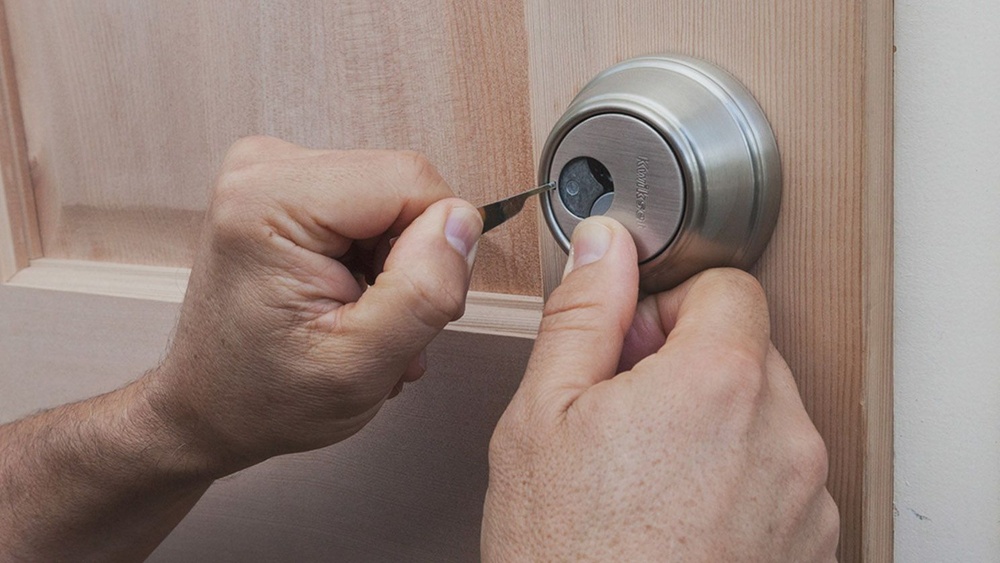
Removing old pins is a key step in rekeying a Kwikset deadbolt. This process allows you to replace the pins inside the lock cylinder. Doing this properly ensures the lock works with a new key. Careful removal helps avoid damaging the lock parts.
Using The Key To Extract Pins
Insert the original key into the lock cylinder. Turn the cylinder slightly to align the pins. Use a pinning tool or tweezers to pull out each pin. The key holds the pins in place for easy removal. Remove all pins carefully, one by one.
Organizing Old Pins
Keep the old pins in order as you remove them. Use a small container or tray to hold the pins. Organizing pins helps you understand their sizes. It also prevents losing any small parts. This step makes reassembly easier and faster.

Credit: www.youtube.com
Preparing The Lock
Selecting new pins is a key step in rekeying a Kwikset deadbolt. The pins inside the lock cylinder control how the key turns. Using the right pins ensures the lock works smoothly with your new key. This step involves choosing pins that match the cuts on your new key. Careful selection makes your lock secure and easy to use.
Matching Pin Sizes
Each pin must fit perfectly with the key’s cuts. Pins come in different lengths to match key grooves. You measure the depth of each cut on the new key. Then, find the pin size that fits this depth. Using pins that are too long or short can cause the lock to jam or not turn. Correct pin sizes ensure smooth lock operation and security.
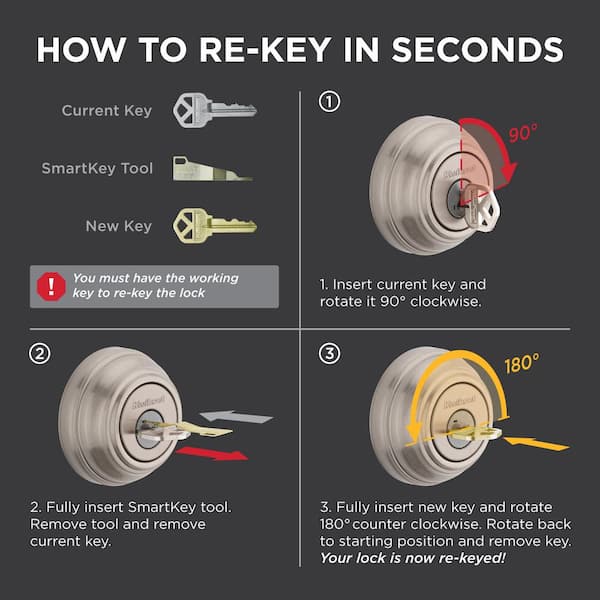
Using The Pinning Chart
A pinning chart helps match key cuts to pin sizes. It shows which pin length fits each cut depth. You read the chart based on the code stamped on your new key. The chart guides you to pick pins quickly and correctly. Always keep the chart close when rekeying. It helps avoid mistakes and speeds up the process.

Credit: www.ifixit.com
Frequently Asked Questions
How Do I Start Rekeying A Kwikset Deadbolt?
Begin by removing the deadbolt from the door. Use a screwdriver to take off the interior cover. Locate the rekeying pins inside the cylinder. Follow the kit instructions to replace pins matching your new key.
What Tools Do I Need To Rekey A Kwikset Lock?
You need a screwdriver, a Kwikset rekeying kit, and new keys. The kit includes pins, a follower tool, and instructions. Having a clean workspace helps keep small parts organized during rekeying.
Can I Rekey A Kwikset Deadbolt Without Professional Help?
Yes, rekeying a Kwikset deadbolt is DIY-friendly with proper tools. The kits are designed for easy use by homeowners. Follow step-by-step instructions carefully to avoid damaging the lock.
How Long Does It Take To Rekey A Kwikset Lock?
Rekeying usually takes 15 to 30 minutes for beginners. Time depends on your familiarity and the lock’s condition. Practicing on an old lock can speed up the process.
Conclusion
Rekeying a Kwikset deadbolt can save money and improve home security. The steps are simple and do not take much time. Always use the right tools and follow instructions carefully. Double-check your work to ensure the lock works smoothly. Practice makes perfect, so don’t rush.
Taking control of your lock helps keep your home safe. Try it yourself and feel confident in your skills. Safe and secure—just a few steps away.