Have you ever flipped a light switch only to find nothing happens? It’s frustrating when you don’t know which switch controls which light.
But what if you could quickly and easily figure out exactly where that switch leads? Imagine never having to guess again or stumble around in the dark. You’ll discover simple steps to track down any light switch’s connection in your home.
By the end, you’ll have the confidence to identify switches with ease—and save yourself time and hassle. Ready to uncover the mystery behind your light switches? Let’s get started.
Tools Needed
Finding where a light switch goes requires the right tools. These tools help you check wires and connections safely and easily. Having the correct tools makes the job faster and avoids mistakes.
Basic Electrical Tools
A voltage tester is essential. It shows if wires carry electricity. A screwdriver set helps remove switch covers and panels. Wire strippers cut and strip wires without damage. Needle-nose pliers bend and hold small wires. Electrical tape secures wire connections safely. A flashlight helps see in dark spaces behind switches and outlets.
Safety Equipment
Safety goggles protect your eyes from sparks or debris. Insulated gloves stop electric shocks while handling wires. Wear rubber-soled shoes to avoid grounding yourself. Turn off power at the circuit breaker before starting. Have a fire extinguisher nearby in case of emergencies.
Credit: www.etsy.com
Preparing For The Task
Preparing for the task of finding where a light switch goes is important for safety and efficiency. Start by getting ready with the right steps. This helps prevent accidents and saves time. Safety is the top priority when working with electrical switches.
Gather basic tools like a screwdriver, a voltage tester, and a flashlight. Wear rubber-soled shoes and avoid wet areas. These simple precautions keep you safe while working.
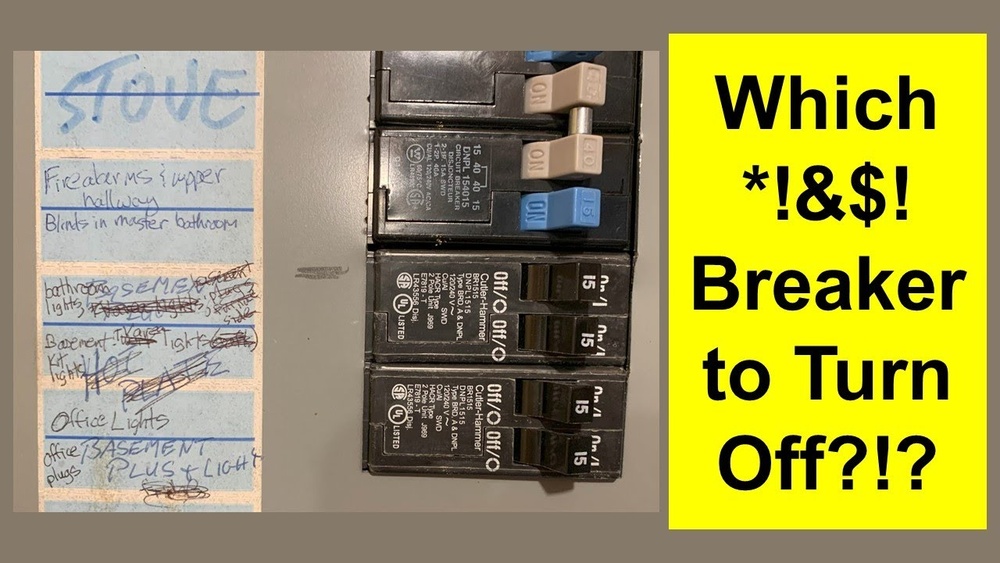
Turn Off Power
Always turn off the power before touching any switch. Find the correct circuit breaker in your main panel. Flip the switch to cut the power. Use a voltage tester to double-check no electricity flows. This step stops electric shocks and damage.
Locate The Switch Box
Next, find the switch box on the wall. Look for a small rectangular or square plate. Remove the cover carefully using a screwdriver. Inside, you will see wires connected to the switch. This box shows where the switch controls the light.
Tracing The Wiring
Tracing the wiring is a key step in finding where a light switch leads. It helps you understand which wires connect the switch to the light or other devices. This process involves careful observation and some basic tools. It can save you time and effort before you start any repairs or changes.
Take your time. Safety is important. Always turn off power at the breaker before handling wires. Use a voltage tester to be sure wires are not live. Once safe, you can start tracing the wiring step by step.
Identify Wire Types
Wires come in different colors and sizes. Each color has a specific role. Black or red wires usually carry current to the switch. White wires often act as neutral wires. Bare copper or green wires are ground wires. Knowing these helps you understand the wiring layout.
Look for wire labels or markings. They provide clues about the wire’s purpose. Use a flashlight if needed to see inside the switch box. Be gentle to avoid damaging the wires or connections.
Follow The Wiring Path
Start from the switch box and trace wires along the wall or ceiling. Wires often run inside walls or under floors. You may see wires leading to light fixtures, outlets, or other switches.
Use a non-contact voltage tester to check if wires are live. This helps confirm the path without disconnecting anything. Mark wires with tape or labels as you follow them. This keeps track and prevents confusion later.
Sometimes wires connect in junction boxes. Open these carefully to see where wires join or split. Tracing wires step by step helps map the whole circuit. This makes it easier to find what the switch controls.

Credit: www.youtube.com
Testing The Switch
Testing a light switch helps identify which fixture it controls. It is a simple process that needs a few tools and safety steps. Testing ensures you avoid confusion and fix electrical problems correctly.
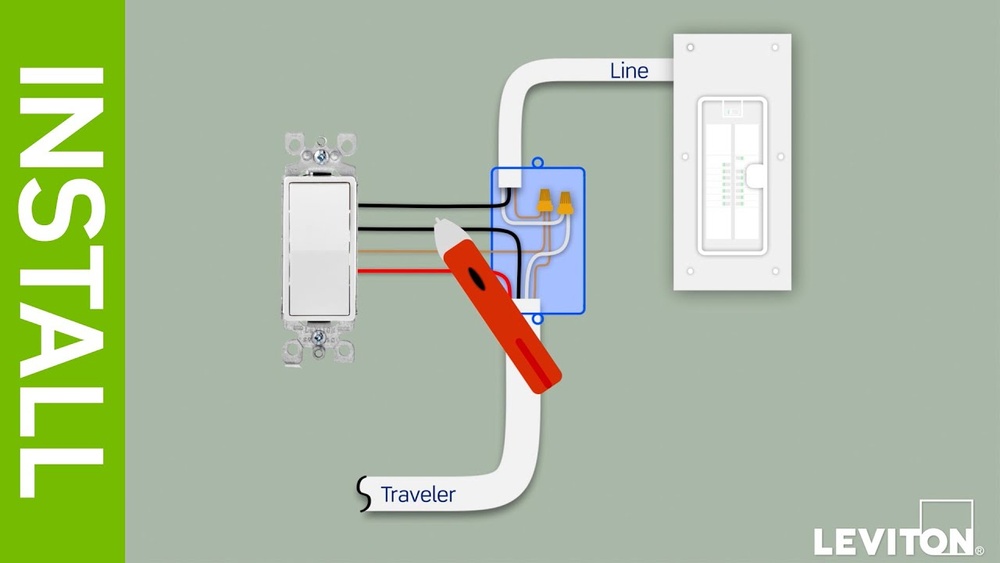
Use A Voltage Tester
A voltage tester shows if electricity flows through the switch. Turn off the power at the breaker before starting. Remove the switch cover carefully. Touch the tester probes to the switch terminals. A light or beep means power is present. This test confirms the switch receives electricity. It does not show what the switch controls. Always follow safety rules to avoid shocks.
Check Connected Fixtures
Turn the switch on and off. Watch nearby lights, fans, or outlets for changes. If a device turns on or off, the switch controls it. Test all rooms and areas near the switch. Some switches control outdoor lights or attic fans. Note which fixture reacts to the switch. This method helps you map the switch to its device. It is quick and needs no special tools.
Using A Circuit Tracer
Using a circuit tracer is an effective way to find where a light switch connects. This tool helps you follow wires behind walls without damage. It makes tracing circuits simple and clear. Anyone can use it, even with little electrical knowledge. The process is fast and accurate, saving time and effort.
How Circuit Tracers Work
Circuit tracers send a small signal through electrical wires. The device detects this signal along the wire’s path. It shows where wires lead and connect. This helps find the light switch’s location and its linked fixtures. The tracer works without cutting or opening walls. It is safe for home use and easy to handle.
Step-by-step Tracing Process
First, turn off the power to the circuit. Attach the tracer’s transmitter to the switch wire. Turn on the transmitter to send a signal. Use the receiver to scan walls and outlets. Follow the signal until it leads to the light fixture. Mark the spot where the signal is strongest. This shows where the switch controls the light. Finally, turn the power back on and test the switch. The circuit tracer helps confirm the correct wiring quickly.
Marking And Labeling
Marking and labeling are important steps to keep track of your work. They help you know which wire or switch controls what. This saves time and avoids confusion later. Simple marks can make a big difference.
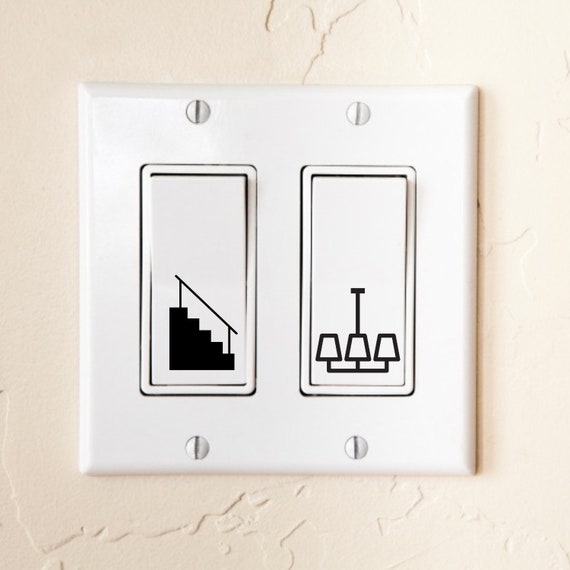
Labeling wires and switches clearly helps you identify them easily. Use tape or stickers and write short notes. For example, write “Living Room Light” or “Hallway Switch.” This makes it easier to connect everything back properly.
Labeling Wires And Switches
Start by turning off the power. Then, use masking tape or small labels on each wire. Write clear names that describe where the wire goes. Do the same for the switch. Mark each switch with a matching label.
Use a pencil or pen that does not smudge. Keep labels neat and easy to read. Avoid long names; use simple words. This helps you or anyone else work on the switch later.
Documenting Your Findings
Write down your labels and what they mean on paper. Create a simple list or diagram. Note which wire or switch controls which light or outlet. Keep this document safe for future reference.
Take photos of the labeled wires and switches. Save them with your notes. This extra step helps you recall details quickly. Documentation prevents mistakes in wiring or repairs later.
Common Issues And Fixes
Finding where a light switch leads can be tricky. Common problems often cause confusion. Knowing the usual issues helps fix the problem faster. This section covers two main problems. Loose connections and faulty switch replacement. Both are easy to check and repair.
Loose Connections
Loose wires can stop a light switch from working. Wires may come loose inside the switch box. This causes flickering or no light at all. Turn off power before checking the wires. Use a screwdriver to open the switch plate. Look for wires that are not tight. Tighten any loose screws holding the wires. Make sure wires are firmly connected to the switch. After fixing, turn the power back on and test the switch.
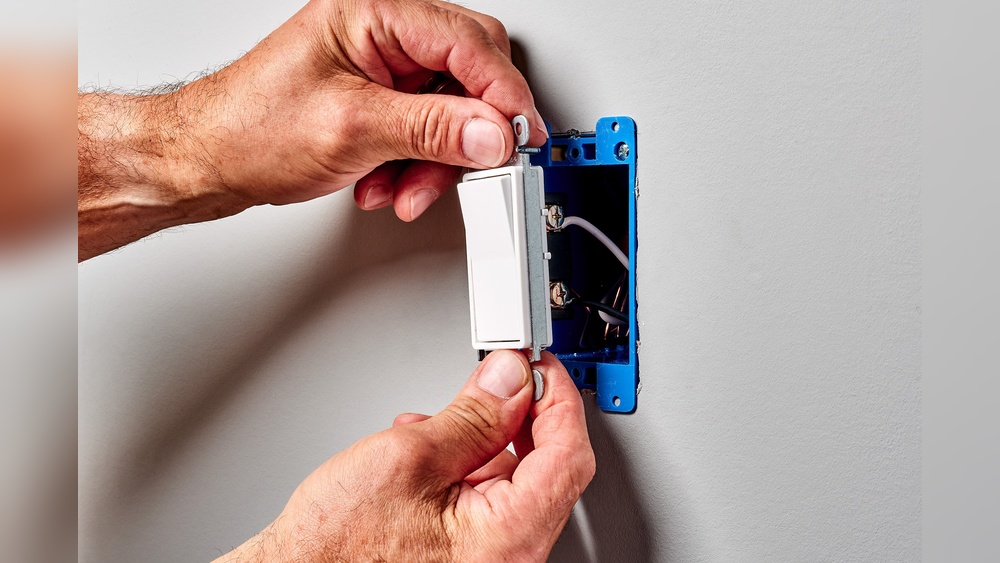
Faulty Switch Replacement
Switches can wear out over time. A broken switch will not control the light properly. Signs include a switch that feels loose or does not click. To replace, turn off power at the breaker. Remove the old switch by unscrewing it. Note where each wire connects. Take the wires off the old switch. Attach them to the new switch in the same way. Screw the new switch into the box. Turn power back on and test the new switch.
Safety Tips
Working with light switches needs care. Safety should always come first. Taking simple safety steps can stop accidents. This keeps you safe and the job smooth.
Avoiding Electrical Shock
Turn off the power at the breaker box. Use a voltage tester to check the wires. Never touch wires with wet hands. Wear rubber-soled shoes for extra protection. Keep metal tools away from live wires. Work in a dry place and good light.
When To Call A Professional
Call an electrician if you feel unsure. Complex wiring needs expert knowledge. If wires look damaged or old, get help. Strange smells or sparks need urgent attention. For safety, do not guess or experiment. Professionals have the right tools and skills.

Credit: www.reddit.com
Frequently Asked Questions
How Do I Identify A Light Switch’s Connected Fixture?
Turn off the power and remove the switch cover. Use a circuit tester to check wires. Follow the wires to see which fixture they connect to, or turn the switch on and observe which light or outlet activates.
Can I Find A Light Switch Connection Without Tools?
Yes, you can try turning the switch on and off while observing nearby lights or outlets. This helps identify which fixture the switch controls without using any tools.
Why Doesn’t My Light Switch Control Any Fixture?
The switch may be disconnected, broken, or control a hidden fixture. Check wiring connections and test the switch with a voltage tester to diagnose the issue.
How Can I Trace Hidden Wires Linked To A Light Switch?
Use a non-contact voltage tester or wire tracer to detect live wires inside walls. This helps find hidden wiring paths connected to the light switch.
Conclusion
Finding where a light switch leads takes some simple steps. Start by turning off the power to stay safe. Use a tester to check wires and circuits carefully. Trace wires from the switch to see what lights or outlets it controls.
Patience helps when testing each switch’s effect. Marking switches and lights makes future work easier. Understanding your home’s wiring saves time and trouble. You can fix or update switches with more confidence. Small efforts bring clearer results in your home’s lighting.
Keep practicing, and it will get easier each time.