Have you ever faced a stuck deadbolt lock and felt completely helpless? Whether you need to fix it, replace it, or just understand how it works, knowing how to take apart a deadbolt lock can save you time and money.
In this guide, you’ll find simple, step-by-step instructions that anyone can follow—even if you’re not a handyman. By the end, you’ll have the confidence to handle your deadbolt like a pro. Ready to unlock this skill? Let’s get started.
Tools Needed
Taking apart a deadbolt lock requires some basic tools. Having the right tools makes the job easier and safer. Use tools that fit well and work smoothly.
Some tools help remove screws. Others help pull parts apart. Prepare all tools before starting to avoid interruptions.
Screwdrivers
A set of screwdrivers is essential. Use both flathead and Phillips screwdrivers. Screws on deadbolts come in different shapes. Choose the right size to avoid stripping screws.
Pliers
Pliers help grip and pull small parts. Needle-nose pliers work best for tight spaces. They make it easy to hold pins and springs.
Allen Wrench
Some deadbolts use hex screws. An Allen wrench set is useful. It fits these screws and helps remove them quickly.
Utility Knife
A utility knife can cut through paint or sealant. This helps expose screws hidden under layers. Use carefully to avoid damage to the lock or door.
Hammer
A small hammer helps tap loose parts gently. Use it with a screwdriver or punch to free stuck pieces. Tap lightly to prevent damage.

Credit: www.youtube.com
Prepare The Door
Preparing the door is the first step to take apart a deadbolt lock. It helps you work safely and easily. You need to clear the area around the lock. This way, you can see all parts clearly and avoid damage.
Start by making sure the door is open. This gives you space to work. Also, gather simple tools like a screwdriver. These will help remove the lock parts step by step.
Remove Door Handles
Begin with the door handles. They can block access to the deadbolt screws. Check both sides of the door. Use a screwdriver to remove the screws holding the handles. Keep the screws safe for later use.
Once screws are out, pull the handles off gently. Avoid forcing them. This prevents damage to the door surface and lock parts. Removing handles clears your workspace around the deadbolt.
Locate Screws
Next, find the screws that hold the deadbolt. These are usually on the inside edge of the door. Look closely around the lock faceplate. Some screws might be hidden under small covers.
Use a flat tool to lift these covers carefully. This reveals the screws without scratching the door. Once found, use your screwdriver to remove these screws. This step frees the deadbolt from the door frame.
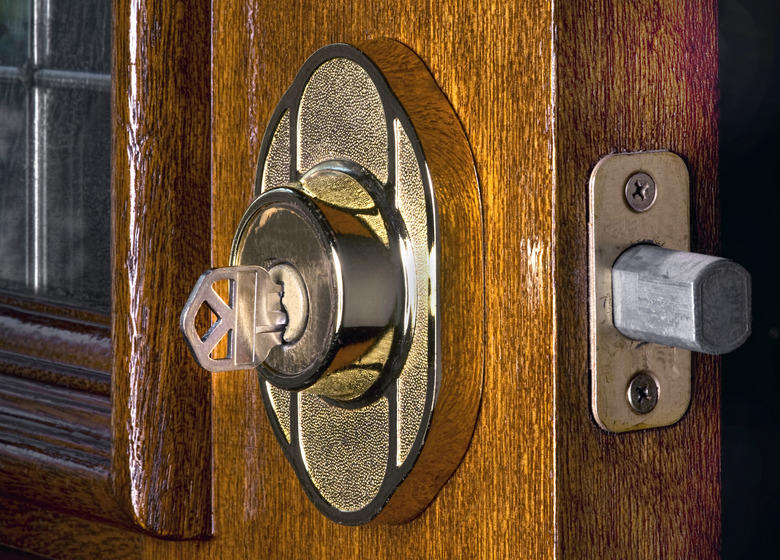
Remove Exterior Cylinder
Removing the exterior cylinder is a key step in taking apart a deadbolt lock. This part holds the keyhole and connects to the internal locking mechanism. Removing it carefully helps you access the inside parts for repair or replacement. Follow the simple steps below to remove the exterior cylinder safely.
Unscrew Cylinder
Locate the screws holding the exterior cylinder in place. Usually, they are on the interior side of the lock. Use a screwdriver that fits the screws well. Turn the screws counterclockwise to loosen them. Keep the screws safe for reassembly. Do not force the screws; they should turn easily.
Pull Out Cylinder
After unscrewing, gently pull the exterior cylinder away from the door. It may need a slight wiggle to come free. Avoid using too much force to prevent damage. Once loose, the cylinder will slide out smoothly. Set it aside carefully to avoid losing small parts.

Credit: www.eufy.com
Disassemble Interior Mechanism
Disassembling the interior mechanism of a deadbolt lock is a key step in taking it apart. This part holds the thumb turn and the mounting plate. Removing these parts carefully helps you access the lock’s inner workings.
Work slowly and keep track of all screws and pieces. You will need a screwdriver and a small container for parts. Follow each step to avoid damage and ensure easy reassembly.
Remove Thumb Turn
Start by locating the thumb turn on the inside of the door. It is the small knob you twist to lock or unlock.
Look for a small screw or clip holding the thumb turn in place. Use a screwdriver to remove the screw. If there is a clip, gently pry it off with a flat tool.
Once loose, pull the thumb turn straight out. Do not force it. Set it aside carefully to avoid losing it.
Extract Mounting Plate
Next, find the mounting plate that holds the lock to the door. It usually sits behind the thumb turn.
Remove the screws securing the mounting plate using your screwdriver. Keep the screws safe for later use.
After all screws are out, pull the mounting plate away from the door. It should come off easily. This reveals the lock’s interior parts.
Take Out Deadbolt
Removing a deadbolt lock involves unscrewing the interior and exterior parts carefully. Start by taking off the screws and pulling the lock apart gently. This process helps fix or replace the lock easily.
Unscrew Faceplate
Start by locating the screws on the deadbolt faceplate. These screws hold the lock in place on the door edge. Use a screwdriver to remove all the screws carefully. Keep the screws safe for later use. Once the screws are out, gently pull the faceplate away from the door. This step exposes the bolt mechanism inside the door edge. Take your time to avoid damage to the door or lock parts.
Slide Out Bolt
With the faceplate removed, the bolt is now visible and accessible. Grip the bolt firmly and slide it straight out from the door. It should come out smoothly without forcing. If the bolt sticks, check for any hidden screws or debris blocking it. Removing the bolt clears the way to fully detach the deadbolt. Store the bolt with other parts to keep everything together. This step completes the removal of the deadbolt from the door.
Inspect And Clean Parts
After taking apart a deadbolt lock, the next step is to inspect and clean all parts. Dirt and rust can stop the lock from working well. Cleaning helps the lock work smoothly and last longer.
Check every piece carefully. Look for damage or wear. Small problems can cause big issues later. Cleaning removes dust, grime, and old grease that block movement.
Inspect The Cylinder And Plug
Look closely at the cylinder and plug. These parts hold the key pins. Make sure pins move freely. Dirt can block their movement and cause the lock to jam. Check for cracks or worn edges.
Clean The Pins And Springs
Remove pins and springs carefully. Use a soft brush to clean them. Dust and rust can stick to these small parts. Clean parts move easier inside the lock. Dry them well before putting back.
Examine The Bolt And Housing
Look at the bolt and housing. These parts slide to lock and unlock. Dirt or rust can slow them down. Wipe them with a cloth and use light oil if needed. Avoid too much oil; it attracts dust.
Use The Right Cleaning Tools
Use cotton swabs, small brushes, and soft cloths. These tools clean hard-to-reach areas. Avoid harsh chemicals that damage metal. Mild soap and water or rubbing alcohol work best. Dry parts completely before reassembly.
Tips For Reassembly
Reassembling a deadbolt lock can be tricky without the right approach. Keeping parts organized and following steps carefully helps avoid mistakes. This section offers simple tips for smooth reassembly.
Organize Parts Before Starting
Lay out all screws and components on a clean surface. Group similar parts together. This prevents losing small pieces during reassembly. It also makes the process faster and easier.
Follow The Reverse Order
Put the lock back together in the opposite order of disassembly. Start with the innermost parts and work outward. This method keeps the mechanism aligned correctly. It reduces the risk of damage.
Align The Bolt Properly
Make sure the bolt slides smoothly into the casing. Check alignment before tightening screws. Misalignment can cause the lock to jam or not work properly. Adjust the bolt position carefully.
Tighten Screws Evenly
Do not overtighten screws. Tighten them in small steps, alternating sides. This keeps the lock balanced and prevents stripping screw holes. Use a screwdriver that fits the screws well.
Test The Lock Function
Check the lock operation before finalizing assembly. Turn the key and handle several times. Confirm the bolt moves freely and locks securely. Fix any issues before putting the lock back on the door.
Credit: www.hunker.com
Frequently Asked Questions
How Do I Safely Remove A Deadbolt Lock?
First, remove the screws on the interior side of the lock. Then, gently pull off the lock components. Use a screwdriver carefully to avoid damage. Always disconnect the lock from the door before handling the cylinder or bolt.
What Tools Are Needed To Disassemble A Deadbolt?
You typically need a Phillips screwdriver, flathead screwdriver, and sometimes an Allen wrench. A lubricant spray can help loosen tight parts. Having a small container for screws is useful. Ensure all tools are clean and ready before starting.
Can I Reuse Parts From A Disassembled Deadbolt?
Yes, if the parts are not damaged or worn out. Inspect the cylinder, bolt, and screws for any signs of wear. Clean all parts thoroughly before reuse. Replace any broken or rusted components for safety.
How Long Does It Take To Take Apart A Deadbolt?
It usually takes 10 to 20 minutes for an average DIYer. Time depends on the lock type and your experience. Being organized and using the right tools speeds up the process.
Conclusion
Taking apart a deadbolt lock is easier than it seems. With the right tools and steps, you can do it yourself. Remember to keep parts organized and work slowly. This helps avoid mistakes and saves time. Practice patience and focus on each step carefully.
Soon, you will feel confident handling deadbolt locks. This skill can help with repairs or replacements at home. Keep this guide handy for future use. Stay safe and take your time.