Are you tired of struggling to hang your pictures just right? Using picture hooks on your wall can make the job quick and damage-free.
Imagine your favorite photos and artwork perfectly displayed, brightening up your space without messy holes or heavy tools. In this guide, you’ll learn simple steps to use picture hooks like a pro, making your walls look neat and stylish. Keep reading to discover how easy it is to transform your room with just a few hooks and a little know-how!

Credit: thistlekeylane.com
Choosing The Right Picture Hooks
Choosing the right picture hooks is important for hanging your artwork safely. The right hooks keep your pictures secure and protect your walls. This guide helps you pick hooks that fit your needs and style.
Types Of Picture Hooks
There are many types of picture hooks. Some hooks have nails, while others use adhesive strips. Nail hooks work well for heavy frames. Adhesive hooks are good for light pictures and easy to remove. Choose hooks based on your picture size and wall type.
Weight Capacity Considerations
Check the weight of your picture before picking hooks. Each hook has a weight limit. Use hooks that hold more than your picture’s weight. Strong hooks prevent falls and wall damage. Always follow the weight guidelines on the hook package.
Material And Finish Options
Picture hooks come in different materials like metal and plastic. Metal hooks are strong and last longer. Plastic hooks are lighter and less visible. Choose a finish that matches your wall or frame color. This keeps your display neat and stylish.

Credit: cascadeironco.com
Preparing The Wall Surface
Preparing the wall surface is the first step before hanging picture hooks. A clean and suitable wall ensures the hooks hold strong and your pictures stay safe. Taking time to prepare prevents damage and keeps your wall looking neat.
Cleaning The Wall
Remove dust and dirt from the wall. Use a damp cloth or sponge with mild soap. Let the wall dry completely before placing any hooks. A clean surface helps the hooks stick better and last longer.
Checking Wall Material
Know what type of wall you have. Drywall, plaster, brick, or concrete need different hooks. Choose hooks that work with your wall material. This prevents damage and keeps your pictures secure.
Locating Studs And Avoiding Obstacles
Find wall studs using a stud finder or tapping method. Hooks placed on studs hold heavier pictures safely. Avoid wires, pipes, or nails inside the wall. Use caution to stop accidents and wall damage.
Measuring And Marking Placement
Measuring and marking the placement of picture hooks is an important step. It ensures your pictures hang straight and look good on the wall. Careful measurement helps avoid mistakes and keeps your walls neat. Follow these steps for perfect placement every time.
Determining Picture Height
Decide how high you want your picture to hang. A common height is eye level, about 57 to 60 inches from the floor. Consider the size of the picture and the wall space. Smaller pictures can hang a bit lower or higher, based on your room’s layout. Mark the desired height lightly on the wall with a pencil.
Using A Level And Measuring Tape
Use a measuring tape to measure the width of your picture. Find the center point of the picture’s top edge. Transfer this center point to the wall by measuring the same distance from a corner or edge. Use a level to draw a straight line at the height you marked. This line guides where the hooks will go.
Marking Hook Positions
Check how many hooks your picture needs. Most pictures use one or two hooks. Measure the distance between hooks on the picture frame. Mark these points on the wall along the level line. Make small pencil marks for each hook. These marks show where to place the picture hooks.
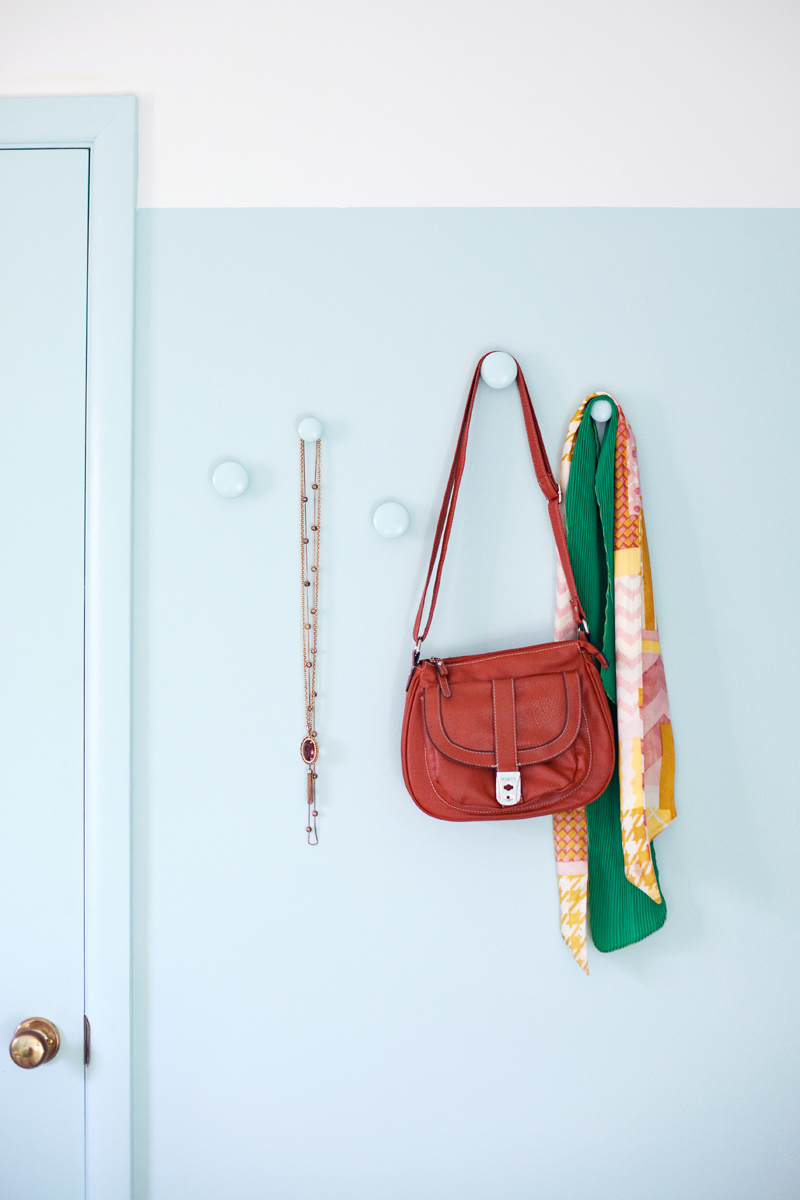
Credit: abeautifulmess.com
Installing Picture Hooks
Installing picture hooks on your wall is a simple task that anyone can do. It helps you hang your favorite photos or art safely and neatly. Choosing the right method depends on your wall type and the weight of the frame. This guide explains easy ways to install picture hooks for a secure hold.
Nailing Hooks Into Drywall
Drywall is common in many homes. For light frames, small picture hooks work well. Use a hammer to gently nail the hook into the wall. Aim the nail slightly upward for better strength. Avoid hitting too hard to prevent wall damage. Test the hook by hanging the frame and checking stability.
Using Anchors For Heavy Frames
Heavy frames need stronger support. Plastic or metal anchors give extra hold in drywall. First, drill a small hole in the wall. Push the anchor inside the hole. Then, screw the picture hook into the anchor. This method stops the hook from pulling out. It keeps your heavy frame safe and secure on the wall.
Alternative Fastening Methods
Not all walls suit nails or anchors. For brick or concrete walls, use masonry hooks or screws. Use a drill with a masonry bit to make holes. For wooden walls, simple screws or nails work well. Another option is adhesive hooks for very light frames. These hooks stick to the wall without damage but hold less weight.
Hanging Your Picture
Hanging your picture on the wall can change the look of a room quickly. It is important to do it right to keep the picture safe and straight. Using picture hooks helps to hold your artwork firmly. Follow simple steps to hang your picture with ease and care.
Attaching Wire Or Hanging Hardware
Check the back of your picture first. Some have wires already attached. If not, attach hanging hardware like D-rings or sawtooth hangers. Make sure the wire or hardware is tight and secure. This will help the picture stay in place on the hooks.
Aligning The Picture On Hooks
Place the picture hooks on the wall at the right height. Use a tape measure to be exact. Hang the picture by placing the wire or hardware onto the hooks. Make sure the picture feels stable and does not move easily.
Adjusting For Level And Balance
Step back and look at your picture. Check if it is straight using a level tool or your eyes. If it tilts, adjust by moving the wire slightly on the hooks. Small changes make a big difference in balance and look.
Tips For Safe And Secure Hanging
Hanging pictures safely and securely ensures they stay in place and your walls stay intact. Following simple tips helps protect your walls and keeps your frames stable. Use the right tools and methods for the best results.
Avoiding Wall Damage
Choose the right picture hook for your wall type. Use hooks designed for drywall, plaster, or brick. Avoid using nails or screws that are too long. They can cause big holes or cracks. Use a level to place hooks straight. This prevents unnecessary holes from adjustments. Always mark spots lightly with a pencil before drilling or hammering.
Ensuring Stability Over Time
Use hooks with proper weight ratings for your pictures. Check the frame’s weight before hanging. Use two hooks for wide or heavy frames. This keeps the picture balanced and stable. Regularly check the hooks and frames for signs of loosening. Tighten or replace hooks if needed to avoid falls.
Handling Different Frame Types
For thin frames, use small hooks or adhesive strips. For heavy frames, use wall anchors or screws. Frames with wire backs hang best on sturdy hooks. Frames with D-rings need hooks placed under the rings. Always match the hook type to the frame style and weight for secure hanging.
Frequently Asked Questions
How Do I Install Picture Hooks On Drywall?
To install picture hooks on drywall, mark the spot, gently tap the hook’s nail into the wall, and ensure it is secure. Use a level to keep pictures straight. Choose hooks rated for your picture’s weight for safety and stability.
Can Picture Hooks Hold Heavy Frames?
Yes, picture hooks can hold heavy frames if you use the right type. Select hooks rated for the frame’s weight. For very heavy items, consider multiple hooks or wall anchors to distribute weight evenly and prevent wall damage.
What Tools Are Needed For Picture Hook Installation?
You need a hammer, a pencil for marking, and a level to install picture hooks. Optionally, use a stud finder for heavier frames. These tools help ensure your picture hangs securely and straight on the wall.
Are Picture Hooks Better Than Nails For Hanging Art?
Picture hooks are better than nails as they distribute weight evenly and minimize wall damage. They provide more stability, especially for heavier items, and often come with nails angled for secure placement.
Conclusion
Picture hooks make hanging art simple and neat. They keep walls safe from damage and hold items securely. Use them to change your room’s look anytime. Just follow the steps carefully for best results. Enjoy decorating without stress or mess.
Your walls will look great with little effort. Try picture hooks for easy and clean wall displays.