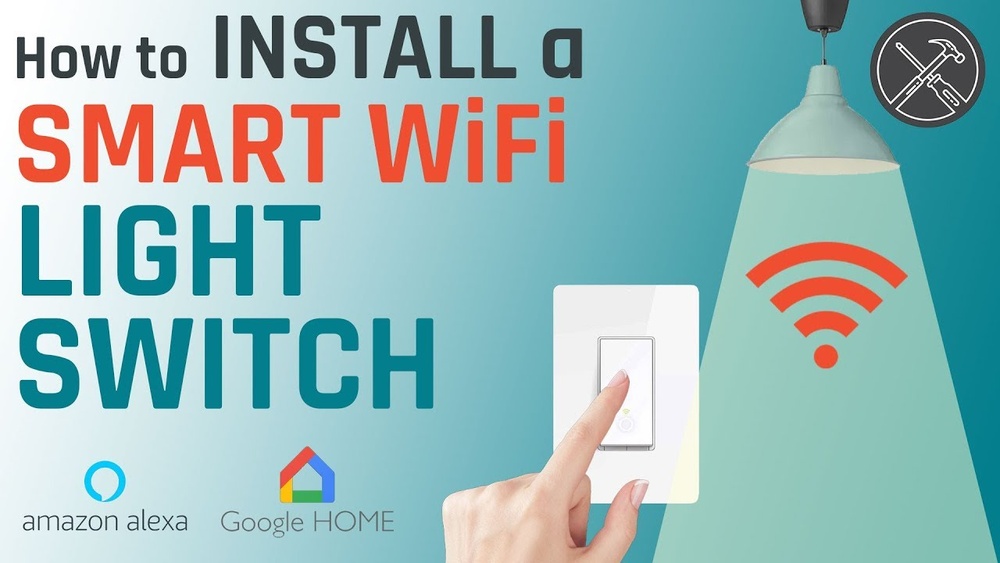
Are you ready to take control of your home lighting with just a tap on your phone? Connecting a WiFi light switch can make your life easier, save energy, and add a touch of smart technology to your space.
But if you’re unsure where to start or worried it might be complicated, don’t worry—you’re in the right place. This guide will walk you through every step, using simple instructions that anyone can follow. By the end, you’ll have your WiFi light switch up and running, giving you the power to control your lights anytime, anywhere.
Keep reading to discover how effortless smart lighting can be!

Credit: www.youtube.com
Choosing The Right Wifi Light Switch
Choosing the right wifi light switch is important for a smooth setup. It affects how well the switch works with your home and devices. Picking the right switch helps you control your lights easily and saves time during installation.
Compatibility With Home Network
Check if the wifi switch works with your home’s wifi frequency. Most switches use 2.4 GHz wifi. Some do not support 5 GHz networks. Make sure your home wifi matches the switch’s requirements. Also, see if the switch works with your smart home system, like Alexa or Google Home.
Features To Consider
Look for features that fit your needs. Some switches have dimmer options to control light brightness. Others offer scheduling to turn lights on or off automatically. Voice control can add convenience. Also, check if the switch supports multiple users and remote control via an app.
Budget Options
Wifi light switches come in different price ranges. Basic models offer simple on and off functions. More expensive switches include extra features like dimming and voice control. Decide how much you want to spend. Choose a switch that fits your budget but still meets your needs.

Credit: www.belkin.com
Tools And Materials Needed
Before you start connecting your WiFi light switch, gather all the necessary tools and materials. Having everything ready helps the process go smoothly and safely. It also saves time and reduces mistakes.
Basic Electrical Tools
Start with a screwdriver set, including flathead and Phillips. Wire strippers help remove insulation from wires without damage. Use a voltage tester to check if wires carry current. Needle-nose pliers make bending and twisting wires easier. Electrical tape secures wire connections and prevents shorts.
Safety Equipment
Wear insulated gloves to protect against electric shocks. Safety goggles shield your eyes from sparks or debris. Use a non-contact voltage tester to verify power is off. A flashlight helps you see in dark areas. Keep a first-aid kit nearby for emergencies.
Wifi Light Switch Components
Your WiFi light switch package includes the switch itself and mounting screws. It often comes with a user manual for installation steps. Check for wire connectors or wire nuts inside the box. You may need a neutral wire from your home wiring. Make sure your WiFi switch matches your home’s voltage and wiring.
Preparing For Installation
Preparing for installation is the first step in connecting a WiFi light switch. It helps ensure safety and smooth setup. Take time to understand the process. This avoids mistakes and saves effort later.
Turning Off Power Safely
Start by switching off the power at the circuit breaker. This prevents electric shocks during work. Use a voltage tester to confirm no electricity flows to the switch. Never skip this safety check.
Removing Existing Switch
Unscrew the wall plate covering the current switch. Carefully pull the switch out without pulling wires. Note how wires connect to the switch. Take a photo for reference before disconnecting wires.
Checking Wiring Setup
Inspect the wiring to match the WiFi switch requirements. Identify the live, neutral, and ground wires clearly. The WiFi switch needs a neutral wire for power. If unsure, consult an electrician for help.
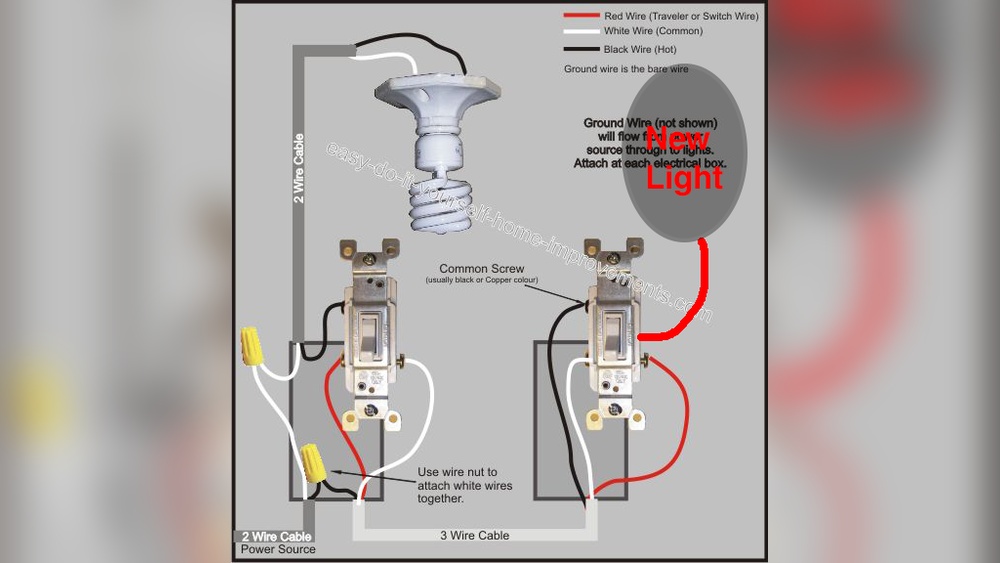
Wiring The Wifi Light Switch
Wiring the WiFi light switch is a key step in the installation process. It ensures the switch works safely and connects to your home network. Proper wiring helps avoid electrical problems and keeps your devices running smoothly.
Before starting, turn off the power at the circuit breaker. This prevents shocks and accidents during installation. Use a voltage tester to confirm the power is off.
Identifying Wires
Look inside your wall box to find the wires. Usually, you will see a live wire, a neutral wire, and a ground wire. The live wire often has black or red insulation. The neutral wire is usually white or gray. The ground wire is green or bare copper.
Check the wires carefully. Knowing which wire is which helps avoid mistakes. Label the wires if needed to keep track.
Connecting Live, Neutral, And Ground
Connect the live wire from the wall to the live terminal on the switch. Do the same for the neutral wire to the neutral terminal. Attach the ground wire to the switch’s ground screw or terminal.
Use wire nuts or connectors to secure the wires together. Make sure no bare wire is exposed. Tight connections prevent sparks and loose wiring.
Securing The Switch
After wiring, gently push the wires back into the wall box. Position the switch carefully and align it with the screw holes. Use screws to fasten the switch to the box firmly.
Double-check the switch is tight and does not move. Loose switches can cause wiring problems. Finally, attach the switch cover plate to finish the installation.
Setting Up The Wifi Connection
Setting up the WiFi connection for your WiFi light switch is an important step. It lets you control your lights from anywhere using your phone. Follow these simple steps to connect your switch to your home network.
Downloading The App
Start by downloading the app that works with your WiFi light switch. Check the product manual for the app name. Find the app in the Apple App Store or Google Play Store. Download and install it on your smartphone. Open the app and create an account if needed.
Connecting To Home Network
Turn on your WiFi light switch. Open the app and follow the instructions to add a new device. The app will ask you to connect the switch to your home WiFi network. Enter your WiFi name and password carefully. Wait for the switch to connect. The app will confirm once the connection is successful.
Troubleshooting Connection Issues
Sometimes the switch may not connect right away. Check that your phone is on the same WiFi network you want to connect the switch to. Make sure your WiFi signal is strong near the switch. Restart your router and the switch. Try reconnecting through the app. If problems continue, reset the switch and start over.

Credit: support.retrotouch.co.uk
Testing And Using Your Switch
Testing and using your WiFi light switch is the next important step after installation. It ensures everything works properly and helps you enjoy your new smart switch. This section guides you through powering on, customizing settings, and integrating the switch with your smart home system.
Powering On And Initial Test
Turn on the power at the circuit breaker. Check if the switch light or indicator turns on. Press the switch to see if the connected light responds. Make sure the switch connects to your WiFi network. Use the app to confirm the switch status. This simple test shows if the switch works correctly.
Customizing Settings
Open the switch app on your phone. Adjust brightness or timer settings if available. Set schedules to turn lights on or off automatically. Rename the switch for easy identification. Change notification preferences to get alerts. These settings help tailor the switch to your needs.
Integrating With Smart Home Systems
Check if your switch supports Alexa, Google Home, or Apple HomeKit. Open your smart home app and add the switch device. Follow instructions to link the switch with your assistant. Test voice commands to control the light switch hands-free. Integration adds convenience and improves your home experience.
Safety Tips And Maintenance
Connecting a WiFi light switch brings comfort and control to your home. Safety and maintenance are key to keeping it working well. Regular care prevents issues and keeps your switch safe to use.
Regular Inspection
Check your WiFi light switch often. Look for loose wires or damage. Make sure the switch feels firm on the wall. Turn off the power before touching any parts. Clean dust and dirt gently with a dry cloth. Spotting problems early can stop bigger issues.
Firmware Updates
Update the switch’s firmware regularly. These updates fix bugs and improve security. Use the app connected to your switch to check for updates. Follow the steps carefully to avoid errors. Updated firmware helps your switch run smoothly and safely.
Avoiding Common Issues
Keep the switch dry and away from water. Avoid overloading the circuit with too many devices. Use the switch only as instructed in the manual. Restart the switch if it stops responding. Simple care helps prevent most problems with WiFi light switches.
Frequently Asked Questions
How Do I Install A Wifi Light Switch?
Turn off the power at the breaker. Remove the old switch and connect the new WiFi switch wires. Follow the manufacturer’s instructions carefully. Restore power and configure the switch using the app.
What Tools Are Needed For Wifi Light Switch Setup?
You typically need a screwdriver, wire stripper, voltage tester, and possibly a drill. These tools help ensure safe and correct installation of the WiFi light switch.
Can I Connect A Wifi Switch Without A Neutral Wire?
Most WiFi switches require a neutral wire for power. However, some models support installation without a neutral wire. Check the switch specifications before purchasing.
How Do I Troubleshoot A Wifi Light Switch Connection?
Ensure the switch is within WiFi range and the router is working. Restart the switch and router. Verify correct WiFi credentials and check the app for error messages.
Conclusion
Connecting a WiFi light switch is simple with clear steps. Start by turning off the power for safety. Follow the instructions carefully for wiring and setup. Use your phone app to control the lights easily. Enjoy the convenience of smart lighting in your home.
Small efforts bring big changes in daily life. Try it today and see how it works for you.