Are you struggling to find the best way to anchor on a shallow wall? You’re not alone.
Shallow walls can be tricky because they don’t offer much depth for secure attachments. But don’t worry—this guide will show you simple, effective techniques to make sure your anchors hold strong every time. Whether you’re hanging shelves, mounting fixtures, or securing heavy items, understanding how to anchor properly can save you from damage and frustration.
Keep reading to discover practical tips that will make your next project easier and safer.

Credit: www.youtube.com
Choosing The Right Anchor
Choosing the right anchor for a shallow wall is crucial for a secure hold. The wrong anchor can cause damage or fail to support the load. This section helps you understand how to pick the best anchor for your wall type and needs.
Types Of Anchors For Shallow Walls
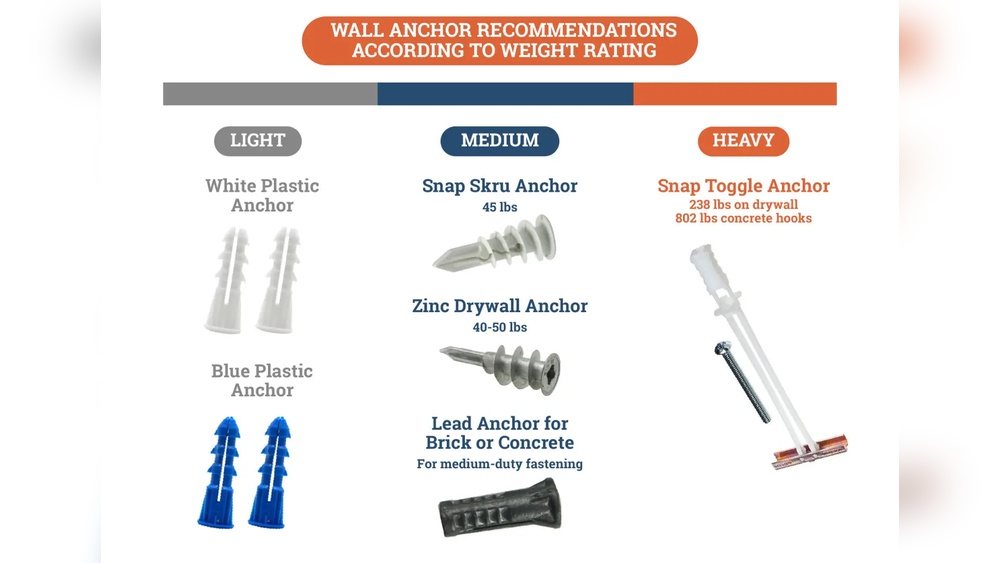
Shallow walls require anchors designed to work with limited depth. Plastic expansion anchors are common for light loads. Metal anchors like toggle bolts spread the load over a wider area. Self-drilling anchors work well for thin walls without pre-drilling. Choose an anchor that fits the wall thickness and type.
Material Compatibility
Wall material affects anchor choice. Concrete and brick need stronger anchors like sleeve or wedge anchors. Drywall or plaster walls need light-duty anchors such as plastic or molly bolts. Use anchors made from corrosion-resistant materials in damp areas. Matching anchor material to wall type ensures durability and strength.
Load Capacity Considerations
Check the weight the anchor must hold. Light items like pictures need small plastic anchors. Heavy shelves or cabinets need metal anchors rated for high loads. Always pick anchors with a load capacity higher than the expected weight. This prevents accidents and keeps your items secure.

Credit: www.jugenheimersupplies.com
Preparing The Wall Surface
Preparing the wall surface is a key step before anchoring on a shallow wall. A clean and well-checked wall ensures the anchors hold tightly. This step helps avoid weak spots and improves safety. Proper preparation makes the anchoring process smoother and more reliable.
Cleaning And Inspecting The Wall
Start by removing dust, dirt, and loose paint from the wall. Use a brush or cloth to clean the area well. Check for cracks, holes, or flaking paint. These problems can weaken the hold of anchors. Fix or avoid damaged spots before drilling or attaching anchors.
Identifying Wall Material
Know what your wall is made of. It could be drywall, concrete, brick, or wood. Each material needs different anchors and tools. Use a simple test or a small drill hole to identify the material. Correct identification helps choose the right anchor type for a strong hold.
Avoiding Common Surface Issues
Watch out for damp spots or soft areas on the wall. These can reduce anchor strength. Avoid areas with peeling paint or crumbling plaster. These surfaces cannot support anchors well. Always choose firm, dry, and stable sections of the wall for anchoring.
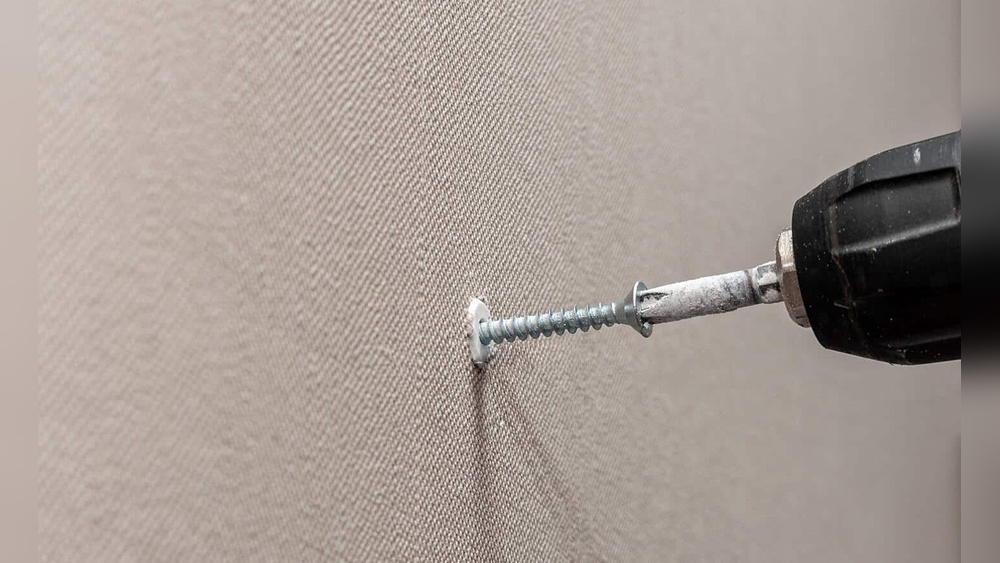
Drilling Techniques
Drilling is a key step to anchor on shallow walls. Proper drilling ensures strong hold and avoids damage. Using the right technique makes the task easier and safer. Below are important tips for drilling into shallow walls.
Selecting The Correct Drill Bit
Choose a drill bit that matches your anchor size. Masonry bits work well for concrete or brick walls. For drywall, a standard twist bit is enough. Using the wrong bit can cause weak anchors or damage the wall.
Drill Depth And Angle Tips
Mark the drill depth to avoid drilling too deep. Use tape on the bit as a depth guide. Drill straight into the wall at a 90-degree angle. Angled drilling weakens the hole and anchor hold.
Preventing Wall Damage
Start drilling slowly to prevent cracks. Use a low speed setting on your drill. Avoid pushing too hard; let the bit do the work. Clear dust from the hole to ensure better anchor grip.
Installing Anchors Correctly
Installing anchors correctly is key to a strong hold on a shallow wall. Proper steps ensure the anchor grips tightly and supports weight safely. This process avoids damage to walls and keeps fixtures secure.
Step-by-step Installation Process
Start by choosing the right anchor type for your wall. Mark the spot for drilling carefully. Use a drill bit that matches the anchor size. Drill a hole straight and clean out the dust. Insert the anchor gently into the hole until it is flush with the wall. Avoid forcing it, which can damage the wall or anchor.
Ensuring Proper Anchor Expansion
As you tighten the screw, the anchor expands inside the wall. This expansion creates a strong grip. Tighten the screw slowly and steadily. Stop when the anchor feels firm and does not move. Over-tightening can break the anchor or damage the wall. Check for any gaps between the anchor and wall surface.
Securing Fixtures Safely
Place the fixture over the anchor hole. Insert the screw through the fixture and into the anchor. Tighten the screw until the fixture feels secure. Avoid pushing too hard, which can strip the anchor’s grip. Test the fixture by gently pulling it to ensure it is stable. Properly secured fixtures last longer and hold better.
Testing Anchor Strength
Testing anchor strength is important for safety and durability. It shows how well an anchor holds on a shallow wall. You must check the strength before adding heavy loads. Regular tests help prevent accidents and damage. Below are key methods and signs to watch for.
Methods For Load Testing
Load testing checks how much weight an anchor can hold. Use a spring scale or a pull tester for this. Attach the tool to the anchor and pull slowly. Note the weight at which the anchor starts to move. Repeat the test a few times for accuracy. Testing helps ensure the anchor meets required strength levels.
Signs Of Weak Fixings
Look for cracks around the anchor area. Loose screws or bolts also show weak fixing. Movement or wobbling when applying force means poor hold. Rust or corrosion on metal parts weakens anchors too. These signs mean the anchor may fail under load.
When To Reinforce Or Replace
Reinforce anchors if they show small movements or minor cracks. Use stronger materials or add extra support. Replace anchors that move freely or have large cracks. Also, change anchors with rust or damage. Strong anchors keep your wall and objects safe.

Credit: www.andersonlumbercompany.com
Common Mistakes To Avoid
Anchoring on a shallow wall requires care and attention. Many people make simple mistakes that reduce safety and strength. Avoiding these errors helps keep your anchors secure and your walls intact. Here are common mistakes to watch out for.
Overloading Anchors
Anchors have weight limits. Putting too much weight on an anchor can cause it to fail. Always check the anchor’s load rating. Distribute weight evenly across multiple anchors. Overloading causes cracks and damage to the wall.
Ignoring Wall Material Limits
Not all walls hold anchors the same way. Shallow walls may have thin plaster or weak bricks. Using anchors meant for strong walls can lead to poor grip. Choose anchors that fit the material of your wall. Test the wall strength before anchoring.
Using Incorrect Anchor Types
Different anchors work for different walls. Plastic anchors may not hold well in shallow walls. Metal or toggle anchors often provide better support. Match the anchor type to your wall and the object weight. Wrong anchors increase risk of falling objects.
Advanced Fixing Solutions
Advanced fixing solutions provide strong and reliable ways to anchor on shallow walls. These methods improve safety and increase the holding power of anchors. Using the right technique can prevent damage to the wall and ensure the fixture stays secure over time.
Chemical Anchors For Extra Strength
Chemical anchors use special resins to bond the anchor to the wall. This creates a very strong hold, even in shallow or weak walls. The resin fills gaps and hardens, locking the anchor in place.
These anchors work well for heavy loads and vibrations. They are ideal for fixing shelves, brackets, or heavy equipment on shallow walls.
Using Backing Plates
Backing plates spread the load over a larger area of the wall. This reduces pressure on any single point, lowering the risk of cracks or damage.
Attach the backing plate behind the wall surface. Then fix the anchor through the plate for stronger support. This method helps when walls are thin or fragile.
Combining Multiple Anchors
Using several anchors together increases the overall strength of the fixing. Spread anchors evenly around the object to balance the load.
This approach works well for wide or heavy items. It reduces stress on each anchor and improves wall stability.
Frequently Asked Questions
What Tools Are Needed To Anchor On A Shallow Wall?
You need a drill, masonry bit, anchors, screws, a hammer, and a screwdriver. These tools ensure secure and precise anchoring on shallow walls.
How Do You Choose The Right Anchor For Shallow Walls?
Select anchors based on wall material and load weight. Use plastic anchors for light loads and metal anchors for heavier items.
Can I Anchor Heavy Objects On A Shallow Wall?
Yes, but use heavy-duty anchors designed for shallow walls. Ensure the wall material can support the object’s weight safely.
What Is The Step-by-step Process To Anchor On Shallow Walls?
Drill holes at marked points, insert anchors, tap gently, then screw in fasteners. Check stability before hanging items.
Conclusion
Anchoring on a shallow wall needs careful steps. Choose the right anchor type for your wall material. Drill holes with the correct size and depth. Insert anchors firmly to ensure a strong hold. Tighten screws slowly to avoid wall damage.
Always check the wall’s condition before starting. Small details make a big difference in safety. Follow these tips to secure anchors properly. Your project will stay stable and safe with care. Simple actions lead to lasting results every time.