Are you tired of those stubborn hooks ruining your walls? Removing hooks might seem simple, but doing it wrong can leave ugly holes or damage behind.
You want your walls to look clean and fresh without extra work or frustration. In this guide, you’ll discover easy, effective ways to take hooks off your wall safely. Keep reading to learn the best tricks that save your walls and your time.
Your space deserves to look its best—and it all starts here.
Credit: www.familyhandyman.com
Types Of Wall Hooks
Wall hooks come in many types. Each type holds different weights and suits various wall surfaces. Knowing these types helps you remove hooks safely without damage. Here are the common types of wall hooks found in homes.
Adhesive Hooks
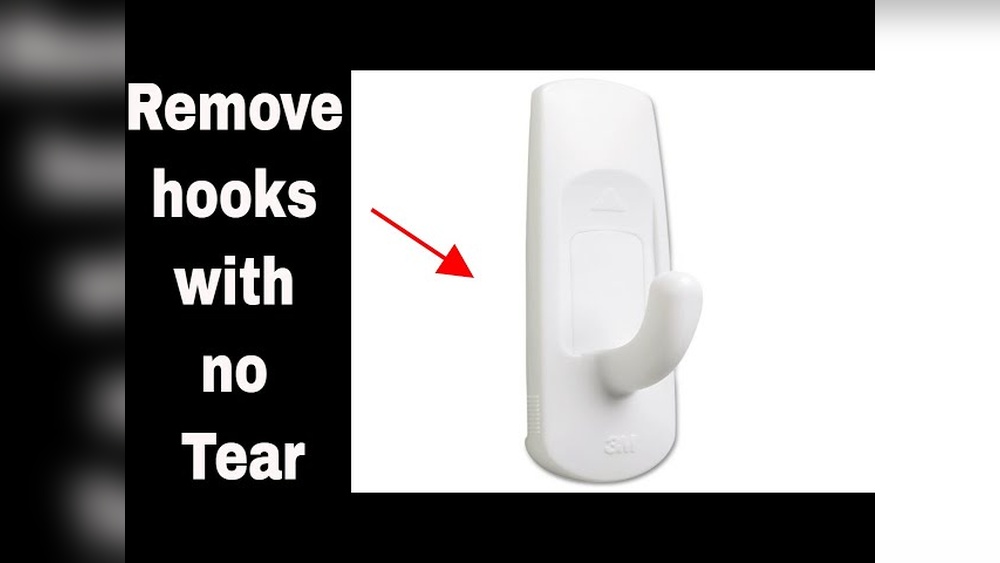
Adhesive hooks stick directly to the wall using a sticky pad. They do not require drilling or nails. These hooks are easy to install and remove. They work well on smooth surfaces like tiles or painted walls. Removing them gently prevents paint peeling.
Nail And Screw Hooks
These hooks use nails or screws to hold firmly in place. They can carry heavier items than adhesive hooks. Removing them leaves small holes in the wall. You may need to fill and paint over the holes after removal.
Command Strips
Command strips use strong glue but peel off cleanly. They hold well on painted walls and other smooth surfaces. These strips remove without damaging the wall. Pulling the tab slowly helps release the strip safely.
Magnetic Hooks
Magnetic hooks work only on metal surfaces. They use magnets to hold items without any damage. Removing them is simple; just pull them off the surface. They do not leave marks or holes behind.
Preparing To Remove Hooks
Preparing to remove hooks from your wall is an important first step. It helps prevent damage and makes the process easier. Taking time to get ready means less stress and better results.
Gathering Tools
Start by collecting the right tools. Common items include a flathead screwdriver, pliers, and a putty knife. Have some mild soap and water ready to clean the wall after removal. A step ladder can help reach high hooks safely. Gather all tools in one place before you start. This saves time and keeps you organized.
Protecting Wall Surfaces
Protecting your wall is key to avoid marks and holes. Place a soft cloth or painter’s tape around the hook area. This shields the paint or wallpaper from scratches. Work slowly and gently to reduce wall damage. If you use a putty knife, slide it carefully under the hook base. Take small breaks to check the wall condition as you remove the hook.
Removing Adhesive Hooks
Removing adhesive hooks from your wall can be tricky. The goal is to avoid damage to paint or drywall. Adhesive hooks stick tightly, but they can come off cleanly. Patience and the right method help a lot. Follow these steps for a smooth removal process.
Using Heat To Soften Adhesive
Heat helps loosen the glue under the hook. Use a hair dryer on low heat. Hold it close to the hook for about 30 seconds. Warmth makes the adhesive softer and easier to peel. Avoid too much heat to protect your wall.
Peeling Off Slowly
Start peeling the hook slowly from one edge. Pull gently and steadily to prevent wall damage. If the hook resists, apply more heat. Pulling too fast can tear paint or drywall. Take your time and be patient.
Cleaning Residue
After removing the hook, some sticky residue may remain. Use a soft cloth with warm soapy water. Rub gently to remove leftover glue. For tougher spots, try rubbing alcohol or vinegar. Clean walls look fresh and ready for new decor.

Credit: www.youtube.com
Taking Down Nail And Screw Hooks
Removing nail and screw hooks from walls requires care. These hooks leave small holes that need attention. Proper steps help keep your walls neat and ready for new decor.
Using The Right Tools
Choose tools carefully to avoid damage. A flathead screwdriver or pliers work well. Gently pry the hook away from the wall. Avoid pulling hard to stop cracks or dents. Have a putty knife ready for later fixes.
Minimizing Wall Damage
Slow and steady wins this task. Pull hooks straight out to reduce wall stress. Avoid twisting or bending nails and screws. Check for loose drywall around holes. This helps keep your wall strong and smooth.
Filling And Touching Up Holes
Fill holes with spackling paste or wall filler. Use a putty knife to spread it evenly. Let it dry fully before sanding it smooth. Match paint color to cover patched spots. This makes walls look fresh and clean again.
Detaching Command Strips
Detaching Command Strips is an easy way to remove hooks without damaging walls. These strips hold hooks firmly but peel off cleanly. The key is to pull the strip slowly and correctly. This prevents paint or drywall from coming off.
Use gentle, steady pressure. Avoid yanking or pulling too fast. This method keeps your walls safe and smooth. Follow simple steps to get the best results.
Pulling The Tab Correctly
Find the small tab at the bottom of the Command Strip. Hold the hook with one hand. With the other hand, pull the tab straight down. Pull slowly and stretch the strip along the wall. Keep pulling until the strip releases completely.
Do not pull the tab outwards or upwards. Pulling straight down is the safest way. This helps the adhesive release without damage. Take your time. Rushing may harm your wall.
Handling Stubborn Strips
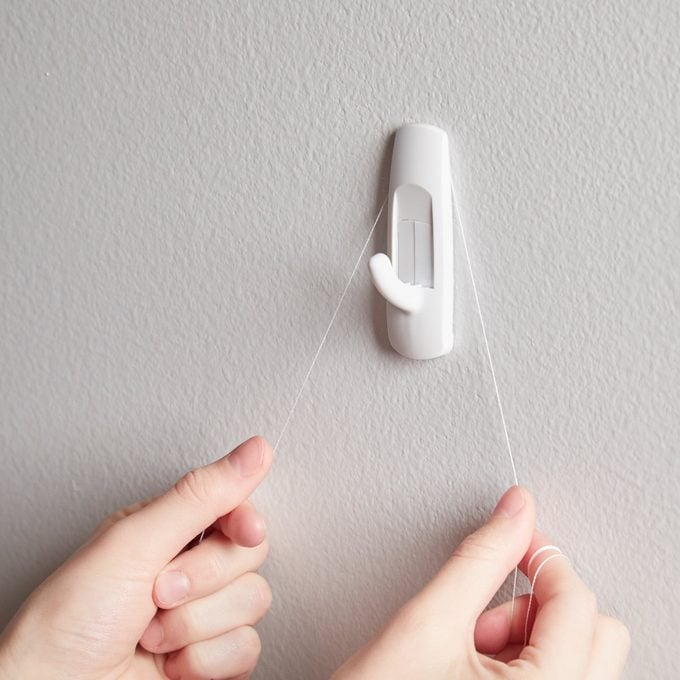
Sometimes strips stick very tightly. Try warming the strip with a hairdryer. Warmth softens the glue. After warming, pull the tab again slowly. If the strip stays stuck, use dental floss.
Slide the floss behind the strip. Move it back and forth gently. This cuts the glue without hurting the wall. Be patient and careful. Stubborn strips need more time and care.

Credit: www.reddit.com
Safe Removal Of Magnetic Hooks
Magnetic hooks hold items firmly without nails or screws. They stick to metal surfaces using strong magnets. Removing them safely keeps your walls clean and undamaged. Follow simple steps to take off magnetic hooks without leaving marks or scratches.
Sliding Off Magnetic Hooks
To remove a magnetic hook, gently slide it sideways. Avoid pulling it straight off. Sliding reduces the risk of paint or surface damage. Use slow, steady pressure to move the hook. If the magnet feels stuck, try sliding it in the opposite direction.
Preventing Wall Marks
Protect your wall by cleaning the surface before removal. Dust and dirt can cause scratches during removal. Place a soft cloth under the hook as you slide it off. This cushions the surface and prevents marks. After removal, wipe the area with a damp cloth to remove any residue.
Repairing Wall Damage
Removing hooks from walls often leaves small holes or marks. Repairing these damages restores the wall’s smooth look. It also prepares the wall for painting or new decorations. Simple steps can fix most wall damage quickly and neatly.
Patching Small Holes
Start by cleaning the hole and removing loose debris. Use a putty knife to apply spackle or wall filler. Press the filler into the hole, then smooth the surface. Let it dry completely; drying time varies by product. For deeper holes, apply filler in layers. Allow each layer to dry before adding the next.
Sanding And Painting
Once the filler is dry, sand the patch gently. Use fine-grit sandpaper for a smooth finish. Wipe away dust with a clean cloth. Choose paint that matches the wall color. Apply paint in thin, even coats over the patched area. Let the paint dry before adding a second coat if needed. This process blends the repair with the rest of the wall.
Tips To Prevent Wall Damage
Keeping your walls safe while using hooks is important. Small mistakes can cause big damage. Follow simple tips to avoid holes, cracks, or paint peeling. Protect your walls and keep them looking fresh.
Choosing the right hooks and installing them carefully helps prevent wall damage. These easy steps save time and money in the long run.
Choosing The Right Hooks
Pick hooks based on wall type and weight needs. Light items need small adhesive hooks. Heavy items require strong, wall-safe hooks like anchors. Avoid nails or screws in delicate walls like drywall. Use hooks made for your wall surface. This reduces risk of damage.
Proper Installation Techniques
Clean the wall surface before adding hooks. This helps hooks stick better. Follow package instructions for weight limits. Use a level to place hooks straight. Press hooks firmly but gently. Avoid hammering or forcing hooks. Remove hooks slowly to stop paint from peeling. These steps keep walls intact and smooth.
Frequently Asked Questions
How Do I Safely Remove Hooks From Walls?
To safely remove hooks, gently pull or twist them. Use a hairdryer to warm adhesive hooks. Avoid damaging paint by pulling slowly and evenly.
What Tools Help Remove Wall Hooks Without Damage?
Use pliers, a hairdryer, or dental floss to remove hooks. These tools help loosen hooks and adhesive without harming the wall surface.
Can I Reuse Wall Hooks After Removal?
Yes, you can reuse some hooks if they remain undamaged. Clean any residual adhesive and store them properly for future use.
How To Remove Sticky Residue After Taking Hooks Off?
Use rubbing alcohol, vinegar, or warm soapy water to clean sticky residue. Apply gently with a cloth and wipe until residue disappears.
Conclusion
Removing hooks from the wall is simple with the right steps. Take your time to avoid wall damage. Use gentle tools and steady hands. Clean the area after removing the hooks. Fix any small marks with paint or putty. This keeps your walls looking fresh and neat.
Now, you can hang new decorations easily. Enjoy your clean and smooth walls.