
Your vintage cabinet hardware holds stories and charm that modern pieces simply can’t match. But over time, dust, grime, and tarnish can hide that beauty.
If you want to bring back the shine and keep your hardware looking amazing without damaging it, you’ve come to the right place. In this guide, you’ll discover simple, effective ways to clean your vintage cabinet hardware safely. By the end, you’ll know exactly how to restore its original glow and make your cabinets the highlight of your space.
Ready to unlock the secret to sparkling vintage hardware? Let’s dive in!

Credit: www.youtube.com
Identify Hardware Material
Before cleaning vintage cabinet hardware, identify the material. Knowing the material helps choose the right cleaning method. Different metals and finishes need special care. This protects the hardware and keeps it looking great.
Common Vintage Materials
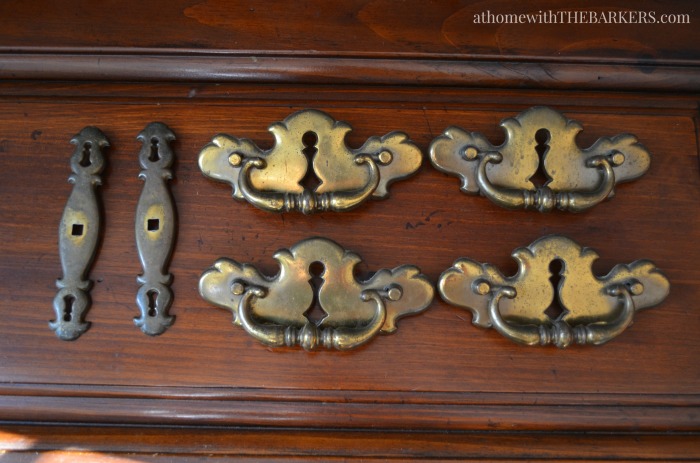
Vintage hardware often uses brass, bronze, iron, or steel. Brass has a warm, yellow-gold color. Bronze looks darker with a reddish tone. Iron and steel are usually gray or black. Some pieces may have chrome or nickel plating. Each material reacts differently to cleaners and water.
Spotting Delicate Finishes
Many vintage pieces have delicate finishes like lacquer or paint. These finishes protect the metal but can peel or fade easily. Look for shiny or smooth coatings on the hardware. Avoid harsh scrubbing or strong chemicals on these finishes. Use gentle cleaning methods to keep the finish intact.
Gather Cleaning Supplies
Before cleaning vintage cabinet hardware, gather the right supplies. Having the proper materials ensures safe and effective cleaning. This step helps protect delicate finishes and detail work. Prepare your workspace with all items at hand. This approach saves time and avoids damage during cleaning.
Safe Cleaning Agents
Choose gentle cleaning agents to protect hardware surfaces. Mild dish soap mixed with warm water works well. Avoid harsh chemicals like bleach or ammonia. These substances can harm metal or remove patina. White vinegar diluted with water suits some metals but test first. Baking soda paste offers gentle scrubbing without scratching. Always select cleaners suited for the hardware’s material.
Tools For Gentle Scrubbing
Use soft tools to clean without scratching. A soft toothbrush reaches small crevices easily. Microfiber cloths wipe surfaces gently and absorb moisture. Cotton swabs work well for detailed areas. Avoid steel wool or stiff brushes that damage finishes. Small plastic or wooden picks help remove dirt in tight spots. Pick tools and cloths that fit the hardware size and shape.
Remove Hardware Safely
Start by gently removing hardware from the cabinet to avoid damage. Keep screws and parts safe for easy reassembly later. This step ensures thorough cleaning without hurting the vintage pieces.
Tools Needed For Removal
Gather the right tools before starting. A screwdriver is essential.
Choose the correct size and type for your screws. A flathead or Phillips screwdriver works best.
Use a soft cloth to protect the cabinet surface. This prevents scratches during removal.
Needle-nose pliers help with small or tight screws. They provide a better grip.
Have a small container ready. Store screws safely to avoid losing them.
Labeling For Reassembly
Label each piece during removal. This makes reassembly easier and faster.
Use masking tape and a pen to mark parts. Write simple numbers or letters.
Stick labels on the back of hardware or nearby areas. Avoid covering decorative surfaces.
Take pictures of each hardware piece in place. Photos guide you during reassembly.
Keep all labeled parts together in a small box or bag. This prevents mix-ups and loss.
Pre-cleaning Preparation
Preparing vintage cabinet hardware for cleaning is important. Proper preparation helps protect the hardware and makes cleaning easier. It also prevents damage to delicate parts and finishes. Follow these simple steps before starting the cleaning process.
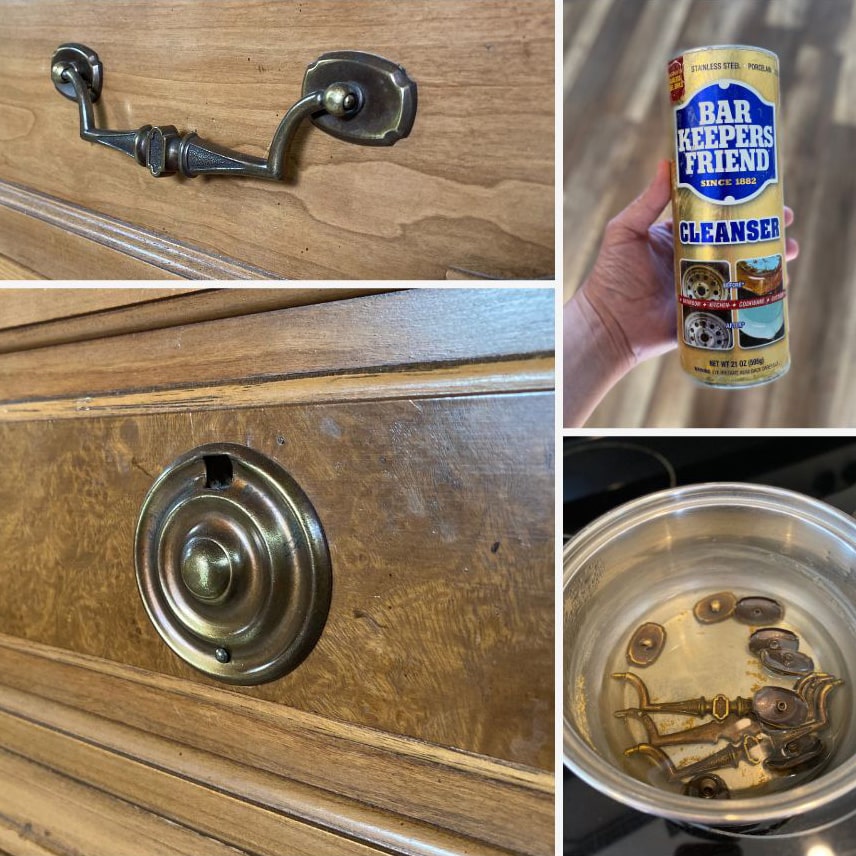
Soaking Techniques
Soaking helps loosen dirt and grime on metal hardware. Use warm water mixed with mild soap or vinegar. Place the hardware in the solution for 10 to 15 minutes. Avoid soaking wooden parts to prevent swelling or warping. After soaking, gently scrub with a soft brush to remove residue.
Avoiding Damage
Handle vintage hardware with care to avoid scratches or breaks. Test cleaning solutions on a small area first. Avoid harsh chemicals that can strip finishes or cause corrosion. Use soft cloths or brushes instead of abrasive materials. Always dry the hardware completely after cleaning to stop rust or water stains.
Cleaning Methods By Material
Cleaning vintage cabinet hardware requires different care for each material. Each metal or surface needs a special approach. This helps keep the hardware strong and shiny. Using the right method avoids damage and preserves the look. Below are simple steps for common materials.
Brass And Bronze
Brass and bronze often develop a greenish layer called patina. Use a mix of lemon juice and baking soda to clean it. Apply gently with a soft cloth. Rinse with warm water and dry well. Avoid harsh chemicals. They can harm the finish.
Chrome And Nickel
Chrome and nickel shine when cleaned with mild soap and water. Use a soft cloth or sponge to wipe the surface. For tough spots, try a paste of baking soda and water. Rinse thoroughly and dry with a clean cloth. Avoid abrasive materials to prevent scratches.
Iron And Steel
Iron and steel may rust over time. Remove rust by rubbing with fine steel wool or a soft brush. Apply a mixture of vinegar and water for extra cleaning power. Dry completely to stop rust from returning. Consider a light coat of oil for protection.
Porcelain And Glass
Porcelain and glass handles need gentle cleaning. Use warm water with mild dish soap. Wipe carefully with a soft cloth. Avoid strong cleaners that can crack or dull the surface. Dry with a soft towel to avoid water spots.
Polishing For Extra Shine
Polishing vintage cabinet hardware brings out its true beauty. It restores shine and highlights intricate details. This step gives your cabinets a fresh, clean look. Proper polishing protects the metal and keeps it bright longer.
Choosing The Right Polish
Select a polish made for your hardware’s metal type. Brass, bronze, or chrome need different care. Avoid harsh chemicals that can damage the finish. A gentle, metal-specific polish works best. Check product labels for compatibility and safety.
Application Tips
Use a soft cloth or cotton swab for applying polish. Apply a small amount at a time. Rub gently in circular motions to avoid scratches. Let the polish sit for a few minutes. Then, buff the hardware with a clean, dry cloth. Repeat if needed for extra shine.
Drying And Protecting Hardware
Drying and protecting vintage cabinet hardware is key to keeping it in great shape. After cleaning, hardware must be dried carefully to stop moisture from causing damage. Protecting the metal helps keep its shine and prevents wear over time.
Take your time drying each piece. Use a soft, clean cloth to remove all water. Check small crevices to ensure no moisture is left behind. Damp spots can lead to rust or tarnish, ruining your hardware.
Preventing Rust And Tarnish
Rust and tarnish form when metal meets water and air. Avoid these by drying hardware fully and quickly. Store pieces in a dry place after cleaning. Use silica gel packets to reduce moisture in storage boxes. Handle hardware with clean, dry hands to avoid oils that cause tarnish. Regular checks help catch rust early. Clean minor rust spots gently with fine steel wool or a soft brush.
Using Protective Coatings
Protective coatings keep vintage hardware looking fresh longer. Clear wax or lacquer forms a shield against moisture and air. Apply a thin coat with a soft cloth or brush. Let it dry completely before handling. Avoid thick layers that can peel or look uneven. Reapply coatings every few months for best results. Choose products safe for your hardware’s metal type to avoid damage. Protective coatings reduce the need for frequent cleaning and keep the finish smooth.
Credit: athomewiththebarkers.com
Reinstalling Hardware
Reinstalling vintage cabinet hardware is the final step after cleaning. It requires care to keep the look authentic. Proper reinstallation ensures the hardware stays secure and looks great. Follow these tips to place each piece correctly without damage.
Aligning Pieces Correctly
Check each piece’s position before screwing it in. Use the original holes as guides. This keeps the hardware straight and balanced. Misaligned hardware looks messy and can cause wear over time. Take your time to match handles and knobs with their spots.
Securing Without Damage
Use the right screwdriver size to avoid stripping screws. Tighten screws gently to prevent cracking the wood. Over-tightening can damage both hardware and cabinet surface. If screws feel loose, try a slightly bigger screw or add a small wood filler. Handle each piece with care to keep the vintage charm intact.
Maintenance Tips For Longevity
Keeping vintage cabinet hardware clean and well-maintained helps it last longer. Proper care prevents damage and keeps the hardware looking good. Simple steps can protect the metal and finish from wear and tear. Follow these easy maintenance tips to preserve your vintage pieces.
Regular Cleaning Schedule
Set a regular time to clean your vintage hardware. Use a soft cloth and mild soap with water. Avoid harsh chemicals that can harm the metal or finish. Dry each piece fully after cleaning. Regular dusting also stops dirt buildup. This simple routine keeps hardware shiny and strong.
Handling Wear And Tear
Check your hardware for loose screws and parts. Tighten them gently to avoid damage. Use a small brush to clean crevices and edges. Avoid using abrasive pads that scratch surfaces. If the finish starts to fade, consider applying a clear wax. This adds a protective layer and reduces wear.
Credit: arayofsunlight.com
Frequently Asked Questions
How Do I Safely Remove Vintage Cabinet Hardware?
Use a screwdriver to carefully unscrew the hardware. Avoid forcing it to prevent damage. Keep screws and pieces organized for reinstallation.
What Household Items Clean Vintage Metal Hardware?
Mild soap, warm water, and a soft cloth effectively clean most vintage metals. For tarnish, use a paste of baking soda and water gently.
Can I Use Commercial Cleaners On Vintage Hardware?
Avoid harsh chemicals as they may damage finishes. Opt for gentle, metal-safe cleaners designed for antiques to preserve the hardware’s integrity.
How Do I Restore Shine To Tarnished Cabinet Hardware?
Apply a small amount of metal polish with a soft cloth. Rub gently in circular motions, then buff with a clean cloth for shine.
Conclusion
Cleaning vintage cabinet hardware keeps old pieces looking fresh and bright. Regular care stops dirt and rust from building up. Use gentle cleaners and soft cloths to avoid damage. Small steps make a big difference in preserving charm. Enjoy the beauty of your cabinets for many years.
Simple cleaning brings back their original shine and style. Keep these tips handy for easy maintenance anytime. Your vintage hardware will thank you with lasting appeal.

