Are your cabinet drawers feeling outdated or hard to open? Installing new drawer hardware can instantly transform the look and function of your cabinets.
But if you’re worried it’s a complicated task, don’t be! You can install cabinet drawer hardware quickly and easily with just a few simple tools and steps. In this guide, you’ll learn exactly how to measure, drill, and attach drawer pulls or knobs perfectly every time—no guesswork, no frustration.
By the end, your cabinets will look fresh, stylish, and feel smoother to use. Ready to upgrade your space and take control of this project? Let’s get started!
Tools And Materials Needed
Installing cabinet drawer hardware requires specific tools and materials. Having everything ready simplifies the process. It helps ensure a neat and secure installation. Gather all items before you begin to save time and avoid interruptions.
Essential Tools
You need a drill with drill bits for making holes. A screwdriver helps tighten screws securely. A measuring tape ensures correct placement of hardware. A pencil is useful for marking drill points. A level checks that the hardware is straight. A center punch can prevent drill slipping. Optional tools include clamps to hold pieces steady.
Choosing The Right Hardware
Select hardware that fits your drawer style and size. Pulls, knobs, or handles come in various designs and finishes. Ensure screws match the thickness of your drawer front. Hardware should be comfortable to grip and easy to use. Quality hardware lasts longer and looks better. Consider hardware that matches other fixtures in your space.
Preparing Your Workspace
Clear a flat surface to work on your drawers. Good lighting helps you see drill marks clearly. Lay down a cloth to protect drawer surfaces from scratches. Keep all tools and hardware close for easy access. Organize screws and small parts in containers to avoid loss. Work patiently to avoid mistakes and damage.
Measuring And Marking
Measuring and marking are the first crucial steps in installing cabinet drawer hardware. Accurate measurements ensure the hardware fits perfectly and looks balanced. Taking your time here saves effort later. Marking exact points prevents mistakes during drilling and mounting.
Finding The Center
Start by finding the center of the drawer front. Measure the width of the drawer. Divide this number by two to get the midpoint. Use a pencil to mark this spot lightly. This mark guides where the hardware will go.
Check the height for the hardware placement. Usually, pulls sit in the middle vertically. Measure the drawer’s height and divide by two. Mark this point as well. These two marks create a center point for your hardware.
Marking Screw Locations
Next, measure the distance between the screw holes on your hardware. Most pulls have two screw holes. Use this measurement to mark where the screws will go. Measure equal distances from the center mark on each side.
Double-check your marks before drilling. Hold the hardware against the drawer front. Align the holes with your marks. Adjust if needed. Accurate marking stops misaligned screws and uneven hardware.
Using Templates And Jigs
Templates and jigs simplify marking screw locations. They help keep holes consistent on multiple drawers. Many hardware brands include paper templates. You can also buy adjustable jigs for this task.
Place the template on the drawer front. Align it with the center marks. Use a pencil to mark screw holes through the template. With a jig, clamp it to the drawer and mark through its guides. This method saves time and ensures accuracy.
Drilling Holes
Drilling holes is a key step in installing cabinet drawer hardware. Accurate holes ensure the hardware fits well and looks good. Take your time and follow these tips to drill perfect holes.
Selecting The Drill Bit
Choose a drill bit that matches the screw size of your hardware. Use a bit slightly smaller than the screw to ensure a tight fit. A standard twist bit works well for wood drawers. Avoid bits that are too large or too small.
Drilling Straight And Clean Holes
Mark the exact spot for your holes with a pencil. Use a ruler or template for consistent placement. Hold the drill steady and perpendicular to the drawer surface. Drill slowly to avoid splintering the wood. Clean the hole of any debris before installing the hardware.
Avoiding Common Mistakes
Do not rush the drilling process. Avoid drilling too deep, which can damage the drawer. Double-check measurements before drilling to prevent misaligned holes. Use painter’s tape over the drilling spot to reduce wood splintering. Always wear safety glasses to protect your eyes.

Credit: www.thriftydecorchick.com
Attaching The Hardware
Attaching the hardware to your cabinet drawers is a key step for a polished look. It requires careful alignment and secure fastening. Follow these simple steps to ensure your handles or pulls fit perfectly and last long.
Aligning Handles And Pulls
Start by positioning the handle or pull on the drawer front. Check that the holes line up with the drilled spots. Use a level or ruler for straight placement. Make small adjustments until it sits evenly and looks balanced.
Inserting And Tightening Screws
Insert screws through the back of the drawer into the hardware holes. Turn them by hand first to avoid cross-threading. Use a screwdriver to tighten the screws slowly. Stop when the hardware feels snug but do not overtighten.
Ensuring A Secure Fit
Check the handle or pull for any movement. It should not wiggle or feel loose. If needed, tighten the screws a bit more. Avoid forcing screws too hard, which can strip the holes or damage the drawer.
Adjusting And Finishing
After installing your cabinet drawer hardware, the final steps involve adjusting and finishing. These steps ensure the hardware fits perfectly and looks polished. Proper adjustment prevents issues like misalignment or loose handles. Finishing touches improve both function and appearance.
Checking Alignment
Start by closing the drawer gently. Look closely to see if the hardware lines up straight. Handles should sit evenly on the drawer front. Check that screws are flush and not crooked. Use a level or ruler to verify horizontal alignment. Proper alignment avoids wear and keeps the drawer easy to open.
Making Minor Adjustments
Loosen screws slightly if the hardware is off-center. Shift the handle or knob until it looks balanced. Tighten the screws carefully to hold the position. Avoid overtightening, which can strip screws or damage wood. Test the drawer by pulling the handle several times. Adjust again if the hardware feels loose or wobbly.
Cleaning And Maintenance Tips
Wipe the hardware with a soft cloth to remove fingerprints. Use mild soap and water for tougher stains, then dry well. Avoid abrasive cleaners that can scratch finishes. Periodically check screws and tighten as needed. Keeping hardware clean and secure extends its lifespan and keeps your cabinets looking fresh.
Credit: www.homedepot.com
Tips For Different Drawer Types
Different drawer types need specific hardware installation methods. This ensures a perfect fit and smooth operation. Understanding these tips helps you avoid common mistakes. It also improves the look and function of your drawers.
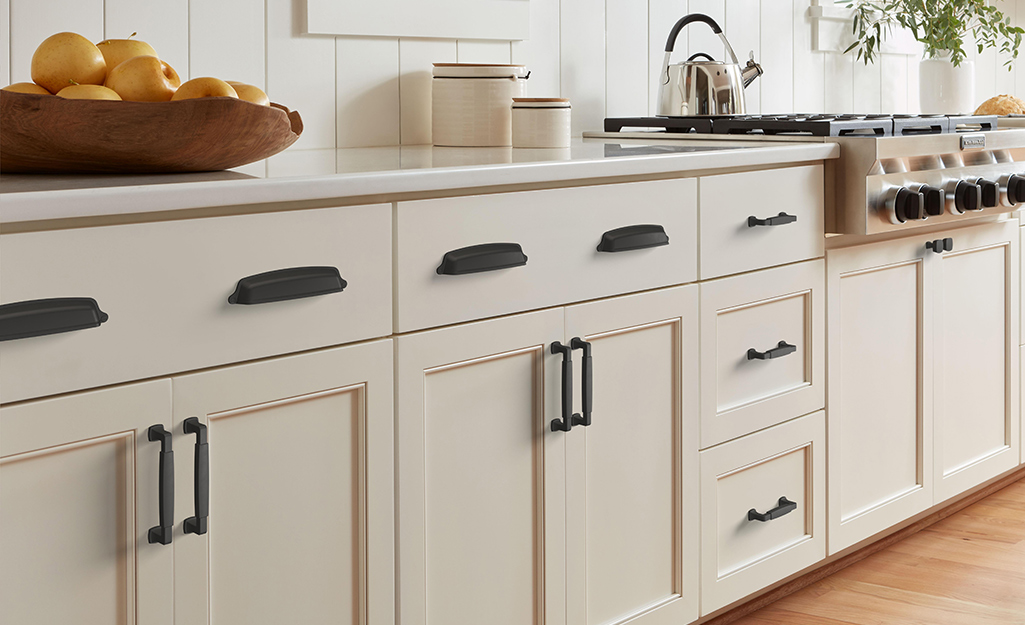
Installing On Shaker Cabinets
Shaker cabinets have a simple, clean design. Measure the drawer front carefully before drilling holes. Use a ruler to mark the center point. Drill pilot holes to avoid splitting the wood. Attach the hardware with screws that fit well. Tighten screws until the hardware is secure but not too tight. Check if the drawer opens smoothly after installation.
Handling Frameless Drawers
Frameless drawers lack a face frame, so hardware placement differs. Measure from the drawer edges to find the best spot. Use a template or tape measure for accuracy. Drill holes carefully to prevent cracking the drawer front. Use screws that match the drawer thickness. Test the hardware to ensure it is sturdy and aligned. Adjust if necessary for even spacing.
Using Finger Pulls And Knobs
Finger pulls and knobs need less space but precise placement. Decide on the height and position before drilling. Mark the spots clearly with a pencil. Drill holes slowly to avoid damage. Use screws that fit the hardware size exactly. Tighten screws gently to secure the pulls or knobs. Verify ease of use by opening and closing drawers.
Troubleshooting Common Issues
Troubleshooting common issues during cabinet drawer hardware installation saves time and frustration. Small problems can affect the look and function of your drawers. Fixing these quickly keeps your project on track. Below are solutions to frequent hardware installation problems.
Fixing Misaligned Handles
Misaligned handles look uneven and feel uncomfortable. Measure the distance between screw holes carefully before drilling. Use a level to keep handles straight. If handles are off, remove screws and adjust holes slightly. Fill old holes with wood filler and drill new ones in the correct spot. Tighten screws evenly to secure handles properly.
Dealing With Stripped Screws
Stripped screws slip and fail to hold hardware firmly. Use a rubber band over the screw head for better grip with your screwdriver. Try a screwdriver with a better fit to prevent stripping. If screws are badly stripped, remove them with pliers or a screw extractor. Replace with new screws of the same size and type. Avoid overtightening to prevent future stripping.
Replacing Damaged Hardware
Damaged handles or knobs affect drawer appearance and use. Remove old hardware carefully with a screwdriver. Check if new hardware matches the hole size and style. If holes do not align, fill them and drill new ones. Choose durable hardware to avoid frequent replacements. Secure new pieces tightly but do not overtighten to prevent damage.

Credit: cabinetdoorsnmore.com
Frequently Asked Questions
What Is The 1 3 Rule For Drawer Pulls?
The 1-3 rule for drawer pulls places the handle one-third from each edge, centering it on the drawer front for balanced looks.
How To Install Drawer Pulls On New Cabinets?
Mark drawer pull placement on cabinet fronts using a ruler and pencil. Drill holes at marks carefully. Align pulls, insert screws, and tighten securely with a screwdriver. Check for level and symmetry.
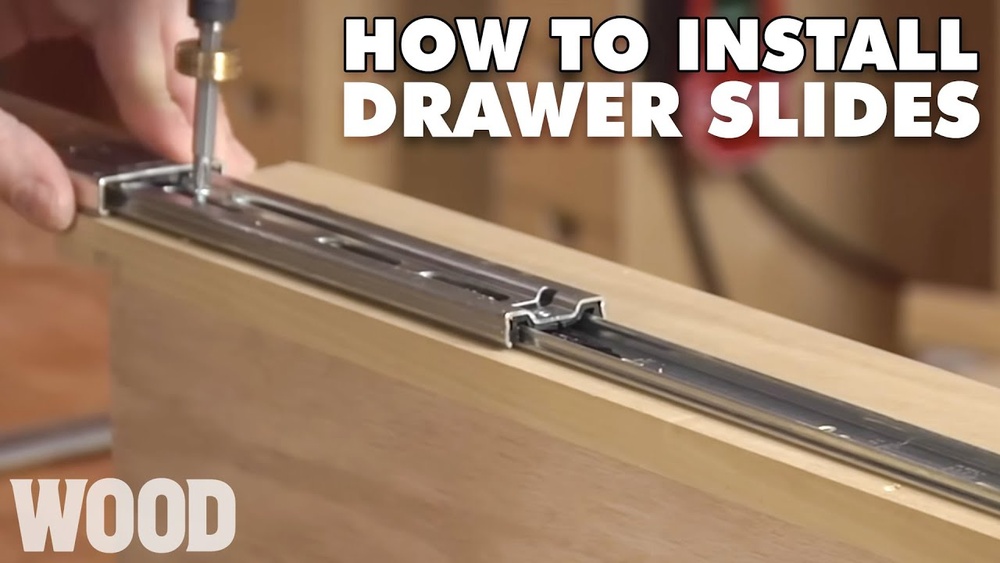
How To Install Sliding Drawer Hardware?
Measure and mark slide positions inside the cabinet. Attach slides with screws, ensuring they are level. Insert the drawer and secure the matching slides to it. Test the drawer for smooth sliding and adjust screws if needed.
How To Perfectly Center Drawer Handles?
Measure drawer width and handle length. Mark center points on the drawer front. Align handle holes with marks. Drill pilot holes. Attach handle securely using screws. Double-check alignment with a level for perfect centering.
Conclusion
Installing cabinet drawer hardware can be simple and quick. Measure carefully to ensure perfect placement every time. Use the right tools to make the job easier. Take your time to avoid mistakes and wasted effort. Proper installation improves both function and appearance.
Enjoy your upgraded cabinets with new, smooth-operating drawers. Small steps lead to big improvements in your home. Now, you can confidently install drawer hardware yourself.

