Are you struggling to attach snap fasteners neatly and securely? Whether you’re fixing a favorite jacket, making DIY crafts, or working on sewing projects, knowing how to snap fasteners correctly can save you time and frustration.
In this guide, you’ll discover simple, step-by-step tips that anyone can follow to get perfect snaps every time. Ready to make your clothes and creations look professional and last longer? Keep reading, because mastering snap fasteners is easier than you think—and your next project will thank you for it.

Credit: susieddesigns.wordpress.com
Choosing The Right Snap Fasteners
Choosing the right snap fasteners is important for a strong, lasting hold. The right fastener fits your project needs and fabric type. Snap fasteners come in many styles, sizes, and materials. Picking the correct one ensures easy installation and use.
Types Of Snap Fasteners
Snap fasteners include sew-on, rivet, and adhesive types. Sew-on snaps attach by stitching and suit fabric projects. Rivet snaps need special tools to press and are very secure. Adhesive snaps stick on without sewing, good for light fabrics. Each type serves different purposes and fabrics.
Materials And Sizes
Snap fasteners come in metal, plastic, and brass. Metal snaps are strong and durable for heavy use. Plastic snaps work well for lightweight fabrics and kids’ clothes. Brass snaps resist rust and last long in wet conditions. Sizes vary from tiny for delicate fabric to large for heavy materials. Choose size based on fabric thickness and project type.
Tools Needed
Some snap fasteners require special tools for installation. A snap plier or press tool helps set rivet snaps easily. Sewing needles and thread are needed for sew-on snaps. For adhesive snaps, no tools are necessary, just press firmly. Using the right tool makes snapping faster and cleaner.
Preparing Your Fabric
Preparing your fabric is the first step to attach snap fasteners neatly. Taking time here makes the snaps last longer and work better. Proper preparation helps avoid mistakes and keeps the fabric strong around the snaps.
Marking Snap Placement
Start by deciding where the snaps will go. Use a fabric pencil or chalk to mark the spots. Make sure the marks are even and aligned. Measure carefully for a professional look. Clear marks guide you during the snap installation.
Reinforcing Fabric
Snaps can pull on fabric and cause damage. Reinforce the area with extra fabric or interfacing. Iron-on interfacing works well to add strength. Sew a small patch behind the snap spots for support. Reinforcement prevents tearing and keeps snaps secure.
Cutting Holes For Snaps
Cut small holes where the snaps will attach. Use sharp scissors or a hole punch for clean cuts. Make holes just big enough for the snap parts. Too big can weaken the fabric, too small can make snapping hard. Precise holes help snaps fit perfectly.
Attaching Snap Fasteners
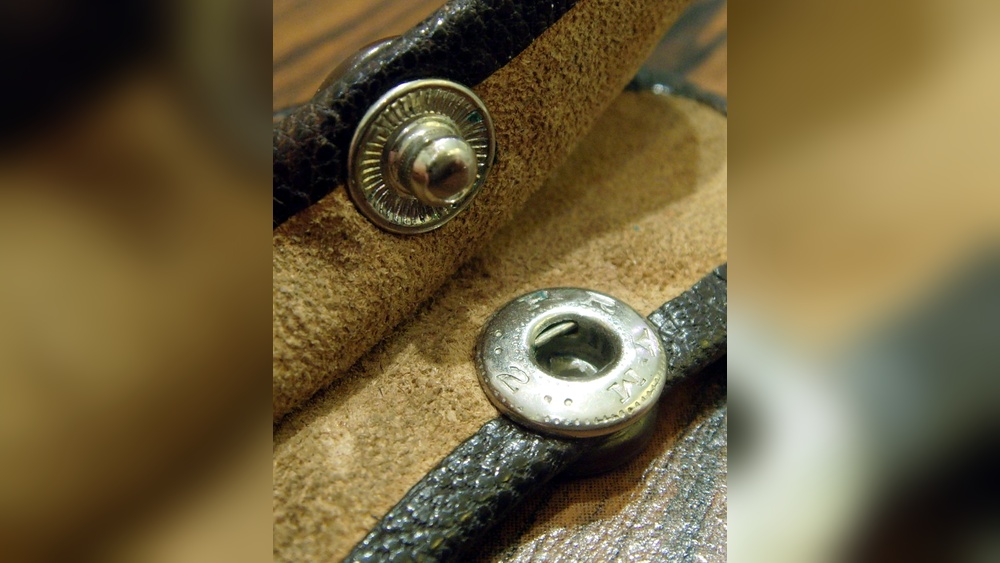
Attaching snap fasteners is a simple way to add closures to clothes and accessories. These fasteners hold fabric pieces together firmly. The process needs careful handling for a neat finish. This section explains how to attach snap fasteners easily and correctly.
Aligning Snap Components
Start by placing the snap parts on the fabric. The male and female pieces must match. Align them so they will snap together smoothly. Check the fabric thickness before fixing snaps. Mark the spots to keep snaps straight and even.
Using A Snap Pliers
Snap pliers make attaching fasteners quick and easy. Insert the snap pieces in the plier’s jaws. Position the fabric between the snap parts. Squeeze the pliers firmly to press the snap together. Avoid too much force to prevent damage.
Setting Snaps Without Pliers
You can attach snaps without special tools. Use a hammer and a hard surface instead. Place the snap parts on the fabric. Hold them steady and tap gently with the hammer. Check the snap fits tightly after each tap.

Credit: so-sew-easy.com
Troubleshooting Common Issues
Troubleshooting common issues with snap fasteners helps keep your projects neat and functional. Small problems can stop snaps from working well. Fixing these quickly saves time and effort.
Loose Snaps
Loose snaps do not hold fabric tightly. This happens if the snap is not pressed firmly. Use a snap tool to press the fastener again. Make sure the snap parts line up before pressing.
If the snap stays loose, try replacing it. Choose a snap size that fits your fabric thickness. Tight snaps keep your work secure and look better.
Misaligned Fasteners
Misaligned fasteners make snapping hard or impossible. Check both parts of the snap before attaching. Mark the spot with a pencil to align them perfectly. Use a ruler for even spacing.
Press snaps carefully to keep them straight. Misalignment can cause the snap to bend or break. Straight snaps last longer and snap easily.
Damaged Fabric
Fabric can tear around snaps if not handled well. Use sturdy fabric for heavy snaps. Avoid pressing snaps too close to fabric edges.
If the fabric is damaged, patch it before adding snaps. Reinforce weak spots with extra fabric or interfacing. Strong fabric holds snaps better and lasts longer.
Caring For Snap Fastened Items
Snap fasteners add convenience and style to many items. Caring for these fastened items helps keep them strong and functional. Proper care avoids damage and extends their life.
Small efforts in washing, repairing, and handling snap fasteners make a big difference. Follow simple steps to maintain snap fastened items well.
Washing Tips
Close all snaps before washing. This prevents them from catching on other fabrics. Use a gentle wash cycle with cold water. Avoid bleach or harsh detergents that can weaken snaps. Air dry items to protect the snap’s metal or plastic parts. Avoid high heat from dryers, which can cause snaps to warp or break.
Repairing Snaps
Check snaps regularly for looseness or damage. Use pliers to gently tighten loose snaps. Replace broken snaps with a snap repair kit or take the item to a tailor. Fixing snaps early stops further damage. Keep spare snaps handy for quick repairs.
Extending Snap Lifespan
Open and close snaps carefully to avoid stress. Do not force snaps if they stick. Clean snaps with a soft cloth to remove dirt and debris. Store snap fastened items flat to prevent bending. Avoid heavy pulling or tugging on fastened areas.

Credit: www.sailrite.com
Frequently Asked Questions
What Tools Do I Need To Snap Fasteners Correctly?
You need snap fasteners, a snap setter tool, a hammer, and fabric or leather. These tools ensure precise and secure fastening.
How Do I Align Snap Fasteners Before Snapping?
Align both parts of the snap fastener on the fabric carefully. Proper alignment prevents damage and ensures a strong hold.
Can I Snap Fasteners On Thick Fabric Or Leather?
Yes, snap fasteners work on thick fabrics and leather. Use a heavy-duty snap setter and hammer for best results.
How Do I Remove Snap Fasteners Without Damage?
Use pliers to gently pry open the snap fastener. Avoid cutting fabric by working slowly and carefully during removal.
Conclusion
Snapping fasteners is easier than it seems. With the right tools and steps, you can do it quickly. Practice helps you get better every time. Choose the right size and type for your project. Take your time to line up the pieces well.
This ensures a strong and neat finish. Now, you can fix clothes, bags, or crafts with ease. Keep these tips in mind for your next task. Snap fasteners add both function and style simply. Give it a try and see the difference yourself.