Are you struggling with those stubborn car fasteners that just won’t budge? Removing car fasteners can feel tricky and frustrating, especially if you don’t have the right tools or know the best techniques.
But what if you could learn simple, effective methods to get the job done quickly and without damage? In this guide, you’ll discover easy steps to remove car fasteners like a pro—saving you time, effort, and money. Keep reading, and you’ll gain the confidence to handle your car repairs with ease.
Types Of Car Fasteners
Car fasteners hold many parts of a vehicle together. They come in different shapes and sizes. Knowing types helps in removing them safely. This prevents damage to car parts and fasteners.
Plastic Clips
Plastic clips are common in car interiors and panels. They are lightweight and easy to install. Use a flat tool to pry them out gently. Avoid breaking the clips by applying slow pressure.
Push Pins
Push pins hold trim and liners firmly. They have a center pin that locks the fastener. Pull the center pin out carefully. Then remove the outer part without forcing it.
Screws And Bolts
Screws and bolts secure heavy parts like bumpers and lights. They require screwdrivers or wrenches for removal. Turn counterclockwise to loosen them. Keep track to avoid losing these fasteners.
Rivets
Rivets join parts permanently and need special tools. Drill the head gently to remove them. Use replacement rivets to reinstall parts securely. Handle rivets with care to avoid damage.

Credit: www.youtube.com
Tools Needed
Removing car fasteners requires the right tools. Using proper tools makes the job easier and safer. It also helps prevent damage to your car parts. Here are the main tools you need to remove car fasteners effectively.
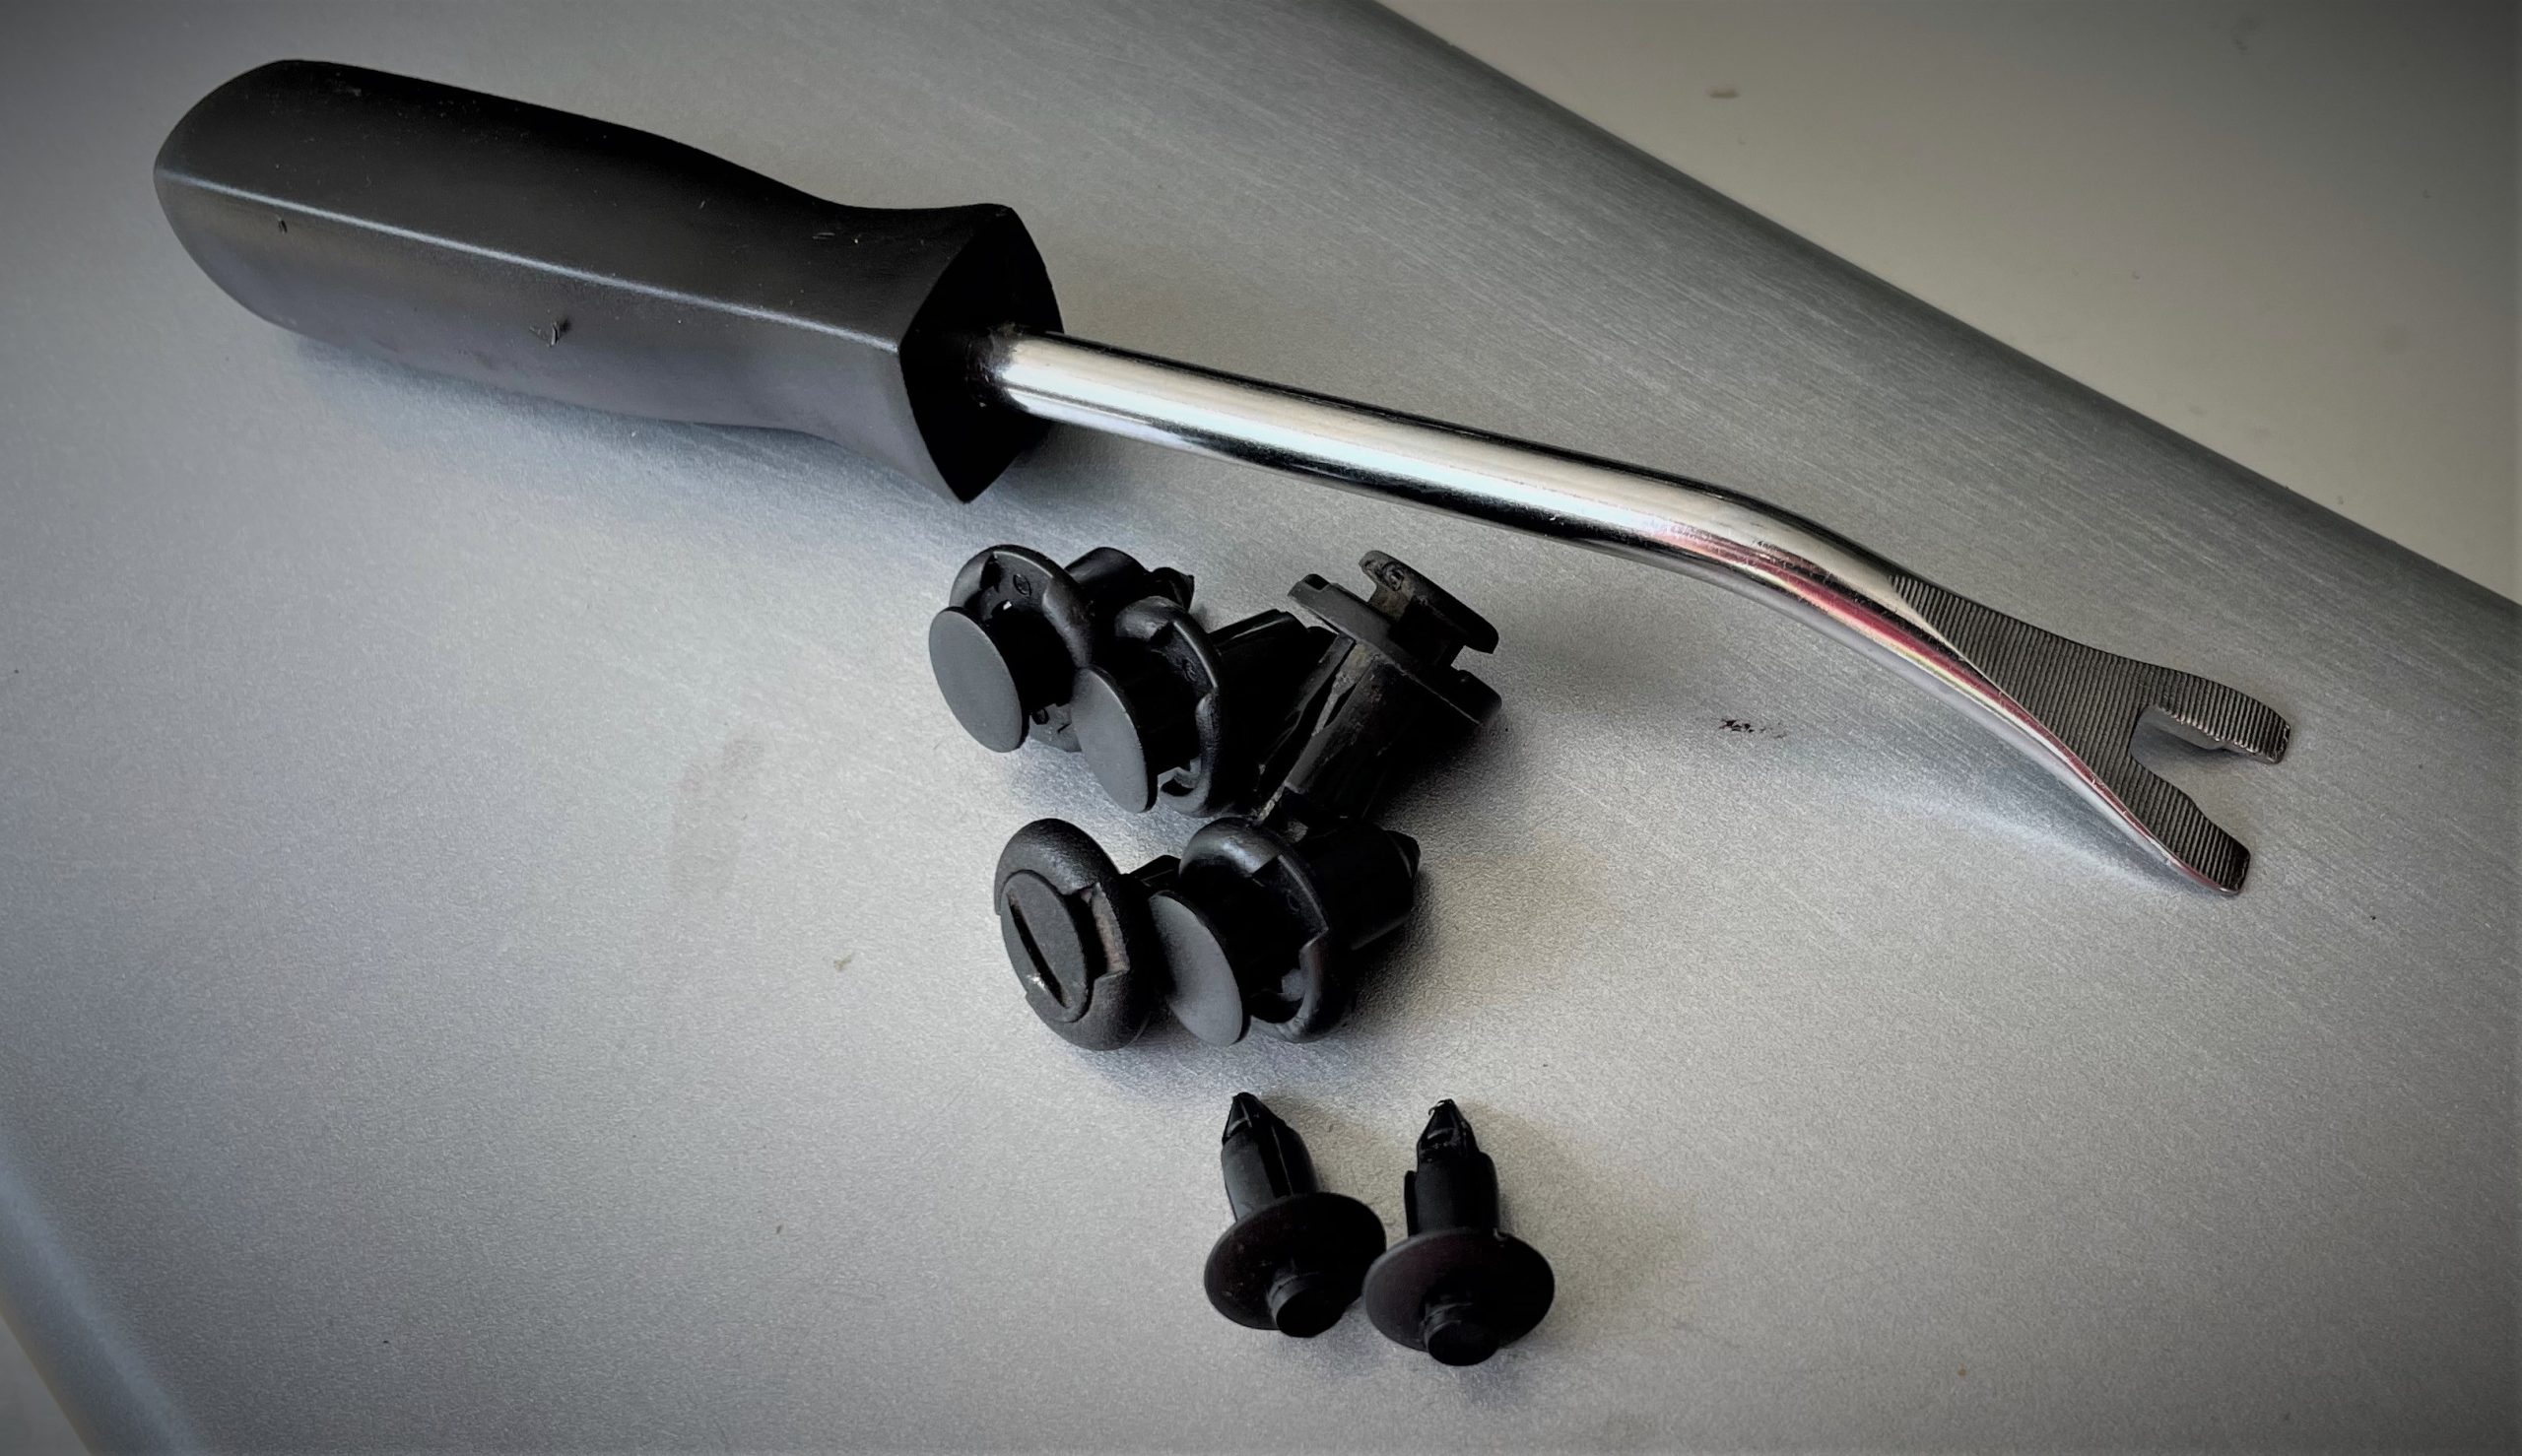
Trim Removal Tools
Trim removal tools are plastic or metal. They help pry off clips and panels without scratching. These tools fit under the fasteners to lift them gently. They come in different shapes for various fasteners. Using them reduces the risk of breaking clips.
Screwdrivers
Screwdrivers are essential for fasteners with screws. Flathead and Phillips are the most common types. Choose the right size to avoid stripping screws. A good grip helps turn screws smoothly. Sometimes, screwdrivers assist in prying small clips.
Pliers
Pliers grip and pull out stubborn fasteners. Needle-nose pliers work well in tight spaces. Slip-joint pliers provide a strong hold on larger clips. Use pliers carefully to avoid bending or breaking fasteners. They are handy for wire or plastic clips.
Socket Wrench
Socket wrenches remove bolts and nuts holding fasteners. They come with different sized sockets to fit various bolts. A ratchet handle speeds up the process. Socket wrenches apply strong torque with less effort. Use them for fasteners that screw into metal parts.
Preparation Tips
Proper preparation makes removing car fasteners easier and safer. It saves time and helps avoid damage. Follow simple steps before starting the removal process.
Safety Precautions
Wear gloves to protect your hands from sharp edges. Use safety glasses to guard your eyes. Work in a well-lit area to see clearly. Keep tools organized to avoid accidents. Take your time and move carefully.
Cleaning The Area
Remove dirt and debris around the fastener. Use a soft brush or cloth to clean the surface. Clean areas reveal fasteners better. This helps you avoid slipping tools. It also prevents damage to car parts.
Identifying Fastener Type
Look closely at the fastener’s shape and size. Different types need different tools. Common types include clips, screws, and bolts. Knowing the type helps choose the right tool. This reduces the risk of breaking the fastener.
Removing Plastic Clips
Plastic clips hold many car parts tightly. They keep panels, trims, and covers in place. Removing these clips carefully is key to avoid damage. Using the right tools and methods makes the job easier. This section explains how to remove plastic clips safely and quickly.
Using A Trim Removal Tool
A trim removal tool helps remove plastic clips without breaking them. It slides under the clip’s edge to lift it gently. Use slow, steady pressure to pop the clip out. Avoid pulling hard with your fingers or pliers. These tools come in many shapes and sizes. Choose one that fits well under the clip for best results.
Avoiding Damage
Plastic clips break easily when forced. Use proper tools to prevent scratches on panels. Start by prying gently around the clip’s base. Never twist the clip too much or pull too fast. Keep the tool flat to avoid bending the clip. Take your time to protect both the clip and car surface.
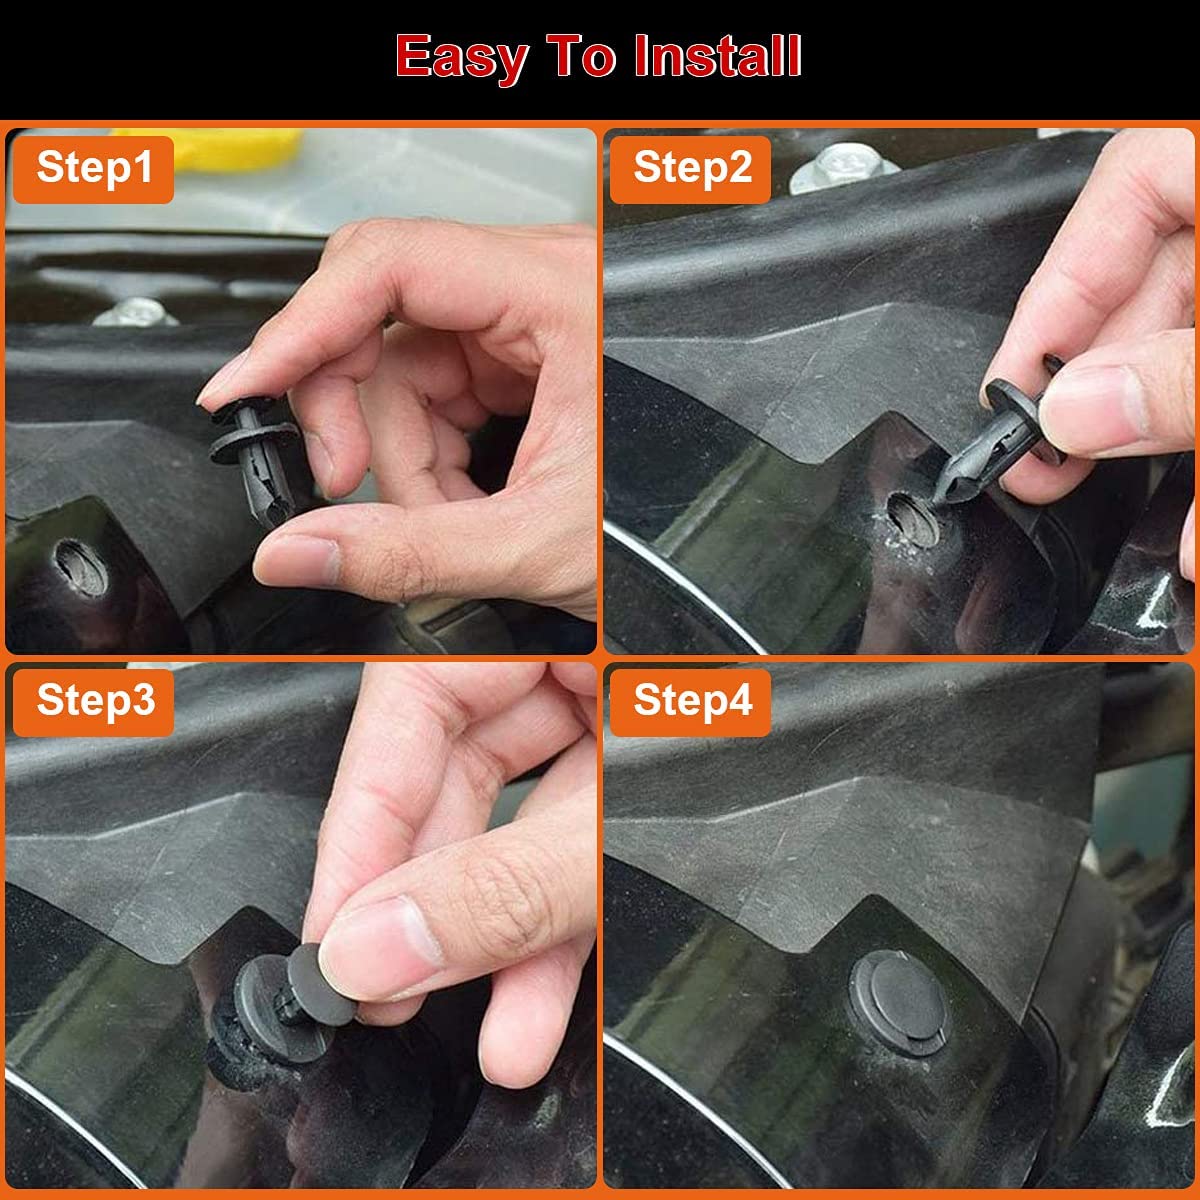
Removing Push Pins
Push pins hold many parts of a car together. They are common in door panels, bumpers, and trim. Removing push pins carefully stops damage to the car. This section shows easy ways to remove push pins safely.
Prying Techniques
Start by finding the center of the push pin. Use a flat tool to lift the center gently. This loosens the pin’s grip. Slide the tool under the pin’s edge. Pry slowly and steadily. Avoid using too much force. This helps keep the pin and car safe.
Work around the pin to lift it evenly. If the pin feels stuck, try moving the tool slightly. This can help release the pin without breaking it. Pry pins out one by one. Be patient and careful.
Using Screwdrivers Safely
Choose a flat-head screwdriver that fits under the pin. Place a cloth or tape on the tool tip. This protects the car’s paint and plastic parts. Insert the screwdriver gently under the pin’s edge.
Twist the screwdriver slowly to lift the pin. Do not force it hard. If the pin does not move, try prying from another side. Keep the screwdriver steady to avoid slips. Use light taps with a small hammer if needed. This helps ease out the pin without damage.
Credit: refusingtoforget.org
Removing Screws And Bolts
Removing screws and bolts is a common task when working on cars. These fasteners hold many parts together. Knowing how to remove them safely saves time and effort. The right tools and techniques help avoid damage to parts or fasteners. This section explains how to choose tools and loosen stuck screws and bolts.
Choosing The Right Tool
Select a tool that fits the screw or bolt head perfectly. Use a screwdriver or socket wrench that matches the size and type. Using the wrong tool can strip the fastener or make removal harder. For Phillips screws, use a Phillips screwdriver. Flathead screws need a flat screwdriver. Hex bolts require a socket or Allen wrench. A snug fit ensures better grip and control.
Loosening Stuck Fasteners
Stuck screws and bolts need extra care. Apply a small amount of penetrating oil on the fastener. Let it sit for a few minutes to loosen rust or dirt. Use steady, firm pressure with your tool. Avoid sudden force to prevent stripping or breaking. Tap the fastener lightly with a hammer to help loosen it. Turn the fastener back and forth gently to free it.
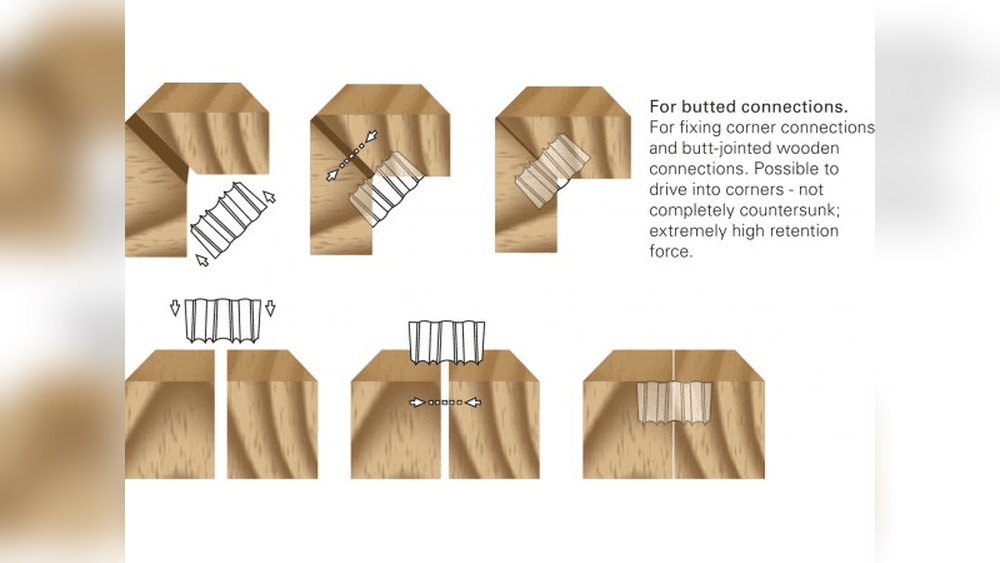
Handling Rivets
Rivets hold many parts of a car tightly together. Removing them needs care and the right tools. Rivets do not unscrew like bolts. They must be drilled out carefully. This process keeps the car parts safe from damage.
Drilling Out Rivets
Choose a drill bit that matches the rivet size. Place the drill bit in the center of the rivet head. Drill slowly to avoid slipping or damaging the surface. Once the rivet head is removed, push out the rest of the rivet. Use a punch tool if needed. Always wear safety glasses to protect your eyes from metal pieces.
Replacing With New Fasteners
After removing the rivet, clean the hole area well. Select a new fastener that fits the hole size. Pop rivets are common replacements for car rivets. Insert the new rivet and use a rivet gun to secure it. Check the fit to ensure the parts are tightly connected. Proper replacement keeps the car safe and stable.
Credit: www.autoevolution.com
Tips For Quick Repair
Fast car repairs save time and reduce stress. Following simple tips helps finish repairs quickly and safely. Clear steps keep work organized and prevent mistakes. These tips make removing car fasteners easier and more efficient.
Organizing Removed Fasteners
Keep all fasteners in one place after removal. Use small containers or trays to separate types. Label each container to avoid confusion later. This prevents lost parts and speeds up reassembly. Clear organization saves time and effort.
Working Methodically
Work step-by-step to avoid errors. Remove fasteners in the order they were attached. Take notes or photos to track progress. Avoid rushing to prevent damage to parts. A steady pace improves accuracy and safety.
Preventing Future Damage
Use the right tools to avoid stripping fasteners. Apply gentle force and avoid twisting too hard. Clean fasteners before reinstalling to ensure a tight fit. Replace damaged fasteners immediately. These steps extend the life of your car parts.
Frequently Asked Questions
What Tools Do I Need To Remove Car Fasteners?
You need a trim removal tool, flathead screwdriver, and pliers. These tools help avoid damage while prying out fasteners safely and efficiently.
How Can I Remove Plastic Car Fasteners Without Breaking Them?
Use a plastic trim removal tool to gently pry around the fastener. Apply slow, even pressure to avoid snapping or cracking the fastener.
Are Car Fasteners Reusable After Removal?
Most plastic fasteners are single-use and should be replaced. Metal clips can often be reused if they remain undamaged during removal.
Can I Remove Car Fasteners Without Professional Help?
Yes, with the right tools and careful technique, you can remove car fasteners at home. Follow step-by-step instructions to avoid damage.
Conclusion
Removing car fasteners can be simple with the right steps. Use the proper tools to avoid damage. Take your time and work carefully. Practice makes the process easier and faster. Always keep track of the fasteners you remove. This helps when putting parts back together.
Safety matters, so wear gloves and protect your eyes. Now, you can handle car fasteners confidently and safely.