Are you ready to give your cabinets a fresh new look with stylish hardware knobs? Installing cabinet knobs might seem tricky at first, but with the right steps, you can do it quickly and accurately—no special skills needed.
Whether you want to update your kitchen, bathroom, or any other room, knowing exactly where and how to place your knobs will make your cabinets look polished and professional. In this guide, you’ll discover simple, proven tips to install cabinet hardware knobs like a pro.
Keep reading, and you’ll transform your space with confidence and ease!
Choose The Right Hardware
Choosing the right cabinet hardware knobs is key to improving both style and function. The right knobs make cabinets easier to use and add charm to your space. Consider the types, materials, and how they match your decor before buying. This helps ensure your cabinets look great and work well.
Types Of Knobs
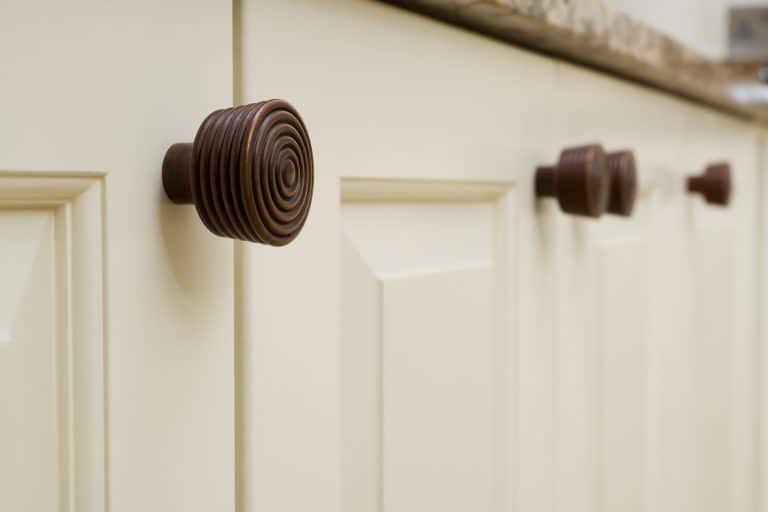
Cabinet knobs come in many shapes and sizes. Round knobs are classic and fit most styles. Square or rectangular knobs offer a modern touch. Some knobs have decorative designs or patterns for a unique look. Choose a type that feels comfortable to hold and suits your cabinet style.
Material And Finish Options
Knobs are made from metals, wood, glass, or plastic. Metal knobs are strong and long-lasting. Wood knobs add warmth and a natural feel. Glass knobs bring elegance and shine. Finishes like brushed nickel, bronze, or chrome create different moods. Pick a material and finish that fits your room’s needs and style.
Matching Your Decor
Knobs should blend with your room’s colors and style. For traditional kitchens, warm metals and classic shapes work well. Modern spaces suit sleek, simple designs in cool finishes. Rustic rooms look great with wooden or aged metal knobs. Matching hardware to your decor ties the whole look together.
Tools And Materials Needed
Before installing cabinet hardware knobs, gather all necessary tools and materials. Having everything ready helps the process go smoothly. This section lists the essential items for a successful installation.
Basic Tools
- Electric drill or screwdriver for drilling holes
- Drill bits matching the knob screws
- Phillips or flat-head screwdriver to tighten screws
- Hammer for light tapping if needed
- Level to ensure knobs align properly
Measuring Devices
- Tape measure for accurate distance measurement
- Ruler or straight edge to mark placement
- Combination square for precise right angles
- Pencil to mark drilling spots clearly
Additional Supplies
- Cabinet knobs and matching screws
- Masking tape to protect the cabinet surface
- Wood filler to cover any mistakes or old holes
- Soft cloth to clean dust after drilling
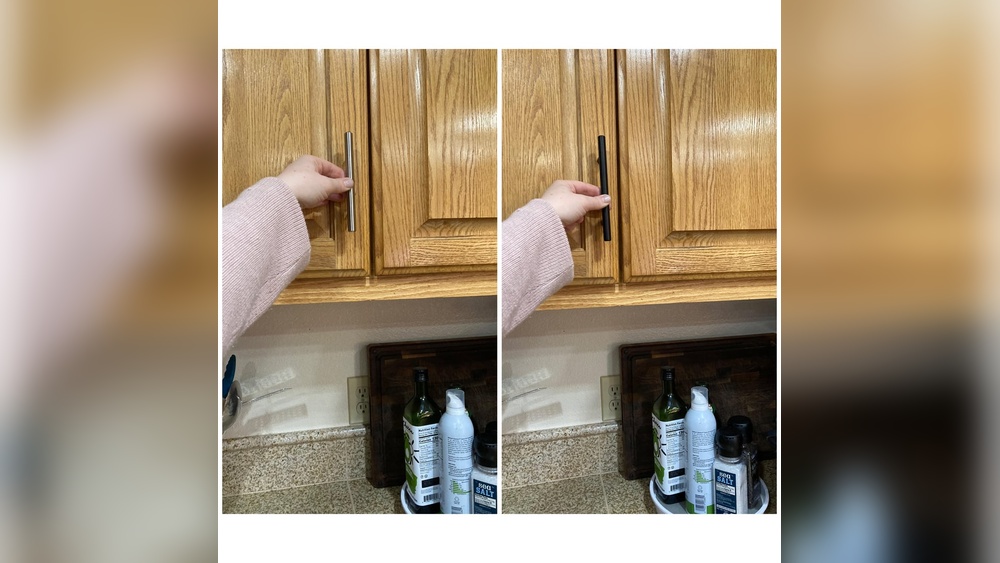
Determine Knob Placement
Determining the correct placement of cabinet hardware knobs is important for both style and function. Proper placement makes cabinets easier to open and adds balance to your kitchen or bathroom design. This step requires careful measurement and planning before drilling any holes.
Position On Cabinet Doors
Place the knob on the side opposite the hinges. For upper cabinets, position it near the bottom corner. On base cabinets, place it near the top corner. This placement allows easy access and looks natural. For modern slab doors, center the knob horizontally and vertically for a sleek look.
Placement On Drawers
Center the knob horizontally on the drawer front. Vertically, place it in the middle of the drawer height. This makes the drawer easy to pull open. For wider drawers, consider two knobs spaced evenly apart. Use a ruler or tape measure to mark the exact spot before installing.
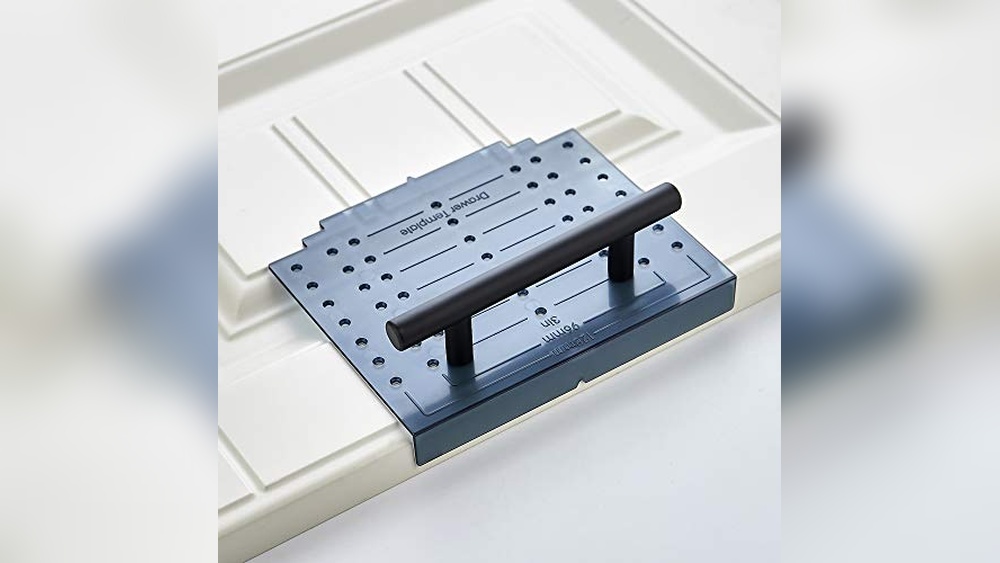
Tips For Consistency
Measure all doors and drawers before marking holes. Use a template or jig to keep knob placement uniform. Mark spots lightly with a pencil to avoid mistakes. Check alignment by stepping back and viewing the cabinets as a whole. Consistent placement improves the overall look and function.
Credit: truepositiontools.com
Mark Drill Points Accurately
Marking drill points accurately is vital for installing cabinet hardware knobs. Precise marks ensure the knobs fit perfectly without causing damage. Careful marking saves time and avoids mistakes. This step sets the foundation for a smooth installation process.
Using A Template Or Jig
A template or jig helps place drill points evenly. It guides the drill in the right spot every time. This tool reduces guesswork and speeds up marking. Templates come in various sizes for different knob styles. Using one guarantees uniform placement across all cabinets.
Measuring And Marking
Measure the exact spot before marking. Use a ruler or tape measure for accuracy. Mark the point lightly with a pencil. Check measurements from the cabinet edges or corners. Clear, small marks help avoid errors during drilling. Precision here leads to a professional look on your cabinets.
Double-checking Alignment
Always double-check your marks before drilling. Use a level to ensure horizontal alignment. Compare marks on adjacent doors or drawers for consistency. Correct any uneven marks early to prevent mistakes. Taking this extra step guarantees your knobs will line up perfectly.
Drill Holes Safely
Drilling holes safely is a key step in installing cabinet hardware knobs. It ensures your cabinets stay strong and look great. Taking care while drilling saves time and avoids costly repairs. Follow these simple tips to drill with confidence and precision.
Choosing The Right Drill Bit
Select a drill bit that matches your knob’s screw size. Typically, a 3/16-inch bit works for most knobs. Use a sharp, high-quality bit for clean holes. Wood bits are best for cabinet doors and drawers. Avoid using bits that are too large or small. This keeps the knob secure and prevents wobbling.
Drilling Techniques
Mark the spot clearly with a pencil before drilling. Place a piece of masking tape on the drill bit tip to control hole depth. Hold the drill steady and start at a low speed. Drill straight into the wood, not at an angle. Stop once you reach the tape mark. Clean any rough edges with sandpaper for a smooth finish.
Preventing Damage
Protect the cabinet surface with painter’s tape around the drill spot. This reduces splintering and chipping. Use a backing board inside the cabinet to avoid blowout. Keep steady pressure on the drill to prevent slipping. Check the drill bit often for wear and replace if dull. These steps keep your cabinets safe and looking new.
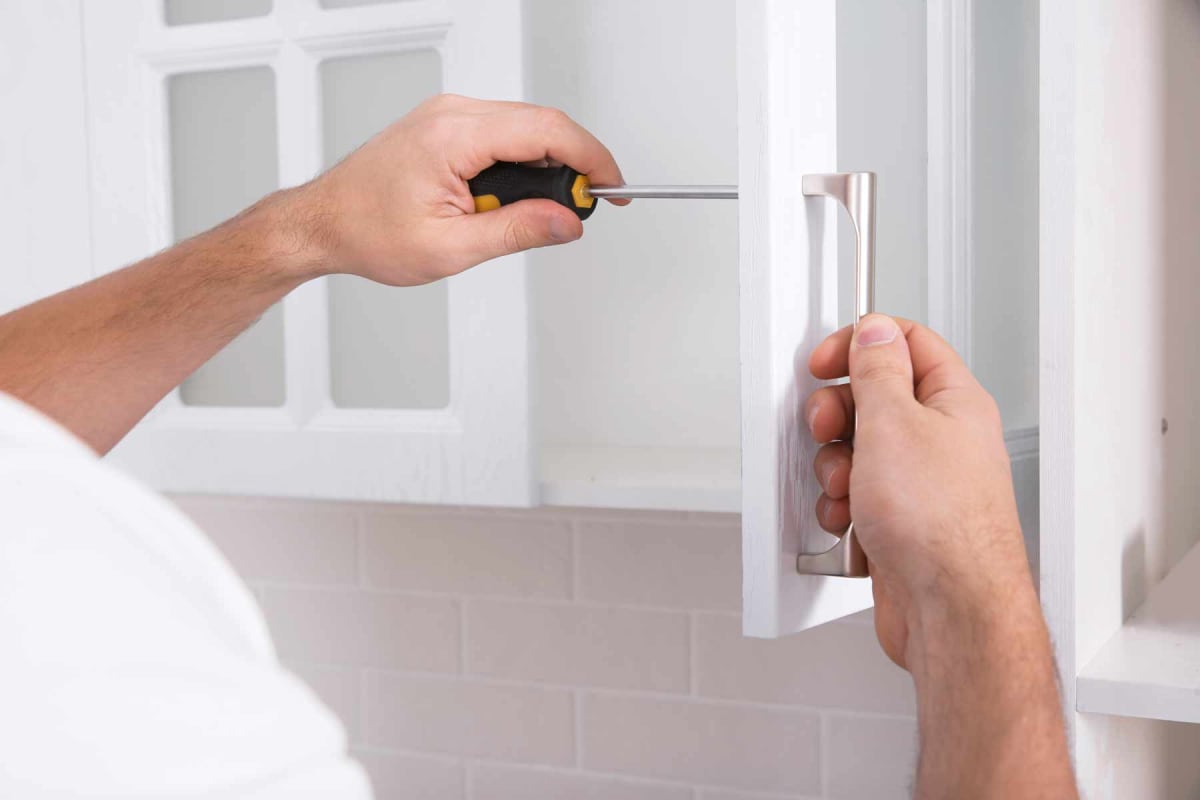
Attach Cabinet Knobs
Attaching cabinet knobs is the final step in upgrading your cabinets. This process requires careful attention to ensure knobs fit correctly and securely. Proper attachment improves both the look and function of your cabinets. Follow these simple steps to install your knobs with confidence and ease.
Aligning Hardware
Start by positioning the knob over the pre-drilled hole. Make sure the knob sits straight and lines up with the cabinet surface. Check alignment from different angles for accuracy. Proper alignment avoids awkward angles and ensures smooth use.
Inserting Screws
Hold the knob firmly in place. Insert the screw from inside the cabinet through the hole. Push the screw until it reaches the knob’s base. Avoid forcing the screw to prevent damage to the knob or cabinet.
Tightening Securely
Use a screwdriver to tighten the screw gently. Turn clockwise and stop when the knob feels firm. Do not overtighten, as this can strip the screw or crack the cabinet. Test the knob by pulling lightly to confirm it is secure.
Check And Adjust Hardware
After installing cabinet hardware knobs, it is essential to check and adjust them. This step ensures the knobs fit well and work properly. Careful inspection helps avoid loose or crooked knobs. Proper adjustments improve the cabinet’s look and function. Spend time to make sure each knob is perfect.
Ensuring Proper Fit
Check if each knob sits flush against the cabinet surface. The knob should not wobble or feel loose. Tighten screws gently to secure the knob. Avoid overtightening, as it can damage the cabinet. Make sure the knob aligns with the hole for a clean fit.
Making Adjustments
If a knob feels loose, tighten the screw carefully. Use a screwdriver that fits the screw head well. For knobs that are crooked, loosen and realign them. Adjust the angle until the knob looks straight. Confirm the knob turns smoothly without resistance.
Maintaining Consistency
Keep the placement of all knobs uniform across cabinets. Measure the distance from edges to ensure even spacing. Consistent hardware placement enhances the cabinet’s appearance. Double-check each knob after installation for matching height. Small differences can affect the overall look.
Credit: homeguide.com
Tips For A Professional Finish
Achieving a professional finish when installing cabinet hardware knobs makes a big difference. Small details affect the overall look and feel of your cabinets. Careful steps ensure your hardware looks neat and lasts long. Follow these tips for a smooth and polished installation.
Cleaning Up
Remove dust and debris from the cabinet surface before starting. Wipe the area with a damp cloth to clear any dirt. Clean holes and edges after drilling to avoid rough spots. Use a soft brush to clear out sawdust inside the holes. This creates a smooth base for your knobs and prevents scratches.
Avoiding Common Mistakes
Measure twice, drill once to avoid misaligned holes. Use a template or ruler for even spacing. Avoid overtightening screws which can damage the knob or cabinet. Choose the right drill bit size to match the screw diameter. Check knob orientation before final tightening to keep them straight and level.
Enhancing Durability
Apply a small amount of clear nail polish or thread locker on screw threads. This prevents loosening over time from regular use. Use washers if needed to protect the cabinet surface. Tighten screws firmly but gently to avoid stripping threads. Regularly check and retighten knobs to maintain a secure fit.

Credit: truepositiontools.com
Frequently Asked Questions
How Do You Install Knobs On Cabinets?
Mark the knob position opposite the hinge. Drill a hole through the cabinet door. Insert the screw from inside. Tighten the knob securely with a screwdriver. Use a ruler or jig for consistent placement on all doors and drawers.
What Is The 1 3 Rule For Cabinet Hardware?
The 1-3 rule for cabinet hardware means placing knobs 1 inch from the edge and 3 inches from the top or bottom. This ensures consistent, ergonomic, and visually balanced hardware placement on cabinets and drawers.
What Is The Proper Placement For Cabinet Knobs?
Place cabinet door knobs opposite the hinges—bottom corner for upper cabinets, top corner for base cabinets. Center knobs horizontally and vertically on drawers. For large drawers, use two evenly spaced knobs. Ensure consistent placement using measuring tools for a balanced, functional look.
How To Install A Doorknob With Hidden Screws?
Align the doorknob parts on the door. Insert screws through the latch plate inside. Tighten screws firmly. Snap the cover plate to hide screws. Test the knob for smooth operation.
Conclusion
Installing cabinet hardware knobs is a simple task anyone can do. Measure carefully and mark the spots before drilling holes. Use the right tools to avoid damage. Tighten screws firmly but not too much. Choose knob styles that fit your kitchen design.
Well-installed knobs improve both look and function. Enjoy your refreshed cabinets and easy grip handles. Small upgrades make big differences in your space. Keep practicing for perfect results every time.