If you’ve ever struggled with adding fasteners in SolidWorks, you’re not alone. Fasteners like bolts, nuts, and screws are essential parts of any assembly, but inserting them correctly can be tricky if you don’t know the right steps.
Imagine saving time by quickly adding the exact fasteners you need without endless searching or manual adjustments. In this guide, you’ll learn how to insert fasteners efficiently using SolidWorks tools and features designed to make your workflow smoother. By the end, you’ll have the confidence to add fasteners like a pro, ensuring your assemblies are both accurate and ready for production.
Ready to simplify your SolidWorks projects? Let’s dive in!
Credit: hawkridgesys.com
Enable Toolbox Add-in
Applying assembly mates is essential when inserting fasteners in SolidWorks. Mates control how parts connect and move together. Correct mates make your assembly realistic and functional. They ensure fasteners fit and align properly in the design. This section explains key mates to apply in fastener assemblies.
Use Standard Mates
Standard mates include coincident, concentric, and distance mates. Use coincident mates to align faces or edges of fasteners and parts. Concentric mates help center holes and pins perfectly. Distance mates keep parts at a fixed gap. These mates position fasteners without allowing unwanted movement. They create a stable, secure assembly quickly.
Use Screw Mate For Threads
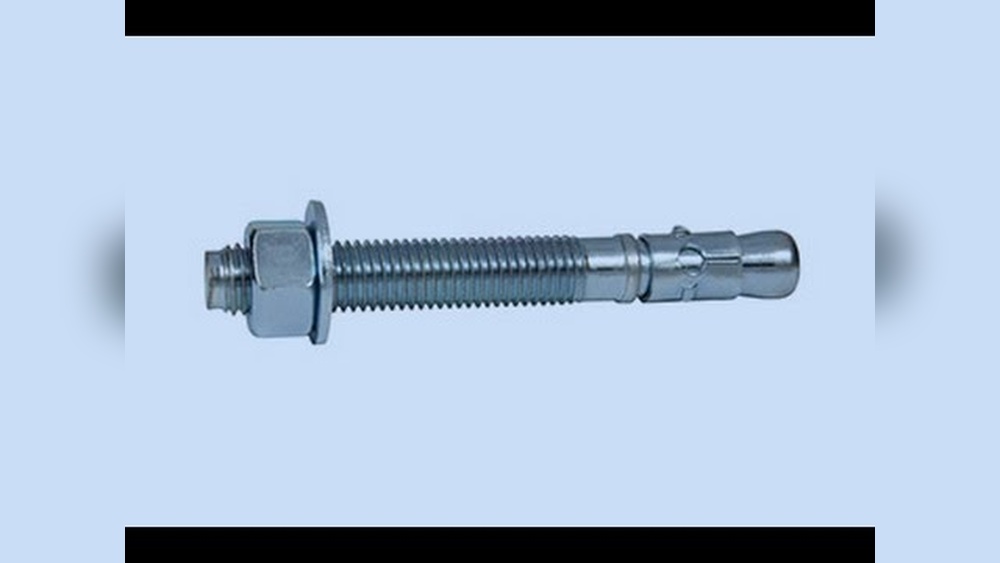
Screw mates simulate threaded fastener motion. They combine rotation and translation along an axis. Select the rotation axis on the fastener and the hole axis on the part. Specify the pitch to match the thread. This mate shows how the fastener turns and moves into place. It adds realism and helps check assembly function before production.
Credit: hawkridgesys.com
Use Hole Wizard For Holes
Patterning fasteners in SolidWorks saves time and ensures consistency. It helps place multiple fasteners quickly across your design. Efficient patterns reduce errors and speed up assembly work. Use built-in tools to copy fasteners in a few clicks. Focus on the right method to match your hole layout.
Use Driven Component Pattern
The Driven Component Pattern copies existing fasteners along a path. It follows the placement of the original fastener exactly. Choose the fastener you want to repeat. Select the path or direction for the pattern. Set the number of instances to fill your holes. This method keeps all mates and relationships intact. It works well for linear or circular hole patterns. Adjust spacing to match hole distances precisely. This saves time compared to inserting each fastener manually.
Duplicate Fasteners Across Holes
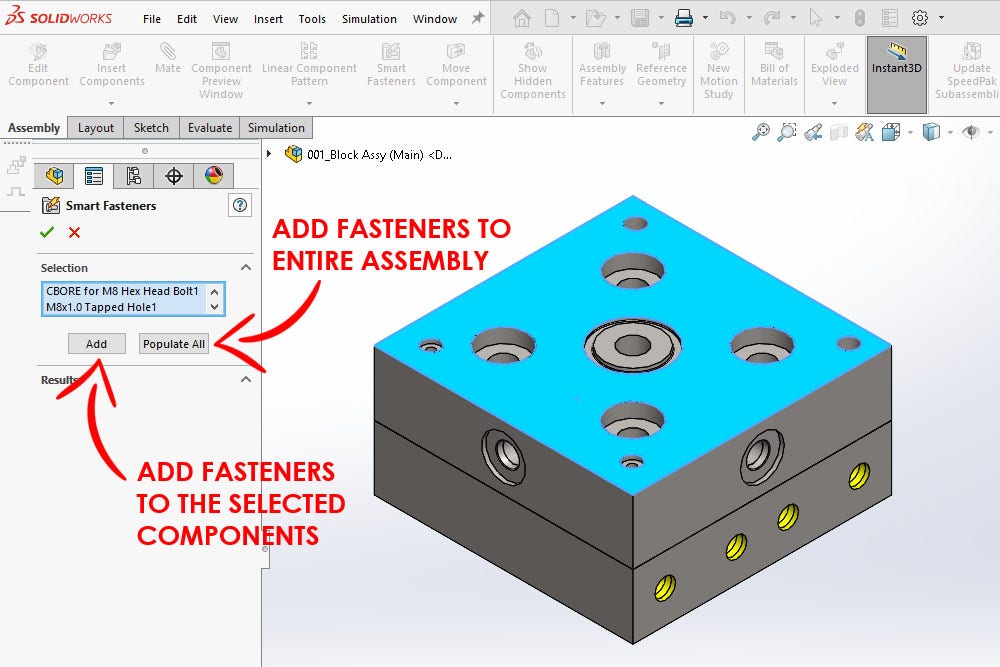
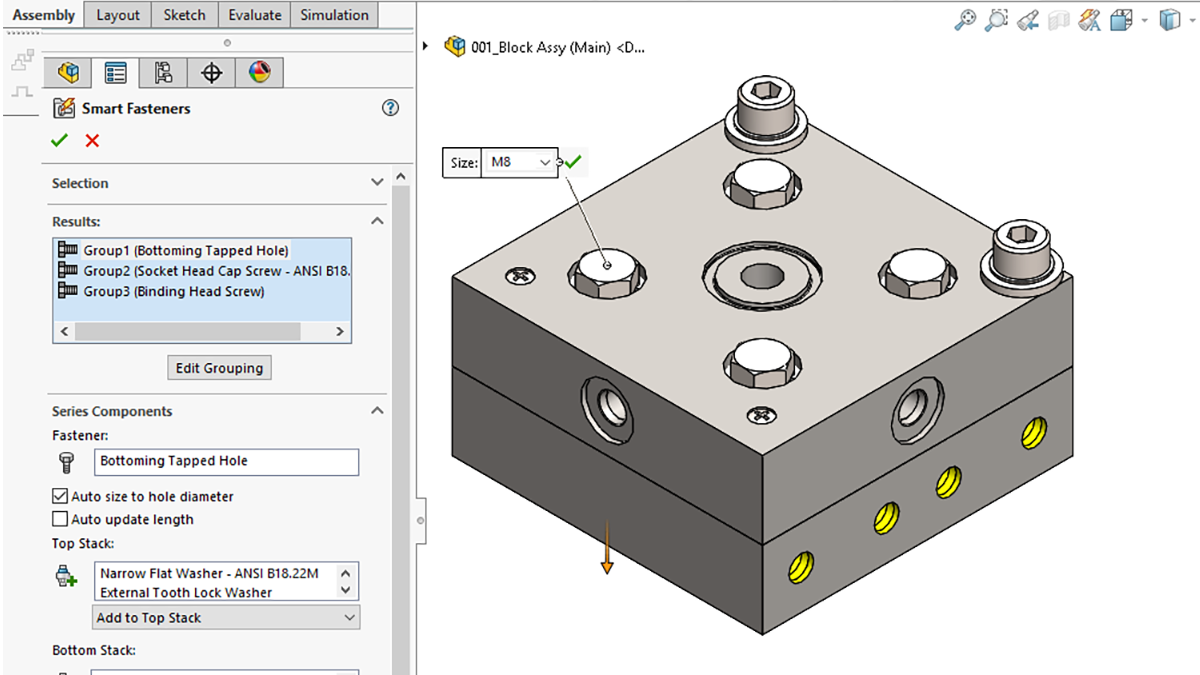
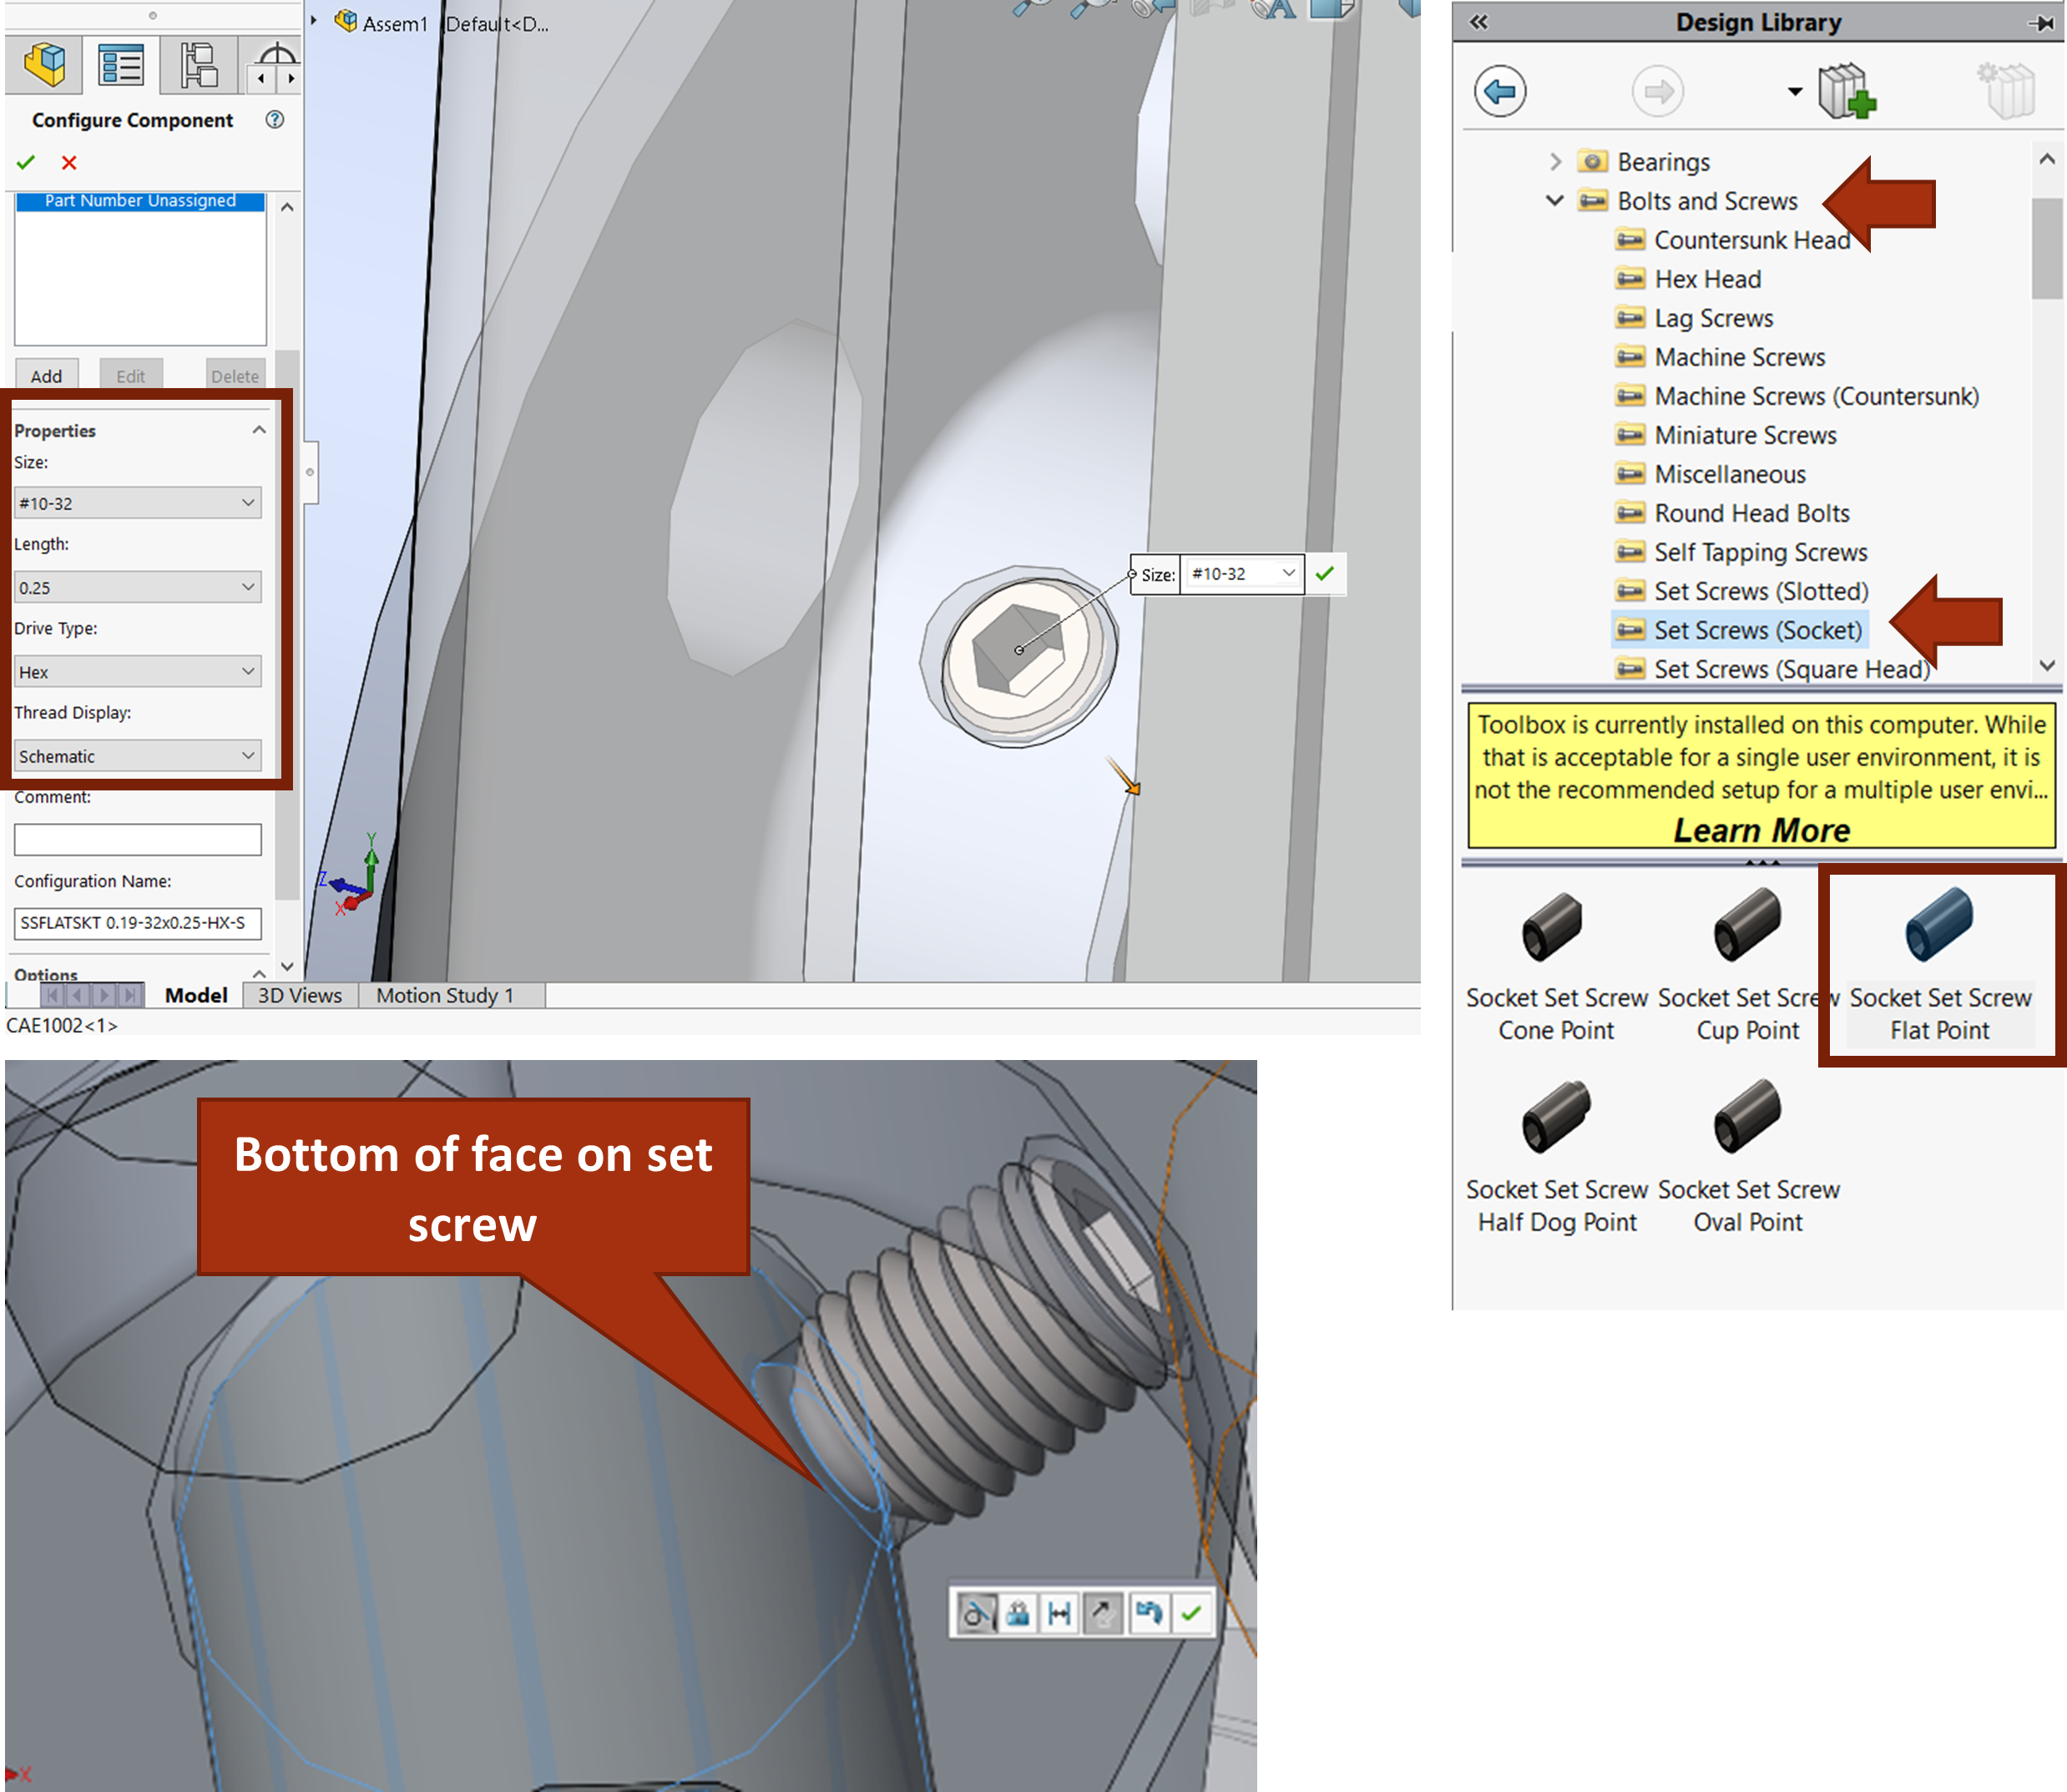
Duplicating fasteners across holes is simple with the Hole Wizard feature. Select one fastener in your assembly. Use the “Select Other” option to pick all holes of the same size. SolidWorks will prompt to add fasteners to all selected holes. This method uses the Smart Fasteners tool from the Toolbox library. It automatically matches fastener size to hole size. This ensures the correct fastener fits every hole. The process is fast, accurate, and reduces manual work.
Credit: openwa.pressbooks.pub
Frequently Asked Questions
How Do I Add Fasteners To Solidworks?
Enable SOLIDWORKS Toolbox under Tools > Add-ins. Use the Smart Fasteners tool in the Assembly tab. Select holes, then click Add. Fasteners auto-populate and align with your model. Apply mates to fix their positions.
How To Get Smart Fasteners In Solidworks?
Enable SOLIDWORKS Toolbox Library via Tools > Add-ins. Then, use the Smart Fasteners tool in the Assembly tab to add fasteners automatically. Select holes, and SOLIDWORKS inserts matching bolts and nuts quickly.
How To Mate Fasteners In Solidworks?
Click Mate in the Assembly toolbar or Insert > Mate. Choose the Mechanical tab, then select Screw. Select rotation axes on both components. Set revolutions per unit length to mate fasteners in SOLIDWORKS.
How To Make A Threaded Insert In Solidworks?
Create a hole using Hole Wizard, select a threaded hole type, define size and thread. Apply cosmetic threads for visual detail. Insert the threaded insert from Toolbox or custom part library, then mate it properly in the assembly.
Conclusion
Inserting fasteners in SolidWorks is simple and saves time. Use the Toolbox to find common bolts and nuts quickly. Select holes carefully to add fasteners automatically. Apply mates to position fasteners correctly within assemblies. Practice these steps to improve your design process.
SolidWorks makes adding fasteners clear and efficient. This skill helps create stronger, more accurate models. Keep exploring features to enhance your assembly work.