
If you’ve ever struggled to install cabinet hardware and ended up with crooked handles or uneven knobs, you’re not alone. Getting those perfect, consistent holes can be tricky and time-consuming—unless you use a cabinet hardware jig.
This simple tool takes the guesswork out of the process, helping you place every handle or knob exactly where it belongs with ease and precision. You’ll learn how to use a cabinet hardware jig step-by-step, so your cabinets look professionally finished and you save time and frustration.
Ready to transform your cabinet installation from a headache into a smooth, satisfying task? Let’s get started!
Choosing The Right Pull Size
Choosing the right pull size is key to both the look and use of your cabinets. A well-sized pull adds style and makes opening doors or drawers easy. Too small pulls feel awkward and may look lost on big surfaces. Too large pulls can overpower smaller cabinets and look out of place. The cabinet hardware jig helps place pulls exactly where they belong. It also guides you to pick the right size for each drawer or door. Here is how to select the perfect pull size using simple rules.
Applying The One-third Rule
The one-third rule is a simple way to find pull size. For drawers, divide the drawer’s width by three. The result is the ideal pull length. For cabinet doors, use the door’s height instead. The pull’s length should be about one-third of that height. This rule works well for most cabinets. It creates a balanced and neat look. The pull will also be easy to grip and use.
- For drawers: Divide drawer width by three for pull length.
- For cabinet doors: Divide door height by three for pull length.
This rule is good because it blends style with function. It gives pulls a size that fits both small and large cabinets. It fits modern and classic designs. Pulls sized by this rule offer comfort and look right.
Adjusting For Wide Drawers
Wide drawers need longer pulls than the one-third rule suggests. A longer pull lets your hand grip comfortably anywhere along the drawer. For very wide drawers, add a few inches to the pull length. This helps keep the pull useful and stylish. Use the cabinet hardware jig to mark the center and drill holes evenly. This keeps pulls straight and balanced, even on large drawers.
Balancing Aesthetics And Functionality
Choose a pull size that looks good and works well. Pulls should match the cabinet style and size. Slim cabinets need smaller pulls for a neat look. Big cabinets suit longer pulls that stand out. Also, think about who will use the cabinets. Larger pulls help kids and adults with weaker grip. Small pulls can be tricky for heavy drawers. Use the jig to place pulls at a comfortable height and position.
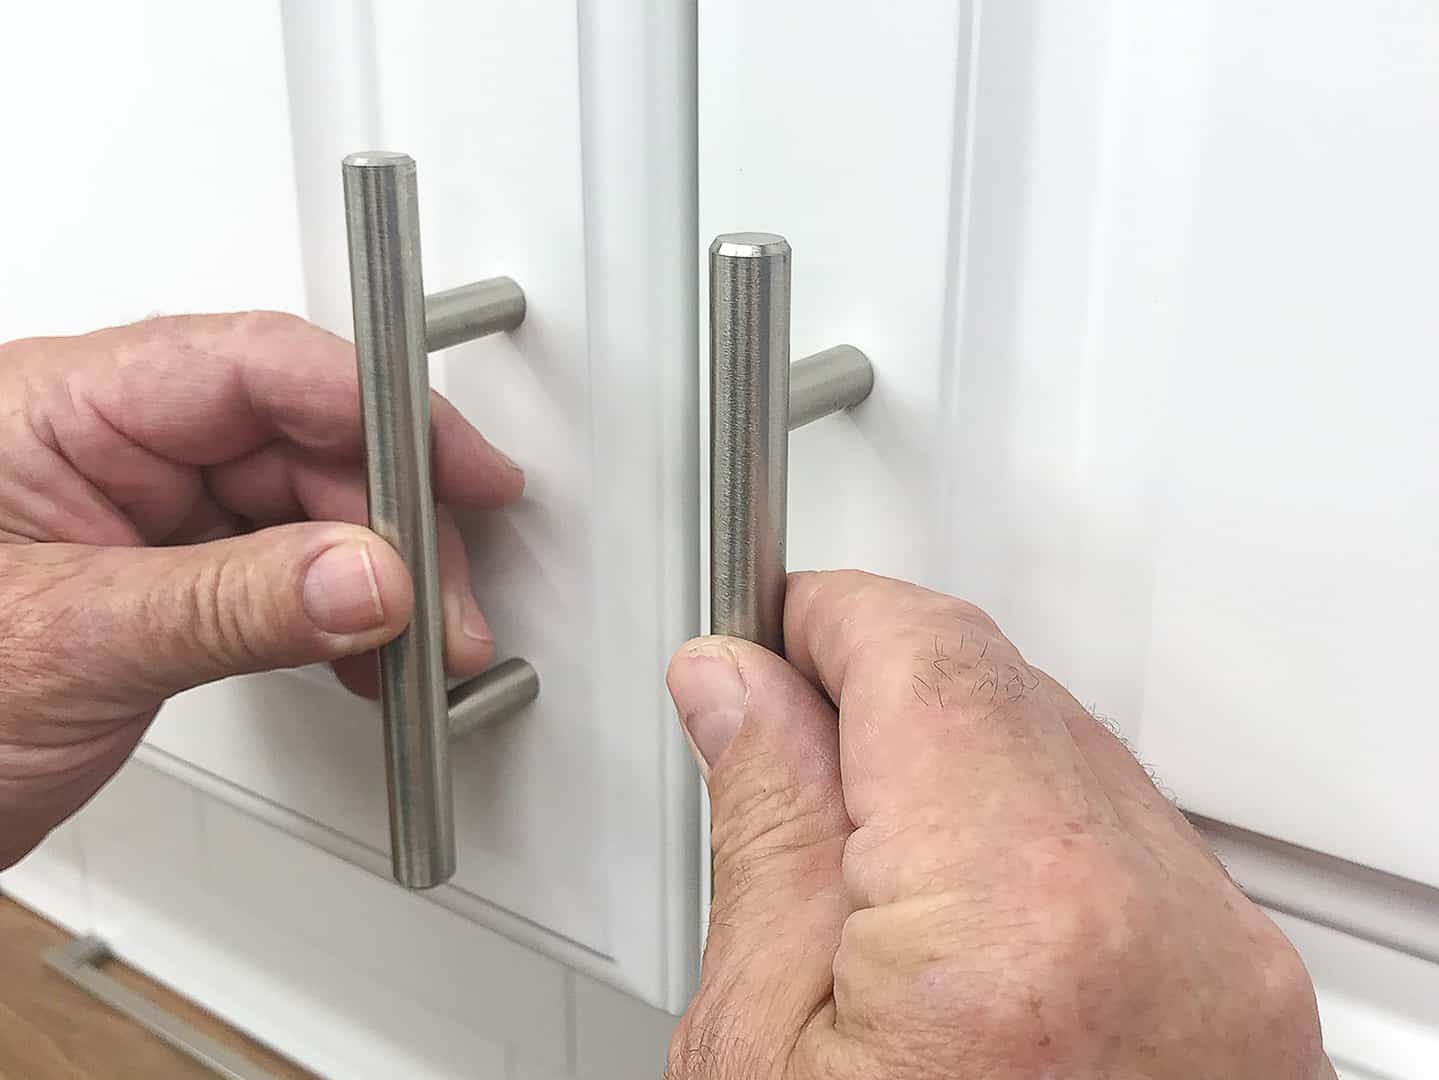
Credit: truepositiontools.com
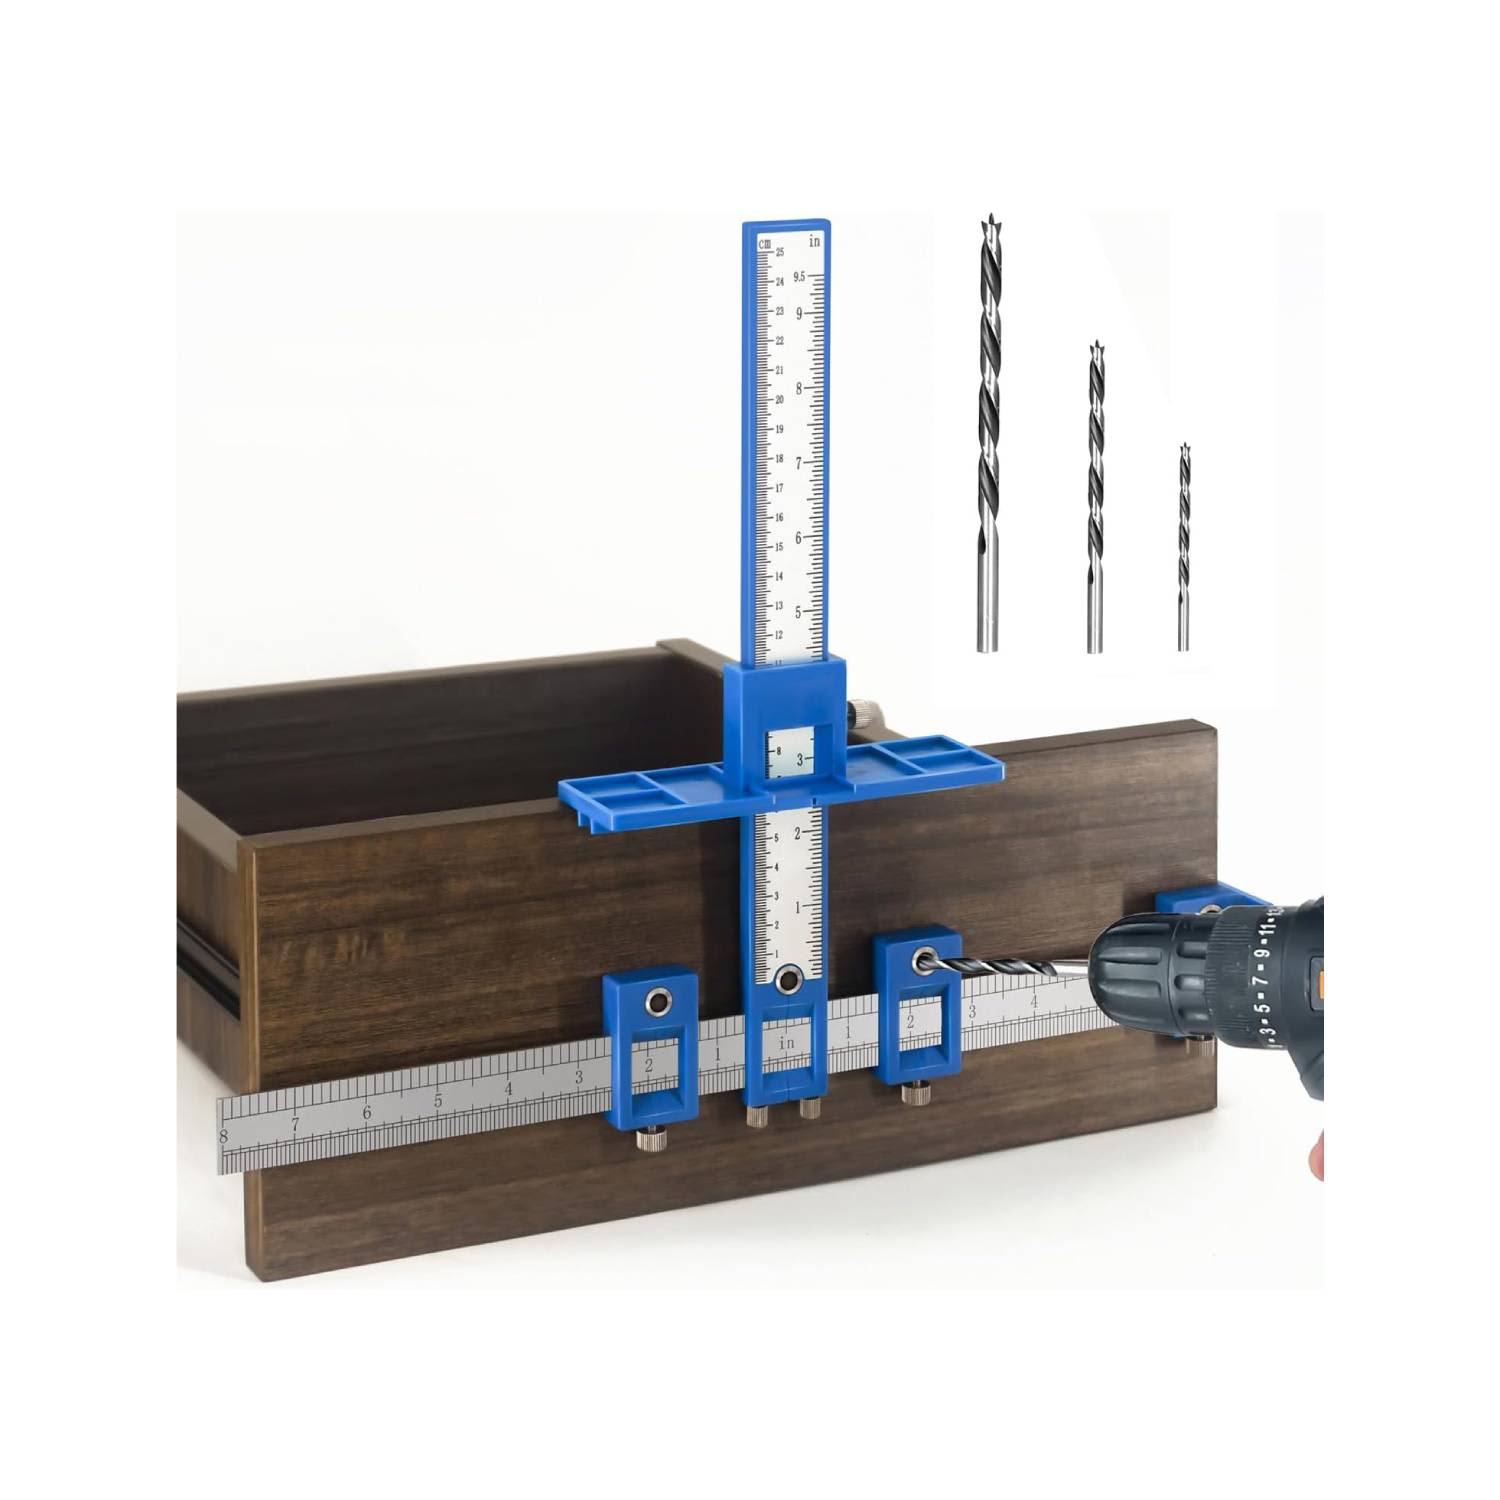
Preparing The Cabinet Hardware Jig
Preparing the cabinet hardware jig is an important step before drilling holes. It ensures accurate placement and a professional finish. Taking time to set up the jig correctly saves effort later.
Proper preparation helps avoid mistakes and misaligned handles. Follow these steps carefully for best results.
Selecting The Correct Drill Bit
Choose a drill bit that matches the hardware screws. Check the screw diameter on your cabinet pulls or knobs. Use a drill bit slightly smaller than the screw for a tight fit.
Too large a bit causes loose hardware. Too small may split the wood. Most cabinet handles require a 3/16 or 1/8 inch bit. Confirm your hardware size before drilling.
Setting Jig Measurements
Measure where you want the handle or knob on the door or drawer. Use a tape measure or ruler for accuracy. Mark the spot lightly with a pencil.
Adjust the jig to match your measurements. Most jigs have adjustable stops or guides. Set these to the correct distance for hole spacing.
Double check all measurements. Correct settings ensure holes line up perfectly with the hardware.
Securing The Jig On Cabinets
Place the jig firmly on the cabinet surface. Align it with your pencil marks. Use clamps or screws to hold the jig steady.
A loose jig causes uneven holes and damage. Make sure the jig does not move while drilling. Secure it tightly but avoid scratching the cabinet.
Check alignment one last time before starting to drill. Properly secured jigs make drilling fast and accurate.
Marking And Drilling Holes
Marking and drilling holes is the key step in installing cabinet hardware accurately. This process ensures your handles or knobs fit perfectly and look professional. A cabinet hardware jig helps guide your drill to make precise holes every time. Follow these simple steps to mark and drill with confidence.
Aligning The Jig For Precision
Place the jig on the cabinet door or drawer front. Match the jig edges with the cabinet edges carefully. Check that the jig is level using a small level tool or by eye. Lock the jig in place if it has clamps or screws. Proper alignment prevents uneven hole placement and improves the final look.
Drilling With Adjustable Guides
Set the drill bit size according to your hardware screws. Most jigs have adjustable guides to control hole position. Adjust the guide stops to match the screw hole spacing on your hardware. Insert the drill bit into the guide hole for straight drilling. Drill slowly and steadily to avoid splintering the wood.
Ensuring Consistent Hole Placement
Check hole positions against the jig marks before drilling. Use the jig on each cabinet piece to keep hole placement uniform. Mark holes lightly with a pencil through the jig for a backup guide. Drill each hole carefully to maintain consistency. Consistent holes make hardware installation easier and ensure a neat appearance.
Installing Cabinet Handles And Knobs
Installing cabinet handles and knobs enhances both function and style. Using a cabinet hardware jig makes this task simple and accurate. This tool helps place holes perfectly every time. Correct placement prevents damage and ensures a professional look. Follow these steps to attach hardware to doors and drawers with ease.
Attaching Hardware To Doors
Start by positioning the jig on the cabinet door. Align it according to the door size and desired handle height. Secure the jig firmly to avoid movement. Drill holes through the jig’s guide holes. Use the right drill bit size for your screws. Insert screws from the inside and attach the handle or knob. Tighten screws carefully to avoid stripping or damage.
Mounting On Drawers
Place the jig on the drawer front. Center it horizontally for balanced placement. Adjust the jig to match the pull length and drawer size. Clamp the jig to keep it steady. Drill pilot holes using the jig’s guide. Fix the hardware by inserting screws from behind the drawer. Tighten screws evenly for a secure fit.
Verifying Alignment And Fit
Check that all handles and knobs line up straight. Use a level or measure from edges to confirm alignment. Test each handle by pulling gently to ensure it is secure. Adjust screws if any hardware feels loose or crooked. Proper fit avoids wear and enhances cabinet usability. A well-installed handle or knob improves the overall look.
Tips For Efficient Installation
Efficient installation of cabinet hardware jig saves time and ensures perfect results. Follow simple tips to speed up your work and avoid errors. Proper care of your jig keeps it accurate and lasts longer. These tips help you install hardware smoothly and with confidence.
Repeating The Process Quickly
Set the jig firmly on the cabinet surface before drilling. Use clamps to hold it steady and prevent slipping. Mark your first hole carefully to guide the jig. After each hole, move the jig smoothly to the next spot. Keep the jig aligned to ensure holes match perfectly. Practice the motion a few times to build speed. Use the same settings for all cabinets to keep consistency.
Avoiding Common Mistakes
Check measurements twice before drilling any holes. Avoid rushing, which can cause misaligned holes. Do not apply too much pressure on the drill. Use a sharp drill bit to prevent splintering wood. Keep the jig clean from dust and debris for accurate placement. Confirm the jig is properly set for left or right doors. Test the drill depth to avoid drilling through the cabinet.
Maintaining Jig For Longevity
Clean the jig after every use with a dry cloth. Store it in a dry place to stop rust and damage. Check screws and parts regularly and tighten them if loose. Avoid dropping or bending the jig to keep its shape intact. Lubricate moving parts lightly to prevent sticking. Replace worn-out parts promptly to keep jig precise. Proper maintenance extends the life of your jig and keeps it reliable.
Credit: www.apartmenttherapy.com

Credit: www.amazon.com
Frequently Asked Questions
What Is The 1/3 Rule For Cabinet Pulls?
The 1/3 rule for cabinet pulls means the pull’s length should equal one-third the drawer’s width or cabinet door’s height. This ensures balanced looks and comfortable grip.
How To Use Cabinet Door Mounting Jig?
Align the cabinet door mounting jig with the door’s edge. Secure it firmly. Drill holes using the jig’s guides. Attach the hardware. Repeat for consistent, aligned installations.
How To Use A Kreg Cabinet Hardware Jig Pro?
Set the Kreg jig to match your hardware’s screw spacing. Hold it firmly on the drawer face. Drill holes using the adjustable guides for accurate, repeatable placement.
What Size Drill Bit For Kreg Cabinet Hardware Jig?
Use a 3/16-inch drill bit for the Kreg cabinet hardware jig to ensure precise and clean holes.
Conclusion
Using a cabinet hardware jig makes installation quick and precise. It helps place handles evenly on doors and drawers. This tool saves time and reduces mistakes during setup. Following simple steps ensures a neat, professional look. Practice a few times to gain confidence.
Consistent handle placement improves both function and style. Keep your workspace organized and measure carefully. A cabinet hardware jig is a helpful aid for any DIY project. It brings better results with less effort and stress. Try it on your next cabinet upgrade to see the difference.

