Are you struggling with noisy vibrations or loose parts in your projects? Learning how to use deadening fasteners can be a game-changer for you.
These simple tools help reduce noise and secure components tightly, making your work more durable and professional. You’ll discover easy steps to apply deadening fasteners effectively and see immediate improvements in your results. Keep reading to unlock tips that will save you time and frustration.

Credit: vehicleclips.co.uk
What Are Deadening Fasteners
Deadening fasteners play a key role in reducing noise and vibration in many projects. They help stop rattles and unwanted sounds. These fasteners attach materials firmly and dampen sound waves. Their design focuses on controlling noise rather than just holding parts together.
Understanding deadening fasteners helps choose the right type for your needs. These fasteners come in various shapes and sizes. Each type works well for specific materials and uses. They make your space quieter and more comfortable.
What Are Deadening Fasteners?
Deadening fasteners are special tools that reduce noise and vibration. They hold parts tightly while absorbing sound energy. These fasteners often have rubber or foam layers. This material helps block noise from passing through joints.
Common types include clips, screws, and bolts with sound-dampening pads. Some fasteners have built-in rubber washers. Others use separate soundproofing washers or gaskets. Each type suits different surfaces and noise levels.
How Deadening Fasteners Work
These fasteners reduce vibration by creating a soft barrier. The barrier stops metal or wood parts from touching directly. This reduces the noise made by movement or impact. The dampening layer absorbs sound waves and stops them from traveling.
Types Of Deadening Fasteners
Deadening fasteners help reduce noise and vibrations in many projects. Choosing the right type improves soundproofing and durability. Various deadening fasteners fit different materials and uses. Understanding these types makes installation easier and more effective.
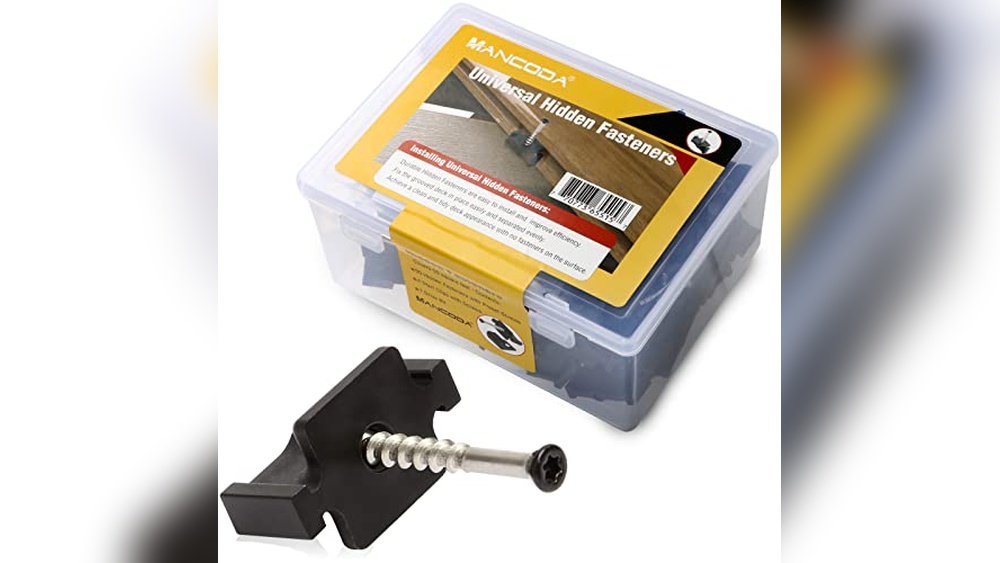
Screws And Clips
Screws and clips hold sound-deadening materials firmly in place. Screws provide strong, lasting attachment for heavy materials. Clips work well for quick, easy installation on panels. Both types resist loosening from vibrations. Use them for automotive or construction soundproofing jobs.
Adhesive Fasteners
Adhesive fasteners stick deadening materials without nails or screws. They are simple to apply on flat or curved surfaces. Adhesives offer a clean look with no visible hardware. Some adhesives resist heat and moisture for durability. These fasteners suit temporary or permanent soundproofing.
Combination Fasteners
Combination fasteners mix mechanical and adhesive methods. They use screws or clips plus sticky backing for extra hold. This type ensures materials stay fixed under tough conditions. Combination fasteners reduce installation time and increase security. Ideal for heavy or irregular surfaces needing strong bonding.
Choosing The Right Fastener
Choosing the right fastener is key to a strong, lasting hold. The correct fastener prevents damage and ensures safety. Picking the wrong type can cause failure or weaken your project. Focus on the material, load, and environment for the best choice.
Material Compatibility
Match the fastener material to the surfaces you join. Use stainless steel for metals to prevent rust. Wood needs screws made for wood to avoid splitting. Plastic or soft materials need special fasteners to avoid cracking. Proper material choice ensures a tight, secure fit.
Load Capacity
Check the weight the fastener must hold. Heavy loads require stronger, thicker fasteners. Light loads can use smaller, simpler fasteners. Always pick a fastener that can handle more than the expected weight. This avoids unexpected breaks or loosening.
Environment Considerations
Consider where the fastener will be used. Outdoor use needs rust-resistant materials like stainless steel or coated fasteners. Wet or humid places need corrosion-resistant fasteners. High-temperature areas require fasteners made to withstand heat. Right choices keep fasteners safe and long-lasting.

Credit: www.smartek.shop
Preparing Surfaces For Installation
Preparing surfaces is a key step before installing deadening fasteners. It helps ensure the fasteners hold tightly and last longer. Clean, dry, and well-marked surfaces make the installation easier and more effective.
Cleaning And Drying
Start by removing dust, dirt, and grease from the surface. Use a clean cloth and a mild cleaner to wipe the area. Let the surface dry completely before moving to the next step. Moisture can weaken the bond of the fastener.
Surface Inspection
Check the surface for cracks, holes, or damage. Uneven or damaged areas can affect fastener strength. Repair any issues with filler or sand the surface smooth. This creates a firm base for the fastener.
Marking Attachment Points
Use a pencil or marker to outline where each fastener will go. Space the marks evenly based on the product’s instructions. Clear marks guide precise placement and help avoid mistakes during installation.
Step-by-step Installation Process
Installing deadening fasteners properly is key for effective soundproofing. This step-by-step process guides you through placing the fasteners, securing materials, and checking seals. Follow these steps to ensure strong attachment and maximum noise reduction.
Positioning The Fasteners
Start by planning where to place the fasteners. Space them evenly for balanced support. Mark spots clearly before you begin. Avoid placing fasteners too close to edges. Proper positioning helps the material stay flat and secure.
Securing Deadening Materials
Lay the deadening material on the surface carefully. Align it with your marked fastener spots. Press the fastener through the material into the surface firmly. Use a tool to push each fastener until tight. Check that the material is smooth and wrinkle-free.
Checking For Gaps And Seals
Inspect the area around each fastener for gaps. Small gaps let sound pass through. Press the material down and add more fasteners if needed. Seal edges and corners with tape or sealant. This step ensures a complete sound barrier.
Common Installation Mistakes
Using deadening fasteners correctly is key for good results. Many people make simple mistakes during installation. These errors reduce the effectiveness of the fasteners. They can cause damage or poor soundproofing. Avoiding these mistakes saves time and effort.
Over-tightening Fasteners
Fasteners should be snug but not too tight. Over-tightening can crush the material. It reduces the fastener’s ability to absorb sound. Too much pressure can also crack or damage surfaces. Use a torque wrench or follow product instructions for the right tightness.
Incorrect Placement
Placing fasteners in the wrong spots lowers their performance. They must be spaced evenly and positioned on solid surfaces. Avoid placing fasteners too close to edges. This prevents the material from bending or breaking. Plan your layout carefully before installation.
Ignoring Surface Prep
Surfaces must be clean and dry before installing fasteners. Dust, oil, or moisture weakens the bond. It causes fasteners to loosen over time. Use a brush or cloth to clean the area. Let the surface dry completely for best results.
Maintaining And Inspecting Fasteners
Maintaining and inspecting deadening fasteners is essential for safety and performance. Regular care ensures they stay strong and effective. Neglecting this step can lead to fastener failure and damage.
Checking fasteners often helps catch problems early. It also extends their useful life. Proper inspection saves time and money in the long run.
Routine Checks
Check fasteners for signs of rust, wear, or loosening. Use a screwdriver or wrench to test tightness. Look for cracks or bent parts. Clean dirt and debris around fasteners to keep them visible. Routine checks prevent small problems from becoming big issues.
Replacing Damaged Fasteners
Replace fasteners showing damage or corrosion immediately. Damaged fasteners lose their grip and strength. Use the same type and size for replacements. Proper replacement keeps the structure safe and secure. Avoid reusing old or worn fasteners.
Ensuring Long-term Effectiveness
Apply rust-resistant coatings to metal fasteners. Store spare fasteners in a dry place. Tighten fasteners regularly to maintain a firm hold. Use protective covers in harsh environments. These steps help fasteners last longer and perform better.
Enhancing Soundproofing With Deadening Fasteners
Enhancing soundproofing with deadening fasteners improves noise control efficiently. These fasteners reduce vibrations that cause sound to travel through walls and floors. They work best when combined with other soundproofing methods. Using deadening fasteners properly helps create quieter spaces.
Combining With Other Materials
Deadening fasteners work well with soundproofing mats and foam panels. These materials absorb sound waves, while fasteners stop vibrations. Adding mass loaded vinyl or fiberglass insulation increases noise reduction. Layering different materials creates a barrier that blocks and absorbs sound.
Layering Techniques
Place deadening fasteners between layers of drywall or plywood. This setup isolates surfaces and prevents sound from passing. Use multiple layers of drywall with fasteners in between for better results. The space between layers acts as a sound buffer. This method blocks more noise than a single layer.
Optimizing Fastener Layout
Space fasteners evenly to cover the entire surface. Avoid clustering them in one area. Fasteners placed too far apart reduce effectiveness. Follow manufacturer guidelines for proper spacing. Correct layout ensures vibrations are controlled across the whole panel.

Credit: www.kafuwell.com
Frequently Asked Questions
What Is A Deadening Fastener Used For?
A deadening fastener reduces noise and vibration in structures. It secures materials while minimizing sound transmission. This improves comfort and durability in automotive and construction applications.
How Do You Install A Deadening Fastener Properly?
Clean the surface before installation. Align the fastener with pre-drilled holes. Press firmly or use tools as required. Ensure it fits tightly to maximize noise reduction.
Can Deadening Fasteners Be Reused?
Generally, deadening fasteners are designed for one-time use. Removing them may damage the fastener or reduce effectiveness. It’s best to replace them for optimal performance.
What Materials Work Best With Deadening Fasteners?
Deadening fasteners work well with metal, plastic, and composite surfaces. They are ideal for automotive panels, machinery parts, and building materials needing vibration control.
Conclusion
Using deadening fasteners improves sound control and reduces noise effectively. They are simple to install and fit many surfaces well. Choose the right fastener to match your project needs. Proper use helps create a quieter, more comfortable space. Keep tools handy and follow instructions carefully for best results.
Small steps make a big difference in noise reduction. Try using deadening fasteners to enjoy peace and calm in your home or workspace.